This Is The Best Homemade Cupcake Recipe For Chocolate Lovers!
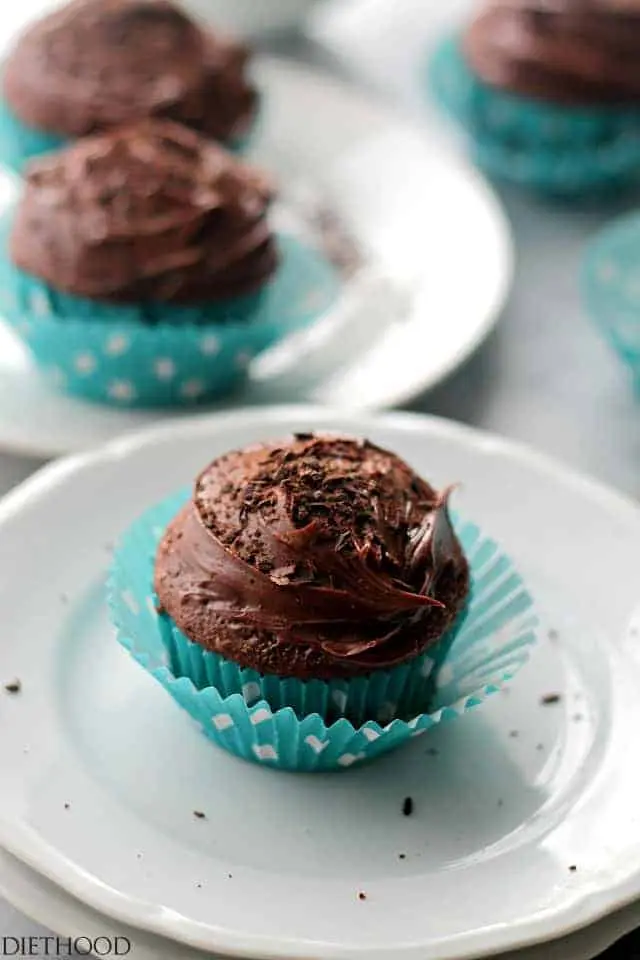
Prepare to embark on a delightful journey into the world of intensely rich and wonderfully fluffy chocolate treats. These Devil’s Food Cupcakes, crowned with a luscious chocolate frosting, are not just a dessert; they’re an experience designed to satisfy even the most discerning chocolate aficionado. Get ready to be swept away by a wave of pure, unadulterated chocolate bliss.
Whether you’re celebrating a special occasion or simply craving a moment of sweet indulgence, these cupcakes are sure to become a go-to favorite. Their deep chocolate flavor and tender crumb, perfectly complemented by a smooth, homemade frosting, make them an irresistible choice for any time you need a touch of homemade magic.
Why You Will Love This Recipe
- Intense Chocolate Flavor: These cupcakes boast a profound chocolate essence, thanks to high-quality cocoa powder, ensuring every bite is a decadent experience.
- Incredibly Tender Crumb: The secret ingredient, sour cream, works wonders to create a uniquely soft and melt-in-your-mouth texture that is simply divine.
- Effortless Preparation: Designed for simplicity, this recipe often involves minimal steps and straightforward mixing, making it accessible for bakers of all skill levels.
- Homemade Perfection: Enjoy the satisfaction of creating a gourmet dessert from scratch, surpassing anything you might find at a bakery, with a delightful homemade chocolate frosting.
- Lower Calorie Option: Compared to many store-bought or larger bakery cupcakes, these homemade delights offer a satisfying treat with a more manageable calorie count per serving.
Ingredients You Need
The foundation of any exceptional dessert lies in the quality of its ingredients. For these Devil’s Food Cupcakes, selecting good quality cocoa powder is paramount to achieving that deep, dark chocolate flavor. The inclusion of sour cream is a clever trick that lends unparalleled tenderness and moisture to the cake. Remember to gather all your ingredients before you begin, ensuring a smooth and enjoyable baking process.
Devil’s Food Cupcakes with Chocolate Frosting

Chocolate lovers will LOVE this recipe for Devil's Food Cupcakes with Chocolate Frosting. It's a fluffy cupcake recipe that's made with sour cream and topped with a homemade chocolate frosting!
- For the Devil's Food Cupcakes:
- 3/4 cup all-purpose flour
- 1/2 teaspoon baking soda
- 1/2 cup packed brown sugar
- 1/4 cup unsweetened good quality cocoa powder (e.g., Ghirardelli)
- 2 large eggs
- 4 tablespoons butter, softened
- 1/2 cup sour cream
- For the Chocolate Frosting:
- 1/2 cup semisweet chocolate chips, chopped
- 2 tablespoons caster sugar or superfine sugar
- 2/3 cup sour cream
- chocolate shavings for topping
- 1Preheat oven to 350F (175C).
- 2Line a cupcake pan with cupcake liners and set aside.
- 3In your mixer's bowl, combine flour, baking soda, brown sugar, cocoa powder, eggs, and softened butter.
- 4Using your mixer fitted with a whisk attachment, beat ingredients together until smooth.
- 5Using a spoon, gently fold in the sour cream until just combined. Do not overmix.
- 6Spoon the batter evenly into the prepared cupcake liners, filling each about two-thirds full.
- 7Bake for 18 to 20 minutes, or until a toothpick inserted into the center of a cupcake comes out clean.
- 8Remove the cupcakes from the oven and let them stand in the pan for 5 minutes.
- 9Transfer the cupcakes to wire racks to cool completely.
- 10While the cupcakes are cooling, prepare the chocolate frosting.
- 11Set up a double boiler by placing a glass bowl over a pan of simmering water.
- 12Add the chopped semisweet chocolate chips to the glass bowl and heat until melted, stirring occasionally.
- 13Remove the bowl from the heat and let it stand for 2 minutes.
- 14Whisk in the caster sugar and sour cream until the frosting is smooth and well combined.
- 15Once the cupcakes are completely cooled, spread the chocolate frosting generously over the top of each cupcake.
- 16Let the frosting set in the refrigerator for a short period before serving.
- 17Top with chocolate shavings and serve.
Keywords: chocolate cupcakes, devil's food cake, sour cream cupcakes, homemade frosting, easy dessert
Quantities for each ingredient are detailed within the recipe card for your convenience.
Variations
The beauty of these Devil’s Food Cupcakes lies not only in their classic perfection but also in their versatility. Imagine transforming these already decadent treats into something even more extraordinary with a few simple tweaks.
For a truly decadent twist, consider infusing the chocolate frosting with a hint of espresso or a splash of your favorite liqueur. A dark chocolate ganache could also elevate the frosting to new heights of richness, creating a truly luxurious topping. This variation adds a sophisticated layer that appeals to those who appreciate deeper, more complex flavor profiles.
If you’re catering to dietary needs or simply exploring new culinary horizons, a vegan adaptation is entirely possible. This would involve substituting dairy-based ingredients like butter and sour cream with plant-based alternatives such as vegan butter, coconut yogurt, or a flax egg. Ensuring you use a high-quality vegan cocoa powder will maintain the intense chocolate character that makes these cupcakes so beloved. The frosting can also be made vegan by using plant-based butter and milk alternatives, proving that dietary restrictions don’t have to mean sacrificing indulgence.
For those monitoring their carbohydrate intake, a low-carb version presents an exciting challenge. This would necessitate swapping conventional flour for a blend of almond flour and coconut flour, and replacing sugar with a keto-friendly sweetener. The frosting can be adapted using sugar-free chocolate chips and a low-carb sweetener. While this requires careful ingredient selection and potentially a bit more experimentation, the result can be a guilt-free indulgence that still delivers on rich chocolate flavor. You can find a fantastic example of low-carb baking inspiration on sites like easycookfeed.com/category/dessert/.
How to Prepare Devil’s Food Cupcakes with Chocolate Frosting
Step 1: Preparing the Dry and Wet Ingredients
Begin by preheating your oven to a steady 350°F (175°C). This consistent temperature is crucial for ensuring the cupcakes bake evenly, developing a beautiful rise and a tender crumb. Simultaneously, prepare your cupcake pan by lining it with paper liners; this prevents sticking and makes for easy removal later.
In a large mixing bowl, combine your dry ingredients: the all-purpose flour, baking soda, packed brown sugar, and the unsweetened cocoa powder. Whisk these together thoroughly to ensure the leavening agent and cocoa are evenly distributed throughout the flour. This initial mixing of dry ingredients helps prevent pockets of baking soda or clumps of cocoa powder in the finished cupcakes, leading to a more uniform texture and flavor.
In a separate bowl, whisk together the wet ingredients. This typically includes eggs, softened butter, and the key ingredient for tenderness – sour cream. The combination of these elements will form the moist base of your cupcake batter. Ensure the butter is softened to room temperature; this allows it to incorporate smoothly into the wet ingredients without creating lumps, contributing to a silky batter.
Step 2: Combining the Batter
Now, it’s time to bring the dry and wet ingredients together. Add the wet ingredient mixture to the bowl containing the dry ingredients. Using an electric mixer, preferably fitted with a whisk attachment, beat these ingredients together until you achieve a smooth, cohesive batter. It is important not to overmix at this stage; beating for just long enough to combine will prevent the development of excess gluten, which can lead to tough cupcakes.
Once the initial batter is smooth, it’s time to incorporate the sour cream. Gently fold in the sour cream using a spoon or a spatula. The sour cream is the secret to the cupcakes’ incredibly tender and moist crumb, so incorporate it with care, ensuring it’s just combined. Overmixing at this point can deflate the batter and negatively impact the final texture. The batter should be thick but pourable, with a deep, rich chocolate hue.
Carefully spoon the batter into the prepared cupcake liners, filling each one about two-thirds full. This allows ample space for the cupcakes to rise during baking without overflowing. Evenly distributing the batter ensures that all your cupcakes will bake consistently, resulting in a uniform batch of delicious treats.
Step 3: Baking the Cupcakes
Place the filled cupcake pan into your preheated oven. Bake for approximately 18 to 20 minutes. The exact baking time can vary depending on your oven, so it’s essential to keep an eye on them. You’ll know they’re perfectly baked when a toothpick inserted into the center of a cupcake comes out clean, with no wet batter clinging to it.
Once baked, remove the cupcakes from the oven and allow them to rest in the cupcake pan for about 5 minutes. This brief resting period helps the cupcakes firm up slightly, making them easier to handle. During this time, the residual heat continues to cook the very center of the cupcakes gently.
After the 5-minute rest, carefully remove the cupcakes from the pan and transfer them to a wire cooling rack. Allowing them to cool completely on the rack is a critical step before frosting. Any residual warmth can melt the frosting, leading to a messy and less appealing finish. Patience here is key to achieving those beautifully frosted cupcakes you envision.
Step 4: Preparing the Chocolate Frosting
While the cupcakes are cooling, you can prepare the luscious chocolate frosting. Set up a double boiler by placing a heatproof glass bowl over a saucepan filled with a few inches of simmering water. Ensure the bottom of the bowl does not touch the water; this gentle, indirect heat is ideal for melting chocolate without scorching it.
Add the semisweet chocolate chips to the glass bowl. Heat them gently, stirring occasionally, until they are completely melted and smooth. The key here is to melt the chocolate slowly and evenly. Once melted, remove the bowl from the heat and let it stand for about 2 minutes to allow the chocolate to cool slightly, which helps the frosting set properly.
Now, whisk in the caster sugar (or superfine sugar) and the sour cream into the melted chocolate. Continue whisking until the mixture is thoroughly combined and forms a smooth, glossy frosting. The sour cream not only adds a delightful tang but also contributes to the frosting’s creamy texture, balancing the richness of the chocolate. This mixture will thicken as it cools.
Step 5: Frosting the Cupcakes
Once the cupcakes have reached room temperature and are completely cool, it’s time to frost them. You can use an offset spatula or a piping bag with your favorite tip to apply the chocolate frosting. Ensure an even layer of frosting over each cupcake, creating a beautiful swirl or a smooth dome.
For an extra touch of visual appeal and flavor, sprinkle chocolate shavings generously over the top of the frosting. This adds a delightful texture and intensifies the chocolate experience. The contrast between the smooth frosting and the delicate shavings is both visually appealing and texturally pleasing.
To allow the frosting to set properly before serving, place the frosted cupcakes in the refrigerator for a short period. This chilling step ensures the frosting holds its shape and offers a delightful contrast in temperature and texture. These beautifully finished cupcakes are now ready to be enjoyed, promising a truly decadent dessert experience. For more delightful baking inspiration, explore resources like Pinterest.
Step 6: Enjoying Your Masterpiece
Finally, the moment you’ve been waiting for: savoring your homemade Devil’s Food Cupcakes with Chocolate Frosting. Serve them chilled for a delightful contrast, or at room temperature for a softer, more yielding texture. These cupcakes are perfect on their own but can also be paired with a glass of cold milk or a hot cup of coffee for an elevated dessert experience.
Each bite should offer a symphony of flavors and textures: the tender, rich chocolate cake, the smooth and slightly tangy frosting, and the delicate crunch of chocolate shavings. This combination is designed to be deeply satisfying and incredibly addictive. They are a testament to the joy of homemade baking and the simple pleasure of a perfectly crafted chocolate treat.
Share these delightful creations with friends and family, or keep them all to yourself – no judgment here! They make a wonderful addition to any celebration, from birthdays to holidays, or simply as a way to brighten an ordinary day. Remember, the effort you put into crafting these treats will be rewarded with smiles and contented sighs. Consider pairing them with other delicious recipes from easycookfeed, like the Cajun Chicken Pasta for a complete meal experience, or the No-Bake Mango Truffles for another sweet option.
Pro Tips for Devil’s Food Cupcakes with Chocolate Frosting
Room Temperature Ingredients: Ensure your eggs, butter, and sour cream are at room temperature before starting. This is crucial for proper emulsification, leading to a smoother batter and a more uniform crumb. Cold ingredients can result in a lumpy batter and uneven baking, diminishing the overall quality of your cupcakes.
Don’t Overmix: Overmixing the batter after adding the flour can develop too much gluten, resulting in tough, dense cupcakes. Mix only until the ingredients are just combined. This gentle approach ensures a tender, cake-like texture that melts in your mouth.
Quality Cocoa Powder: Use a good quality unsweetened cocoa powder, such as Ghirardelli, as specified. The cocoa powder is responsible for the deep, rich chocolate flavor, so investing in a premium brand will significantly elevate your cupcakes. Different types of cocoa powder (natural vs. Dutch-processed) can affect the color and leavening, so follow recipe recommendations.
Accurate Measuring: Baking is a science, and precision matters. Use measuring cups and spoons correctly, leveling off flour and sugar to ensure you have the right proportions. Incorrect measurements can lead to a batter that is too wet or too dry, impacting the texture and bake of your cupcakes.
Cool Completely Before Frosting: It’s vital to let the cupcakes cool completely on a wire rack before applying the frosting. Frosting warm cupcakes will cause the frosting to melt and slide off, creating a messy appearance. Patience ensures a beautifully finished product that is as pleasing to the eye as it is to the palate.
Serving Suggestions for Devil’s Food Cupcakes with Chocolate Frosting
Decoration
Elevate your cupcakes with artistic touches that enhance their visual appeal and flavor. A simple dusting of cocoa powder or a sprinkle of edible glitter can add a festive sparkle. Consider using a piping bag with various tips to create elegant rosettes, swirls, or starburst patterns on top of the frosting, transforming each cupcake into a miniature work of art.
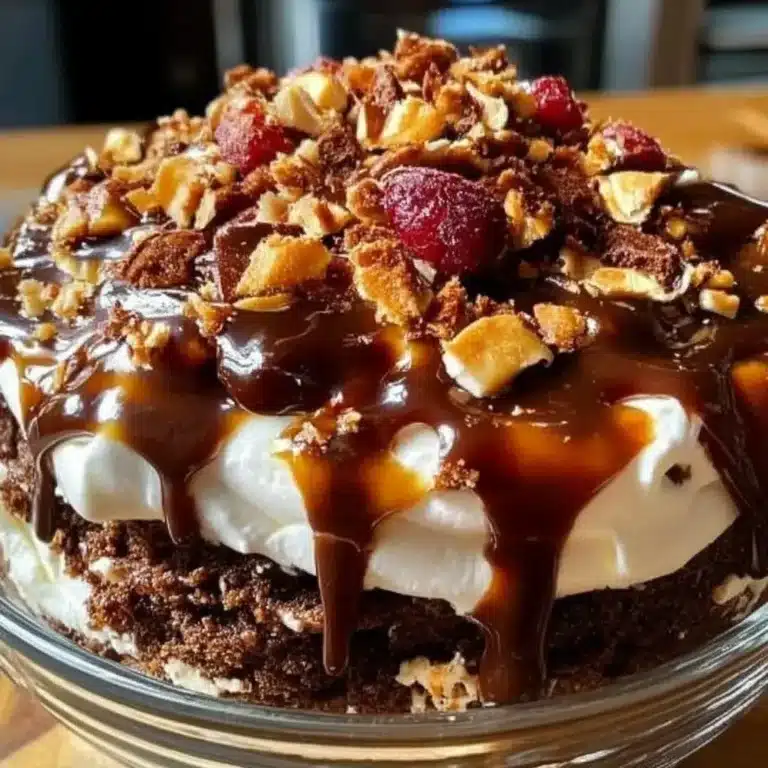
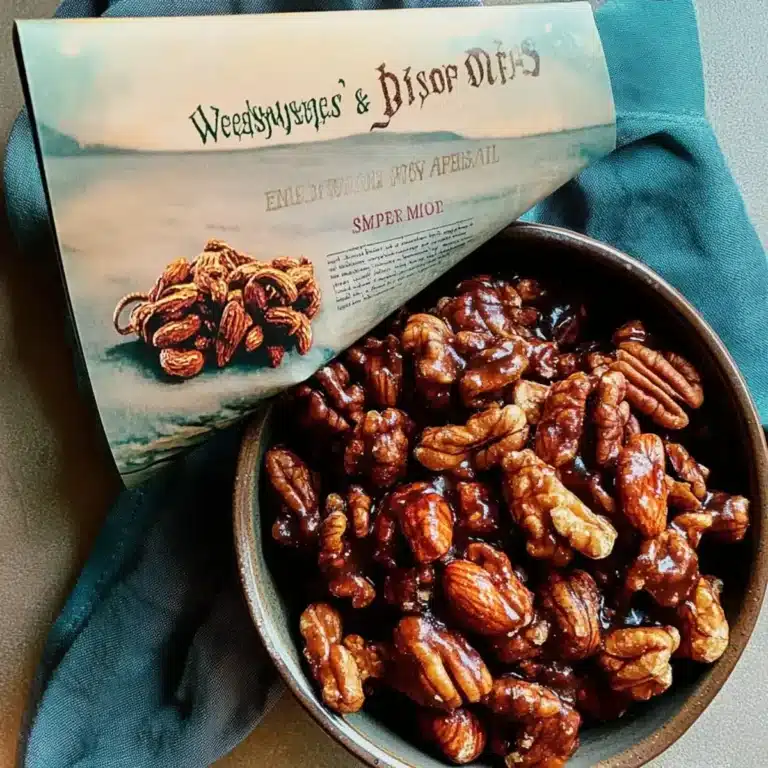
For a more textural contrast, top the frosting with finely chopped nuts like toasted walnuts or pecans, or even a scattering of mini chocolate chips. Another delightful option is to add a few fresh berries, such as raspberries or strawberries, which offer a burst of color and a refreshing tartness that complements the rich chocolate. Edible flowers can also provide a stunning and sophisticated garnish for special occasions.
Don’t shy away from creative sprinkles! You can find themed sprinkles for holidays or special events, or opt for classic rainbow jimmies or nonpareils for a fun, playful look. A drizzle of white chocolate ganache over the dark chocolate frosting can create a beautiful marbled effect, adding another layer of visual interest and a subtle vanilla sweetness. The possibilities for decoration are truly endless, limited only by your imagination and the ingredients at hand.
Side Dishes
While these cupcakes are a magnificent dessert on their own, they can be enhanced by thoughtful pairings. A tall glass of cold milk is a classic and beloved accompaniment, its creaminess cutting through the richness of the chocolate. For adults, a robust coffee or a rich espresso provides a perfect counterpoint, its slight bitterness enhancing the chocolate’s depth.
Consider a scoop of high-quality vanilla bean ice cream or a creamy gelato alongside the cupcake. The contrast in temperature and the complementary flavors create a truly decadent experience. For a lighter option, a small serving of fresh fruit salad, particularly berries or sliced stone fruits, can offer a refreshing palate cleanser between bites of intense chocolate.
If you’re serving these as part of a larger dessert spread, they pair wonderfully with lighter fare. Think of delicate shortbread cookies, a fruit tart, or even a simple pound cake. For a more adventurous pairing, a small glass of port wine or a rich dessert wine can beautifully complement the deep chocolate notes, creating a sophisticated dessert course.
Creative Serving Ideas
Transform your cupcakes into a captivating dessert centerpiece by arranging them in a tiered stand. This vertical display not only saves table space but also adds an elegant touch to any gathering. For a whimsical touch, consider creating a “cupcake bouquet” by attaching each frosted cupcake to a skewer and arranging them in a vase or pot.
Miniature versions of these Devil’s Food Cupcakes can be perfect for cocktail parties or dessert buffets, allowing guests to sample the deliciousness without committing to a full-sized treat. For a truly interactive experience, set up a “decorate your own cupcake” station for kids (or adults!), providing an array of frosting colors, sprinkles, and toppings.
Consider incorporating these cupcakes into a larger dessert concept, such as a “build your own sundae” bar, where the cupcakes can serve as a base instead of or in addition to ice cream. For a sophisticated brunch or afternoon tea, serve them alongside delicate pastries and finger sandwiches, offering a rich and satisfying sweet option. You might also find inspiration for creative dessert presentations on blogs dedicated to baking, like easycookfeed.com/swirled-garlic-herb-and-cheese-bread/, which often features visually stunning baked goods.
Preparation & Storage
Storing Leftovers
Proper storage is key to maintaining the freshness and deliciousness of your Devil’s Food Cupcakes. If you have any leftover cupcakes, store them in an airtight container at room temperature for up to two days. Ensure the container is truly airtight to prevent the cupcakes from drying out or absorbing unwanted odors from the refrigerator.
If the weather is particularly warm or humid, it’s advisable to refrigerate the cupcakes. However, be aware that refrigeration can sometimes slightly alter the texture of the cake, making it a bit firmer. If you do refrigerate them, allow them to come back to room temperature for about 20-30 minutes before serving to enjoy them at their best.
Avoid stacking cupcakes directly on top of each other in the container if possible, as this can cause the frosting to smudge. If stacking is unavoidable, place a piece of parchment paper or wax paper between layers to protect the frosting. Proper storage ensures that your delicious treats remain enjoyable for as long as possible.
Freezing
Devil’s Food Cupcakes freeze exceptionally well, making them an excellent option for preparing in advance. It’s best to freeze the unfrosted cupcakes for optimal results. Place the cooled cupcakes in a single layer on a baking sheet and freeze them until solid, which usually takes about 1-2 hours.
Once the cupcakes are firm, transfer them to a freezer-safe airtight container or wrap them tightly in plastic wrap followed by a layer of aluminum foil. This double layer of protection helps prevent freezer burn. Properly stored, unfrosted cupcakes can last in the freezer for up to two to three months.
When you’re ready to enjoy them, remove the cupcakes from the freezer and let them thaw at room temperature. Once thawed, you can frost them as usual. If you wish to freeze frosted cupcakes, ensure the frosting is firm (you may need to refrigerate them briefly beforehand) and use the same airtight wrapping method to protect them from freezer burn.
Reheating
Reheating is generally not necessary for cupcakes unless they have been refrigerated and you wish to bring them back to a softer consistency. If you’ve stored your cupcakes in the refrigerator, simply take them out and let them sit at room temperature for about 20-30 minutes. This allows the cake to soften and the flavors to develop.
For a very slight warming, you can place a cupcake on a microwave-safe plate and microwave it on low power for about 5-10 seconds. Be extremely cautious with this method, as over-microwaving can quickly dry out the cake and make it tough. The goal is just to take the chill off, not to cook it further.
If you’ve frozen your cupcakes and thawed them, they typically don’t require reheating at all. As they come to room temperature, their original tender texture should be restored. The magic of these cupcakes is in their moistness, and excessive heat can diminish that wonderfully tender crumb you worked so hard to achieve. For more breakfast and dessert ideas, check out easycookfeed.com/category/breakfast/.
Frequently Asked Questions
-
What makes Devil’s Food cupcakes different from regular chocolate cupcakes?
Devil’s Food cupcakes are distinguished by their darker color and more intense, richer chocolate flavor compared to standard chocolate cupcakes. This profound chocolate essence is typically achieved by using a higher proportion of cocoa powder, and often, baking soda as a leavening agent, which reacts with acidic ingredients to create a deeper hue and a more tender, moist crumb. The name “Devil’s Food” itself evokes a sense of decadent indulgence, hinting at the luxurious depth of flavor and color that sets them apart from their lighter counterparts. While both are delicious chocolate treats, Devil’s Food often leans into a more complex and profound cocoa experience.
-
Can I make the chocolate frosting ahead of time?
Yes, the chocolate frosting for these Devil’s Food Cupcakes can certainly be made ahead of time, offering a convenient way to streamline your baking process. Once prepared, store the frosting in an airtight container in the refrigerator. It will firm up considerably when chilled, so before you’re ready to frost your cooled cupcakes, allow the frosting to sit at room temperature for a while, or gently warm it by stirring it vigorously to bring it back to a spreadable consistency. If it seems too stiff, you can add a tiny splash of milk or cream to loosen it up. Just ensure it’s at a good consistency for spreading or piping before you begin decorating.
-
Why are my cupcakes dry, and how can I prevent this in the future?
Dry cupcakes are a common baking frustration, but usually stem from a few key issues. The most frequent culprit is over-baking; even a few extra minutes in the oven can significantly dry out the delicate cake. Always rely on the toothpick test for doneness, checking in the center of the cupcake, and remove them as soon as it comes out with moist crumbs attached, not wet batter. Another common cause is inaccurate measuring of dry ingredients, especially flour, which can absorb too much liquid if over-measured. Scooping flour directly from the bag can compact it, leading to too much being used; instead, gently spoon flour into your measuring cup and level it off. Finally, not using enough fat or moisture-rich ingredients, like the sour cream in this recipe, can also contribute to dryness. Ensuring all ingredients are at room temperature before mixing helps them combine properly, leading to a better texture overall. Following the recipe precisely, especially regarding baking time and ingredient measurements, is the best defense against dry cupcakes.