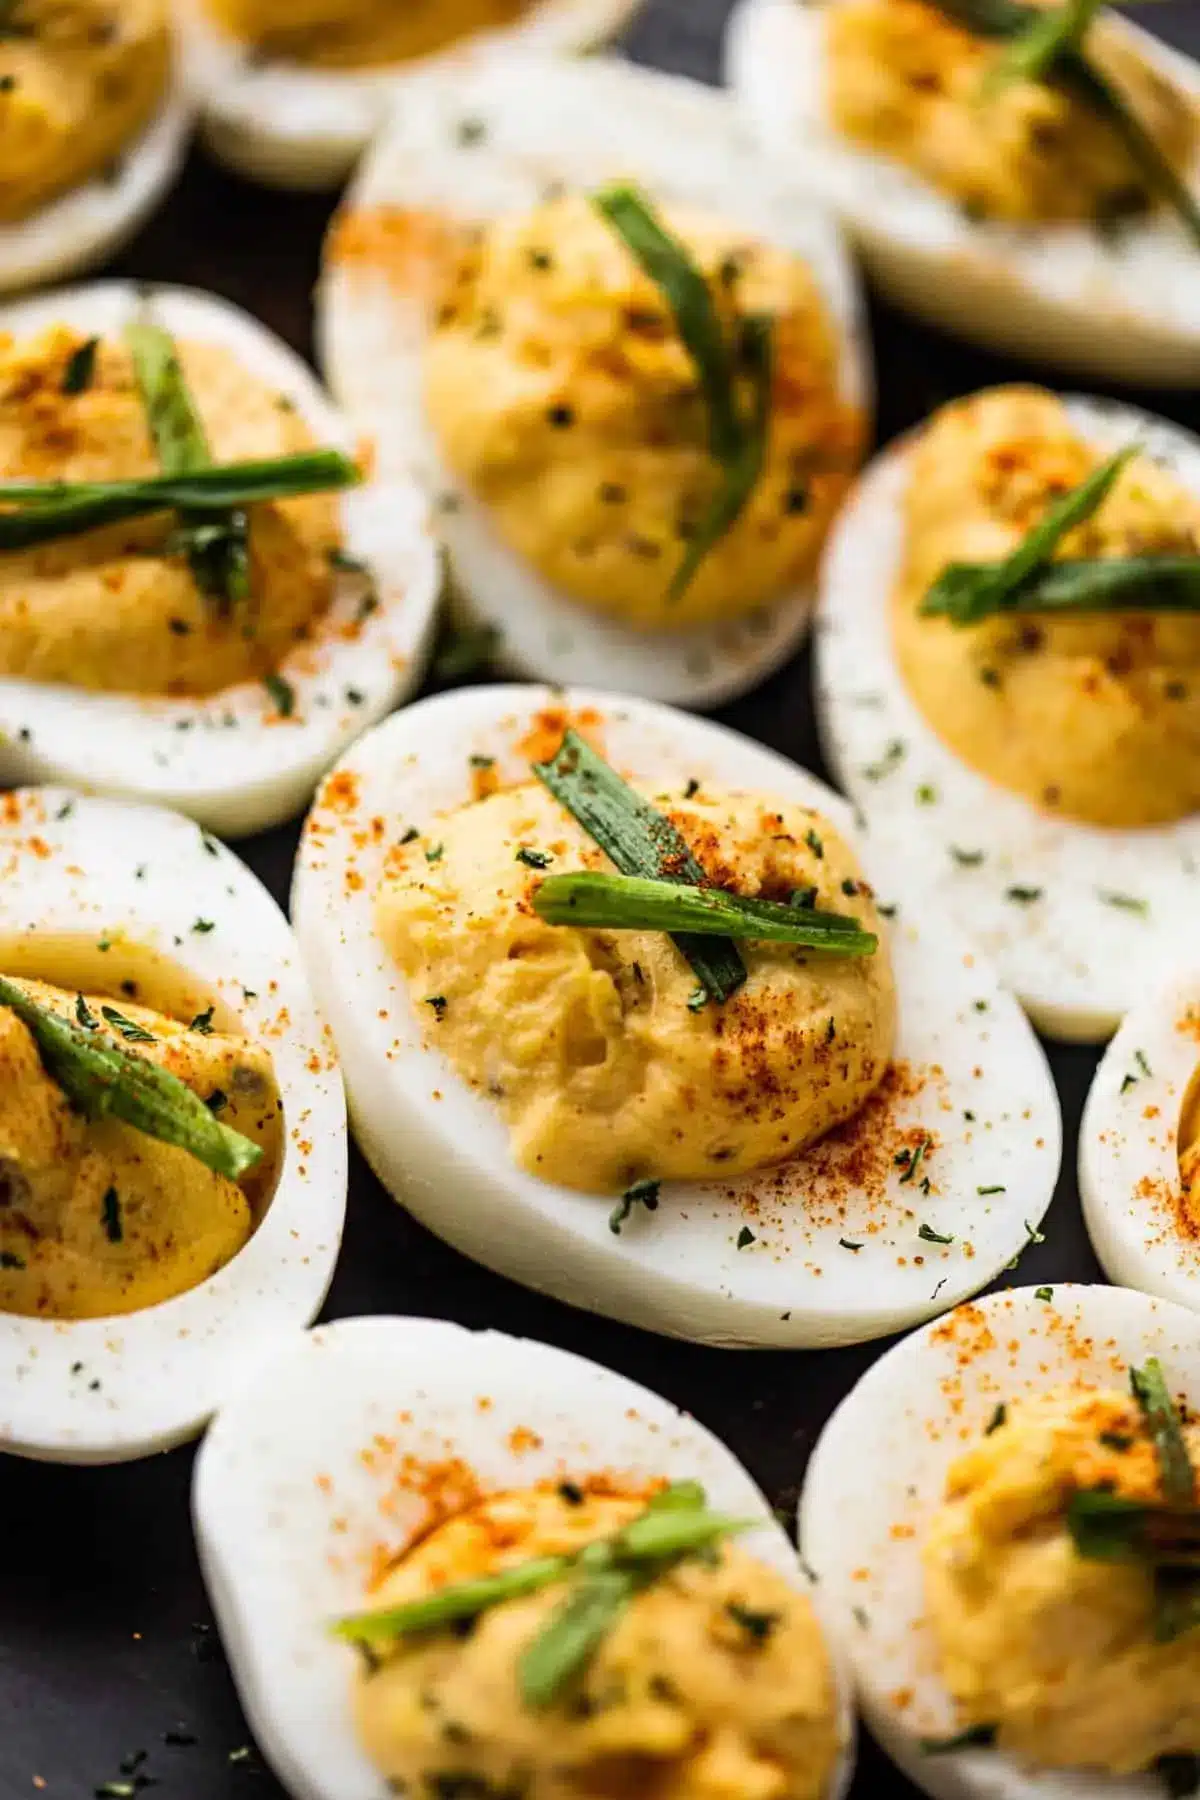
Classic Deviled Eggs – Easy Appetizer!
If you’re searching for that quintessential appetizer that always disappears first at parties, look no further than these classic deviled eggs. They are an absolute must-have for holiday celebrations, Easter brunches, casual potlucks, and virtually any social gathering you can imagine.
This straightforward deviled eggs recipe focuses on a simple yet delicious blend of hard-boiled eggs, creamy mayonnaise, tangy mustard, and a subtle kick of hot sauce, all perfectly seasoned with salt and pepper. A final flourish of paprika and fresh chives elevates both the flavor and the visual appeal, making them utterly irresistible.
Why You Will Love This Recipe
- Effortless Preparation: Transform simple ingredients into a show-stopping appetizer in under 20 minutes.
- Crowd-Pleasing Flavor: The classic combination of creamy, tangy, and slightly spicy is universally loved by all ages.
- Make-Ahead Convenience: Prepare these delights a day in advance, saving you precious time on the day of your event.
- Versatile Appeal: Perfect for brunches, picnics, barbecues, or as a light snack, they fit seamlessly into any occasion.
- Customizable Delight: Easily adapt the basic recipe with your favorite seasonings or additional ingredients for a personal touch.
Ingredients You Need
The beauty of this classic deviled eggs recipe lies in its simplicity and the quality of its core components. Opting for fresh, good-quality ingredients will significantly enhance the final taste and texture, ensuring a truly memorable appetizer that guests will rave about. Don’t be afraid to experiment with different types of mayonnaise or mustard to find your perfect balance.
Classic Deviled Eggs

Discover the perfect Classic Deviled Eggs recipe, blending creamy mayonnaise, tangy Dijon mustard, and a hint of paprika. Ideal for any occasion, these easy-to-make deviled eggs are the ultimate appetizer or side dish for brunch, lunch, or dinner gatherings.
- 6 hard boiled eggs
- 3 tablespoons mayonnaise
- 1 teaspoon dijon mustard
- 3 dashes hot sauce, or to taste
- smoked or sweet paprika, to taste, plus more for garnish
- fresh chives, for garnish, optional
- 1Cut the cooled boiled eggs in half, lengthwise.
- 2Carefully take out the yolks and transfer the yolks to a mixing bowl; mash them with the back of a fork.
- 3To the mashed egg yolk mixture add in the mayonnaise, dijon mustard, hot sauce, salt, pepper, and paprika; mix and stir until thoroughly combined. Taste for salt and pepper and adjust accordingly.
- 4Pipe or spoon the egg yolk mixture into the empty egg white halves.
- 5Cover and refrigerate until ready to use.
- 6Garnish with a sprinkle of paprika and chives, and serve.
Keywords: deviled eggs, appetizer, party food, brunch, side dish, classic
Quantities for these delicious ingredients are detailed in the recipe card above, ensuring you have the perfect balance for a delightful batch.
Variations
While the classic deviled eggs are undeniably perfect, their inherent versatility allows for endless creative adaptations. You can easily tailor them to suit various dietary needs or flavor preferences, ensuring everyone at your gathering can enjoy a bite.
For a delightful vegan option, simply substitute the hard-boiled eggs with firm tofu that has been pressed and cubed, then baked or air-fried until slightly golden. The creamy filling can be achieved using a blend of silken tofu, vegan mayonnaise, Dijon mustard, a touch of nutritional yeast for cheesiness, and your preferred spices. Garnish with a sprinkle of smoked paprika and a dash of black salt for an eggy flavor. This plant-based version offers a surprisingly similar texture and rich flavor profile.
If you’re following a low-carb lifestyle, these deviled eggs are already a fantastic choice, but you can elevate them further. Consider mixing finely chopped celery or finely diced pickles into the yolk filling for added crunch and a refreshing zest. You could also incorporate a small amount of cream cheese for an even richer, smoother filling. For a topping, instead of paprika, try a sprinkle of everything bagel seasoning or finely chopped chives and dill.
To introduce an international flair, explore Mediterranean-inspired variations. Mix in some finely crumbled feta cheese, chopped Kalamata olives, and a pinch of dried oregano into the yolk filling. A squeeze of fresh lemon juice can add a bright, zesty note that complements the richness of the eggs. Garnish with fresh parsley and a drizzle of high-quality olive oil for an elegant presentation that hints at the flavors of Greece and Italy.
How to Prepare deviled eggs recipe
Step 1: Cooking the Eggs
Begin by carefully placing your hard-boiled eggs into a pot. Ensure they are submerged in cold water by about an inch, which helps to prevent the yolks from cracking during cooking. This initial step is crucial for achieving perfectly cooked eggs that will serve as the foundation for your delectable deviled eggs.
Bring the water to a rolling boil over medium-high heat. Once boiling, immediately remove the pot from the heat. Cover the pot tightly with a lid and let the eggs sit undisturbed in the hot water for approximately 9 to 12 minutes, depending on the size of your eggs and your desired level of doneness. This resting period allows the residual heat to cook the eggs thoroughly and evenly without overcooking, which can lead to a rubbery texture or that unappetizing green ring around the yolk.
After the resting time has elapsed, drain the hot water from the pot. Then, immediately plunge the eggs into a bowl filled with ice-cold water. This rapid cooling process, often called an ice bath, is essential. It stops the cooking process, preventing the yolks from becoming overcooked and also helps to make the eggs significantly easier to peel. Let the eggs chill in the ice bath for at least 10 minutes before proceeding to the next step. This cooling and shock method is a key trick to achieving perfectly firm egg whites and easily removable shells.
Step 2: Peeling and Halving
Once the hard-boiled eggs have sufficiently cooled in the ice bath, it’s time to peel them. Gently tap each egg on a hard surface, such as your countertop, to crack the shell all over. Then, under cool running water or by submerging them in a bowl of water, carefully begin to peel away the shell fragments. The cold shock from the ice bath should make the shells slip off quite easily, minimizing frustration and ensuring you don’t damage the delicate egg whites.
After successfully peeling your eggs, pat them dry with a paper towel. This simple step prevents any excess moisture from making the egg whites slippery, which can cause them to break when you cut them. Using a sharp, thin-bladed knife is highly recommended for this next part to ensure clean, precise cuts. A dull knife can crush the egg white as you slice, resulting in a less appealing presentation.
Carefully slice each peeled egg in half lengthwise. This means cutting from one end of the egg to the other, creating two oval-shaped halves. Aim for a clean cut that goes straight through the center. The goal is to expose the bright yellow yolk nestled within the firm white, preparing it for the next stage of creating the creamy filling. Take your time and be deliberate with your cuts for the best results.
Step 3: Extracting and Mashing the Yolks
With your eggs perfectly halved, it’s time to gently remove the yolks. Using a small spoon or even your fingers, carefully scoop out the cooked yolks from each egg white half. Place all the removed yolks into a medium-sized mixing bowl. It’s important to ensure you get as much of the yolk as possible, as this forms the creamy base of your deviled egg filling. Avoid tearing or damaging the egg white halves, which will serve as the vessel for your filling.
Once all the yolks are collected in the bowl, it’s time to mash them. Grab a fork and begin pressing down on the yolks, vigorously mashing them against the sides and bottom of the bowl. Continue this mashing process until the yolks are as smooth and lump-free as possible. A fine, creamy texture is what you’re aiming for, as this will create a wonderfully smooth and consistent filling that pipes or spoons beautifully.
For an extra smooth filling, you can even pass the mashed yolks through a fine-mesh sieve. This extra step ensures absolutely no small lumps remain, resulting in a luxurious, velvety texture that feels incredibly decadent. While not strictly necessary, it significantly elevates the overall quality and presentation of your deviled eggs, making them truly restaurant-worthy. Achieving this smooth consistency is key to a professional-looking and tasting appetizer.
Step 4: Creating the Creamy Filling
Now that your egg yolks are mashed to a fine consistency, it’s time to incorporate the other key ingredients that will transform them into a luscious, flavorful filling. Add your chosen mayonnaise to the bowl with the mashed yolks. For a classic taste, a good quality full-fat mayonnaise works best, providing that signature creamy richness. Ensure you measure accurately to achieve the perfect balance of flavors without making the filling too loose or too stiff.
Next, stir in the Dijon mustard. The Dijon adds a wonderful tangy sharpness that cuts through the richness of the mayonnaise and egg yolks, providing a delightful counterpoint. Be sure to use Dijon for its specific nuanced flavor, though other mustards can be used in a pinch. Then, add a few dashes of hot sauce. This is where you can introduce a subtle, intriguing warmth that gives the deviled eggs their signature “deviled” kick. Start with a small amount and add more to taste, ensuring you don’t overpower the other flavors.
Finally, season the mixture generously with salt and freshly ground black pepper. These essential seasonings enhance all the other flavors in the filling, bringing them together into a harmonious blend. Taste the mixture at this stage and adjust the seasonings as needed. You might find you want a little more salt, a bit more pepper, or perhaps another dash of hot sauce for extra zing. Ensure the filling is perfectly seasoned before you proceed to filling the egg whites.
Step 5: Assembling the Deviled Eggs
With your perfectly seasoned, creamy filling ready, it’s time to bring your deviled eggs to life. Take the empty egg white halves and arrange them neatly on a serving platter or a baking sheet lined with parchment paper. This makes them easy to handle and transport to the refrigerator later.
For a classic, homemade look, simply use a small spoon to carefully fill each egg white half with the yolk mixture. Don’t be afraid to mound the filling slightly; this creates a more generous and visually appealing presentation. Gently smooth the top of the filling with the back of the spoon if desired. The slightly domed mounds of filling are characteristic of traditional deviled eggs and signal a hearty, satisfying bite.
To achieve a more elegant and professional finish, consider using a piping bag fitted with a star tip. Spoon the yolk mixture into the piping bag and pipe swirls or rosettes of filling into each egg white half. This method creates beautiful, decorative patterns that instantly elevate the presentation of your deviled eggs. If you don’t have a piping bag, you can improvise by using a clean zip-top bag with a small corner snipped off. This technique adds a touch of flair that is sure to impress your guests.
Step 6: Garnishing and Chilling
The final touches are what transform simple deviled eggs into an appetizer that’s as beautiful as it is delicious. Once your egg whites are filled, it’s time for the garnishes. The most classic garnish is a sprinkle of paprika. A light dusting of sweet or smoked paprika adds a lovely pop of color and a subtle, warm flavor that complements the filling perfectly. Use a small sieve or your fingertips to apply it evenly over the top of the filling.
If you’ve opted for fresh herbs, now is the time to add them. Finely chopped fresh chives or parsley add a burst of freshness and a vibrant green contrast to the rich yellow filling and red paprika. Sprinkle them sparingly over the top for a delicate, professional finish. Other popular garnishes include a tiny slice of black olive, a small caper, or even a sprinkle of crispy bacon bits for added texture and flavor.
Once garnished, cover the deviled eggs loosely with plastic wrap or transfer them to an airtight container. Refrigerate them for at least 30 minutes before serving. This chilling period allows the flavors to meld together beautifully, and it ensures the filling is firm and pleasantly cool. Serving them chilled is crucial for the best taste and texture experience, making them a refreshing and delightful treat for any occasion.
Pro Tips for deviled eggs recipe
The Secret to Easy Peeling: Don’t underestimate the power of an ice bath! After boiling, immediately transfer your eggs to a bowl packed with ice and water. This rapid cooling halts the cooking process and causes the egg white to contract slightly, separating it from the shell and making peeling significantly easier. For even better results, consider adding a bit of baking soda or salt to the boiling water.
Achieving Silky Smoothness: For a filling that is incredibly smooth and luxurious, don’t just mash the yolks with a fork. After mashing, pass the yolks through a fine-mesh sieve directly into your mixing bowl. This simple step eliminates any remaining lumps, resulting in a velvety texture that’s perfect for piping.
Perfect Piping Technique: If you’re using a piping bag, ensure it’s not overfilled, as this can make it difficult to control. Hold the bag vertically over the egg white half and apply gentle, consistent pressure. Start from the outside edge and work your way in a circular motion or create elegant rosettes. Practice on a plate first if you’re new to piping.
Flavor Boosters: While the classic ingredients are superb, don’t hesitate to experiment! A tiny splash of pickle juice or white vinegar can add a delightful tang to the filling. A pinch of garlic powder or onion powder can introduce a savory depth. For a touch of heat, consider a tiny amount of horseradish or even a very small amount of sriracha.
Make Ahead Magic: Deviled eggs are an ideal make-ahead appetizer. You can boil and peel the eggs a day or two in advance and store them in an airtight container in the refrigerator. Prepare the yolk filling and store it separately in an airtight container. Assemble and garnish the eggs just before serving to prevent the filling from drying out or the whites from becoming soggy.
Serving Suggestions for deviled eggs recipe
Decoration
The final visual appeal of your deviled eggs can be significantly enhanced with thoughtful garnishes. A classic sprinkle of smoked or sweet paprika provides a warm, inviting color and a subtle flavor enhancement. For a touch of freshness and vibrant contrast, finely chopped fresh chives or parsley are excellent choices, adding a delicate herbaceous note. Consider adding a tiny sliver of pimento for a classic Southern touch, or a small, thin slice of black olive for a savory accent.
Creative decorative elements can also include a small dollop of relish, such as sweet pickle or corn relish, atop the filling for an extra burst of flavor and color. Tiny edible flowers can add an elegant, gourmet touch, especially for special occasions. Even a swirl of balsamic glaze or a micro-green can elevate the presentation from simple to sophisticated, making your deviled eggs a true feast for the eyes.
Don’t forget the textural contrast. A sprinkle of toasted sesame seeds, crispy fried shallots, or even a few small pieces of finely crumbled bacon can add an exciting dimension to both the look and the taste. The key is to balance the visual elements with the flavor profile of the deviled eggs themselves, ensuring the garnishes enhance rather than overpower the classic taste.
Side Dishes
Deviled eggs are incredibly versatile and pair wonderfully with a wide array of dishes, making them suitable for any meal from brunch to a light dinner. They are a perfect complement to traditional picnic fare and holiday spreads, fitting right in alongside classics like fried chicken, a hearty breakfast casserole, or tender baked beans. Their rich, creamy texture also balances the crispness of a fresh cajun pasta salad or a refreshing coleslaw.
For a delightful lunch or brunch setting, consider serving deviled eggs alongside light sandwiches, such as turkey and avocado or cucumber and cream cheese. They also make an excellent addition to a charcuterie board, offering a protein-rich counterpoint to cheeses, cured meats, and artisanal breads. Their presence can add a comforting, familiar element to a more elaborate spread of small bites and appetizers.
When planning a larger gathering, deviled eggs can serve as a fantastic starter before a main course like roasted chicken or a flavorful grilled steak. They are also an integral part of a build-your-own brunch bar, alongside pancakes, waffles, and fruit salads. Imagine them as part of a festive spread including garlic herb bread and perhaps a pitcher of mimosas for a truly celebratory feel.
Creative Serving Ideas
Beyond the traditional platter, think outside the box for truly memorable presentations. Arrange deviled eggs on a bed of fresh greens, like arugula or spinach, drizzled with a light vinaigrette for an elegant appetizer salad. Another idea is to serve them nestled in mini muffin tins lined with colorful paper liners, making them individually portioned and easy to handle at a cocktail party.
For a playful twist, consider serving them on a tiered stand, interspersed with other small appetizers or fruits, creating a visually stunning centerpiece. You could also incorporate them into a “breakfast for dinner” theme, serving them alongside miniature quiches, fruit skewers, and mini sausages. This unexpected pairing can delight guests and offer a unique culinary experience.
On Pinterest, you’ll find inspiration for themed deviled eggs, such as coloring the filling with natural dyes like beet juice for pink eggs or spinach puree for green eggs, perfect for holidays or themed parties. They can also be served warm as a unique appetizer alongside a robust main course, offering a comforting contrast. Consider a “build-your-own” deviled egg bar, providing various toppings like relish, crispy onions, or finely chopped herbs, allowing guests to customize their own delicious creations.
Preparation & Storage
Storing Leftovers
Properly storing leftover deviled eggs is crucial for maintaining their quality and ensuring food safety. Once they have been served and are no longer at room temperature, cover them tightly with plastic wrap or transfer them to an airtight container. It’s important to do this within two hours of them being out to prevent bacterial growth.
When stored correctly in the refrigerator, deviled eggs can typically be enjoyed for about 3 to 4 days. The mayonnaise-based filling helps to preserve the eggs somewhat, but their quality will gradually decline over time. It’s best to consume them sooner rather than later for the optimal taste and texture. Ensure the container is sealed well to prevent the eggs from absorbing other odors from the refrigerator.
Before serving leftovers, always do a quick visual inspection and a sniff test. If you notice any off-smells, discoloration, or a slimy texture, it’s best to discard them. While they can be stored for a few days, they are undeniably at their best when enjoyed within the first 24-48 hours of being made.
Freezing
Unfortunately, deviled eggs, particularly the egg white halves, do not freeze well. The texture of the egg white tends to become watery and rubbery upon thawing, significantly impacting the overall appeal of the dish. The delicate structure of the cooked egg white is simply not designed to withstand the freezing and thawing process.
However, there is a silver lining for those who wish to prepare elements ahead of time. The yolk filling itself can be successfully frozen. If you have made a larger batch of filling than you need for immediate consumption, you can freeze it in an airtight container for up to 3 weeks. Ensure the container is well-sealed to prevent freezer burn.
When you are ready to use the frozen filling, thaw it completely in the refrigerator. Once thawed, you may need to whisk it vigorously to restore its smooth consistency, as some slight separation can occur. You can then use this thawed filling with freshly prepared hard-boiled egg whites for a quick assembly of delicious deviled eggs.
Reheating
Generally, deviled eggs are best served chilled or at room temperature and are not intended to be reheated. Reheating them would typically involve warming the entire egg, which, as mentioned, is not ideal for the egg white’s texture. The heat can cause the whites to become tough, rubbery, and unappealing, diminishing the delightful creamy texture of the filling.
If you have leftovers and prefer them at a slightly warmer temperature, you can consider gently bringing them to room temperature for about 20-30 minutes before serving. This is the safest and most effective way to serve them without compromising their quality. Avoid any direct heating methods like ovens, microwaves, or stovetops, as these will inevitably alter the texture negatively.
For the best experience, simply enjoy your deviled eggs at their intended temperature. If you have prepared the filling separately and frozen it, and you plan to serve it with freshly boiled eggs, you can ensure optimal freshness and texture by assembling them just before serving. This way, you capture the intended delightful creaminess and tender egg white combination.
Frequently Asked Questions
-
How can I ensure my hard-boiled eggs are easy to peel every time?
Achieving easy-to-peel hard-boiled eggs involves a combination of factors, starting with the freshness of the eggs. Older eggs (about a week old) tend to peel more easily than very fresh ones. The steaming method is highly recommended: place eggs in a steamer basket over boiling water for 12-15 minutes. Alternatively, when boiling, add a teaspoon of baking soda or a tablespoon of vinegar to the water, which can help break down the eggshell’s membrane. The most critical step, however, is plunging the hot eggs into a large bowl of ice water immediately after cooking. This rapid cooling causes the egg white to contract and pull away from the shell, making peeling significantly easier once they are thoroughly chilled.
-
Can I make the deviled egg filling ahead of time, and if so, how should I store it?
Yes, absolutely! The deviled egg filling can be prepared up to 2 days in advance, making it a fantastic make-ahead component for entertaining. Once you’ve mashed the yolks and mixed in the mayonnaise, mustard, and seasonings, store the filling in an airtight container in the refrigerator. Some slight separation of the ingredients might occur over time; if it does, simply whisk the filling vigorously with a fork or a small whisk just before you plan to assemble the eggs. This will help to recombine the ingredients and restore a smooth, creamy texture. Ensure the container is well-sealed to prevent the filling from drying out or absorbing odors from other foods.
-
What are some creative ways to add flavor and flair to classic deviled eggs beyond paprika and chives?
The classic deviled egg is a wonderful canvas for culinary creativity. For a spicy kick, consider adding a pinch of cayenne pepper, a dash of sriracha, or finely minced jalapeño to the yolk mixture. To introduce a savory depth, incorporate ingredients like finely crumbled bacon, chopped capers, or a teaspoon of pesto. For a Mediterranean twist, try mixing in finely chopped Kalamata olives, a bit of feta cheese, or a pinch of dried oregano. A squeeze of fresh lemon or lime juice can add brightness, while a tablespoon of relish (sweet pickle or corn relish) offers a delightful sweetness and texture. Don’t hesitate to experiment with herbs like dill, cilantro, or tarragon for unique flavor profiles, or even a touch of curry powder for an exotic flair.