Easy Dairy-Free Pear Compote for a Delicious Breakfast Treat
As I sunk my spoon into the warm, syrupy texture of this Dairy-Free Pear Compote, a delightful wave of nostalgia washed over me, reminding me of cozy autumn mornings filled with sweet aromas wafting from the kitchen. The beauty of this luxurious compote lies not only in its simplicity but also in how effortlessly it transforms ordinary pears into a velvety treat that’s perfect for breakfast or dessert. Imagine serving it atop creamy yogurt or warm oatmeal, or letting it drizzle down a scoop of vanilla ice cream.
With quick prep and a versatile nature, this dairy-free delight is bound to impress both friends and family alike. Curious about how this cherished recipe can elevate your next meal? Let’s dive in! This simple yet luxurious dairy-free pear compote comes together with delightful ingredients, making it a perfect addition to your breakfast or dessert spread.
Why You Will Love This Recipe
- Quick Preparation: This luxurious dairy-free pear compote can be prepared in just minutes, making it an ideal choice for busy home cooks or those new to the kitchen, ensuring a delightful treat is always within reach.
- Versatile Flavor: Enjoy it warm over oatmeal or cold as a topping for ice cream; every spoonful delivers a sweet, syrupy flavor that’s sure to satisfy a wide range of dessert and breakfast cravings.
- Crowd Pleaser: Whether you’re hosting brunch or treating yourself, this recipe is designed to impress, bringing a touch of elegance and homemade charm to any meal, making it a go-to for gatherings.
- Guilt-Free Indulgence: Naturally lower in fat and entirely dairy-free, this compote allows you to indulge in a sweet treat without any of the common dietary concerns, offering a wholesome and satisfying experience.
- Make-Ahead Convenience: Easily whip up a larger batch for quick breakfasts or dessert options throughout the week; your future self will thank you for the effortless elegance it brings to busy days.
Ingredients You Need
The magic of this dairy-free pear compote lies in its accessible ingredients, where the natural sweetness of ripe pears forms the foundation, enhanced by a touch of citrus and warming spices. Selecting the ripest pears you can find will significantly boost the compote’s natural sugars and create a beautifully tender texture, minimizing the need for added sweeteners and allowing the pure fruit flavor to shine through. Remember, the quality of your ingredients directly impacts the final taste, so opting for fresh, seasonal produce is always the best approach for a truly exquisite result.
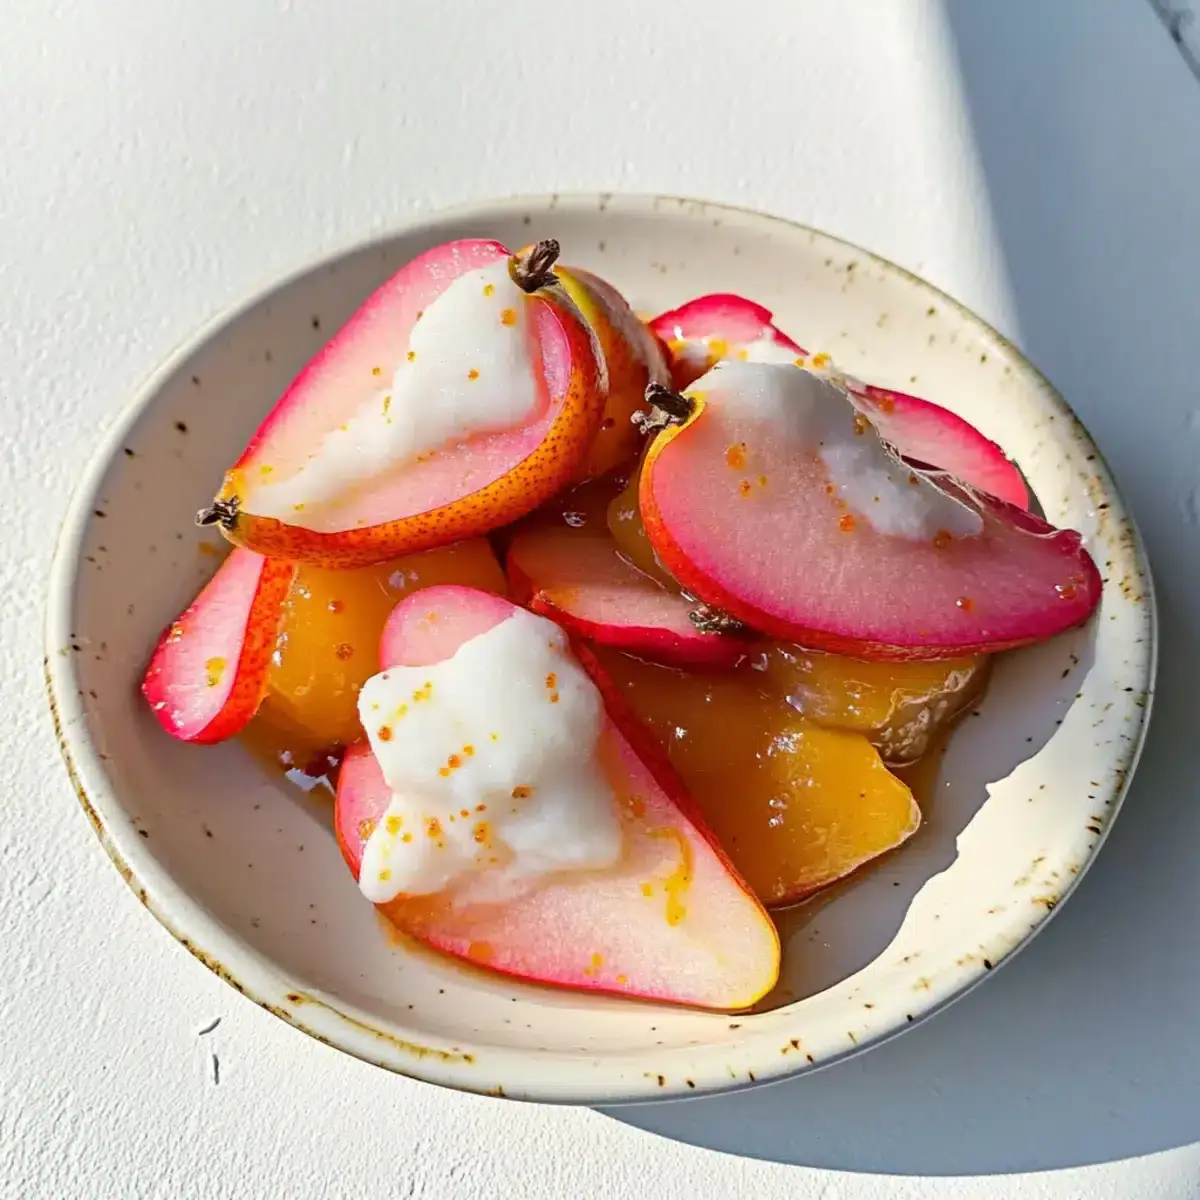
Dairy-Free Pear Compote with Hibiscus & Orange

A simple yet luxurious dairy-free pear compote that's perfect for breakfast or dessert. This recipe is naturally lower in fat, quick to prepare, and can be customized with various flavor additions. It's a crowd-pleaser that brings elegance to any meal, offering a guilt-free indulgence with its velvety texture and sweet, syrupy flavor.
- 4 medium Pears (Choose ripe pears for optimal sweetness and flavor.)
- 1/4 cup Sweetener (e.g., maple syrup, adjust based on sweetness of pears)
- 1 teaspoon Cinnamon (Can be replaced with nutmeg.)
- 2 tablespoons Lemon Juice (Can use lime juice as an alternative.)
- 3 cups Hibiscus Tea
- 1/2 cup Freshly squeezed Orange Juice
- 1Prepare the pears by peeling, coring, and slicing them into thick wedges.
- 2In a medium saucepan, combine the hibiscus tea, freshly squeezed orange juice, and any desired sweetener. Bring to a gentle simmer over medium heat.
- 3Add the pear wedges to the saucepan, ensuring they are mostly submerged in the liquid. Cover and let them poach gently for 15-20 minutes, or until tender.
- 4Check the pears for doneness by piercing a wedge with a fork; it should glide in easily. If they're not quite tender, continue poaching for an additional 5 minutes.
- 5Remove the saucepan from heat and let the pears cool in the poaching liquid for 10 minutes.
- 6Serve the warm pears drizzled with the poaching syrup over yogurt, oatmeal, or as a sweet finish to your meal.
- 7Store any leftovers in an airtight container in the fridge for up to a week.
Keywords: pear compote, dairy-free, vegan, breakfast, dessert, healthy, easy, homemade, spiced pears, fruit compote
Quantities for these delightful ingredients are readily available within the recipe card, ensuring you have all the precise measurements needed for success. You’ll find a comprehensive list there to guide you through every step of creating this exquisite compote.
Variations
For a vibrant and slightly tart twist, consider infusing your compote with the floral notes of hibiscus. You can achieve this by brewing a strong hibiscus tea and using it as the base liquid for your pear compote, perhaps adding a splash of fresh orange juice for brightness. This variation introduces a beautiful rosy hue and a refreshing complexity that beautifully complements the sweetness of the pears.
If you’re aiming for a lighter, more invigorating flavor, a citrus-forward variation is divine. Incorporate the zest of a lemon or lime directly into the simmering pears, along with a squeeze of their juice. This not only balances the sweetness but also adds a lively zest that can brighten up even the most decadent breakfast or dessert, making it feel incredibly fresh and appealing.
For those who adore warming spices, a delightful variation involves adding a generous pinch of freshly grated ginger or a touch of star anise to the simmering pears. These aromatic additions lend a subtle heat and a deeper, more complex flavor profile that is particularly enchanting during cooler months, transforming the compote into a truly comforting treat.
How to Prepare dairy free pear compote
Step 1: Prepare the Pears
Begin your culinary journey by carefully selecting the perfect pears for this delightful compote. Aim for fruits that are ripe but still firm to the touch, as this ensures they will soften beautifully during the cooking process without turning mushy. Overripe pears might break down too much, resulting in a less desirable texture, while underripe ones might remain stubbornly hard even after adequate cooking time.
Once you have chosen your ideal pears, the next crucial step is to prepare them for cooking. You’ll need to peel the outer skin away with a sharp paring knife or a vegetable peeler. After peeling, carefully core each pear, removing the fibrous center and any seeds. This meticulous preparation ensures a smooth and enjoyable eating experience, free from any undesirable bits.
Finally, slice the prepared pears into uniform wedges or chunks, depending on your preference for texture. Aim for pieces that are roughly the same size, so they cook evenly and at the same rate. The thickness of your slices will influence the final texture of the compote; thinner slices will yield a softer, more jam-like consistency, while thicker wedges will retain more of their shape and offer a delightful bite.
Step 2: Create the Flavorful Liquid Base
In a medium-sized saucepan, combine your chosen liquid with any sweeteners and spices. If you’re using water or a non-dairy milk, start with about a cup or two, adjusting the quantity based on how syrupy you want your compote. The goal here is to create a flavorful medium that will gently cook the pears and infuse them with delicious notes.
If you’re opting for a sweeter compote, now is the time to add your preferred sweetener. Maple syrup, agave nectar, or even a touch of granulated sugar can be used, but start with a smaller amount, as ripe pears are naturally sweet. You can always add more later if needed. This step allows the sweetener to dissolve fully into the liquid, ensuring an even distribution of sweetness throughout the compote.
Consider adding warming spices like cinnamon sticks, a hint of nutmeg, or even a piece of star anise at this stage. These spices will slowly release their aroma and flavor as they simmer, permeating the pears and creating a wonderfully aromatic and complex compote. This aromatic infusion is key to developing a truly memorable dessert or breakfast topping.
Step 3: Simmer the Pears to Perfection
Gently place the prepared pear wedges or chunks into the saucepan containing your flavorful liquid base. Ensure the pears are mostly submerged in the liquid; if not, you can add a little more liquid until they are adequately covered. This submersion is vital for ensuring that the pears cook evenly from all sides and absorb the delightful flavors surrounding them.
Once the pears are nestled in the liquid, bring the mixture to a gentle simmer over medium-low heat. Avoid a rolling boil, as this can break down the pears too quickly and lead to an uneven texture. A slow, steady simmer is key to achieving that perfect tender consistency that defines a wonderful compote, allowing the fruit to soften gradually.
Cover the saucepan with a lid, leaving it slightly ajar to allow some steam to escape. Let the pears simmer for approximately 15 to 20 minutes, or until they are tender when pierced with a fork. The exact cooking time will vary depending on the type and ripeness of the pears you are using, so it’s important to check them periodically.
Step 4: Achieving the Ideal Consistency
As the pears simmer, the liquid will gradually transform into a rich, syrupy glaze. This is the magic moment when the natural sugars from the pears meld with the liquid, creating that luscious texture everyone loves in a good compote. Keep an eye on the consistency; you’re aiming for a balance between tender fruit pieces and a beautifully thickened syrup.
If, after the initial simmering time, the liquid seems too thin, you can remove the lid and increase the heat slightly to medium. Continue to simmer uncovered for another 5-10 minutes, allowing the excess liquid to evaporate and the syrup to thicken further. Stir gently and frequently during this stage to prevent sticking or scorching on the bottom of the pan.
Conversely, if your compote becomes too thick, don’t fret. You can easily loosen it up by stirring in a tablespoon or two of water, a splash of non-dairy milk, or even a bit more of your chosen liquid base. This simple adjustment will help you achieve that perfect, spoonable consistency that makes your dairy-free pear compote so delightful. The key is patience and gentle adjustments to reach your desired outcome.
Step 5: Infuse with Finishing Touches
Once your pears have reached the desired tenderness and the compote has achieved a beautiful, syrupy consistency, it’s time for the finishing touches. Remove the saucepan from the heat to prevent overcooking. At this point, you can stir in a small amount of lemon juice or lime juice to add a touch of brightness and acidity. This acidity balances the sweetness of the pears and sweetener, making the overall flavor profile more complex and appealing.
Consider adding optional flavor enhancements now, such as a sprinkle of ground cinnamon, a pinch of nutmeg, or even a touch of vanilla extract. These additions can elevate the compote from simple fruit to an aromatic delight. Stir them in gently, allowing their fragrances to meld with the warm pears and syrup. Remember to taste and adjust seasonings as needed, ensuring the flavor is exactly to your liking.
If you’ve added whole spices like cinnamon sticks or star anise, this is also the time to carefully remove them before serving. This ensures a smooth texture and prevents anyone from biting into a hard spice piece. The compote is now ready to be enjoyed, either warm or cooled, showcasing its delightful texture and perfectly balanced flavors. This final step ensures every spoonful is a harmonious blend of sweetness, spice, and fruit.
Step 6: Cooling and Serving
Allow the dairy-free pear compote to cool in the saucepan for at least 10-15 minutes after removing it from the heat. This cooling period is essential as it allows the flavors to meld together further and the syrup to thicken to its final, perfect consistency. Serving it warm is a wonderful option, but letting it cool slightly prevents any accidental burns and allows the true depth of flavor to emerge.
Once cooled to your desired temperature, you can serve the compote immediately. It is absolutely delicious spooned warm over a scoop of dairy-free vanilla ice cream, dolloped onto fluffy pancakes or waffles, or swirled into a bowl of creamy oatmeal or non-dairy yogurt. The warm, syrupy pears offer a comforting contrast to colder dishes and add a touch of elegance to simple breakfasts.
For a more refined dessert presentation, consider garnishing the compote with a sprinkle of toasted nuts like almonds or pistachios, a sprig of fresh mint, or a delicate drizzle of extra syrup. These small touches can transform a simple compote into a show-stopping finale to any meal, demonstrating that elegant dairy-free desserts are easily achievable with a little bit of culinary care and attention.
Pro Tips for dairy free pear compote
- Choose the Right Pears: Select pears that are ripe but still firm. Varieties like Bartlett, Bosc, or Anjou work wonderfully, offering a good balance of sweetness and texture that holds up well during cooking.
- Sweeten to Taste: Pears vary in sweetness, so always start with a smaller amount of your chosen sweetener (like maple syrup or agave) and taste as you go. You can always add more if needed.
- Don’t Overcook: Keep a close eye on the pears during simmering. You want them tender, but not mushy, so they retain some shape and offer a pleasant bite in the compote.
- Achieve Perfect Consistency: If your compote is too thin, simmer uncovered for a few more minutes to allow the syrup to thicken. If it’s too thick, add a splash of water or non-dairy milk to loosen it.
- Flavor Boosters: Consider adding a cinnamon stick, a slice of fresh ginger, or a strip of citrus peel during simmering for added aromatic depth. Remove them before serving for a smooth texture.
Serving Suggestions for dairy free pear compote
Decoration
Elevate your dairy-free pear compote with a few simple decorative touches that enhance both its visual appeal and its flavor profile. A light dusting of ground cinnamon or a sprinkle of finely chopped toasted nuts, such as almonds or pecans, adds texture and visual interest. For a burst of freshness and a vibrant color contrast, a few fresh mint leaves or a small sprig of rosemary can be artfully placed on top.
Side Dishes
This versatile compote pairs beautifully with a wide array of breakfast and dessert accompaniments, offering a touch of natural sweetness and fruitiness. It’s divine spooned over a hearty bowl of warm oatmeal or a creamy dairy-free yogurt parfait, providing a delightful textural contrast. For a more indulgent treat, consider serving it alongside a slice of dairy-free pound cake, a scoop of vegan vanilla ice cream, or even as a topping for gluten-free pancakes or waffles.
Creative Serving Ideas
Beyond the usual, think outside the box for unique ways to present your dairy-free pear compote. Layer it into individual parfait glasses with dairy-free yogurt and granola for an elegant breakfast or dessert option. It can also be used as a luscious filling for crepes or turnovers, adding a sweet, fruity burst. For a more savory application, a small dollop can be an intriguing accompaniment to certain cheeses or even alongside roasted pork, offering a delightful sweet-and-savory interplay.
Preparation & Storage
Storing Leftovers
To keep your delicious dairy-free pear compote fresh and flavorful, it’s essential to store it properly. Once the compote has cooled completely to room temperature, transfer it into an airtight container. Glass jars with tight-fitting lids are ideal for this purpose, as they prevent air from entering and maintain the compote’s quality.
Store the sealed container in the refrigerator. Properly stored, this compote will remain fresh and enjoyable for up to one week. It’s a wonderful way to have a homemade, healthy topping readily available for your breakfasts, desserts, or snacks throughout the week, saving you time and effort on busy days.
Freezing
If you’ve made a large batch of this delightful compote and want to preserve it for longer, freezing is an excellent option. Allow the compote to cool completely, then portion it into freezer-safe containers or heavy-duty freezer bags. It’s often convenient to freeze it in individual serving sizes, making it easy to thaw only what you need.
Ensure that the containers are sealed tightly to prevent freezer burn. Label each container with the contents and the date of freezing. Properly frozen dairy-free pear compote can maintain its quality for up to three months, offering a taste of autumnal sweetness whenever you desire it.
Reheating
When you’re ready to enjoy your frozen or refrigerated pear compote, reheating is a simple process. For frozen compote, the best approach is to thaw it overnight in the refrigerator. Once thawed, you can gently reheat it on the stovetop over low heat. Stir occasionally until it reaches your desired warm temperature, being careful not to boil it vigorously, which could alter the texture.
If reheating refrigerated compote, simply place the desired amount in a small saucepan and warm it over low heat, stirring gently. You can also microwave it in short intervals, stirring between each to ensure even heating. The compote should be warmed through, releasing its lovely aroma and returning to its lusciously syrupy state, ready to be enjoyed anew.
Frequently Asked Questions
-
What is the best type of pear to use for this dairy-free compote?
When selecting pears for this dairy-free compote, look for varieties that are ripe but still hold their shape well during cooking. Pears like Bosc, Anjou, or Bartlett are excellent choices because they offer a good balance of sweetness and a texture that softens beautifully without becoming overly mushy. Slightly underripe pears might remain too firm, while overly ripe ones can break down too easily, so aim for that sweet spot of just-tender to the touch. A gentle aroma is also a good indicator of ripeness and will contribute to a more flavorful compote.
-
Can I make this pear compote without any added sweetener?
Yes, you absolutely can make this pear compote without added sweetener, especially if you are using very ripe pears, which are naturally quite sweet. The sweetness level will depend on the specific pears you choose and your personal preference. It’s always recommended to start by tasting the pears themselves and then adding a minimal amount of sweetener, like maple syrup or agave, only if necessary. You can also incorporate a touch of unsweetened applesauce or a splash of orange juice to enhance the natural fruitiness and balance any tartness, making it a healthier option.
-
What are some creative ways to use leftover dairy-free pear compote beyond breakfast?
Leftover dairy-free pear compote is incredibly versatile and can be used in numerous creative ways to enhance both sweet and savory dishes. For desserts, it makes a fantastic filling for tarts, turnovers, or crepes, or as a luscious topping for vegan cheesecakes and parfaits. You can also swirl it into dairy-free ice cream or blend it into smoothies for a fruity kick. For savory applications, a spoonful can complement roasted pork or chicken dishes, or even be added to a cheese board to provide a sweet contrast to salty crackers and artisanal cheeses.