Crispy Air Fryer Chickpeas Recipe Easy Smoky Lemon Snack

These aren’t just any chickpeas; they’re your new favorite snack, a crunchy revelation that will transform your perception of pantry staples. Imagine perfectly crisp little nuggets, bursting with smoky paprika and a vibrant zing of lemon, all made effortlessly in your air fryer. They’re the kind of snack that makes you pause, savor, and then immediately reach for another handful, leaving you wondering how something so simple can be so utterly addictive.
My journey with these crispy air fryer chickpeas started with a simple offer from a colleague and quickly escalated into a culinary obsession. They represent that rare breed of recipe: incredibly easy, astonishingly delicious, and wonderfully wholesome. They’re proof that you don’t need complicated ingredients or lengthy cooking times to create something truly special and satisfying. Get ready to discover a snack that’s both comforting and exciting, a delightful twist on a humble legume.
Why You Will Love This Recipe
- Effortless Preparation: In under 30 minutes, you can transform canned chickpeas into a gourmet-level snack, perfect for spontaneous cravings or quick party appetizers.
- Pantry Staples: This recipe relies on common ingredients like chickpeas, olive oil, smoked paprika, and lemon, meaning you likely have most of what you need on hand right now.
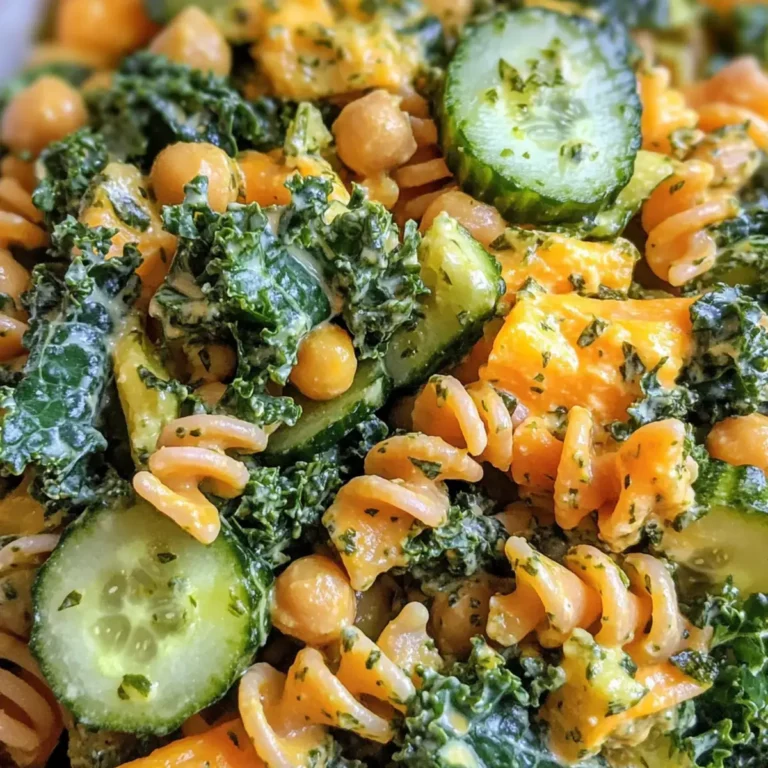
- Versatile Snack: Enjoy them straight from the air fryer basket, toss them into salads for a delightful crunch, or add them as a topping to your favorite grain bowls.
- Incredibly Crispy Texture: The magic of the air fryer creates a satisfying crunch that rivals fried snacks, but without the excess oil and mess.
- Bold Flavor Profile: The combination of smoky paprika and bright lemon zest provides a complex and utterly addictive taste that keeps you coming back for more.
Ingredients You Need
The beauty of this recipe lies in its simplicity, utilizing common pantry items to create an explosion of flavor and texture. We’re aiming for ingredients that are readily available and contribute to that perfect crispy outcome. The key is to ensure the chickpeas are well-dried before seasoning, as moisture is the enemy of crispiness. These humble legumes, when treated correctly, transform into something truly special.
Crispy Air Fryer Chickpeas with Smoked Paprika and Lemon

A quick and easy snack of crispy chickpeas with smoky paprika and fresh lemon zest, perfect for snacking or topping salads. This recipe uses an air fryer to achieve a crunchy texture without greasiness.
- 1 can (15 oz) chickpeas, drained and rinsed well
- 1 tablespoon olive oil
- 1 teaspoon smoked paprika
- 1/2 teaspoon garlic powder
- 1/2 teaspoon salt
- Zest of 1 fresh lemon
- Optional: 1/4 teaspoon cayenne pepper for heat
- Optional: fresh chopped parsley for garnish
- 1Drain and rinse the canned chickpeas under cold water. Spread them out on paper towels or a clean kitchen towel and pat dry thoroughly. Let air dry for 10 minutes if possible.
- 2Preheat the air fryer to 390°F (200°C).
- 3In a mixing bowl, combine olive oil, smoked paprika, garlic powder, salt, and cayenne pepper if using. Add the chickpeas and toss to coat evenly.
- 4Arrange chickpeas in a single layer in the air fryer basket, avoiding overcrowding. Cook in batches if necessary.
- 5Air fry for 15-18 minutes, shaking the basket every 5 minutes to ensure even cooking. Chickpeas should be golden brown and crisp.
- 6Transfer chickpeas to a bowl and sprinkle with fresh lemon zest. Toss gently to combine.
- 7Let cool slightly before serving. Chickpeas will crisp up more as they cool.
Keywords: air fryer chickpeas, crispy chickpeas, smoky lemon snack, healthy snack, vegan snack, gluten-free snack, easy snack recipe
You’ll find all the exact quantities within the recipe card provided, but the main stars include canned chickpeas, good quality olive oil, robust smoked paprika, and the zest of a fresh lemon for that essential bright finish. We’ll also add a touch of garlic powder and salt to round out the flavors, creating a balanced and irresistible profile. Don’t forget to keep an eye on the recipe card for the specific measurements that ensure perfect results every time.
Variations
Spicy Kick: For those who love a little heat, amp up the spice level by adding a pinch of cayenne pepper or a dash of chipotle powder alongside the smoked paprika. This creates a dynamic flavor profile that’s both smoky and fiery, perfect for an adventurous palate.
Herbaceous Delight: Swap the smoked paprika for dried herbs like oregano, thyme, or rosemary. This Italian-inspired twist offers a more Mediterranean aroma and flavor, pairing beautifully with fresh salads or light lunches.
Curried Infusion: Embrace the warm, exotic flavors of curry powder. Replace the smoked paprika with your favorite curry blend and finish with a squeeze of fresh lime juice instead of lemon zest for a delightful Indian-inspired snack.
Sweet & Salty Balance: Especially in cooler months, consider a subtle sweet and savory approach. A tiny sprinkle of brown sugar or a hint of cinnamon mixed with the paprika can create a more complex, autumnal flavor that’s surprisingly addictive. This is reminiscent of some delightful dessert recipes that play with sweet and savory notes.
Umami Boost: For a savory, cheesy note, toss the chickpeas with a tablespoon of nutritional yeast and a quarter cup of grated Parmesan cheese (if not strictly vegan) after they come out of the air fryer. The heat will help the cheese melt slightly and adhere, creating a rich umami coating.
Lemon Herb Twist: Combine the lemon zest with finely chopped fresh parsley or cilantro after cooking for an extra layer of freshness and visual appeal. This brightens the flavor and adds a lovely green fleck, making the chickpeas look as good as they taste.
How to Prepare crispy air fryer chickpeas
Step 1: Preparing the Chickpeas for Crispiness
The foundation of incredibly crispy air fryer chickpeas lies in thorough preparation. Begin by opening a can of chickpeas and pouring them into a colander to drain and rinse them under cold running water. This removes any residual canning liquid and excess starch, which can prevent them from getting truly crisp. After rinsing, spread the chickpeas out on a double layer of paper towels or a clean kitchen towel.
Gently pat them dry, ensuring you remove as much surface moisture as possible. For an even better result, allow them to air dry for at least 10-15 minutes on the towel. This crucial step helps to evaporate any lingering moisture, which is the primary enemy of crispiness in air-fried foods. The drier the chickpeas, the crispier they will become in the air fryer.
Tip: If you have time, you can even spread them on a baking sheet and let them air dry in a slightly open oven (turned off) for a while. This extra drying time really pays off in achieving that coveted crunchy texture. Think of this as the pre-game ritual for ultimate crispiness.
Step 2: Preheating the Air Fryer and Mixing the Spices
While your chickpeas are diligently drying, it’s time to get your air fryer ready. Preheat your air fryer to 390°F (200°C). Allowing the air fryer to reach its full temperature before adding the food ensures an even and immediate crisping process. A preheated air fryer basket creates the perfect environment for that delightful crunch.
In a medium-sized mixing bowl, combine the olive oil with the smoked paprika, garlic powder, and salt. If you’re opting for a spicy version, now is the time to add your cayenne pepper or other chili flakes. Ensure the oil is evenly distributed amongst the spices to create a cohesive coating mixture. This blend of spices is what gives the chickpeas their signature smoky and savory flavor.
The Best Part: The quality of your smoked paprika truly matters here. Using a good Spanish Pimentón de la Vera will provide a deeper, more authentic smoky flavor than standard paprika. It’s a small investment that makes a significant difference in the final taste of your snack.
Step 3: Coating the Chickpeas Thoroughly
Once the chickpeas are well-dried and the spice mixture is ready, add the dried chickpeas to the mixing bowl with the seasoned olive oil. Use a spoon or your clean hands to toss everything together thoroughly, ensuring each chickpea is evenly coated with the spice blend. This even coating is vital for consistent flavor and color development during air frying.
Make sure there are no dry spots and that the oil and spices are clinging to the surface of each bean. If some chickpeas seem a bit sparse on seasoning, add a tiny bit more oil and spices to ensure full coverage. This step is where the magic starts to happen, infusing the humble chickpea with its delicious flavor profile, much like how ingredients are prepared for a flavorful dish.
Important Note: Avoid using too much olive oil, as this can make the chickpeas greasy and prevent them from crisping properly. A light, even coating is all you need to help the spices adhere and achieve that perfect texture.
Step 4: Air Frying for Maximum Crispiness
Now it’s time to introduce your seasoned chickpeas to the hot air fryer. Carefully place the seasoned chickpeas into the preheated air fryer basket. It is absolutely crucial to spread them out in a single layer, avoiding any overcrowding. Overcrowding will cause the chickpeas to steam rather than crisp, defeating the purpose of the air fryer.
If your air fryer basket is not large enough to accommodate all the chickpeas in a single layer, it’s best to cook them in batches. Cooking in batches ensures that hot air can circulate freely around each chickpea, promoting even cooking and maximum crispiness. This might add a few extra minutes to your total cooking time, but the superior texture is well worth it. You are aiming for that perfect crunchy bite.
Pro Tip: For the best crispy results, don’t overcrowd the basket. Think of it like giving each chickpea its own personal space to get perfectly golden and crunchy. This makes a huge difference compared to a packed basket.
Step 5: The Crucial Cooking and Shaking Process
Air fry the chickpeas for approximately 15 to 18 minutes. During this cooking time, it is essential to shake the air fryer basket every 5 minutes. This simple action helps to ensure that all sides of the chickpeas are exposed to the hot air, leading to even browning and consistent crispiness. Shaking prevents hot spots and ensures that no chickpeas are left undercooked or overly browned.
Keep a close eye on the chickpeas, especially during the last few minutes of cooking, as they can go from perfectly crisp to burnt very quickly. You’re looking for a deep golden-brown color and a texture that feels firm and crunchy when lightly pressed. Listen for a satisfying rattle when you shake the basket, indicating they’re getting nice and dry.
Observation: The exact cooking time can vary slightly depending on your air fryer model and the moisture content of your chickpeas. It’s always best to start checking around the 12-minute mark and adjust as needed. The goal is a delightful crunch that holds up well.
Step 6: Adding the Fresh Lemon Zest Finish
Once the chickpeas have reached their desired level of crispiness, carefully remove the air fryer basket. Immediately transfer the hot, crispy chickpeas into a clean bowl. While they are still warm, zest one fresh lemon directly over the chickpeas. The warmth of the chickpeas will help to release the fragrant oils from the lemon zest, infusing them with a bright, citrusy aroma and flavor.
Gently toss the chickpeas to distribute the lemon zest evenly. The combination of the smoky paprika and the fresh lemon zest is what makes these chickpeas so uniquely delicious and addictive. It’s a simple finishing touch that elevates them from just “spiced” to “exquisitely flavored.” This is akin to the final flourish on a beautifully presented bread, adding that extra layer of appeal.
Final Touch: For an extra pop of freshness and color, you can also sprinkle some finely chopped fresh parsley over the chickpeas after adding the lemon zest. This not only enhances the visual appeal but also adds another layer of herbaceous flavor.
Pro Tips for crispy air fryer chickpeas
- Dryness is Key: Never skip the step of thoroughly drying your chickpeas. Even a little residual moisture can lead to soggy chickpeas instead of crispy ones. Pat them dry, then let them air dry for at least 10-15 minutes.
- Don’t Overcrowd: Give your chickpeas plenty of space in the air fryer basket. This allows hot air to circulate freely, ensuring each chickpea gets evenly crispy. Cook in batches if necessary; it’s worth it for the texture.
- Shake it Up: Shaking the basket every 5 minutes during the cooking process is crucial. This simple action ensures even browning and prevents any hot spots from burning the chickpeas.
- Zest at the End: Add the fresh lemon zest *after* the chickpeas have finished cooking. This preserves its bright, vibrant flavor and aroma, preventing it from becoming bitter during the high heat of the air fryer.
- Cooling for Crispness: As the chickpeas cool, they will continue to crisp up. If they seem a little soft right out of the air fryer, let them sit for a few minutes. If they lose crispness in storage, a quick reheat in the air fryer will revive them.
Serving Suggestions for crispy air fryer chickpeas
Decoration
For an extra touch of freshness and visual appeal, sprinkle finely chopped fresh parsley, chives, or cilantro over the finished chickpeas after adding the lemon zest. This adds a vibrant green contrast and a hint of herbaceous flavor that complements the smoky and citrus notes beautifully. A tiny pinch of red pepper flakes can also add a visually appealing pop of color and a subtle hint of heat.
Side Dishes
These crispy chickpeas are a fantastic accompaniment to a variety of dishes. They add a delightful crunch and smoky flavor to salads, grain bowls, and roasted vegetables. Consider serving them alongside lighter fare like a fresh meal for a balanced meal, or as a crunchy topping for hearty soups and stews, providing textural contrast. They also pair wonderfully with dips like hummus, tzatziki, or a creamy avocado dip for a delightful appetizer spread.
Creative Serving Ideas
Beyond snacking, get creative with these crispy chickpeas. Sprinkle them generously over avocado toast for an added textural element and smoky flavor. They can also be incorporated into a Mediterranean-inspired mezze platter alongside olives, feta cheese, and pita bread. For a unique twist, try adding them to a charcuterie board for an unexpected crunchy element that guests will adore. Their versatility makes them a go-to ingredient for elevating everyday meals into something special.
Preparation & Storage
Storing Leftovers
Once completely cooled, store any leftover crispy air fryer chickpeas in an airtight container at room temperature. They will retain their crispiness best when stored this way for up to 2 days. If stored in the refrigerator, they may soften due to moisture, but can still be enjoyed for up to a week. Ensure the container is truly airtight to minimize exposure to air, which can lead to staleness or softening.
Freezing
While not ideal for maintaining maximum crispiness, it is possible to freeze these chickpeas. Spread them out in a single layer on a baking sheet and freeze until solid, then transfer them to a freezer-safe bag or container. They will likely be softer upon thawing, so a quick reheat is highly recommended. It’s generally better to refrigerate or consume them fresh for the best texture.
Reheating
To revive the crispiness of leftover chickpeas, the best method is to reheat them in the air fryer. Place them in the air fryer basket in a single layer and cook at 350°F (175°C) for 2-4 minutes, or until they are crisp again. You can also reheat them in a toaster oven or a conventional oven at a similar temperature for a few minutes. Avoid microwaving, as this will make them soft and chewy.
Frequently Asked Questions
-
Can I use canned chickpeas if they aren’t dried thoroughly?
While you can use canned chickpeas that aren’t dried completely, the results will be significantly less crispy. Moisture is the main enemy of crispiness in air-fried foods. If you can’t dry them thoroughly, consider increasing the cooking time slightly or cooking in smaller batches to allow for better air circulation and evaporation. However, thorough drying is the single most impactful step in achieving that desirable crunch, so it’s highly recommended to dedicate the time to this step.
-
How can I make the chickpeas even crispier if they aren’t to my liking?
If your chickpeas aren’t as crispy as you’d prefer after the initial cooking time, you can extend the air frying duration by a few minutes at a slightly lower temperature (around 350°F/175°C) to prevent burning. Another effective method is to ensure they are completely dry before seasoning and to use a single layer in the air fryer basket. Some users also find that adding a tiny bit of cornstarch or arrowroot powder along with the spices before air frying can help enhance crispiness by absorbing excess moisture.
-
What are some other spices or flavor combinations I could use for these air fryer chickpeas?
The possibilities are vast! For a smoky and slightly spicy flavor, try adding cumin and a pinch of chipotle powder. For a Mediterranean twist, incorporate dried oregano, thyme, and a touch of garlic powder. A sweet and savory option could include a hint of cinnamon and a pinch of brown sugar with the paprika. You can also experiment with curry powder and a squeeze of lime juice for an Indian-inspired flavor profile. Freshly chopped herbs like rosemary or sage added towards the end of cooking can also offer a lovely aromatic dimension.