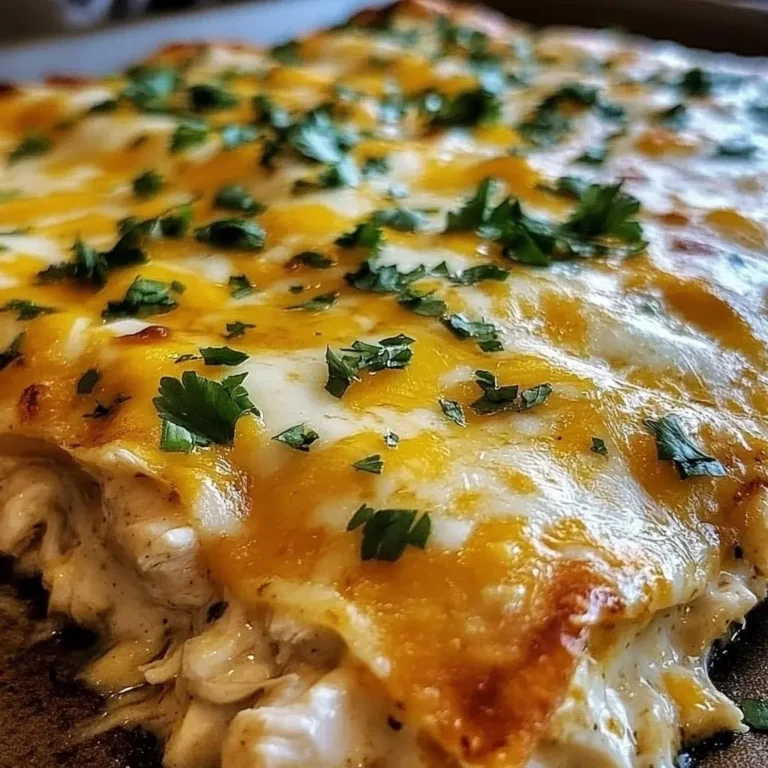
Creamy Queso Chicken Enchiladas: Irresistibly Cheesy & Easy Recipe!
Creamy Queso Chicken Enchiladas have become my absolute weeknight hero dish! The first time I pulled these cheesy, sauce-drenched beauties from the oven, the aroma of melted cheese and spices filled my kitchen, and I knew I’d found something special. There’s something magical about that moment when the queso sauce bubbles around the edges of corn tortillas packed with tender shredded chicken.
Every bite delivers that perfect balance of creaminess, spice, and comfort that makes you close your eyes and savor. If you’re looking for a meal that brings the restaurant experience home, this enchilada recipe deserves a permanent spot in your rotation. The sheer joy of watching those ooey-gooey cheese pulls emerge from the baking dish is a reward in itself, promising a truly decadent meal. It’s a culinary hug that never fails to impress, regardless of the occasion.
Why You Will Love This Recipe
- Effortless Preparation: These enchiladas are designed for busy lives, allowing for significant make-ahead steps that simplify weeknight cooking. You can assemble the entire dish hours in advance, ensuring a stress-free dinner when it’s time to serve. The minimal active cooking time means you can enjoy more moments with loved ones.
- Incredible Flavor Profile: The combination of tender shredded chicken, savory sautéed vegetables, and a luxuriously creamy queso sauce creates a symphony of tastes and textures. Each element plays a vital role, from the slight tang of the sauce to the subtle sweetness of the onions, culminating in a truly memorable dish. This recipe is a masterclass in balanced flavors.
- Comfort Food Perfection: This dish embodies the very essence of comfort food, offering warmth and satisfaction with every bite. The melty cheese, the tender chicken, and the rich sauce combine to create a deeply comforting experience that soothes the soul. It’s the kind of meal that feels like a warm embrace on a chilly evening.
- Versatile and Adaptable: While this recipe is fantastic as is, it also offers endless possibilities for customization. You can easily swap out ingredients, add new ones, or adjust the spice level to suit your preferences, making it a truly personalizable meal. This adaptability ensures it can cater to a variety of tastes and dietary needs with a few simple tweaks.
- Crowd-Pleasing Appeal: These enchiladas are guaranteed to be a hit with family and friends alike. Their universally loved flavors and indulgent texture make them a perfect choice for gatherings, potlucks, or any occasion where you want to impress your guests with a delicious homemade meal. The visual appeal alone, with its bubbling cheese, makes it an instant favorite.
Ingredients You Need
Crafting these creamy queso chicken enchiladas relies on fresh, quality ingredients to achieve that signature depth of flavor and irresistible texture. Opting for good quality cheese, like a blend of sharp cheddar and Monterey Jack, will result in a wonderfully melty and flavorful sauce that coats each tortilla perfectly. The chicken should be tender and easy to shred, ensuring it integrates seamlessly into the filling without being dry. Using fresh aromatics like onions and bell peppers will build a solid foundation of savory taste.
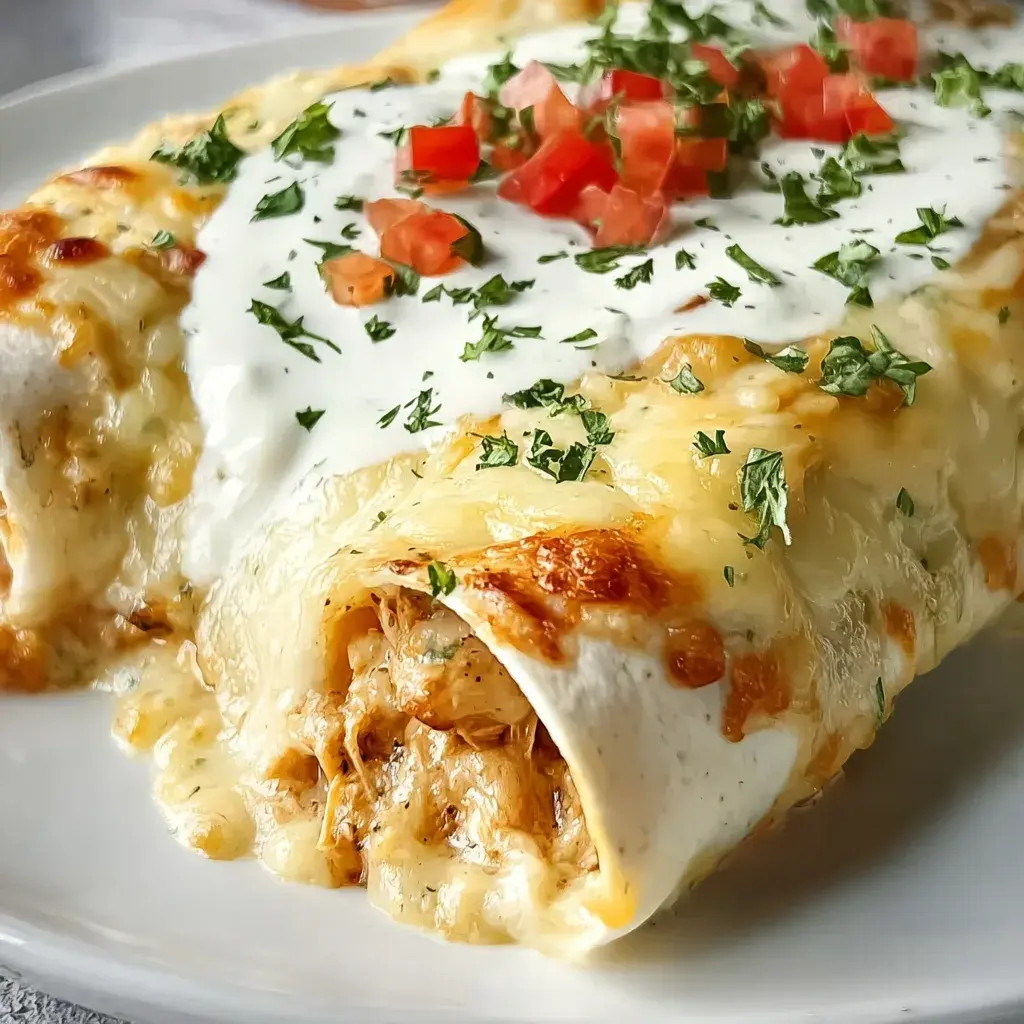
Creamy Queso Chicken Enchiladas

These Creamy Queso Chicken Enchiladas are an absolute weeknight hero dish, delivering a perfect balance of creaminess, spice, and comfort. The velvety queso sauce blankets tender shredded chicken and softened corn tortillas, making for a meal that brings the restaurant experience home.
- For the Chicken Filling:
- 2 cups shredded cooked chicken (rotisserie chicken recommended)
- 1/2 cup chopped white onion
- 1/2 cup chopped green bell pepper
- 1 tablespoon olive oil
- 1 teaspoon chili powder
- 1/2 teaspoon cumin
- 1/4 teaspoon garlic powder
- Salt and pepper to taste
- For the Queso Sauce:
- 4 tablespoons unsalted butter
- 4 tablespoons all-purpose flour
- 2 cups milk (whole milk recommended)
- 1 cup shredded Monterey Jack cheese
- 1 cup shredded Cheddar cheese
- 1/4 teaspoon cayenne pepper (optional)
- 1 tablespoon pickle juice (optional, for brightness)
- Salt and pepper to taste
- For Assembly:
- 8-10 corn tortillas
- 1/4 cup chopped fresh cilantro, for garnish
- Diced avocado, for garnish
- Sour cream, for garnish
- 1Prepare the Chicken Filling: Heat olive oil in a skillet over medium heat. Add chopped onion and bell pepper and sauté until softened, about 5-7 minutes. Add the shredded chicken, chili powder, cumin, garlic powder, salt, and pepper. Stir well to combine and cook for another 2-3 minutes until heated through. Set aside.
- 2Make the Queso Sauce: Melt butter in a medium saucepan over medium heat. Whisk in the flour and cook for 1 minute, stirring constantly, until it smells slightly nutty but hasn't browned (this is a roux). Gradually whisk in the milk until smooth. Bring to a simmer, stirring constantly, until the sauce thickens, about 5-7 minutes. Remove from heat. Stir in the Monterey Jack cheese and Cheddar cheese, a handful at a time, until smooth and melted. Stir in cayenne pepper and pickle juice if using. Season with salt and pepper to taste.
- 3Prepare the Tortillas: Heat a small skillet over medium heat. Quickly warm each corn tortilla for 10-15 seconds per side until pliable. Stack warmed tortillas and cover with a clean kitchen towel to keep them warm and soft.
- 4Assemble the Enchiladas: Preheat oven to 375°F (190°C). Spread a thin layer of queso sauce on the bottom of a 9x13 inch baking dish.
- 5Place about 1/4 cup of the chicken filling slightly off-center on a warmed tortilla. Roll it up tightly but gently. Place the enchilada seam-side down in the prepared baking dish. Repeat with the remaining filling and tortillas.
- 6Pour the remaining queso sauce evenly over the rolled enchiladas, ensuring they are well-covered.
- 7Bake: Cover the baking dish with aluminum foil and bake for 20 minutes. Remove the foil and bake for another 10-15 minutes, or until the sauce is bubbly and the enchiladas are heated through.
- 8Serve: Garnish with fresh cilantro, diced avocado, and a dollop of sour cream.
Keywords: enchiladas, chicken, queso, Mexican, comfort food, weeknight meal, cheesy, creamy, baked
- corn tortillas: essential for the classic enchilada structure; warming them makes them pliable and prevents cracking.
- shredded chicken: rotisserie chicken is a fantastic shortcut, or you can poach and shred your own chicken breasts or thighs.
- onion: finely chopped to sauté and add a sweet, savory base to the filling.
- bell pepper: any color works; diced and sautéed with the onion for added flavor and texture.
- butter: the base for our roux, creating a smooth and creamy sauce.
- all-purpose flour: works with butter to thicken the queso sauce to the perfect consistency.
- milk: the liquid that brings our cheese sauce to life, ensuring it’s lusciously creamy.
- shredded cheese: a blend of Monterey Jack and sharp cheddar provides the ultimate gooey melt.
- cream cheese: adds an extra layer of richness and ultra-smoothness to the queso sauce.
- taco seasoning: a convenient blend that infuses the chicken and sauce with classic Mexican flavors.
- salt: to enhance and balance all the other flavors.
- black pepper: freshly ground is best for a subtle peppery bite.
- optional toppings: cilantro, sour cream, avocado, jalapeños for garnish.
The specific quantities for each ingredient are detailed within the accompanying recipe card, ensuring you have all the precise measurements needed for success. These components come together to create a dish that is both comforting and undeniably delicious.
Variations
For those following a plant-based lifestyle, transforming these enchiladas into a vegan delight is wonderfully achievable. Simply swap out the chicken for a hearty filling of seasoned black beans, roasted sweet potatoes, corn, and sautéed mushrooms. The creamy queso sauce can be recreated using a cashew-based sauce, nutritional yeast for a cheesy flavor, and a touch of almond milk for creaminess. You’ll achieve a similar satisfying richness that’s entirely plant-powered and utterly delicious.
If you’re aiming for a low-carb option, the key is to substitute the corn tortillas. While not traditional, you can use large lettuce leaves, such as romaine or butter lettuce, as wrappers. Alternatively, you could omit the tortillas altogether and layer the chicken filling and queso sauce in a baking dish for a delicious cheesy chicken bake. This approach cuts down significantly on carbohydrates while still delivering all the comforting flavors you love.
Another exciting variation involves infusing a bit of smoky heat. Consider adding a tablespoon or two of finely chopped chipotle peppers in adobo sauce to the chicken mixture before filling the tortillas. This will impart a wonderful smoky depth and a pleasant level of spice that elevates the entire dish. You could also incorporate diced roasted poblano peppers into the filling for a milder, earthy smokiness that complements the cheese beautifully.
How to Prepare creamy queso chicken enchiladas
Step 1: Prepare the Chicken Filling
Begin by preparing your chicken filling, which forms the savory heart of these enchiladas. If you are using a rotisserie chicken, simply shred the meat from the bones, ensuring you get nice, tender pieces. If you are cooking chicken breasts from scratch, poaching them in seasoned water until tender and then shredding them is an excellent method for moist results. You want the chicken to be easily shredded into bite-sized pieces that will distribute evenly within the tortillas.
In a large skillet, heat a tablespoon of olive oil over medium heat. Add one finely chopped yellow onion and sauté until it becomes translucent and slightly softened, which should take about 5-7 minutes. This process caramelizes the natural sugars in the onion, adding a foundational sweetness and depth of flavor to the filling. Next, add one diced bell pepper (any color you prefer, though red or green work wonderfully) to the skillet.
Continue to sauté the onion and bell pepper together for another 5-7 minutes until the vegetables are tender but still retain a slight bite. Stir in your shredded chicken, 2 tablespoons of taco seasoning, and salt and pepper to taste. Cook for an additional 2-3 minutes, stirring constantly, to ensure the chicken is evenly coated with the seasoning and heated through. This step ensures every morsel of chicken is packed with flavor before it’s rolled into the tortillas. Remove from heat and set aside.
Step 2: Warm the Tortillas
Warming the corn tortillas is a critical step for achieving pliable enchiladas that won’t crack or tear when rolled. This technique ensures they remain flexible throughout the baking process, resulting in perfectly formed enchiladas. A tortilla that is too stiff will likely break, leading to a messier presentation and a less enjoyable eating experience. Therefore, investing a few minutes in this preparation makes a significant difference in the final outcome.
You can warm the tortillas using a few different methods, each offering slightly different results but achieving the same goal of pliability. One effective method is to use a dry skillet over medium heat. Quickly heat each tortilla for about 10-15 seconds per side, just until it becomes soft and flexible. You are not trying to crisp them up; you simply want to make them pliable enough to roll without breaking. Be sure to work in batches and keep the warmed tortillas covered with a clean kitchen towel to trap steam and keep them warm and soft as you assemble the enchiladas.
Alternatively, you can briefly dip each tortilla in warm oil for a few seconds per side before placing it on a paper towel to drain any excess. This method adds a subtle richness and helps create a slightly more robust wrapper. Some people also opt to wrap a stack of tortillas in damp paper towels and microwave them for about 30-60 seconds until they are soft and steamy. Whichever method you choose, ensure they are warm and flexible before moving on to the filling and rolling stage.
Step 3: Assemble the Enchiladas
Now it’s time to bring all the components together and assemble your creamy queso chicken enchiladas. This is where the magic truly begins to take shape as you transform simple ingredients into a cohesive and delicious dish. Ensure your filling is ready and your tortillas are warm and pliable before you start this exciting stage. Having everything prepared beforehand will make the assembly process smooth and efficient, allowing you to focus on creating perfectly rolled enchiladas.
To begin, spread a thin layer of your prepared queso sauce on the bottom of a 9×13 inch baking dish. This initial layer of sauce prevents the bottom tortillas from sticking to the dish and provides a moist foundation for the enchiladas. It also ensures that the first layer of enchiladas receives a bit of that creamy sauce from the start, infusing them with flavor from below as they bake.
Take one warm tortilla and place it flat on your work surface. Spoon a generous portion of the seasoned chicken and vegetable filling down the center of the tortilla, leaving a small border on the sides. You don’t want to overfill the tortilla, as this can make rolling difficult and cause the filling to spill out during baking. Carefully roll the tortilla up tightly but gently, enclosing the filling completely. Place the rolled enchilada seam-side down in the prepared baking dish, tucking it snugly against the other enchiladas.
Continue this process, filling and rolling each tortilla with the remaining chicken mixture and placing them seam-side down in the baking dish, working in rows. Try to pack them snugly together; this helps them maintain their shape during baking. If you have any leftover filling, you can simply serve it alongside the enchiladas, or if you have a few extra tortillas, you can make additional smaller enchiladas.
Step 4: Create the Creamy Queso Sauce
The creamy queso sauce is undoubtedly the star of these enchiladas, lending them their signature richness and irresistible gooeyness. Achieving a perfectly smooth, velvety sauce is key to their success, and this step is where you’ll build that luxurious flavor. It’s a process that, while seemingly simple, requires attention to detail to ensure a flawless sauce that coats every element beautifully.
Start by melting 4 tablespoons of butter in a medium saucepan over medium heat. Once the butter is melted and shimmering, whisk in 4 tablespoons of all-purpose flour. Cook this mixture, known as a roux, for about 1-2 minutes, whisking constantly. You want to cook out the raw flour taste without letting it brown too much; a pale golden color is ideal. This roux will serve as the thickening agent for your sauce, providing a smooth and stable base.
Gradually whisk in 2 cups of milk, a little at a time, ensuring each addition is fully incorporated before adding more. Continue whisking until the sauce begins to thicken, which should take about 5-7 minutes. Once the sauce has thickened to a coating consistency on the back of a spoon, remove the saucepan from the heat. This is a crucial step to prevent the cheese from becoming oily or grainy.
Stir in 4 ounces of softened cream cheese until it is completely melted and smooth. Then, gradually add 2 cups of shredded Monterey Jack cheese and 1 cup of shredded sharp cheddar cheese, stirring until each handful is melted and incorporated before adding more. Continue to stir until the sauce is luxuriously smooth and creamy. Season with 1 teaspoon of taco seasoning, salt, and pepper to taste. If the sauce seems too thick, you can add a splash more milk or a bit of water to reach your desired consistency. The goal is a velvety, rich sauce that generously coats the enchiladas.
Step 5: Bake the Enchiladas
With the enchiladas assembled and the queso sauce prepared, it’s time for the final transformation in the oven. Baking not only melts the cheese to perfection but also allows the flavors to meld together, creating a cohesive and deeply satisfying dish. Ensure your oven is preheated and your baking dish is ready to go before you start this stage.
Pour the remaining creamy queso sauce evenly over the top of the assembled enchiladas, ensuring each one is well-coated. You want a generous blanket of cheesy sauce to bake over the tortillas, creating that signature gooey topping. Some of the sauce will naturally seep down into the tortillas and filling, enriching them further as they bake. Don’t be shy with the sauce; it’s what makes these enchiladas so wonderfully indulgent and flavorful.
Cover the baking dish tightly with aluminum foil. This helps to steam the enchiladas and ensure the filling heats through evenly without the cheese on top burning prematurely. Place the covered dish in a preheated oven at 375°F (190°C) and bake for 20-25 minutes. The foil traps the steam, cooking the tortillas through and softening them further while allowing the flavors to meld beautifully.
After the initial baking time, remove the aluminum foil. This step allows the cheese on top to melt and bubble to a golden-brown perfection. Bake for an additional 5-10 minutes, or until the sauce is bubbly around the edges and the cheese is melted and slightly golden in spots. Keep an eye on them during this final stage to prevent the cheese from burning. Once they’re perfectly golden and bubbling, carefully remove the baking dish from the oven.
Step 6: Rest and Serve
The final step before diving into your delicious creation is to allow the enchiladas to rest for a few minutes. This brief resting period is crucial for several reasons, allowing the flavors to settle and the sauce to thicken slightly, making them easier to serve and preventing them from falling apart. Patience here will be rewarded with a more cohesive and aesthetically pleasing final dish.
Once removed from the oven, let the enchiladas sit uncovered on a wire rack for about 5-10 minutes. This resting time allows the molten cheese and sauce to settle slightly. It gives the tortillas a moment to firm up just enough so that when you scoop them out with a spatula, they hold their shape beautifully. This is especially important for presentation, ensuring that each serving looks as appealing as it tastes.
Serve the creamy queso chicken enchiladas hot, straight from the baking dish. They are wonderful on their own, but garnishes take them to the next level. Sprinkle with fresh chopped cilantro for a burst of freshness, add a dollop of cool sour cream to cut through the richness, or top with diced avocado for creamy texture. Sliced jalapeños offer an extra kick for those who enjoy more heat.
Pro Tips for creamy queso chicken enchiladas
Don’t skip warming your tortillas; this is the golden rule for pliable, non-cracking enchiladas. Cold corn tortillas are brittle and will break when you try to roll them, leading to a messy filling explosion. A quick pass over a warm skillet or a few seconds in the microwave makes all the difference in their flexibility, ensuring a perfect roll every time.
Shred your chicken properly for the best texture. Whether using rotisserie chicken or cooking your own, ensure it’s shredded finely enough to distribute evenly within the tortillas. Avoid large chunks, as they can make rolling difficult and create uneven bites. The goal is tender, easily shreddable chicken that melds seamlessly with the other filling ingredients.
Adjust the queso sauce consistency to your preference. If it’s too thick after adding the cheese, whisk in a tablespoon or two of milk or warm water until it reaches your desired pourable yet creamy consistency. Conversely, if it’s too thin, let it simmer gently for a few more minutes off the heat (stirring constantly) until it thickens slightly. The perfect sauce should coat the back of a spoon luxuriously.
Consider a blend of cheeses for the queso sauce. While Monterey Jack and cheddar are classic, experimenting with a touch of pepper jack for heat or a hint of smoked gouda for depth can elevate the flavor profile. Cotija cheese sprinkled on top after baking adds a salty, crumbly finish that provides a wonderful textural contrast.
Serving Suggestions for creamy queso chicken enchiladas
Decoration
Elevate the visual appeal of your creamy queso chicken enchiladas with thoughtful garnishes. A vibrant sprinkle of fresh, finely chopped cilantro brings a pop of green and a fresh, herbaceous aroma that perfectly complements the richness of the dish. For a creamy contrast, a dollop of cool, tangy sour cream or Mexican crema adds a beautiful swirl and a pleasant temperature difference. Diced avocado provides creamy texture and a rich, buttery flavor that enhances the overall experience, while thinly sliced jalapeños offer a welcome spicy kick for those who enjoy a bit more heat.
Side Dishes
These enchiladas pair wonderfully with a variety of complementary side dishes that balance their richness and add further layers of flavor and texture to your meal. A simple and refreshing cilantro-lime rice is an excellent choice, as its bright, zesty notes cut through the creamy sauce beautifully. A fresh black bean and corn salad, tossed with a light vinaigrette, adds a delightful crunch and a burst of vibrant flavor. For a lighter option, a crisp green salad with a tangy citrus dressing provides a refreshing counterpoint to the hearty enchiladas.
Creative Serving Ideas
Beyond the traditional plating, consider creative ways to present these beloved enchiladas. For a more elegant presentation, arrange them in a circular pattern in a large serving platter, allowing the cheese sauce to cascade over the edges. You could also serve them in individual small cazuelas or baking dishes for a rustic, personal touch. Another fun idea is to offer a “build-your-own” enchilada bar with various toppings like shredded lettuce, pico de gallo, pickled red onions, and different hot sauces, allowing guests to customize their plates to their heart’s content.
Preparation & Storage
Storing Leftovers
Leftover creamy queso chicken enchiladas can be stored in an airtight container in the refrigerator for up to 3 days. Ensure they are completely cooled before transferring them to the container. Properly stored leftovers will retain their flavor and texture, making them a convenient and delicious meal for days to come. Avoid leaving them at room temperature for extended periods to maintain food safety.
Freezing
These enchiladas freeze exceptionally well, making them a fantastic candidate for meal prepping. For best results, slightly underbake the enchiladas before freezing; this prevents them from becoming mushy upon reheating. Cool them completely, then wrap individual portions or the entire dish tightly in plastic wrap, followed by a layer of aluminum foil to prevent freezer burn. Label with the date and freeze for up to 2 months.
Reheating
To reheat refrigerated enchiladas, place them in an oven-safe dish and add a tablespoon or two of water or broth over the top before covering tightly with foil. Bake in a preheated oven at 350°F (175°C) for 15-20 minutes, or until heated through. For frozen enchiladas, thaw them overnight in the refrigerator first, then reheat as described for refrigerated leftovers. You can also reheat individual portions in the microwave, covered, until hot and bubbly.
Frequently Asked Questions
- Can I use flour tortillas instead of corn for Creamy Queso Chicken Enchiladas?
Yes, you absolutely can use flour tortillas as a substitute for corn tortillas in this recipe, and they offer a slightly different, yet equally delicious, result. Flour tortillas are naturally more pliable and less prone to cracking than corn tortillas, which can make the rolling process a bit easier for some. However, corn tortillas are traditionally used and provide a distinct texture and slightly earthier flavor that many people prefer. If you choose to use flour tortillas, you typically won’t need to warm them as extensively, if at all, as they are already soft and flexible. The cooking time might also vary slightly; keep an eye on them to ensure the cheese is melted and bubbly without overcooking the tortillas. - How can I make these enchiladas spicier?
There are several effective ways to increase the heat level of your creamy queso chicken enchiladas to suit your spice preference. You can incorporate finely diced fresh jalapeño or serrano peppers directly into the chicken and vegetable filling during the sautéing process; adjust the quantity based on how much heat you desire. For an extra kick in the sauce itself, stir in a pinch of cayenne pepper or a dash of hot sauce into the queso mixture before pouring it over the enchiladas. Additionally, swapping some of the Monterey Jack cheese for pepper jack cheese will infuse the sauce with a subtle spiciness. Finally, serving with a selection of your favorite hot sauces on the side allows each diner to customize their individual heat level after the enchiladas are served. - What’s the best chicken to use for enchiladas?
The “best” chicken for enchiladas often comes down to convenience and desired moisture content, with several excellent options available. Rotisserie chicken is a superb choice because it’s already cooked, incredibly flavorful due to the seasonings it’s roasted with, and easy to shred, saving you significant preparation time. If you prefer to cook your own chicken, poaching chicken breasts or thighs in a seasoned broth (perhaps with some Mexican spices like cumin, chili powder, and oregano) until tender, then shredding them, yields moist and flavorful meat. Chicken thighs, in particular, tend to stay moister than chicken breasts after shredding and cooking, making them a great option for ensuring your enchilada filling is never dry. Ensure the chicken is thoroughly shredded into bite-sized pieces for even distribution within the tortillas.