
Red Velvet Cookie Bars offer a delightful twist on a classic cake, delivering rich flavor and vibrant color in every bite. These red velvet squares are incredibly simple to prepare, making them an ideal homemade dessert for any occasion. Perfect for sharing, they combine moist red velvet baking with a tangy cream cheese frosting.
Key Takeaways
- Achieve a decadent, bakery-quality dessert in under an hour.
- Effortlessly combine rich red velvet flavor with luscious cream cheese frosting.
- Perfect for gatherings, snacks, or satisfying a sweet craving.
- Simple storage and freezing options ensure lasting enjoyment.
These bars are a joy to bake. Simple steps lead to delicious results. Their vibrant color truly impresses. The taste is pure comfort. You will love making them.
Red Velvet Cookie Bars: Why Bake?
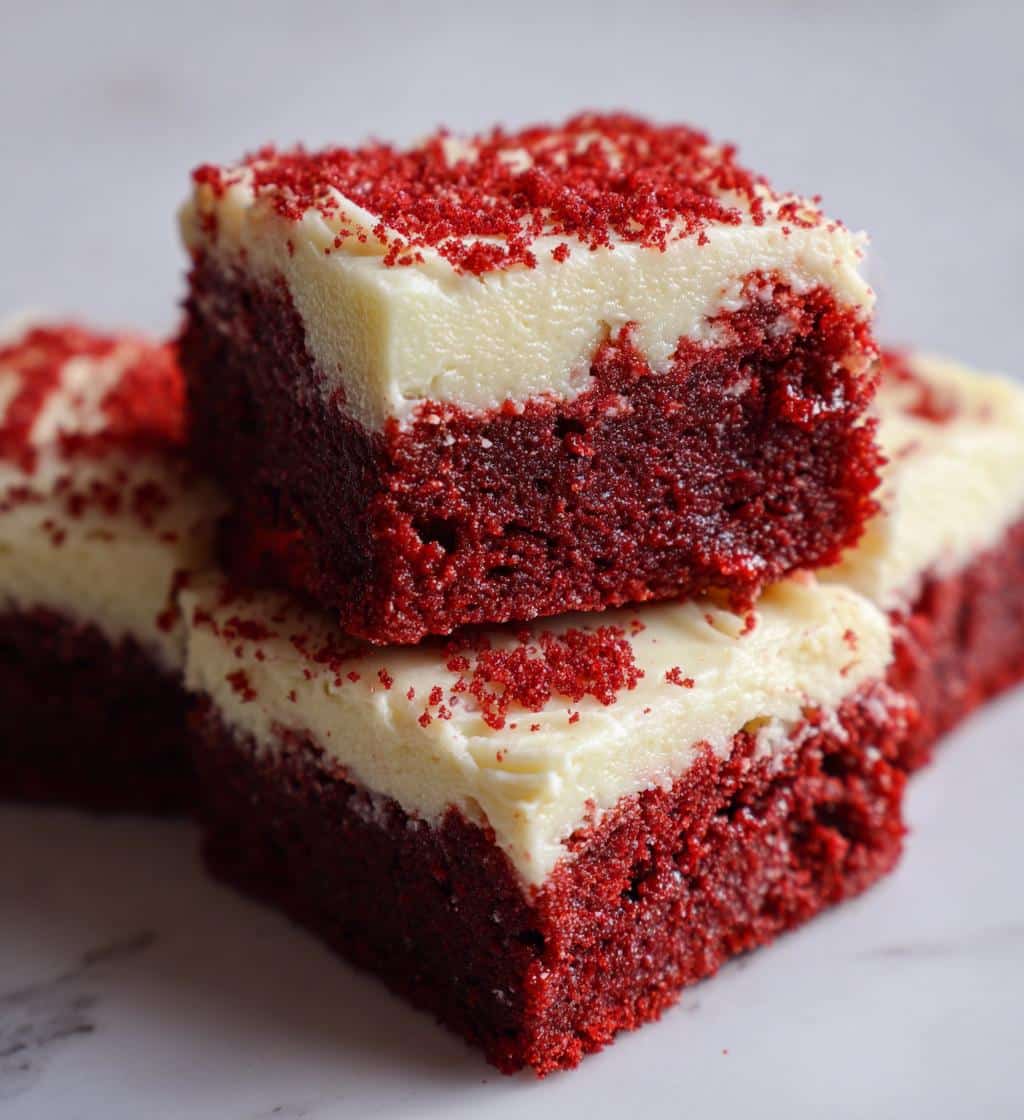
There’s something inherently appealing about red velvet, a classic flavor that evokes warmth and indulgence. These red velvet cookie bars encapsulate all the beloved qualities of a traditional red velvet cake but in a more accessible and often quicker-to-prepare format. They are less fussy than a layer cake yet deliver the same rich, cocoa-tinged flavor and eye-catching crimson hue. For those seeking a delicious dessert without the extensive baking time, these bars are an outstanding choice. They offer a delightful chewiness that traditional cakes often lack, making them a unique and highly satisfying treat.
Perfect for any sweet craving
Whether you’re in the mood for a midday pick-me-up or a delightful after-dinner treat, red velvet cookie bars hit the spot every time. Their balanced sweetness, coupled with the subtle tang of cream cheese frosting, creates a harmonious flavor profile that appeals to nearly everyone. The convenience of a bar means easy portioning and less mess than slices of cake, making them ideal for personal indulgence or sharing with loved ones. They are also incredibly versatile, fitting seamlessly into various occasions from casual family dinners to more festive celebrations. If you enjoy other sweet treats like Snickerdoodle Cobbler, you’ll appreciate the comforting taste of these red velvet bars.
Easy, impressive, delicious dessert
Don’t let the vibrant color and decadent appearance fool you; these red velvet cookie bars are remarkably easy to make. The straightforward baking process makes them suitable for bakers of all skill levels, even those new to the kitchen. Despite their simplicity, they look incredibly impressive, especially when topped with a generous swirl of homemade cream cheese frosting. Presenting a platter of these beautiful red velvet squares will surely garner compliments and happy smiles. They are a delicious dessert that marries ease with elegance, ensuring a rewarding baking experience and a truly delightful end product. It’s a fantastic recipe for when you want to make something special without spending hours in the kitchen.
Gather Ingredients for Your Cookie Bars
The success of any baking project starts with having all your ingredients measured and ready. For these delightful red velvet cookie bars, you’ll need a combination of pantry staples and a few specific items to achieve that signature flavor and color. Taking the time to organize your ingredients beforehand, a technique known as mise en place, will streamline your baking process and prevent any last-minute scrambling. This recipe calls for fresh, quality ingredients to ensure the best possible taste and texture in your homemade dessert.
Dry items for the batter
For the foundation of your red velvet cookie bars, you’ll need the usual suspects in baking. This includes all-purpose flour, which provides the main structure for the bars. Crucially, unsweetened cocoa powder is what gives red velvet its subtle chocolate flavor and depth; it reacts with baking soda to create the classic reddish-brown hue. Baking soda acts as a leavening agent, helping the bars rise and achieve a tender crumb. A pinch of salt is essential to balance the sweetness and enhance all the other flavors, making them pop. Make sure your flour and cocoa are fresh for optimal results.
Wet items and red color
The wet ingredients bring moisture and richness to the batter. You’ll need softened unsalted butter, which provides a tender texture and rich flavor. Granulated sugar and light brown sugar contribute sweetness and moisture, with the brown sugar adding a slight molasses note. Large eggs bind everything together and add richness. Pure vanilla extract enhances the overall flavor profile. And of course, the star of the show for its visual appeal is red food coloring. Gel food coloring is often recommended for a more intense and vibrant red without adding too much liquid to the batter. Buttermilk also plays a key role, adding a slight tang and contributing to the moistness of the bars.
Frosting’s smooth, sweet core
No red velvet treat is complete without a luscious cream cheese frosting. This frosting is relatively simple to prepare but requires specific ingredients for that signature tangy sweetness. You’ll need softened cream cheese, preferably full-fat, for the creamiest texture and distinct flavor. Softened unsalted butter is also necessary to create a smooth, spreadable consistency and add richness. Powdered sugar (confectioners’ sugar) provides the sweetness and helps thicken the frosting. Finally, a touch of vanilla extract rounds out the flavors, complementing the tang of the cream cheese beautifully. Ensuring these ingredients are at room temperature is crucial for a perfectly smooth and lump-free frosting.
Mixing Your Red Velvet Dough
The mixing stage is where the magic truly begins for your red velvet cookie bars, transforming individual ingredients into a cohesive, vibrant batter. Precision in mixing ensures the right texture and flavor development. While it might seem like a simple task, paying attention to the order and duration of mixing can significantly impact the final outcome of your homemade dessert. Overmixing, for instance, can lead to tough bars, so a gentle hand and keen eye are advised. This section guides you through creating that perfectly smooth, red velvet dough, ready for baking.
Combine flour, cocoa, soda, salt
Start by whisking together all your dry ingredients in a medium bowl. This includes the all-purpose flour, unsweetened cocoa powder, baking soda, and salt. Whisking them thoroughly before adding to the wet ingredients helps to evenly distribute the leavening agent and flavors throughout the dough, preventing pockets of unmixed ingredients. This step also aerates the flour slightly, which can contribute to a lighter, more tender cookie bar. Set this dry mixture aside while you prepare the wet components.
Cream butter with both sugars
In a large mixing bowl, using an electric mixer, cream together the softened unsalted butter with both the granulated sugar and light brown sugar. Beat these ingredients on medium speed until the mixture is light, fluffy, and pale in color. This creaming process incorporates air into the butter and sugar, which is vital for creating a tender texture in the final baked good. Scrape down the sides of the bowl periodically to ensure all ingredients are well combined. This stage is crucial for the overall texture of your desserts, similar to making other delightful treats like Quick Italian Cream Cake.
Add eggs, vanilla, red coloring
Once the butter and sugars are creamed, add the eggs one at a time, beating well after each addition until fully incorporated. Follow this with the vanilla extract, ensuring it’s evenly mixed in. Finally, add the red food coloring. Start with a smaller amount and gradually add more until you achieve your desired vibrant red hue. Remember that the color may deepen slightly during baking. Mix until the color is uniformly distributed throughout the batter. This step is where your red velvet dough truly comes to life with its characteristic vibrant appearance.
Assemble and Bake Cookie Bars
With your vibrant red velvet dough perfectly mixed, the next exciting phase is assembling and baking your cookie bars. This stage is relatively straightforward but requires attention to detail to ensure your bars bake evenly and achieve the ideal texture. Proper preparation of your baking pan and careful monitoring during baking are key to producing beautiful, perfectly cooked red velvet squares. The aroma filling your kitchen will be an enticing reward for your efforts.
Gradually mix in dry ingredients
Now it’s time to bring the wet and dry mixtures together. Gradually add the reserved dry ingredients to the wet mixture, mixing on low speed until just combined. Be careful not to overmix; overmixing can develop the gluten in the flour too much, leading to tough, dense cookie bars rather than the desired tender, chewy texture. Stop mixing as soon as no streaks of flour are visible. A slightly crumbly or thick dough is perfectly normal at this stage.
Fold in white chocolate chips
Once the dry ingredients are just incorporated, it’s time for the delightful addition of white chocolate chips. Gently fold these chips into the dough using a spatula. White chocolate provides a lovely contrast in flavor and texture to the rich red velvet, adding pockets of creamy sweetness that enhance each bite. Ensure the chips are evenly distributed throughout the dough so every red velvet cookie bar gets a good amount. If you prefer, you can also use milk chocolate or dark chocolate chips for a different flavor profile.
Spread batter, bake until set
Prepare a 9×13 inch baking pan by lining it with parchment paper, leaving an overhang on the sides for easy removal, and lightly greasing it. Evenly spread the thick red velvet cookie bar batter into the prepared pan. Use the back of a spoon or a spatula to press the batter firmly and spread it from edge to edge. Bake in a preheated oven at the specified temperature (typically 350°F or 175°C) for approximately 25-30 minutes, or until a toothpick inserted into the center comes out with moist crumbs, not wet batter. Avoid overbaking, as this can lead to dry bars. Once baked, let the bars cool completely in the pan before frosting.
Whip Up Cream Cheese Frosting
The crowning glory of any red velvet dessert is its iconic cream cheese frosting. This tangy, sweet, and incredibly smooth topping perfectly complements the rich, subtle cocoa flavor of the red velvet cookie bars. Making homemade cream cheese frosting is surprisingly simple, yet it yields a result far superior to store-bought options. Achieving the right consistency is key: it should be light and fluffy, yet firm enough to spread without dripping. Let’s create this essential component of your red velvet masterpiece.
Soften cream cheese and butter
For the smoothest, most delectable cream cheese frosting, it is absolutely crucial that both your cream cheese and unsalted butter are at room temperature. Take them out of the refrigerator at least an hour before you plan to make the frosting. Softened ingredients combine much more easily and evenly, preventing lumps and ensuring a silky-smooth texture. Cold cream cheese or butter will result in a clumpy, difficult-to-spread frosting, so patience here truly pays off. This step is a foundational baking tip for many frostings and batters.
Beat with powdered sugar until smooth
In a large mixing bowl, combine the softened cream cheese and butter. Using an electric mixer, beat them together on medium speed until the mixture is light, creamy, and completely smooth, with no lumps remaining. This usually takes about 2-3 minutes. Next, gradually add the powdered sugar (confectioners’ sugar), one cup at a time, beating on low speed until each addition is incorporated. Once all the sugar is added, increase the speed to medium-high and beat for another 2-3 minutes until the frosting is light, fluffy, and airy. Finally, stir in the vanilla extract. Scrape down the sides of the bowl as needed to ensure everything is thoroughly mixed. For a visual guide on cream cheese, you might find information on Wikipedia’s cream cheese page helpful.
Spread frosting over cooled bars
Before you even think about frosting, make sure your red velvet cookie bars are completely cooled. Attempting to frost warm bars will result in a melted, runny mess, as the heat will cause the butter and cream cheese in the frosting to break down. Once the bars are cool to the touch, use an offset spatula or the back of a spoon to generously spread the homemade cream cheese frosting evenly over the entire surface of the bars. You can create decorative swirls or simply smooth it out for a clean finish. Once frosted, you can chill the bars for about 15-20 minutes to allow the frosting to set slightly before slicing, making for cleaner cuts.
Quick Total Time for Cookie Bars
One of the most appealing aspects of these red velvet cookie bars, beyond their delightful taste and beautiful appearance, is their efficiency. In a world where time is a precious commodity, a dessert that delivers impressive results without demanding an entire afternoon is a true win. This section highlights just how quickly you can go from craving to indulging in these wonderful homemade treats. It’s the perfect solution for impromptu gatherings or when a sudden sweet tooth strikes.
Prep in just 15 minutes
The hands-on preparation for these red velvet cookie bars is remarkably swift. With your ingredients prepped and ready, you can have the batter mixed and spread into the pan in as little as 15 minutes. This quick prep time makes these bars an ideal choice for busy weekdays or when you need a delicious dessert without a lot of fuss. The straightforward steps, from combining dry ingredients to creaming butter and folding in chocolate chips, are designed for maximum efficiency, letting you spend less time in the kitchen and more time enjoying.
Bake for only 30 minutes
After a speedy prep, the baking time for these red velvet cookie bars is equally manageable. In a preheated oven, they typically bake to perfection in about 25-30 minutes. This relatively short baking duration means you won’t be tethered to your kitchen, constantly checking on them. The quick bake also helps to maintain the bars’ moist and tender interior, preventing them from drying out. A simple toothpick test will confirm when they are perfectly baked and ready to cool.
Enjoy homemade in 45 minutes
Combining the quick 15-minute prep with the approximate 30-minute bake time, you’re looking at a total active cooking and baking time of just 45 minutes to get these red velvet cookie bars into your oven and then ready to cool. While cooling and frosting add a little extra waiting, the actual hands-on effort is minimal. This speedy timeline makes them an excellent choice for a last-minute dessert or when you want a homemade treat without a lengthy commitment. You’ll be savoring these delicious, easy red velvet bars in no time!
Serving Up Delicious Red Velvet Cookie Bars
Once your red velvet cookie bars are baked, cooled, and beautifully frosted, the final step is perhaps the most satisfying: serving them! These bars are designed for easy enjoyment, whether you’re sharing them with a crowd or simply indulging in a quiet moment. Their convenient bar format makes them a versatile dessert for various occasions, and their vibrant appearance ensures they’re always a welcome sight. Get ready to impress and delight with these irresistible treats.
Yields 16 perfect squares
A standard 9×13 inch pan of these red velvet cookie bars will generously yield 16 perfectly portioned squares. This makes them an excellent choice for parties, potlucks, or family gatherings, ensuring there’s enough for everyone to enjoy. The uniform size of the squares also makes them aesthetically pleasing on a serving platter. Each square offers a substantial bite of rich red velvet flavor complemented by the creamy tang of the frosting. For comparison, a similar dessert like Peanut Butter Brownie Swirl Cookies also offers a good yield for sharing.
Ideal for sharing or treats
These red velvet cookie bars are incredibly versatile, fitting perfectly into almost any scenario. They are ideal for sharing, whether you’re bringing them to a picnic, a school event, or just having friends over. Their sturdy nature means they travel well, making them a fantastic contribution to any shared meal. Beyond social events, they are also wonderful for personal treats. Keep a batch on hand for a delightful afternoon snack, a comforting evening indulgence, or to satisfy any sweet craving that arises. Their deliciousness makes them a universal crowd-pleaser.
Nutrition Facts for Red Velvet Bars
Understanding the nutritional content of your homemade desserts can be helpful for those who like to keep track of their intake, even when enjoying a delicious treat. While these red velvet cookie bars are undoubtedly an indulgence, knowing what each serving provides can assist in balanced eating. Keep in mind that exact values can vary based on specific ingredients, brands, and any customizations you make to the recipe. This information offers a general guideline for informed enjoyment.
Each bar is 250 calories
Based on a typical recipe and dividing a 9×13 pan into 16 servings, each red velvet cookie bar typically contains approximately 250 calories. This calorie count reflects the rich ingredients like butter, sugar, cream cheese, and chocolate chips. While this makes them a satisfying treat, it’s a good idea to consider these numbers if you’re managing your daily caloric intake. Enjoying these bars in moderation allows for a guilt-free indulgence, fitting into a balanced diet, especially when you consider other components of your daily meals. They’re a delightful reward for a healthy meal, perhaps a light salad like a Beet Salad with Feta.
Provides 3 grams of protein
In addition to calories, each red velvet cookie bar typically offers around 3 grams of protein. This protein primarily comes from the eggs in the batter and the cream cheese in the frosting. While not a primary source of protein, this small amount contributes to the overall nutritional profile of the dessert. The combination of carbohydrates, fats, and protein helps make these bars quite satisfying, providing a sense of fullness that can prevent overeating. For those looking for more protein-rich main courses, explore options on Carina Recipes Main Course page.
Customize Your Red Velvet Cookie Bars
One of the joys of baking at home is the freedom to personalize recipes to suit your taste or to add an exciting twist. These red velvet cookie bars, while perfect as written, offer ample opportunities for creative customization. Small adjustments can lead to entirely new flavor experiences or cater to specific preferences. Don’t be afraid to experiment; baking is as much an art as it is a science, and your kitchen is the perfect canvas for culinary innovation. Make these red velvet bars truly your own!
Vary chocolate chip types
While white chocolate chips are a classic choice for red velvet, offering a delightful creamy contrast, you are by no means limited to them. Consider incorporating dark chocolate chips for a richer, more intense chocolate flavor that beautifully complements the cocoa notes of the red velvet. Milk chocolate chips can add a sweeter, milder chocolate touch. For an extra layer of texture and flavor, try using a mix of different chocolate chips, like white and semi-sweet, or even adding some chopped nuts such as pecans or walnuts for a delightful crunch. This simple change can significantly alter the character of your red velvet treat.
Adjust red food coloring
The intensity of the red hue in your red velvet cookie bars is entirely up to you. Some prefer a deep, dramatic crimson, while others might lean towards a more subtle, blush-toned red. Gel food coloring is generally recommended as it provides a more vibrant color with less liquid, preventing any unintended changes to the batter’s consistency. Start by adding a small amount, typically a teaspoon or two, and gradually increase it until you achieve your desired shade. Remember that the color can deepen slightly during baking. For a natural alternative, some bakers use beet powder, though this might slightly alter the flavor and result in a less intense red. Feel free to experiment to find your perfect shade!
Tips for Perfect Red Velvet Bars
Baking, like any craft, benefits from a few expert tips and tricks that can elevate a good recipe to an outstanding one. These suggestions are designed to help you achieve the best possible texture, flavor, and appearance for your red velvet cookie bars. By paying attention to these small details, you can ensure that every batch you bake is a resounding success, earning you rave reviews from anyone lucky enough to try them. Embrace these baking insights for consistently perfect results.
Soften butter for fluffy texture
Achieving that melt-in-your-mouth, fluffy texture in your red velvet cookie bars starts with properly softened butter. Butter that is too cold won’t cream properly with the sugars, leading to a dense batter. Conversely, butter that is too soft or melted will result in greasy bars. The ideal consistency for softened butter is when it’s still cool to the touch but yields slightly when pressed with a finger. This allows it to incorporate air effectively during the creaming process, contributing to a light and tender crumb. This tip is fundamental for many baked goods, including Blueberry Muffin Cookies with Streusel.
Cool completely before frosting
This tip is non-negotiable for any frosted baked good, and especially for your red velvet cookie bars. It’s tempting to frost warm bars, but the heat will instantly melt your beautiful, creamy cream cheese frosting, turning it into a runny mess. Not only will it look unappetizing, but the texture will also be compromised. Allow the bars to cool completely to room temperature in the pan before attempting to frost them. This might take a couple of hours, but patience here ensures a perfectly set, gorgeous frosting that holds its shape and texture beautifully. You can even pop the cooled bars into the fridge for 15-20 minutes before frosting to ensure they are thoroughly chilled.
Don’t overbake to avoid dryness
Overbaking is the arch-nemesis of moist and tender cookie bars. While it’s important to ensure your bars are cooked through, baking them for too long will strip them of their moisture, resulting in a dry, crumbly texture. Start checking for doneness at the lower end of the recommended baking time. A good indicator is when a toothpick inserted into the center comes out with moist crumbs attached, but not wet batter. The edges might be slightly golden, but the center should still look soft. Remember that the bars will continue to set slightly as they cool, so pulling them out just a touch underdone is better than overdone. Always set a timer and keep a close eye on your oven to avoid this common baking pitfall.
Storing Your Red Velvet Cookie Bars
Once you’ve enjoyed your first few slices of these magnificent red velvet cookie bars, you’ll want to ensure the remaining ones stay fresh and delicious. Proper storage is key to preserving their moist texture and the integrity of the cream cheese frosting. Depending on how quickly you anticipate devouring them, and for how long you wish to keep them, there are different methods to maintain their peak quality. Here’s how to keep your homemade dessert tasting great.
Airtight container at room temp
For short-term storage, typically up to 2-3 days, you can store your red velvet cookie bars in an airtight container at room temperature. However, this is only advisable if your kitchen is cool and not overly humid. The cream cheese frosting contains dairy, so it’s generally safer and recommended to refrigerate frosted desserts. If you plan to consume them very quickly (within a day) and your environment is stable, an airtight container on the counter can keep them soft. Always keep them away from direct sunlight or heat sources to prevent spoilage and melting frosting.
Refrigerate for longer freshness
To extend the freshness of your red velvet cookie bars, especially due to the cream cheese frosting, refrigeration is the best option. Place the frosted bars in a single layer in an airtight container. This will keep them fresh for up to 5-7 days. The cold temperature helps to firm up the frosting and prevents bacterial growth in the dairy components. When you’re ready to enjoy a bar, it’s often best to let it sit out at room temperature for about 15-30 minutes before serving. This allows the frosting and the bar itself to soften slightly, bringing out their full flavor and preferred texture. You can see more cooking inspiration and ideas on our Carina Recipes Pinterest page.
Freeze Red Velvet Cookie Bars for Later
If you’ve baked a large batch of red velvet cookie bars or simply want to prepare them in advance for future enjoyment, freezing is an excellent option. Freezing allows you to preserve their delicious taste and texture for an extended period, making them a convenient grab-and-go treat whenever a craving strikes. This method is particularly useful for meal prepping desserts or for ensuring you always have a delightful homemade option ready for unexpected guests. Follow these steps for successful freezing and thawing.
Wrap tightly, freeze up to 2 months
To freeze your red velvet cookie bars, first ensure they are completely cooled and the frosting is fully set. For best results, it’s often wise to freeze them unfrosted, then add the frosting after thawing. If freezing frosted bars, flash freeze them on a baking sheet for about an hour until the frosting is firm. Then, wrap individual bars or small portions tightly in plastic wrap, followed by a layer of aluminum foil. This double layer of protection helps prevent freezer burn. Place the wrapped bars in a freezer-safe airtight container or heavy-duty freezer bag. Properly stored, these bars can be kept in the freezer for up to 2 months. For more delicious recipe ideas, be sure to follow us on Instagram @carinarecipes20.
Thaw in fridge before serving
When you’re ready to enjoy your frozen red velvet cookie bars, the best way to thaw them is slowly in the refrigerator. Transfer the desired number of wrapped bars from the freezer to the fridge and let them thaw overnight, or for at least 8-12 hours. Thawing them gradually helps maintain their moist texture and prevents the frosting from becoming watery. Once thawed, you can bring them to room temperature for about 30 minutes before serving to enhance their flavor and softness. If you froze them unfrosted, simply prepare and spread your cream cheese frosting after thawing.
