
Peanut butter blossoms are a beloved classic, bringing smiles with every bite. These soft, chewy cookies feature a rich peanut butter base, crowned with an iconic chocolate kiss. Perfect for any occasion, this homemade cookie recipe ensures delicious results. Learn simple baking tips to create these irresistible treats effortlessly.
Key Takeaways
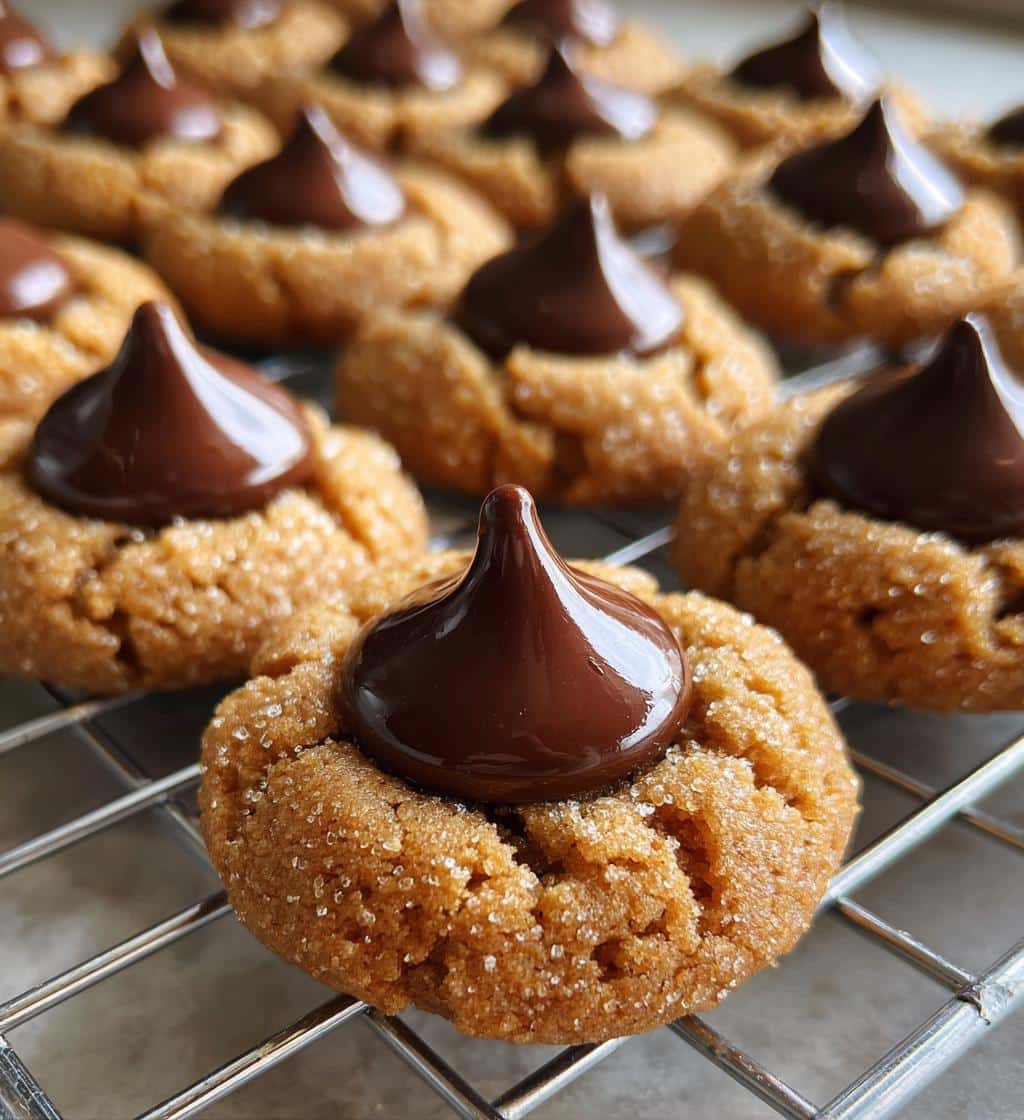
- Peanut Butter Blossoms combine classic peanut butter cookies with a chocolate candy center.
- Simple pantry ingredients are all you need for this easy dessert.
- Baking time is quick, typically 8-10 minutes, making them a fast treat.
- Adding the chocolate kiss immediately after baking ensures it melts perfectly into the warm cookie.
- Proper cooling helps the cookies set, preventing crumbling.
Making these delightful cookies is truly a joy. The aroma fills your kitchen. Their taste is incredibly comforting. They are simple, sweet, and always satisfying. A truly perfect baked treat.
Why Peanut Butter Blossoms are a Favorite
Peanut butter blossoms hold a special place in the hearts of cookie enthusiasts everywhere, particularly during holidays and family gatherings. Their enduring popularity stems from a delightful combination of textures and flavors that are hard to resist. The rich, nutty flavor of peanut butter perfectly complements the sweet, melting chocolate center, creating a symphony of taste in every bite. This iconic treat is not just a dessert; it’s a nostalgic experience, often associated with warmth, home, and cherished memories. Their distinctive appearance, with the chocolate kiss nestled in the crackled cookie, makes them instantly recognizable and appealing.
A Classic Cookie for All Ages
From young children to grandparents, peanut butter blossoms appeal to everyone. Their straightforward, comforting flavors make them an approachable dessert for any palate. Unlike more complex pastries, these cookies offer a simple, honest deliciousness that resonates universally. They are frequently found at school bake sales, holiday parties, and potlucks, always disappearing quickly from the dessert table. The ease of preparation, coupled with their widespread appeal, solidifies their status as a true classic cookie. Making a batch is a fantastic activity for families, allowing even little helpers to participate in rolling dough balls or pressing in the chocolate kisses, creating new memories with an old favorite.
Soft and Chewy Peanut Butter Taste
The hallmark of a great peanut butter blossom is its perfectly soft and chewy texture, bursting with authentic peanut butter taste. The dough is carefully formulated to achieve a tender crumb that melts in your mouth, rather than being dry or crumbly. Each bite delivers that unmistakable, creamy peanut butter flavor, which is robust enough to stand up to the sweetness of the chocolate. This soft, yielding texture is key to their appeal, making them incredibly satisfying. Whether you prefer a slightly crisp edge or a fully soft center, these cookies deliver a comforting chewiness that keeps you reaching for another, perfectly balanced by the rich peanut butter goodness.
Simple Ingredients for Blossom Cookies
One of the many reasons peanut butter blossoms remain a staple in home baking is their reliance on incredibly simple, everyday ingredients. You won’t need any exotic spices or specialty flours; most of what’s required is likely already in your pantry. This accessibility makes them a spontaneous baking project, perfect for when a craving strikes or you need a quick dessert for an unexpected guest. The beauty of these cookies lies in how basic ingredients combine to create something truly delicious and memorable. Gather your supplies, and you’ll be well on your way to baking a batch of these delightful treats in no time.
Basic Pantry Staples You Need
To whip up a batch of these fantastic blossom cookies, you’ll need standard baking staples: all-purpose flour, granulated sugar, brown sugar, baking soda, salt, an egg, butter, and vanilla extract. These foundational items create the perfect base for your peanut butter dough. Ensure your butter is softened to room temperature for easier mixing, and your egg is also at room temperature to incorporate smoothly into the batter. Having these ingredients on hand means you’re always just minutes away from starting a batch of these classic dessert cookies. Don’t forget the star of the show – the peanut butter – and, of course, the chocolate kisses that give these cookies their iconic finish. For other delightful dessert ideas, consider making snickerdoodle cobbler.
The Key to Great Peanut Butter
The quality and type of peanut butter you choose can significantly impact the final texture and flavor of your blossom cookies. For the best results, opt for creamy, shelf-stable peanut butter (like Jif or Skippy) rather than natural or “stir” varieties. Natural peanut butter often separates, has a thinner consistency, and can make the dough too oily or crumbly, leading to cookies that spread too much or are difficult to handle. The added sugar and oils in traditional creamy peanut butter contribute to the ideal chewy texture and consistent flavor profile. Make sure to use fresh peanut butter, as older jars can lose some of their aromatic potency. This key ingredient is what gives the cookie its distinctive, rich flavor and delightful chewiness.
Mixing Your Peanut Butter Cookie Dough
The foundation of perfect peanut butter blossoms lies in properly mixed cookie dough. Achieving the right consistency ensures your cookies will bake evenly, hold their shape, and have that desirable soft and chewy texture. This stage is crucial, so taking a little extra care here will pay off immensely when you pull those warm, fragrant cookies from the oven. Overmixing can lead to tough cookies, while undermixing might result in an inconsistent texture. Focus on combining the ingredients until just blended, allowing the natural properties of the flour and peanut butter to shine through. A stand mixer is ideal for this process, but a hand mixer or even a sturdy spoon will work if you put in a little elbow grease.
Combine Wet and Dry Ingredients Smoothly
Start by creaming together the softened butter, granulated sugar, and brown sugar until the mixture is light and fluffy. This step incorporates air, which contributes to the cookies’ tenderness. Next, beat in the egg and vanilla extract until well combined. In a separate bowl, whisk together your dry ingredients: flour, baking soda, and salt. Gradually add the dry mixture to the wet ingredients, mixing on low speed until just combined. Be careful not to overmix; stop as soon as no dry streaks of flour remain. Finally, stir in the creamy peanut butter. This method ensures all ingredients are evenly distributed, creating a smooth, cohesive dough that’s ready for shaping.
Rolling Perfect Dough Balls Quickly
Once your dough is ready, it’s time to roll it into uniform balls. This step is important for consistent baking and an appealing final presentation. Scoop out roughly 1-inch portions of dough – a small cookie scoop works wonders for consistency, or simply use a tablespoon. Roll each portion between your palms until you have a smooth, round ball. For that classic sugary coating, gently roll the dough balls in extra granulated sugar before placing them on your baking sheet. This sugar crust adds a delightful sparkle and a slight textural contrast to the soft cookie. Working quickly helps prevent the dough from becoming too warm, especially if your kitchen is on the warmer side. You’ll soon have a tray of perfectly shaped dough, ready for the oven.
Baking Your Delicious Peanut Butter Blossoms
Baking is where the magic happens, transforming simple dough into golden-brown, aromatic peanut butter treats. Achieving the right oven temperature and baking time is crucial for cookies that are perfectly cooked through yet remain soft and chewy. Keep a close eye on your cookies during this stage, as oven temperatures can vary, and a minute or two can make a big difference between perfectly done and overbaked. The enticing aroma filling your kitchen will be your first clue that something wonderful is underway, but careful observation will ensure the best possible outcome for your homemade cookies. Baking is not just a science but an art, and mastering this step will result in truly irresistible baked goods.
Oven Temperature and Baking Time
Preheat your oven to 350°F (175°C) to ensure it reaches the correct temperature before the cookies go in. This helps the cookies spread evenly and bake consistently. Place your prepared dough balls, spaced about 2 inches apart, on ungreased baking sheets. Bake for 8 to 10 minutes. The edges of the cookies should be lightly golden, and the centers should still look slightly soft and puffy. Avoid overbaking, as this can lead to dry, crumbly cookies. Remember that cookies continue to cook for a short while after being removed from the oven due to residual heat. Setting a timer and checking early is always a good strategy for achieving perfect results with your peanut butter cookie dough.
Knowing When Cookies Are Done
Determining the exact moment your peanut butter blossoms are perfectly baked is a skill that comes with practice. Look for visual cues: the edges should appear set and lightly golden brown, while the centers might still look a little soft and slightly undercooked. This slight softness in the middle is key to achieving that desirable chewy texture once cooled. If the entire cookie looks firm and deeply browned, it’s likely overbaked. Another good indicator is that the surface might show small cracks or a slight puffiness. Remove the cookies from the oven when they meet these criteria, knowing that they will firm up as they cool on the baking sheet for a few minutes before transferring to a wire rack. This careful observation ensures excellent baking results.
Adding the Iconic Chocolate Kiss
The defining feature of peanut butter blossoms is, without a doubt, the iconic chocolate kiss nestled in the center. This step not only adds a delicious burst of chocolate flavor but also gives the cookies their charming and recognizable appearance. The timing of this addition is crucial to ensure the chocolate melts just enough to adhere to the warm cookie, creating a smooth, glossy finish without completely losing its shape. Having your chocolate kisses unwrapped and ready before the cookies come out of the oven will streamline the process and ensure you act quickly while the cookies are still hot.
Pressing Kisses While Cookies Are Warm
As soon as you remove the baking sheets from the oven, immediately take an unwrapped chocolate kiss and gently press it into the center of each warm peanut butter cookie. The residual heat from the freshly baked cookie will cause the chocolate to soften and slightly melt, creating a beautiful, glossy bond with the cookie. Be gentle but firm enough to embed the kiss securely. If you wait too long, the cookies will cool and harden, making it difficult for the chocolate to adhere properly or create that signature melted look. This quick action is what makes the chocolate kiss cookies so visually appealing and ensures the chocolate melds perfectly with the soft peanut butter base, making them truly irresistible.
Cooling and Serving Fresh Baked Cookies
After the exciting moment of adding the chocolate kisses, the final steps of cooling and serving are just as important for ensuring your peanut butter blossoms are enjoyed at their absolute best. Proper cooling allows the cookies to fully set, preventing them from crumbling and allowing the chocolate kiss to firm up slightly while still maintaining its soft center. Patience during this stage is key, no matter how tempting it is to snatch a warm cookie straight from the tray! Following these simple cooling guidelines will guarantee a perfect texture and a delightful eating experience, showcasing all your hard work in the kitchen.
Let Them Set Before Eating
Once the chocolate kisses have been pressed into the warm cookies, let the cookies cool on the baking sheets for about 5 minutes. This initial cooling period allows them to firm up slightly before you attempt to move them. After 5 minutes, carefully transfer the cookies to a wire rack to cool completely. This full cooling process is essential for two main reasons: it prevents the cookies from falling apart when handled, and it allows the chocolate kisses to set enough so they are no longer overly gooey. While it’s hard to resist a warm cookie, waiting until they are fully cooled results in a much more stable and enjoyable treat, perfect for stacking, sharing, or storing for later. Serve these fresh baked cookies with a cold glass of milk for the ultimate experience.
Quick Times for Your Peanut Butter Treats
One of the most appealing aspects of making peanut butter blossoms is how quickly they come together, offering a satisfying homemade treat without an all-day commitment. This makes them an ideal choice for impromptu baking sessions, last-minute dessert needs, or when you just need a delicious pick-me-up. The efficiency of this recipe means you can go from craving to confection in a remarkably short amount of time, proving that incredible flavor doesn’t always require extensive preparation. Get ready to enjoy fresh-baked goodness with minimal waiting.
Total Time: Just 25 Minutes
From start to finish, you can have a batch of these delightful peanut butter blossoms ready in approximately 25 minutes. This includes about 10 minutes for preparing and rolling the dough, 8-10 minutes for baking, and a few minutes for pressing in the chocolate kisses and initial cooling. This quick recipe truly delivers on speed without compromising on taste or quality, making it a perfect choice for busy households or anyone looking for an efficient yet incredibly rewarding baking project. Enjoy the satisfaction of a homemade dessert with minimal fuss.
Making 24 Irresistible Peanut Butter Cookies
This recipe is designed to yield a generous batch of peanut butter blossoms, ensuring there’s plenty to go around for family, friends, or even just for yourself to enjoy over several days. The quantity is perfect for various occasions, from casual snacking to more formal gatherings, and it’s also great for holiday cookie platters. Having a substantial batch means you can enjoy the fruits of your labor without worrying about them disappearing too quickly, offering ample opportunity to savor each delicious bite. Plus, having a good quantity on hand makes sharing a breeze.
Perfect Batch Size for Sharing
With this recipe, you’ll create approximately 24 irresistible peanut butter cookies. This batch size is ideal for sharing with loved ones, bringing to a potluck, or simply having enough for a week’s worth of personal indulgence. It’s a manageable quantity that fits well on standard baking sheets without requiring multiple, time-consuming baking rounds. Whether you’re planning a small gathering or just want to ensure you have a good supply of your favorite homemade cookies, this batch size strikes the perfect balance between effort and reward, making it an excellent choice for any baker. It’s a quick recipe that delivers a great yield.
Nutrition Facts for Each Cookie
Understanding the nutritional content of your homemade treats can be helpful for those monitoring their intake or simply curious about what they’re enjoying. While peanut butter blossoms are undoubtedly a delicious indulgence, having a general idea of their caloric, sugar, and fat content can help you make informed choices. Keep in mind that exact nutritional values can vary based on specific ingredient brands, exact measurements, and the size of your cookies, but this information provides a useful baseline for your homemade cookies.
Calories, Sugar, and Fat per Serving
Each peanut butter blossom, typically around 1-2 inches in diameter, generally contains approximately 100-120 calories. This includes about 10-15 grams of sugar, depending on the sweetness of your chosen peanut butter and the size of the chocolate kiss. The fat content usually falls in the range of 5-7 grams per cookie, primarily from the peanut butter and butter. While these are estimates for nutritional information, they offer a good perspective on the energy and macronutrients provided by these sweet treats. Enjoy them in moderation as part of a balanced diet.
Best Tips for Blossom Cookie Success
Achieving perfectly soft, chewy, and beautifully adorned peanut butter blossoms is a rewarding experience, and a few key tips can elevate your baking from good to truly exceptional. These expert insights cover everything from proper storage to dough preparation, ensuring that every batch you make is a resounding success. Paying attention to these small details can make a significant difference in the texture, flavor, and overall appeal of your chocolate kiss cookies. Master these baking tips to impress everyone with your culinary skills.
Store Cookies in Air Tight Container
To maintain their freshness and delightful texture, it’s crucial to store your cooled peanut butter blossoms in an airtight container at room temperature. Proper storage prevents them from drying out and helps keep the cookies soft and chewy for up to 3-5 days. If stacking, consider placing a piece of parchment paper between layers to prevent the chocolate kisses from sticking or smudging. For longer storage, you can freeze baked cookies in an airtight container for up to 3 months; simply thaw at room temperature before serving. Correct storage is a simple but vital step for enjoying your delicious homemade cookies for longer.
Chill Dough for Better Texture
While this recipe is designed to be quick, chilling the dough for at least 30 minutes (or even an hour) can significantly improve the texture of your peanut butter blossoms. Chilling helps the butter solidify, preventing the cookies from spreading too much during baking and resulting in a thicker, chewier cookie. It also allows the flavors to meld and develop further. If you have the time, a brief chill period is a worthwhile step for achieving truly superior results, giving you a firmer, easier-to-handle peanut butter cookie dough and a more consistent bake. This is a top baking tip for many cookie recipes.
Creamy or Crunchy Peanut Butter Choice
The choice between creamy and crunchy peanut butter depends on your textural preference, though creamy is traditionally used for blossoms. For the classic soft and smooth cookie texture with just the chocolate crunch, opt for creamy peanut butter. If you enjoy an added layer of texture and a more pronounced nutty bite within the cookie itself, you can experiment with crunchy peanut butter. Be aware that crunchy varieties might slightly alter the dough’s consistency and make it a bit more crumbly to work with. Either way, ensure you are using a stabilized, shelf-stable peanut butter for the best baking results, avoiding natural varieties that separate.
Common Questions About Blossom Cookies
Even with a straightforward recipe, bakers often have questions to ensure their peanut butter blossoms turn out perfectly every time. Addressing these common concerns can help demystify the baking process and empower you to troubleshoot any issues that might arise. From understanding why cookies might spread too much to getting that iconic chocolate kiss just right, having answers to these questions will boost your confidence and lead to consistent success with this classic treat. Knowledge is key to mastering any baking endeavor.
How to Prevent Spreading
Preventing your peanut butter blossoms from spreading too much is a common concern. Several factors contribute to spreading, and addressing them can lead to beautifully shaped cookies. First, ensure your butter is softened but not melted; overly soft or melted butter can cause excessive spread. Second, consider chilling your dough for at least 30 minutes before baking; this helps solidify the fats and maintains the cookie’s shape. Third, make sure your oven is preheated to the correct temperature (350°F / 175°C); an oven that isn’t hot enough can cause cookies to spread before setting. Lastly, avoid overcrowding your baking sheets, as this can affect heat distribution. Following these baking tips will help achieve perfectly formed cookies.
Enjoying Your Homemade Peanut Butter Cookies
After all your efforts, the best part is finally here: enjoying your warm, freshly baked peanut butter blossoms. There’s nothing quite like the satisfaction of biting into a cookie you’ve made yourself, especially one as comforting and delicious as this classic treat. Whether you share them with loved ones, savor them with a cup of coffee or a glass of milk, or pack them up for a special occasion, these homemade cookies are sure to bring joy. Celebrate your baking success and indulge in the simple pleasure of these irresistible chocolate kiss cookies.
