
Homemade Krispy Kreme Doughnuts offer a delightful baking challenge. Achieve that signature light and airy texture and a sweet glaze right in your kitchen. This recipe guides you through each step, ensuring fluffy, golden brown treats that rival the original classic.
Key Takeaways
- Proper yeast activation is fundamental for achieving light and airy dough.
- Thorough kneading develops the necessary smooth and elastic texture for rising.
- Two distinct proofing stages ensure the doughnuts are truly airy and fluffy.
- Precise oil temperature control is vital for golden brown frying without grease.
- Applying the sweet glaze while doughnuts are warm yields a perfect, even coating.
Crafting these doughnuts is a joyful endeavor. The sweet aroma fills your home. Freshly fried, warm, and perfectly glazed. It is pure comfort in every bite. A simple pleasure worth making.
Making Homemade Krispy Kreme Doughnuts
Recreating the iconic taste and texture of Krispy Kreme doughnuts at home is a rewarding culinary project. These light and airy treats, known for their distinctive sweet glaze, are a beloved classic. While it might seem intimidating, breaking down the process into manageable steps makes it accessible for any home baker. The secret lies in precise ingredient measurements, careful yeast handling, and attention to frying temperatures. By following this detailed doughnut recipe, you’ll be able to produce a batch of fluffy, golden brown delights that will impress friends and family, making your kitchen the new favorite bakery spot.
What You Will Need
To begin your journey toward homemade Krispy Kreme doughnuts, gathering all your ingredients and equipment beforehand is essential. This mise en place approach ensures a smooth baking process. You will need standard baking staples along with a few specific items for deep-frying. Here’s a comprehensive list:
- For the Dough: All-purpose flour, granulated sugar, salt, active dry yeast, warm milk, warm water, unsalted butter (cold, cubed), large eggs, and vanilla extract.
- For the Glaze: Powdered sugar, unsalted butter (melted), hot water, and vanilla extract.
- Equipment: A large mixing bowl (or stand mixer with dough hook), measuring cups and spoons, a rolling pin, doughnut cutters (or two different sized round cutters), parchment paper, a deep heavy-bottomed pot or Dutch oven, a slotted spoon or spider, a wire rack, and a kitchen thermometer for oil temperature.
Having everything ready will make the subsequent steps flow seamlessly, allowing you to focus on the technique rather than scrambling for ingredients. Ensuring your yeast is fresh and your butter is cold will significantly impact the final texture of your fluffy dough. For another delightful dessert that uses basic baking ingredients, check out our Peanut Butter Brownie Swirl Cookies recipe.
Activating Yeast for Light Dough
The foundation of truly light and airy doughnuts begins with properly activated yeast. This living organism is responsible for the rise and characteristic texture of your dough. Without a healthy, active yeast, your doughnuts will be dense and heavy, losing that signature Krispy Kreme fluffiness. The goal is to provide a warm, sugary environment where the yeast can thrive and begin its work of fermentation. This process is often referred to as “proofing” the yeast, and it’s a critical first step to ensure your batch of homemade Krispy Kreme doughnuts turns out perfectly.
Mixing Warm Liquids
Start by gently warming your milk and water. The ideal temperature range for activating active dry yeast is between 105°F and 115°F (40°C-46°C). If the liquid is too cold, the yeast won’t activate; if it’s too hot, it will kill the yeast. Use a kitchen thermometer to verify the temperature. In a large bowl, combine the warm milk and warm water. Add a tablespoon of granulated sugar from your measured amount to this liquid mixture. The sugar serves as food for the yeast, encouraging it to activate and multiply. Sprinkle the active dry yeast over the surface of this warm, sugary liquid. Avoid stirring it immediately, as allowing it to sit undisturbed for a moment helps the granules absorb the liquid evenly before activation begins.
Letting Yeast Foam
After sprinkling the yeast, let the mixture sit in a warm spot for about 5-10 minutes. During this time, the yeast will begin to consume the sugar and produce carbon dioxide gas. This activity will manifest as a foamy layer on the surface of the liquid. A thick, bubbly, and fragrant foam indicates that your yeast is alive and well, ready to make your dough rise beautifully. If you don’t see any significant foaming after 10 minutes, your yeast might be old or the water temperature was incorrect. In this case, it’s best to discard the mixture and start again with fresh yeast and carefully measured water temperatures. This crucial step guarantees your homemade Krispy Kreme doughnuts will have the desired light and airy texture.
Understanding yeast is fascinating; you can learn more about its role in baking on Wikipedia’s page on yeast. This active ingredient is also vital in many bread recipes, where proper activation leads to delicious, fluffy loaves.
Combine Doughnut Dry Ingredients
Once your yeast is happily proofing, the next step in creating perfect homemade Krispy Kreme doughnuts is to prepare your dry ingredients. This seemingly simple step is important for ensuring an even distribution of flavor and leavening agents throughout your dough. By combining and sifting or whisking these ingredients together, you prevent pockets of unmixed salt or sugar, which could affect the dough’s texture and taste. This careful preparation also helps to aerate the flour, contributing to the light and airy quality we seek in these classic treats. Precision here lays the groundwork for a consistently delicious batch.
Cutting in Cold Butter
In a separate large mixing bowl, whisk together the all-purpose flour, the remaining granulated sugar, and salt. Now comes a distinctive technique for doughnuts: cutting in cold butter. Unlike many brioche-style doughs where butter is incorporated softened or melted, using cold butter in this recipe helps create pockets of steam during frying, contributing to the flaky, tender interior of the doughnuts. Cut very cold butter into small, ½-inch cubes. Add these butter cubes to the dry ingredients. Using a pastry blender, two knives, or even your fingertips, work the butter into the flour mixture until it resembles coarse crumbs, with some pea-sized pieces of butter remaining. The goal is to evenly distribute the butter without melting it, preserving its cold state. This method, similar to making pie crusts or biscuits, helps achieve that desired light and airy texture in your homemade Krispy Kreme doughnuts, preventing them from becoming dense or greasy when fried.
Mix Dough Until Soft
With the yeast activated and the dry ingredients combined, it’s time to bring everything together to form the doughnut dough. The mixing process is crucial for developing gluten, which provides the structure and elasticity necessary for the dough to rise and hold its shape. However, it’s also important not to overmix, as this can lead to a tough, chewy doughnut rather than the delicate, melt-in-your-mouth texture synonymous with Krispy Kreme. The aim is a soft, pliable, and slightly sticky dough that is a pleasure to work with, signaling the perfect balance for your homemade Krispy Kreme doughnuts.
Adding Wet to Dry
Carefully pour the activated yeast mixture into the bowl with your prepared dry ingredients and butter crumbs. Add the large eggs and vanilla extract. If using a stand mixer, attach the dough hook. Start mixing on low speed, allowing the ingredients to come together gradually. If mixing by hand, use a sturdy wooden spoon or your hands. Continue mixing until a shaggy dough forms, and all the flour is incorporated. At this stage, it might seem a bit sticky, but resist the urge to add more flour. Gradually increase the mixer speed to medium-low, or continue kneading by hand. The dough should start to pull away from the sides of the bowl and gather around the dough hook or your hands. Mix for about 5-7 minutes, until the dough is soft, smooth, and elastic. It should still be slightly tacky to the touch but no longer stick excessively to your fingers or the bowl. This consistent mixing ensures a uniform texture and prepares the dough for the crucial kneading process that follows, setting the stage for perfectly fluffy, golden brown homemade Krispy Kreme doughnuts.
Kneading Dough for Smooth Texture
Kneading is perhaps the most important physical step in developing the structure of your doughnut dough. It’s during this process that the gluten strands within the flour are stretched and strengthened, creating a resilient, elastic network that can trap the gases produced by the yeast. This elasticity is what allows the dough to expand and rise significantly, resulting in the characteristic light and airy texture of homemade Krispy Kreme doughnuts. Proper kneading ensures your doughnuts are tender and fluffy, not dense or crumbly. It’s a rhythmic process that can be therapeutic, and observing the dough transform under your hands is truly satisfying.
When Dough is Ready
Whether you’re using a stand mixer with a dough hook or kneading by hand, the goal is to work the dough until it’s smooth, elastic, and no longer sticky. If using a stand mixer, knead on medium-low speed for about 8-10 minutes after all ingredients are combined. If kneading by hand, turn the dough out onto a lightly floured surface and knead vigorously for 10-15 minutes. You’ll know the dough is ready when it passes the “windowpane test.” To perform this test, pinch off a small piece of dough and gently stretch it between your fingers. If you can stretch it thin enough to see light through it without it tearing, then the gluten is well-developed, and the dough is ready for its first rise. The surface of the dough should also appear smooth and satiny. Properly kneaded dough is vital for achieving the desired light and airy texture in your homemade Krispy Kreme doughnuts, ensuring they puff up beautifully during frying. This step also contributes to their overall stability and prevents them from collapsing. For another recipe that requires careful dough handling, consider making Southern-Style Collard Green and Potato Stew where the dumplings need a perfect consistency.
First Rise Makes Dough Light
The first rise, also known as bulk fermentation, is a crucial period for your doughnut dough. During this time, the activated yeast consumes sugars in the dough, producing carbon dioxide gas and alcohol. The gas gets trapped within the gluten network you’ve painstakingly developed through kneading, causing the dough to expand and become light and airy. This initial rise also contributes significantly to the flavor development of your homemade Krispy Kreme doughnuts, imparting a subtle depth and complexity that would be absent in unfermented dough. Patience during this stage is key, as rushing the process can result in a less flavorful and denser doughnut.
Letting Dough Double
To facilitate the first rise, lightly grease a large bowl with a neutral oil or cooking spray. Place the kneaded dough into the bowl, turning it once to coat the entire surface with oil. This prevents the dough from drying out and forming a crust. Cover the bowl tightly with plastic wrap or a clean kitchen towel. Find a warm, draft-free spot in your kitchen for the dough to rise. Ideal temperatures are typically between 70°F and 80°F (21°C-27°C). Depending on the temperature of your kitchen and the vitality of your yeast, this first rise will take approximately 1 to 1.5 hours. The dough is ready when it has visibly doubled in size and appears puffy. You can gently poke two fingers into the dough; if the indentations remain, it’s sufficiently risen. Once doubled, gently punch down the dough to release the accumulated gases. This prepares it for shaping and its second, equally important rise, ensuring your homemade Krispy Kreme doughnuts maintain their delicate structure.
Shaping Doughnut Balls Neatly
Shaping is where your homemade Krispy Kreme doughnuts truly begin to take their familiar form. This step requires a gentle touch and precision to ensure uniformity in size and thickness, which is vital for even frying. Properly shaped doughnuts will rise beautifully during the second proofing and cook consistently in the hot oil, resulting in that coveted golden brown exterior and perfectly cooked interior. Irregular shapes can lead to uneven cooking, with some doughnuts potentially becoming burnt while others remain raw in the center. Taking your time here will pay dividends in the final presentation and taste of your light and airy treats.
Dividing and Rolling
Turn the risen dough out onto a lightly floured surface. Using a rolling pin, gently roll the dough to an even thickness of about ½ inch. Avoid rolling it too thin, as this will result in small, dense doughnuts, and too thick, which can make them heavy. With a 3-inch doughnut cutter (or a 3-inch round cutter for the outer ring and a 1-inch cutter for the center hole), cut out your doughnuts. Dip the cutter in flour occasionally to prevent sticking. Carefully transfer the cut doughnuts to squares of parchment paper on a baking sheet. This makes transferring them to the hot oil much easier later, minimizing handling and preserving their shape. Gather the dough scraps, gently knead them together (do not overwork), let them rest for 5-10 minutes to relax the gluten, then re-roll and cut out additional doughnuts. Discard any remaining scraps after the second re-roll, as they tend to become tough. This process will yield approximately 12-15 classic ring doughnuts, ready for their second rise to become even more fluffy, creating truly authentic homemade Krispy Kreme doughnuts. You might even use the small centers to make Funnel Cake Bites after frying the doughnuts!
Second Rise for Airy Doughnuts
The second rise, often called the final proof, is just as critical as the first for achieving the signature light and airy texture of homemade Krispy Kreme doughnuts. After shaping, the dough needs another period of rest to allow the yeast to produce more gas, further expanding the doughnuts. This final expansion results in a more delicate, open crumb structure. Without a sufficient second rise, your doughnuts could be dense, tough, or even sink when they hit the hot oil. This stage ensures that each doughnut becomes a puffy, ethereal cloud, perfectly prepared for frying and absorbing that glorious sweet glaze.
Giving Dough Time
Cover the baking sheets with the shaped doughnuts loosely with plastic wrap or a clean kitchen towel. Return them to a warm, draft-free spot for their second rise. This usually takes less time than the first rise, typically about 30-45 minutes. The doughnuts should look visibly puffed up and feel soft and airy when gently touched. They won’t necessarily double in size again, but they should look significantly larger and lighter than when they were first cut. Be careful not to over-proof them, as this can lead to doughnuts that collapse during frying or absorb too much oil. The “wiggle test” can be helpful here: gently nudge a doughnut, and if it jiggles slightly, it’s likely ready. Once they have achieved this light and airy consistency, your homemade Krispy Kreme doughnuts are primed for frying, ready to achieve that perfect golden brown finish. This patience ensures a delicious outcome.
Frying Doughnuts Until Golden
Frying is arguably the most exciting part of making homemade Krispy Kreme doughnuts, as you watch your carefully prepared dough transform into golden brown, puffy delights. This step requires attention and a bit of bravery, but with the right technique, you’ll achieve perfectly cooked doughnuts with a crispy exterior and a light and airy interior. Frying provides that distinct texture and flavor profile that cannot be replicated by baking. It’s important to have everything ready, including your wire racks for draining and the glaze waiting, as timing is everything once the doughnuts hit the hot oil.
Achieving Right Oil Temperature
The key to successful doughnut frying is maintaining the correct oil temperature. Pour about 2-3 inches of neutral oil with a high smoke point (like vegetable, canola, or peanut oil) into a deep, heavy-bottomed pot or Dutch oven. Heat the oil over medium heat until it reaches a consistent temperature of 350°F (175°C). Use a kitchen thermometer clipped to the side of the pot to monitor this temperature diligently. If the oil is too hot, the doughnuts will brown too quickly on the outside, leaving the inside raw. If it’s too cool, they will absorb too much oil, resulting in greasy, heavy doughnuts instead of light and airy ones. Carefully slide 2-3 doughnuts into the hot oil using the parchment paper, then gently remove the paper. Do not overcrowd the pot, as this will drop the oil temperature. Fry for about 1-2 minutes per side, until they are beautifully golden brown. Use a slotted spoon or spider to flip them and remove them, transferring them to a wire rack set over a baking sheet to drain any excess oil. Maintain the oil temperature between batches for consistent results, ensuring every homemade Krispy Kreme doughnut achieves that perfect golden finish.
Creating Sweet Doughnut Glaze
No homemade Krispy Kreme doughnut is complete without its signature sweet glaze. This simple yet crucial component transforms a fried piece of dough into an irresistible confection. The glaze should be thin enough to coat the doughnuts evenly without being excessively thick or clumpy, and it’s best applied when the doughnuts are still warm. The warmth of the doughnut allows the glaze to melt slightly, creating that characteristic translucent, shiny, and quick-setting coating that makes Krispy Kreme doughnuts so famous. It’s the perfect counterpoint to the golden brown, light and airy dough, adding just the right amount of sweetness.
Melting Butter Smoothly
In a medium bowl, melt the unsalted butter until it is completely liquid and smooth. You can do this in a microwave in short bursts or over a double boiler. Ensuring the butter is fully melted and free of any solids is important for a silky, lump-free glaze. This melted butter adds richness and a lovely mouthfeel to the glaze, contributing to its overall luxurious quality. While the primary components of this sweet glaze are powdered sugar and water, the melted butter plays a key role in achieving that sought-after glossy finish and helps the glaze adhere beautifully to the warm surface of your homemade Krispy Kreme doughnuts, creating a truly authentic taste.
Adding Sugar and Vanilla
Once the butter is melted, whisk in the powdered sugar until smooth. Gradually add hot water, one tablespoon at a time, whisking continuously until the glaze reaches your desired consistency. It should be thin enough to easily dip the doughnuts but thick enough to coat them without running off completely. Aim for a consistency similar to warm honey. Finally, stir in the vanilla extract. This enhances the overall flavor profile, adding a warm, aromatic note that complements the sweetness of the sugar. Taste and adjust as needed, adding a pinch more sugar for sweetness or a tiny bit more water to thin it out. Keep the glaze warm while you work, perhaps over a very low heat or by placing the bowl over a pot of simmering water. A warm glaze will coat your doughnuts more effectively, ensuring every homemade Krispy Kreme doughnut is perfectly enrobed in its delightful, sweet casing.
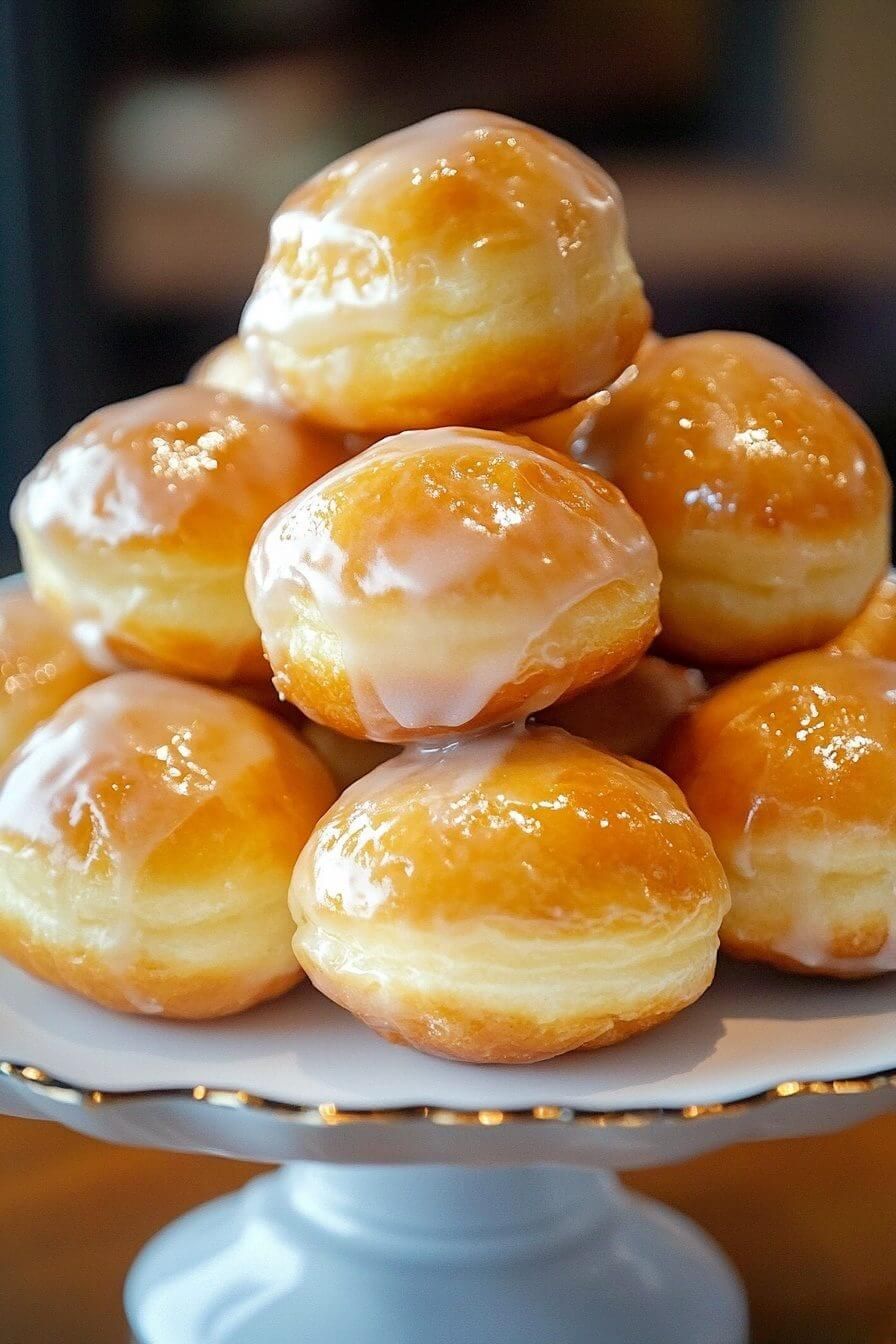
Glaze Warm Doughnuts Perfectly
The timing of glazing is paramount for achieving that classic Krispy Kreme finish. The doughnuts must be warm, but not piping hot, when they meet the sweet glaze. This allows the glaze to melt slightly upon contact, forming a thin, even, and quickly setting coat that becomes translucent as it cools. Glazing warm doughnuts prevents the glaze from becoming too thick or pooling unevenly, ensuring each homemade Krispy Kreme doughnut is perfectly adorned with its iconic sweet shell. It’s the final, magical touch that brings the whole experience together, turning simple fried dough into an utterly decadent treat.
Dipping for Even Coat
Working quickly while the doughnuts are still warm (but cool enough to handle), take one doughnut at a time and gently dip one side into the warm glaze. You can use your fingers to hold it, or for minimal contact, use a fork or tongs. Allow any excess glaze to drip off for a moment. Then, flip the doughnut over and dip the other side, ensuring an even and complete coating. Alternatively, for a heavier glaze, you can simply submerse the entire doughnut. Place the glazed doughnuts back onto the wire rack set over a baking sheet to allow the excess glaze to drip off and to set. The glaze will firm up quickly as the doughnuts cool, forming that characteristic slightly crackly, sweet shell. Serve your homemade Krispy Kreme doughnuts immediately for the best experience when they are still slightly warm and the glaze is fresh. This method ensures a beautiful, uniform, and delicious sweet glaze on every single light and airy doughnut, making your efforts truly worthwhile. Don’t forget to share your creations and find more recipe inspiration by following us on Pinterest and Instagram!
Try Different Doughnut Flavors
While the classic homemade Krispy Kreme doughnut with its simple sweet glaze is undeniably perfect, there’s a world of flavor possibilities waiting to be explored. Once you’ve mastered the basic technique for creating light and airy, golden brown doughnuts, you can begin to experiment with various glazes, toppings, and even fillings. This allows for endless creativity and ensures that your homemade doughnut adventures never get boring. Customizing your doughnuts makes them perfect for different occasions, seasons, or simply to cater to personal preferences, transforming a beloved classic treat into new and exciting variations.
Creative Glaze Ideas
Beyond the traditional sweet glaze, here are some ideas to infuse new life into your homemade Krispy Kreme doughnuts:
- Chocolate Glaze: Add cocoa powder to your basic glaze mixture and a touch more milk or water until smooth.
- Maple Glaze: Replace some of the hot water in the basic glaze with maple syrup for a rich, autumnal flavor.
- Lemon or Orange Glaze: Incorporate fresh citrus zest and a tablespoon or two of citrus juice for a bright, tangy finish.
- Coffee Glaze: Mix in a teaspoon of instant espresso powder dissolved in a tiny bit of hot water for a subtle coffee kick.
- Spiced Glaze: Add a pinch of cinnamon, nutmeg, or pumpkin spice to the basic glaze, perfect for fall.
These creative glazes can elevate your doughnuts, offering a delightful twist on the classic. Remember to adjust the consistency with a bit more powdered sugar or liquid as needed.
Fun Fillings to Add
Transform your ring doughnuts into filled delights, or simply make solid doughnuts (without the center hole) specifically for filling. After frying and glazing (or before, depending on the filling), use a piping bag with a long, thin nozzle to inject deliciousness:
- Classic Custard: A rich, creamy vanilla custard is always a crowd-pleaser.
- Jelly/Jam: Raspberry, strawberry, or apricot jams make for wonderfully fruity centers.
- Chocolate Ganache: A rich, decadent chocolate ganache can be piped into the center for a truly indulgent treat.
- Cream Cheese Frosting: A tangy cream cheese filling provides a lovely contrast to the sweet dough.
- Nutella: For a quick and universally loved filling, warm up some Nutella slightly for easier piping.
With these ideas, your homemade Krispy Kreme doughnuts can become a canvas for your culinary imagination, making every batch a unique and exciting experience. Enjoy the process of creating your own personalized collection of these fluffy, golden brown classic treats!
