
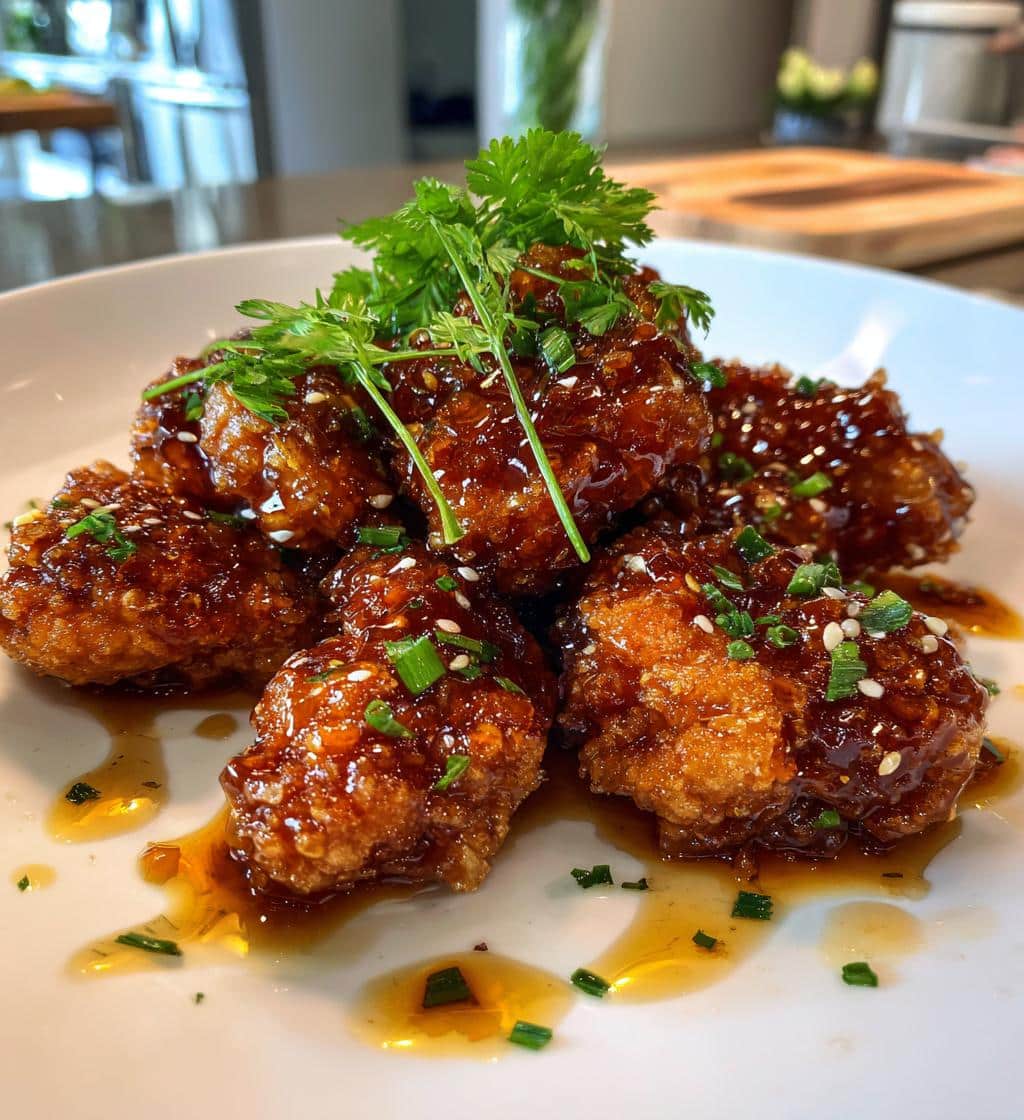
Crispy Honey Chicken is a fantastic meal option that brings together tender chicken with an irresistible sweet and savory glaze. This recipe simplifies the process, ensuring a golden crisp exterior every time. It’s perfect for a quick weeknight dinner, offering satisfying flavors everyone will enjoy.
Key Takeaways
- Learn to make delicious crispy honey chicken at home.
- Achieve a golden crisp texture with baking or frying methods.
- Craft a perfectly balanced sweet and savory honey sauce.
- Get tips for preparation, cooking times, and serving suggestions.
This chicken offers great flavor. It is a satisfying meal. The crispy texture delights taste buds. Honey and soy create magic. You’ll want seconds quickly.
Make Your Own Crispy Honey Chicken
Making your own crispy honey chicken at home is incredibly rewarding and simpler than you might think. This recipe delivers restaurant-quality taste with minimal fuss, transforming ordinary chicken into a delightful meal. The blend of sweet honey and savory soy sauce creates an irresistible flavor profile that appeals to nearly everyone. Forget takeout; you’re about to prepare a dish that’s both fresh and flavorful, perfectly suited for a memorable family dinner or even meal prepping for the week.
Why you’ll love this recipe
You’ll fall in love with this recipe for many reasons, primarily its incredible flavor and straightforward preparation. It’s an easy honey chicken recipe that doesn’t compromise on taste or texture. The chicken emerges beautifully golden crisp, coated in a sticky, sweet, and savory glaze that’s utterly addictive. It’s a fantastic option for a weeknight dinner, requiring common ingredients and relatively little active cooking time. Plus, making it yourself means you control the quality of ingredients, ensuring a healthier and more satisfying outcome. This dish consistently receives rave reviews, becoming a fast family favorite that you’ll want to make again and again.
Easy irresistible flavor steps
Achieving this dish’s irresistible flavor involves a few key steps that are easy to master. First, the chicken is prepared and coated in a seasoned mixture that helps achieve that desired crispiness. Next, it’s baked or lightly fried until perfectly golden. Simultaneously, a simple yet potent honey sauce is crafted, combining sweet honey with savory elements like soy sauce and a hint of garlic. Finally, the warm, crispy chicken is gently tossed in this delicious sauce, ensuring every piece is coated evenly, resulting in a harmonious blend of textures and tastes. Each step builds on the last to create a truly spectacular homemade honey chicken.
Crispy Honey Chicken Ingredients List
Creating mouth-watering crispy honey chicken begins with a careful selection of ingredients. Luckily, most of what you’ll need are likely already in your pantry or readily available at any grocery store. Focusing on quality fresh ingredients and proper seasonings will make all the difference in achieving that perfect sweet and savory balance and the coveted golden crisp texture. This recipe is designed to be accessible, ensuring that even novice cooks can gather the necessary components with ease.
Pantry staples for success
Your journey to a delicious homemade honey chicken starts with these reliable pantry items. You’ll need all-purpose flour and cornstarch for the chicken coating – the cornstarch is key for extra crispiness. For the sauce, gather good quality honey, soy sauce (low-sodium is often preferred), apple cider vinegar or rice vinegar for a touch of tang, and a little brown sugar to enhance the sweetness. You’ll also need neutral cooking oil, like vegetable or canola oil, for baking or frying. Don’t forget salt and black pepper to season the chicken and help bring out its natural flavors.
Fresh chicken and seasonings
The star of our dish is, of course, the chicken. Boneless, skinless chicken thighs or breasts cut into 1-inch pieces work best, as they cook quickly and evenly. Thighs tend to stay juicier, while breasts are a leaner option. For seasonings, we’ll use a blend that complements the honey sauce without overpowering it. Garlic powder and onion powder add aromatic depth, while a dash of paprika contributes a subtle color and warmth. Feel free to adjust these to your preference, perhaps adding a pinch of ginger powder for an Asian-inspired kick. Selecting fresh, high-quality chicken is crucial for the best texture and taste in your crispy honey chicken.
Preparing Chicken for Crispy Texture
The secret to truly crispy honey chicken lies in its preparation, specifically how the chicken is cut and coated. Proper preparation ensures that each piece cooks evenly and develops that desirable golden crisp exterior. This step is fundamental, laying the groundwork for the irresistible texture that makes this dish so popular. Pay close attention to these details, and you’ll be well on your way to a perfect chicken coating.
Cutting chicken into pieces
Start by preparing your chicken. Whether you’re using boneless, skinless chicken breasts or thighs, it’s important to cut them into uniform, bite-sized pieces, roughly 1 to 1.5 inches. Uniformity is key here because it ensures that all the chicken pieces cook at the same rate. If some pieces are too large and others too small, you’ll end up with unevenly cooked chicken—some potentially dry and overcooked, while others might still be undercooked. Use a sharp knife for clean cuts, which also helps the coating adhere better. This precise cutting contributes significantly to the overall texture and presentation of your homemade honey chicken.
Coating chicken perfectly
Achieving a perfect chicken coating is crucial for that crispy texture. In a shallow dish or a sturdy bag, combine your all-purpose flour, cornstarch, salt, pepper, garlic powder, onion powder, and paprika. The cornstarch is vital here; it helps create a lighter, crispier crust than flour alone. Add the chicken pieces to the flour mixture, ensuring each piece is fully coated. Gently shake off any excess flour. A thin, even layer is what you’re aiming for, not a thick, clumpy coating. This ensures that the chicken cooks thoroughly and crisps up beautifully, becoming a delightful golden crisp chicken ready for its sweet and savory sauce. For another fantastic crispy dish, consider this crispy parmesan chicken recipe.
Baking Chicken to Golden Crisp
Baking is a fantastic way to achieve a delicious golden crisp chicken without the added oil of deep frying. This method ensures your crispy honey chicken is not only flavorful but also a healthier option. Understanding the right oven temperature settings and baking duration is crucial for getting that perfectly cooked, tender interior and irresistibly crunchy exterior. Following these steps will yield beautifully baked chicken ready to be coated in its sweet and savory sauce.
Oven temperature settings
To achieve truly crispy results when baking your chicken, a high oven temperature is essential. Preheat your oven to 400°F (200°C). This high heat helps to rapidly evaporate moisture from the chicken’s surface, promoting browning and a crisp crust. It’s also important to place the coated chicken pieces on a wire rack set over a baking sheet. This setup allows air to circulate around all sides of the chicken, preventing the bottom from becoming soggy and ensuring even crispiness. Do not overcrowd the baking sheet; leave space between each piece for optimal airflow. A properly preheated oven is the first step towards perfect baked honey chicken.
How long to bake chicken
The baking time for your chicken will depend on the size and thickness of your pieces. Generally, at 400°F (200°C), boneless, skinless chicken pieces cut into 1 to 1.5-inch chunks will take approximately 20-25 minutes. To ensure the chicken is fully cooked and safely edible, use a meat thermometer to check that the internal temperature reaches 165°F (74°C). For extra crispiness, you can flip the chicken halfway through the baking time. Keep an eye on the chicken during the last few minutes to prevent overcooking, which can lead to dry results. The goal is a beautifully golden crisp exterior with a juicy, tender interior, perfect for your delicious sauce.
Crafting the Irresistible Honey Sauce
The honey sauce is truly what makes this dish shine, transforming simple crispy chicken into a sweet and savory masterpiece. A perfectly balanced sauce elevates the entire meal, providing that signature sticky, glossy coating everyone loves. Learning to combine the key ingredients and heat the sauce gently will ensure a rich, flavorful, and perfectly textured glaze for your crispy honey chicken. This step is where the magic of the “honey” in honey chicken comes to life.
Combining honey and soy
The foundation of this irresistible honey sauce is the harmonious combination of honey and soy sauce. These two ingredients create a perfect balance of sweet and savory. To this base, you’ll add other flavor enhancers: minced garlic and grated fresh ginger for aromatic depth, a splash of rice vinegar or apple cider vinegar to cut through the richness and add a bright tang, and a touch of sesame oil for a nutty aroma. Some recipes also include a small amount of brown sugar for extra sweetness or cornstarch slurry to help thicken the sauce. Mix all these components thoroughly in a saucepan before heating. This ensures all flavors meld together beautifully, preparing for an amazing glaze that coats every piece of your easy honey chicken recipe. Explore more chicken dinner ideas, like this easy honey garlic chicken, for similar delightful flavors.
Heating sauce gently
Once your ingredients are combined, the next step is to heat the sauce gently. Transfer the mixture to a small saucepan and place it over medium-low heat. The key here is not to rush it; gentle heating allows the flavors to meld and the sauce to thicken slightly without scorching the honey. Stir continuously to prevent sticking, especially if you’ve added cornstarch. As the sauce heats, it will begin to bubble lightly and reduce, reaching a syrupy consistency that is perfect for coating the chicken. It should be thick enough to cling to a spoon, but still pourable. Once it reaches the desired consistency, remove it from the heat immediately. This careful approach to crafting the sauce ensures it’s wonderfully delicious and ready for your crispy honey chicken, providing that perfect, glossy finish.
Coating Crispy Honey Chicken Perfectly
After all the effort in getting your chicken beautifully crispy and crafting that irresistible sauce, the final step is to bring them together perfectly. The way you coat your crispy honey chicken can significantly impact the dish’s overall appeal and flavor distribution. A proper coating ensures every piece is evenly glazed with the sweet and savory sauce, providing a consistent taste experience with every bite. This critical step guarantees maximum enjoyment of your delicious sauce.
Tossing warm chicken
The timing of when you toss your chicken in the sauce is important. For the best results, the chicken should be warm, ideally just removed from the oven or fryer. Warm chicken has a slightly porous surface that allows the sauce to adhere more effectively. If the chicken is cold, the sauce might not cling as well, resulting in an uneven coating. Use a large bowl for tossing to give yourself plenty of room to maneuver the chicken without breaking its crispy exterior. The warmth of the chicken also helps to keep the sauce at an optimal temperature, ensuring it remains fluid enough to coat thoroughly but thick enough to stick, contributing to a perfect chicken coating.
Ensuring even sauce coverage
Achieving even sauce coverage is paramount for every piece of your crispy honey chicken. Once the warm chicken is in the large bowl, pour the prepared honey sauce over it. Then, using two spatulas or tongs, gently but thoroughly toss the chicken. The goal is to ensure every single piece is completely coated with the sticky, glossy sauce. Be mindful not to toss too aggressively, which could damage the golden crisp texture you worked hard to achieve. Continue tossing until you see that each chicken nugget or strip is glistening and saturated with the delicious sauce. This careful coating process ensures that every bite offers a balanced blend of crispiness, sweetness, and savory notes, making your homemade honey chicken truly irresistible. For more fantastic dinner options, explore our main course recipes.
7 Secrets for Extra Crispy Results
Achieving truly *extra* crispy results for your crispy honey chicken can elevate the dish from good to exceptional. While baking is a fantastic method, there are specific techniques and considerations that can push the crispiness factor even further. Whether you prefer the golden crunch of frying or the healthier aspects of baking, mastering these secrets will ensure your chicken is always perfectly textured and a true delight to eat. These tips are crucial for a delightful weeknight dinner.
Frying option for crispiness
If you’re aiming for the ultimate crispiness, shallow or deep frying is an excellent option. For shallow frying, heat about 1-2 inches of neutral oil (like vegetable or canola) in a large skillet to 350-375°F (175-190°C). Fry the coated chicken in batches, being careful not to overcrowd the pan, which would lower the oil temperature and lead to soggy chicken. Fry for 3-5 minutes per side, or until deeply golden brown and cooked through. For deep frying, use a larger pot and ensure the oil maintains a consistent temperature. Regardless of the method, drain the fried chicken on a wire rack set over paper towels immediately after cooking to remove excess oil and maintain crispiness. This method is often preferred for fried honey chicken. Learn more about the history and types of chicken preparations on Wikipedia.
Tips for crispy baking
Even with baking, you can achieve impressive crispiness. Here are several tips:
- Use a Wire Rack: Always bake the chicken on a wire rack set inside a baking sheet. This allows air to circulate underneath, preventing sogginess.
- Cornstarch in Coating: As mentioned, adding cornstarch to your flour mixture is vital. It creates a lighter, crispier crust than flour alone.
- High Heat: Bake at a high temperature, around 400-425°F (200-220°C), to encourage rapid browning and moisture evaporation.
- Don’t Overcrowd: Give each piece of chicken space on the rack. Overcrowding steams the chicken instead of crisping it.
- Pat Dry: Before coating, ensure your chicken pieces are thoroughly patted dry. Excess moisture is the enemy of crispiness.
- Light Oil Spray: Lightly spray the coated chicken with cooking oil before baking. This helps achieve a beautiful golden brown color and enhances the crispness.
- Flip Halfway: Flipping the chicken halfway through baking ensures even browning on all sides.
These strategies help create outstanding baked honey chicken results, making for a truly enjoyable sweet and savory meal.
Quick Crispy Honey Chicken Times
One of the many appeals of this crispy honey chicken recipe is its efficiency, making it an ideal candidate for a weeknight dinner. While the results taste like they took hours, the actual hands-on time and total cooking duration are surprisingly minimal. Understanding the breakdown of preparation and cooking times can help you plan your meal effectively, ensuring a delicious and timely dinner without unnecessary stress. This makes for a truly quick chicken meal.
Fast preparation minutes
The beauty of this easy honey chicken recipe lies in its quick preparation. You can expect to spend approximately 15-20 minutes on prep work. This includes tasks such as cutting the chicken into uniform pieces, patting them dry, and coating them thoroughly in the seasoned flour and cornstarch mixture. While the chicken is resting briefly to allow the coating to adhere, you can swiftly assemble the ingredients for your honey sauce. Having all your ingredients measured and ready (mise en place) before you start will significantly cut down on this time, allowing you to move seamlessly from prep to cooking. This fast preparation contributes to making it a genuinely quick chicken meal.
Baking and cooking time
The cooking time for your golden crisp chicken is also quite efficient. If you’re baking, the chicken will typically need 20-25 minutes in a preheated 400°F (200°C) oven, as mentioned earlier. If you opt for pan-frying or shallow frying, the cooking time per batch is even faster, usually around 6-10 minutes total (3-5 minutes per side). While the chicken is cooking, you can gently heat and thicken your honey sauce, which takes about 5-7 minutes. Once the chicken is cooked and the sauce is ready, the final step of tossing the chicken in the sauce takes just a couple of minutes. This means you can have your entire crispy honey chicken meal ready to serve in approximately 40-50 minutes from start to finish, making it perfect for even the busiest evenings.
Serving Your Delicious Honey Chicken
Once your crispy honey chicken is perfectly cooked and coated in its luscious sweet and savory sauce, the next delightful step is to serve it. The presentation and accompanying dishes can enhance the overall dining experience, complementing the rich flavors of the chicken. Whether you’re aiming for a simple, comforting meal or a more elaborate spread, knowing the best side dish pairings and complete meal ideas will help you create a memorable meal that everyone will enjoy. This makes for a truly delicious sauce experience.
Best side dishes pairings
The robust flavors of homemade honey chicken pair wonderfully with a variety of side dishes. The most classic pairing is fluffy white rice, which soaks up the extra honey sauce beautifully and provides a neutral base. Brown rice or quinoa are healthier alternatives that work just as well. For vegetables, consider steamed broccoli, green beans, or asparagus to add a fresh, crisp contrast. A light coleslaw or a simple cucumber salad can also provide a refreshing counterpoint to the sweetness of the chicken. Noodles, such as lo mein or even simple spaghetti tossed with a little sesame oil, also make an excellent choice, creating a fulfilling sweet and savory meal. For another great dinner, try a cheesy chicken and rice casserole.
Complete meal ideas
To create a complete and satisfying meal with your crispy honey chicken, think about balancing flavors and textures. Beyond the main side dishes, you might want to add a starter or a dessert. A light soup, like a clear vegetable broth or a hot and sour soup, could be a great appetizer. For a more vibrant meal, consider adding a fresh garden salad with a light vinaigrette dressing. Finish your meal with a refreshing fruit platter or a simple dessert like green tea ice cream. Don’t forget to check out our Pinterest and Instagram for more inspiring meal ideas and visual delights. This approach ensures your weeknight dinner is well-rounded and delightful from start to finish.
Crispy Honey Chicken Nutrition Facts
Understanding the nutrition facts for your crispy honey chicken can help you make informed dietary choices. While this dish is undeniably delicious, being aware of its caloric, protein, sugar, and fat content allows you to enjoy it as part of a balanced diet. This section provides a general overview, keeping in mind that actual values can vary based on specific ingredients, portion sizes, and cooking methods used, especially regarding the cooking oil. It aims to offer insights into this healthy chicken recipe aspect.
Calories and protein info
Crispy honey chicken can be a good source of lean protein, especially if you use boneless, skinless chicken breasts. Chicken is known for its high protein content, essential for muscle repair and growth. A typical serving might provide a significant portion of your daily protein needs. The calorie count will largely depend on the chicken cut, the amount of coating used, and crucially, the cooking method. Baking generally results in a lower calorie count compared to frying, making it a healthier chicken recipe option. Be mindful of portion sizes to keep calorie intake in check, especially when serving a weeknight dinner.
Sugar and fat content
The honey sauce is the primary contributor to the sugar content in this dish. Honey, while natural, is still a sugar. The amount used directly impacts the total sugar per serving. If you’re concerned about sugar intake, you can adjust the amount of honey or use a sugar substitute in the sauce (see the customization section). As for fat, this varies significantly based on how the chicken is cooked. Baked honey chicken will naturally have less fat than fried honey chicken. Using lean chicken cuts like breast and trimming any visible fat also helps. Cooking oil choice matters too; using just enough for baking or opting for an air fryer can further reduce fat content, making it a more diet-friendly sweet and savory meal. Learn more about honey on Wikipedia.
Customizing Honey Chicken Irresistible Flavor
One of the best aspects of making crispy honey chicken at home is the ability to tailor its flavor profile to your exact preferences. This recipe serves as a fantastic base, but you’re in charge of making it truly your own. Whether you prefer a sweeter glaze, a spicier kick, or something else entirely, customizing the irresistible flavor is simple and encouraged. These adjustments allow you to create a sweet and savory dish that perfectly suits your palate and makes for an even more perfect chicken coating.
Adjusting honey sweetness
The “honey” in crispy honey chicken is obviously a key flavor component, but you can easily adjust its sweetness. If you prefer a less sweet sauce, simply reduce the amount of honey by a tablespoon or two. To counteract the sweetness, you can increase the amount of soy sauce or add a bit more vinegar for an extra tangy note. Conversely, if you have a sweet tooth, a little extra honey or a pinch of brown sugar can boost that delightful sugary glaze. Experiment with small increments until you find your ideal balance of sweet and savory. This flexibility ensures your homemade honey chicken is exactly how you like it.
Adding more spice
For those who love a bit of heat, adding more spice to your crispy honey chicken is incredibly easy. A dash of red chili flakes in the honey sauce will introduce a subtle warmth, while a squirt of sriracha or your favorite hot sauce can provide a more pronounced kick. Finely minced fresh chilies, such as bird’s eye chilies or jalapeños, can also be incorporated into the sauce or sprinkled over the finished dish for a burst of fresh heat. Start with a small amount and taste as you go, as it’s easier to add more spice than to take it away. This customization turns a classic into a fiery delight, making every bite of this delicious sauce an adventure. Enjoy a truly unique sweet and savory weeknight dinner experience.
Frequently Asked Honey Chicken Questions
Having questions about cooking and storing your crispy honey chicken is perfectly normal. To ensure you get the most out of your delicious creation, here are answers to some common inquiries. Knowing how to properly store and reheat your homemade honey chicken can help maintain its quality and flavor, making meal planning easier and reducing food waste. These tips are valuable for enjoying your sweet and savory meal for longer.
Storing leftovers safely
To safely store any leftover crispy honey chicken, allow it to cool completely before transferring it to an airtight container. Refrigerate promptly within two hours of cooking. Properly stored, the chicken will remain fresh in the refrigerator for 3-4 days. While the chicken might lose some of its crispiness in the fridge, the flavors will still be fantastic. For longer storage, you can freeze the cooked chicken in an airtight, freezer-safe container for up to 2-3 months. Thaw frozen chicken in the refrigerator overnight before reheating. This ensures your delicious sauce remains enjoyable for days.
Reheating cooked chicken
Reheating cooked crispy honey chicken effectively means trying to restore some of its original texture and flavor. While microwaving is the quickest option, it often makes the chicken less crispy. For the best results, reheat the chicken in an oven or air fryer. Preheat your oven to 350°F (175°C) and place the chicken on a baking sheet. Reheat for 10-15 minutes, or until warmed through and the edges begin to crisp up again. An air fryer can achieve similar results in about 5-8 minutes at 350°F (175°C). Avoid over-reheating, as this can dry out the chicken. If reheating from frozen, ensure it is thoroughly thawed first. These methods help ensure your golden crisp chicken is nearly as good as fresh, even days later, making it perfect for a quick chicken meal.
