
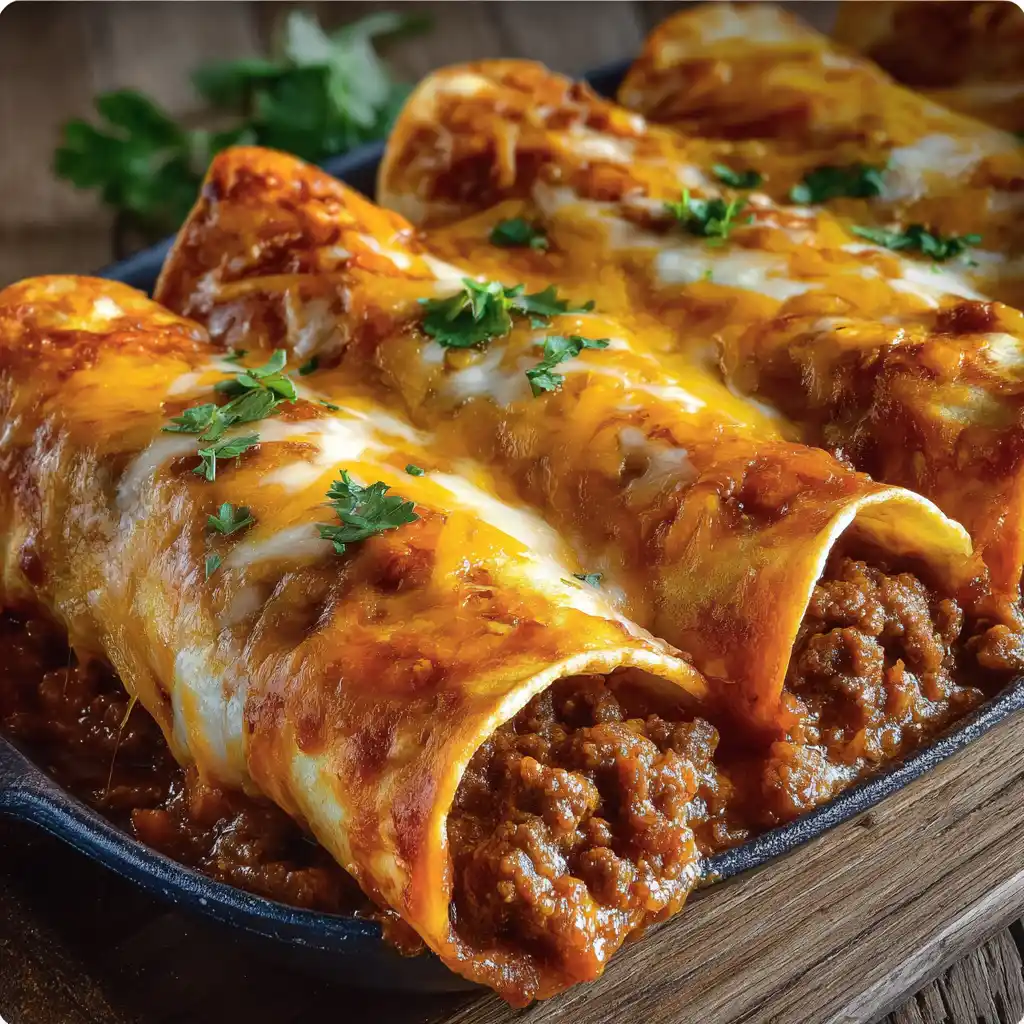
Crispy ground beef chimichangas are a beloved dish offering a satisfying crunch with a savory, cheesy filling. This article simplifies the cooking process, ensuring your homemade chimichangas are perfect every time. Learn techniques for golden brown perfection, along with versatile customization and serving suggestions for a delicious dinner.
Key Takeaways
- Master frying for ultimate crispiness or choose a healthier baked method.
- Perfect the savory ground beef and melty cheese filling with ease.
- Learn effective tortilla folding and assembly techniques for best results.
- Discover valuable make-ahead tips and delicious topping combinations.
Making chimichangas at home is rewarding. Simple steps yield delicious results. Control ingredients for fresh flavors. Enjoy the process. Share a fantastic meal.
Gathering Ingredients for Chimichangas
What You Will Need
Creating mouth-watering, crispy chimichangas starts with selecting the right ingredients. For the perfect ground beef chimichangas, you’ll need large flour tortillas, ideally burrito-sized, as they are easier to fold and hold a generous amount of filling. Fresh, lean ground beef is crucial for the savory core of your dish. When choosing your cheese, consider varieties that melt beautifully, like Monterey Jack or a Mexican blend, ensuring that desirable gooey texture. Other key components include fresh onions, garlic, and a blend of spices such as chili powder, cumin, and oregano, which will build a robust flavor profile. Don’t forget cooking oil for frying or baking, plus any preferred toppings for serving.
Pantry Staples for Cooking
Beyond the fresh items, many chimichanga ingredients are likely already in your pantry. These everyday staples simplify the cooking process, making this a convenient dish for any weeknight or weekend gathering. Common pantry items include vegetable oil or canola oil for achieving that golden brown crispness, salt, and black pepper to season your beef filling to perfection. You might also want to have tomato sauce or diced tomatoes on hand if you prefer a slightly saucier filling. A little chicken or beef broth can also add moisture and deepen the flavor of your ground beef mixture. Having these staples readily available ensures a smoother cooking experience, allowing you to focus on the fun of assembly and frying.
Preparing the Flavorful Beef Filling
Browning the Ground Beef
The foundation of any great ground beef chimichanga is a rich, well-seasoned beef filling. Begin by heating a large skillet over medium-high heat. Add your ground beef, breaking it apart with a wooden spoon as it cooks. It’s important to brown the beef thoroughly, ensuring all pink is gone and a nice caramelized crust begins to form. This step is key to developing deep, savory flavors. As the beef cooks, it will release excess fat; be sure to drain this off to prevent your chimichangas from becoming greasy. A lean cut of beef will minimize the amount of fat needing to be drained, contributing to a cleaner, more enjoyable texture. Properly browning the beef sets the stage for a truly delicious filling, similar to how a good ground turkey and peppers dish starts with well-cooked meat.
Sautéing Onions and Spices
Once your ground beef is beautifully browned and drained, it’s time to infuse it with aromatic flavors. Add finely diced onions to the skillet with the beef and sauté them until they become translucent and softened, which usually takes about 5-7 minutes. Next, stir in minced garlic and your chosen blend of spices – chili powder, cumin, oregano, and a pinch of cayenne for a little kick are excellent choices. Cook these for another minute, stirring constantly, until the spices become fragrant. This brief cooking time for the spices helps to ‘bloom’ their flavors, intensifying their aroma and taste within the beef mixture. If using, a small amount of tomato paste or a splash of beef broth can be added at this stage to create a slightly cohesive and flavorful base for your filling. This careful layering of flavors is what transforms simple ground beef into an irresistible chimichanga core.
Adding Melty Cheese to Ground Beef
Stirring in Shredded Cheese
The addition of melty cheese is what truly makes a chimichanga irresistible, creating a creamy contrast to the crispy exterior. Once your seasoned ground beef filling has cooled slightly, it’s time to stir in the shredded cheese. Monterey Jack, a Mexican cheese blend, or even cheddar are excellent choices for their superior melting qualities. The key here is to incorporate the cheese while the filling is still warm, but not piping hot. If the filling is too hot, the cheese will melt too quickly and might become oily. If it’s too cold, it won’t melt enough during the assembly phase. Gently fold the cheese into the beef mixture until it is evenly distributed and just beginning to soften. This ensures that every bite of your ground beef chimichanga will have that delightful stretch of warm, gooey cheese. This cheesy addition really boosts the appeal, much like the rich fillings in a cheesy chicken and rice casserole.
Assembling Your Crispy Ground Beef Chimichangas
Dividing Beef Mixture Evenly
Proper assembly is crucial for perfectly shaped and cooked chimichangas. Before you start folding, ensure your beef and cheese mixture is evenly divided. This means each tortilla gets an equal, generous portion of filling, resulting in consistently sized chimichangas. Typically, for large burrito-sized tortillas, about 1/2 to 3/4 cup of filling per tortilla is ideal. Using a measuring cup or an ice cream scoop can help maintain this consistency. Place the filling just below the center of the tortilla, leaving ample space on the sides for folding. This thoughtful division not only makes the folding process easier but also ensures that each chimichanga is packed with flavor and holds its shape during frying or baking, contributing to the overall delicious dinner experience. For a visual reference on tortilla usage, you might find Carina Recipes on Pinterest helpful for step-by-step imagery.
How to Fold Tortillas
Folding tortillas correctly is an art that prevents the filling from escaping during cooking and helps achieve that desired crispy ground beef chimichanga exterior. Here’s a simple method:
- Place the filling horizontally just below the center of the tortilla.
- Fold the bottom edge of the tortilla up and over the filling, tucking it snugly.
- Fold in the left and right sides of the tortilla towards the center. This creates a neat, envelope-like shape.
- Roll the tortilla tightly from the bottom up, ensuring the seams are secure. The goal is a compact, cylindrical shape.
A tight fold is essential for maintaining the chimichanga’s structural integrity, especially during frying. Loose folds can lead to the tortilla unraveling or the filling spilling out. Practice makes perfect, but with a few tries, you’ll be folding like a pro, ready for the next step of frying or baking.
Frying for Golden Crispy Chimichangas
Heating the Frying Oil
Achieving truly golden crispy chimichangas requires careful attention to the frying oil. Select a neutral-flavored oil with a high smoke point, such as vegetable, canola, or peanut oil. Pour enough oil into a deep pot or heavy-bottomed skillet to reach a depth of about 2-3 inches, ensuring the chimichangas can be mostly submerged. Heat the oil over medium-high heat. The ideal temperature for frying chimichangas is between 350°F and 375°F (175°C to 190°C). Using a kitchen thermometer is highly recommended to monitor the temperature accurately. If the oil isn’t hot enough, the chimichangas will absorb too much oil and become greasy. If it’s too hot, they’ll brown too quickly on the outside, leaving the inside potentially not as heated through. Proper oil temperature is a crucial step towards creating a delicious dinner with a perfect texture.
Frying Until Golden Brown
Once the oil reaches the correct temperature, carefully place 1-2 chimichangas into the hot oil, seam-side down first. Do not overcrowd the pot, as this will lower the oil temperature and result in soggy chimichangas. Fry for about 2-4 minutes on each side, or until they achieve a beautiful golden brown color and are wonderfully crispy. Use tongs to gently turn them to ensure even browning. The exterior should be firm and crunchy to the touch. Once fried, carefully remove the chimichangas from the oil and place them on a wire rack set over a baking sheet lined with paper towels. This allows excess oil to drain away, maintaining that coveted crispy texture. Repeat with the remaining chimichangas, ensuring the oil returns to the proper temperature between batches. This frying method can also be adapted for other dishes where a crisp exterior is desired, such as for crispy cauliflower.
Achieving the Best Crispy Texture
Oil Temperature is Key
As mentioned, the oil temperature is paramount for achieving the best crispy ground beef chimichangas. If the oil is too cool, the tortilla acts like a sponge, soaking up excess fat and becoming heavy and greasy rather than light and crisp. Conversely, if the oil is too hot, the outside will burn before the filling is thoroughly heated and the tortilla can reach its full crisp potential. Aim for a consistent temperature of 350-375°F (175-190°C). A thermometer is your best friend here. Adjust the heat as needed throughout the frying process to maintain this range. Small fluctuations are normal, but significant drops (from adding too many chimichangas at once) or spikes can compromise the texture. Proper temperature control ensures a rapid cook time, sealing the exterior and creating a satisfying crunch without excessive oil absorption, making for truly irresistible chimichanga ideas.
Draining Excess Oil
After frying, the way you handle your chimichangas significantly impacts their final crispiness. Never place freshly fried chimichangas directly onto a flat plate lined with paper towels. This traps steam and oil underneath, leading to a soggy bottom. Instead, immediately transfer them to a wire rack placed over a baking sheet. The rack allows air to circulate around the entire chimichanga, preventing steam buildup and letting any excess oil drip away. Lining the baking sheet below with paper towels will catch the drips, making cleanup easy. Let them rest for a few minutes on the rack before serving. This brief resting period helps the exterior crisp up further and allows the internal temperatures to equalize, resulting in a perfectly crispy and hot chimichanga ready for your favorite toppings. You can find more cooking tips and delicious dinner ideas by checking out Carina Recipes on Instagram.
Baked Crispy Ground Beef Chimichangas
Baking for a Healthier Choice
While deep-frying yields that classic crispy texture, baking offers a fantastic healthier alternative for your chimichangas. This method significantly reduces the amount of oil used, making it a great option for those looking to enjoy this delicious dish with fewer calories and less fat. Baked chimichangas still achieve a delightful crispiness, albeit a slightly different one than their fried counterparts. It’s an excellent way to prepare chimichangas for a family meal without the mess and added fat of traditional frying. This approach proves that you don’t have to sacrifice flavor for health, allowing for a satisfying meal that aligns with healthier eating goals. Consider baking your ground beef chimichangas if you want to enjoy a guilt-free delicious dinner.
Getting Them Crispy in Oven
To achieve crispy baked ground beef chimichangas, preparation is key. Preheat your oven to a high temperature, typically around 400°F (200°C). Lightly brush or spray the assembled chimichangas with a thin layer of olive oil or cooking spray. This thin coat of fat is crucial for promoting browning and crisping in the oven. Place the chimichangas seam-side down on a baking sheet lined with parchment paper, ensuring they have enough space between them for air circulation. Bake for 20-25 minutes, flipping them halfway through, until they are golden brown and crispy on all sides. Keep a close eye on them towards the end, as oven temperatures can vary. The result is a wonderfully baked crispy chimichanga that’s hot, flavorful, and satisfying, proving that baked options can still be incredibly appealing and a great addition to your family meal rotation.
Smart Tips for Easy Cooking
Don’t Overfill Tortillas
One of the most common pitfalls when making chimichangas is overfilling the tortillas. While it might be tempting to pack in as much of that delicious ground beef and cheese mixture as possible, overfilling makes the tortillas extremely difficult to fold and seal properly. An overloaded chimichanga is prone to bursting during frying or baking, leading to a messy situation and a less appealing final product. Aim for about 1/2 to 3/4 cup of filling for a standard large flour tortilla. This amount allows for a snug, secure fold that will hold up through the cooking process, ensuring your chimichangas retain their shape and all that wonderful flavor stays neatly tucked inside. It’s a simple tip that significantly enhances the cooking experience and the end result.
Keep Seam-Side Down
Whether you’re frying or baking your chimichangas, always start by placing them seam-side down. This seemingly small detail plays a significant role in keeping your chimichangas intact. The heat from the oil or oven helps to ‘seal’ the seam, preventing the tortilla from unraveling as it cooks. If you place them seam-side up, the seam is more likely to open, allowing the filling to leak out and creating a mess in your cooking oil or on your baking sheet. Once the seam has had a chance to set and crisp up, you can then carefully flip the chimichangas to brown the other sides. This method ensures a perfectly sealed, beautifully shaped chimichanga every time, contributing to an overall more professional and enjoyable cooking experience.
Make-Ahead and Storage Ideas
Preparing Chimichangas Ahead
Chimichangas are an excellent dish for make-ahead meals, saving you time and effort on busy days. You can prepare the ground beef filling a day or two in advance and store it in an airtight container in the refrigerator. When you’re ready to assemble, simply warm the filling slightly to make it easier to work with, then proceed with filling and folding your tortillas. Alternatively, you can assemble the chimichangas completely, up to the point of frying or baking. Once assembled, arrange them in a single layer on a baking sheet, cover tightly with plastic wrap, and refrigerate for up to 24 hours. This allows for quick cooking when you’re ready to eat, making them a convenient option for last-minute meal preparation. This approach makes hosting much easier.
Freezing and Reheating Tips
For longer storage, chimichangas freeze remarkably well. After assembly (but before cooking), place them on a baking sheet and freeze until solid, about 2-3 hours. Once frozen, transfer them to a freezer-safe bag or container, separating layers with parchment paper to prevent sticking. They can be stored in the freezer for up to 3 months. When you’re ready to enjoy them, you can cook them directly from frozen. For frying, increase the frying time slightly, ensuring the internal temperature reaches 165°F (74°C). For baking, bake at 400°F (200°C) for about 30-40 minutes, or until golden brown and heated through. Reheating cooked chimichangas is best done in an oven or air fryer to maintain crispiness, rather than a microwave, which can make them soggy. These make-ahead meals provide convenience without compromising on flavor.
Customizing Your Chimichanga Filling
Adding Other Meats or Veggies
While ground beef chimichangas are a classic, the beauty of this dish lies in its versatility. You can easily customize the filling to suit your taste or what you have on hand. Instead of or in addition to ground beef, consider using shredded chicken, seasoned ground turkey, or even pulled pork for a different flavor profile. For an added nutritional boost and texture, incorporate finely diced vegetables like bell peppers, corn, black beans, or zucchini into your filling mixture. Sautéing these vegetables with the onions and spices ensures they are tender and flavorful before being wrapped in the tortilla. These additions can transform the chimichanga into a wholesome and balanced meal, offering endless possibilities for delicious dinner combinations.
Experiment with Different Cheeses
The cheese component is another area ripe for experimentation. Beyond the standard Monterey Jack or Mexican blend, many other cheeses can elevate your chimichangas. Try a sharp cheddar for a bolder flavor, pepper jack for a spicy kick, or even a smoky provolone for a unique twist. For an extra creamy texture, you could even mix in a small amount of cream cheese or a blend of several cheeses. The key is to choose cheeses that melt well and complement the savory filling. Don’t be afraid to mix and match to find your favorite combination. This personalization allows you to create truly unique chimichanga ideas that cater specifically to your palate, making each batch a new culinary adventure.
Perfect Toppings for Your Dish
Sour Cream and Guacamole
No chimichanga experience is complete without the perfect array of toppings. These additions not only enhance the flavor but also add contrasting textures and temperatures, elevating the entire dish. Sour cream is a timeless classic, offering a cool, tangy counterpoint to the rich, savory chimichanga. Its creaminess helps to balance any heat from spices and provides a refreshing finish. Equally popular, fresh guacamole brings a vibrant, creamy, and herbaceous element. Made from ripe avocados, onions, cilantro, and lime juice, guacamole adds a healthy fat and a burst of freshness that complements the deep fried or baked flavors beautifully. These two toppings are almost mandatory for anyone seeking a truly authentic and satisfying chimichanga meal, perfect for making your delicious dinner even more memorable.
Salsa and Fresh Cilantro
To further brighten and add complexity to your ground beef chimichangas, consider a generous dollop of salsa and a sprinkling of fresh cilantro. Salsa, whether mild or spicy, provides a juicy, tangy, and often slightly sweet element that cuts through the richness of the beef and cheese. You can opt for a classic tomato-based salsa, a vibrant salsa verde, or even a fruity mango salsa for an unexpected twist. The acidity and freshness of salsa are fantastic for waking up the palate. Finally, a garnish of fresh, chopped cilantro offers a pungent, citrusy aroma and flavor that provides a final flourish. Its bright green color also adds visual appeal, making your chimichangas look as good as they taste. Together, these toppings create a dynamic and flavorful experience.
Pairing Chimichangas with Sides
What to Serve Alongside
To create a complete and satisfying meal, consider what to serve alongside your crispy ground beef chimichangas. Traditional Mexican-inspired sides are always a hit. Fluffy Spanish rice, seasoned with tomatoes and spices, provides a comforting carbohydrate. Refried beans, creamy and savory, are another classic accompaniment that adds body to the plate. For a lighter touch, a crisp green salad tossed with a zesty lime vinaigrette can offer a refreshing contrast, balancing the richness of the chimichangas. Corn on the cob, either grilled or boiled, and a simple coleslaw are also excellent choices, adding texture and sweetness. These sides help round out the meal, making it a substantial and delicious dinner for any occasion.
Drink Suggestions for Meal
The right beverage can enhance the flavors of your chimichangas and complete the dining experience. For non-alcoholic options, iced tea, horchata (a sweet rice milk drink), or a refreshing limeade or agua fresca are excellent choices that complement Mexican-inspired cuisine well. If you’re looking for alcoholic pairings, a crisp lager or Mexican beer like Corona or Modelo can be a perfect match, as their light, effervescent qualities cut through the richness of the fried dish. Margaritas, with their tangy lime and tequila notes, are another classic pairing that perfectly complements the savory and spicy elements of chimichangas. For wine drinkers, a light-bodied, fruity red like a Zinfandel or a crisp, unoaked white wine such as a Pinot Grigio can also be delightful, offering versatile options for your delicious dinner.
For more main course ideas and inspirations, be sure to visit our main course category, offering a variety of recipes to satisfy any craving. You can also learn about the broader context of this popular dish by reading about the Chimichanga on Wikipedia, or delve into the history and techniques of frying on Wikipedia for a deeper culinary understanding.
