
Japanese curry bun, also known as karē pan, is a popular savory pastry delight. This recipe offers a simple path to creating these delicious, deep-fried or baked treats at home. We cover everything from mixing the dough to choosing your favorite curry filling, ensuring a satisfying culinary experience for everyone.
Key Takeaways
- Homemade Japanese curry buns are achievable with seven outlined steps.
- Ingredients include basic dough items and your preferred curry filling.
- The dough requires careful mixing, kneading, and two distinct rise times.
- Buns can be either fried for crispiness or baked for a healthier option.
- Customization of both the curry filling and sugar content is encouraged.
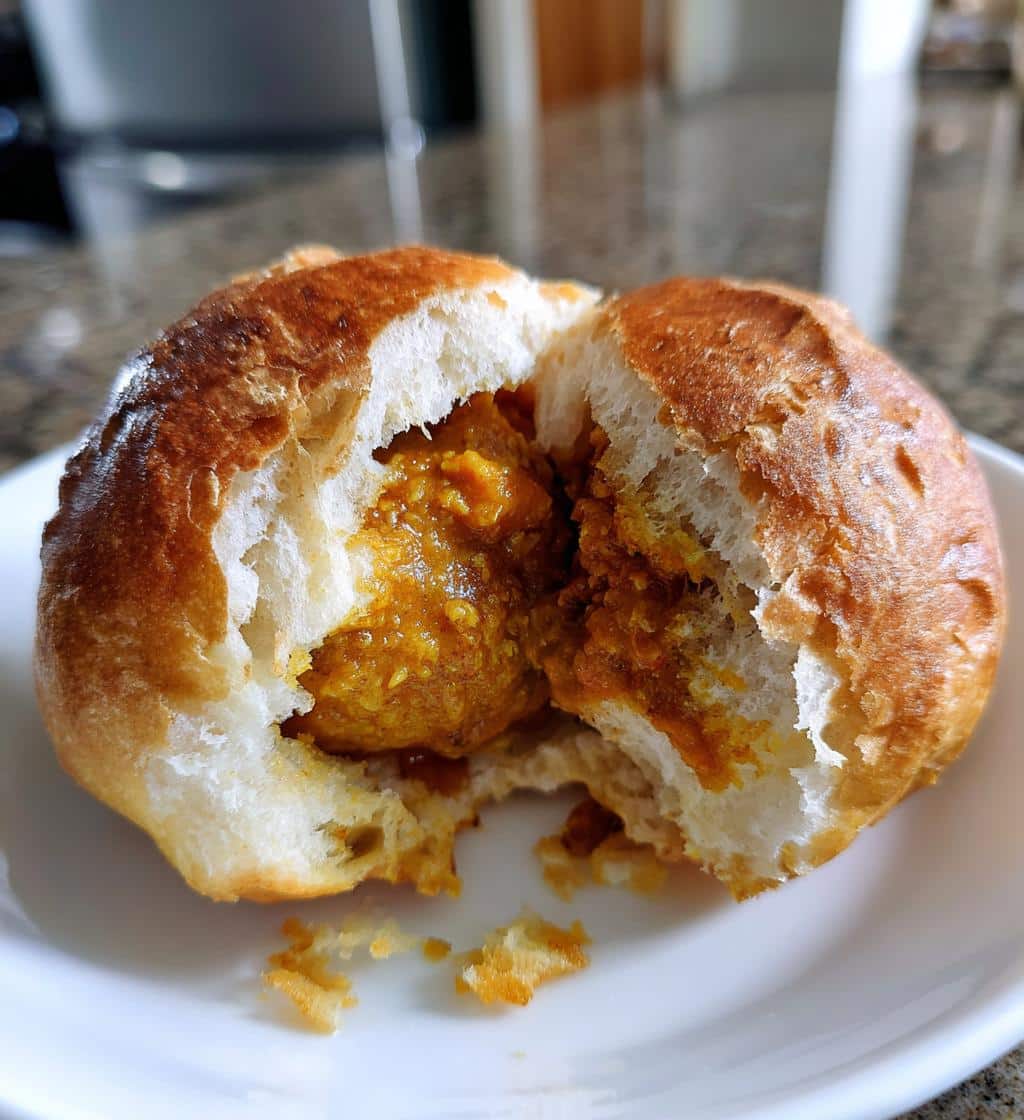
Homemade curry buns are truly rewarding. Freshly baked or fried, they taste wonderful. The process brings joy to cooking. Share these savory treats with family. A delightful meal awaits.
Making Your Own Japanese Curry Bun
Embarking on the creation of your own Japanese curry bun, or karē pan, is a rewarding culinary adventure. These beloved savory pastries, with their crispy outer layer and warm, spiced filling, are a staple in Japanese bakeries and convenience stores. Crafting them at home allows for unparalleled freshness and customization, ensuring each bite is exactly to your liking. Imagine the aroma filling your kitchen as the dough rises and the curry simmers—a true flavor bliss journey. Whether you’re a seasoned baker or a curious beginner, this recipe simplifies the process, making authentic karē pan accessible to all. Prepare to impress your family and friends with these delectable homemade treats. For those who enjoy rich, flavorful main courses, consider pairing your freshly baked buns with a hearty crispy parmesan chicken dish for a complete meal.
Start Your Flavor Bliss Journey
The journey to homemade Japanese curry buns begins with a simple decision: the commitment to fresh, flavorful ingredients and a little patience. This recipe isn’t just about cooking; it’s about the joy of creation, the satisfaction of baking, and the ultimate reward of a warm, savory pastry. You’ll find that the effort put into making these buns is well worth the incredible taste experience. Get ready to transform basic pantry items into something truly special.
Seven Magical Steps Outlined
We’ve broken down the process into seven manageable and magical steps to ensure your success. From mixing the perfect dough to frying or baking your golden-brown buns, each stage is clearly outlined. Follow these steps carefully, and you’ll soon be enjoying delicious karē pan. Understanding the essence of karē pan is key to appreciating its texture and flavor profile.
Gathering Ingredients for Delicious Buns
The foundation of any great recipe lies in its ingredients, and Japanese curry buns are no exception. Success starts with having everything prepped and ready before you begin. For the dough, you’ll mostly rely on pantry staples that you likely already have on hand. The true star, of course, is the curry filling, which offers a fantastic opportunity for personalization. Whether you prefer a mild, sweet curry or a robust, spicy one, the choice is entirely yours. This flexibility makes homemade karē pan incredibly versatile and enjoyable for various palates. Think about what flavors you love in a curry; those are the flavors that will shine in your bun. We’ll guide you through the essentials, ensuring you have the right components for both the perfect fluffy dough and a deeply satisfying center.
Pantry Staples for Dough
To create the soft, slightly sweet dough that encases the curry filling, you’ll need a few basic items. These typically include all-purpose flour, active dry yeast, granulated sugar, salt, milk (whole or low-fat works well), unsalted butter (melted and cooled), and one egg. Using good quality ingredients will always yield superior results, so opt for fresh yeast and a reputable brand of flour. Having these items measured and ready before you start mixing will streamline the entire process, making your baking experience smooth and enjoyable. These simple items will come together to form a supple and easy-to-work-with dough, crucial for achieving that authentic Japanese curry bun texture. For more dinner ideas that make use of pantry staples, check out our recipe for ground turkey and peppers.
Your Favorite Curry Filling
The curry filling is where your personal taste truly comes into play. You can use leftover homemade curry, a store-bought Japanese curry roux prepared according to package directions, or even your own custom curry creation. Traditional karē pan often features a mild, somewhat sweet curry with finely diced meat (like beef or chicken) and vegetables (onions, carrots, potatoes). Ensure your curry filling is thick and not too watery; excess moisture can make the buns soggy or difficult to seal. Allow the filling to cool completely before using it. A chilled filling is much easier to work with when shaping the buns and prevents the dough from becoming greasy. Experiment with different spice levels and ingredient combinations to find your ideal balance of flavors.
Mixing Dough for Perfect Curry Buns
Creating the ideal dough is paramount for a delicious Japanese curry bun. The process involves a careful balance of ingredients and proper technique to achieve a soft, pliable, and slightly elastic texture. This dough will be the perfect vessel for your flavorful curry filling, holding its shape during rising and cooking while remaining delightfully tender inside. Don’t rush this stage, as proper mixing sets the foundation for the entire bun. A well-mixed dough is easier to handle, rises more consistently, and ultimately leads to a superior finished product. Pay attention to the details of combining the ingredients and kneading, as these steps are crucial for developing the gluten structure that gives the buns their characteristic chewiness and fluffiness.
Combine Dry Ingredients First
Begin by whisking together all your dry ingredients in a large mixing bowl. This typically includes the flour, active dry yeast, sugar, and salt. Thoroughly combining these ensures that the yeast and salt are evenly distributed throughout the flour. This prevents pockets of overly salty dough or areas where the yeast might not activate properly, leading to uneven rising. Once the dry ingredients are well-mixed, you’ll create a small well in the center, ready for the wet ingredients. This methodical approach helps in integrating everything smoothly and consistently, forming the base for a successful dough.
Kneading Dough Until Smooth
After incorporating the wet ingredients (milk, melted butter, and egg) into your dry mixture, you’ll move on to the kneading phase. Kneading is essential for developing the gluten in the flour, which gives the dough its structure and elasticity. You can knead by hand on a lightly floured surface for about 8-10 minutes, or use a stand mixer with a dough hook for 5-7 minutes. The goal is to achieve a dough that is smooth, elastic, and no longer sticky. It should pass the windowpane test, meaning you can stretch a small piece thin enough to see light through it without tearing. Proper kneading ensures a light and airy texture in your finished curry buns, making them wonderfully fluffy.
First Dough Rise: Key Step
The first rise, often called bulk fermentation, is a crucial step in developing the flavor and texture of your Japanese curry bun dough. This period allows the yeast to work its magic, consuming sugars and producing carbon dioxide, which causes the dough to expand and develop its characteristic airy structure. It also contributes significantly to the overall taste profile, creating a more complex and nuanced flavor in the final bun. Patience during this stage is key, as rushing the rise can result in dense, less flavorful buns. Providing the right conditions for your dough to rise will make a noticeable difference in the quality of your karē pan.
Let Dough Rest One Hour
After kneading, place your smooth dough in a lightly oiled bowl, turning it once to coat. Cover the bowl tightly with plastic wrap or a damp kitchen towel. Then, find a warm, draft-free spot in your kitchen and let the dough rest for approximately one hour, or until it has doubled in size. A warm environment, ideally around 75-80°F (24-27°C), is best for yeast activity. If your kitchen is cool, you can place the bowl in a slightly warm (but not hot) oven that has been turned off, or even in a microwave (also turned off) with a cup of hot water. This first rise is vital for achieving a light and airy texture in your curry buns. Don’t skip or shorten this step, as it directly impacts the final product’s fluffiness and overall appeal.
Shaping Your Japanese Curry Bun Dough
Shaping the dough correctly is an art form that transforms a simple ball of dough into the familiar, appealing form of a Japanese curry bun. This step requires a gentle touch and precision to ensure that each bun is uniform in size, holds its filling securely, and cooks evenly. Proper shaping not only contributes to the aesthetic appeal but also impacts the final texture and eating experience. Rushing through this stage or improper technique can lead to oddly shaped buns or, worse, buns that burst open during cooking, releasing their delicious filling. Take your time, and enjoy the tactile process of working with the dough, preparing it for its flavorful center.
Divide Dough into Small Balls
Once your dough has completed its first rise, gently punch it down to release the trapped gases. Turn the dough out onto a lightly floured surface. Using a bench scraper or a sharp knife, divide the dough into equal portions. For standard-sized curry buns, aim for about 8 to 10 pieces, each weighing roughly 60-70 grams. Roll each portion into a smooth, round ball. This step ensures that all your buns are consistent in size, which is important for even cooking. Uniformity also makes the subsequent shaping steps much easier and more manageable, leading to a professional-looking batch of karē pan.
Flatten Each Dough Ball
Take one dough ball at a time, keeping the others covered to prevent them from drying out. On a lightly floured surface, gently flatten each ball into a disc, about 4-5 inches (10-12 cm) in diameter. You can use your hands or a rolling pin for this. The edges should be slightly thinner than the center. This slight variation in thickness helps create a better seal later on and ensures the center of the bun has enough dough to encase the filling without being too thick. Aim for a consistent thickness across all your flattened discs, ensuring that each bun will have a similar dough-to-filling ratio.
Adding Flavorful Curry Bun Filling
Placing the curry filling is perhaps the most exciting part of assembling your Japanese curry buns. This is where the delicious curry you prepared earlier takes center stage, ready to be enveloped by the soft, pliable dough. Precision here is key; you want to add enough filling to make each bun satisfying without overfilling, which can make sealing difficult and potentially lead to bursting during cooking. Remember, a perfectly sealed bun keeps all that wonderful flavor locked inside, ensuring a delightful surprise with every bite. The contrast between the fluffy dough and the savory, spiced filling is what makes karē pan so irresistible.
Place Filling in Center
Once your dough discs are ready, spoon about 1 to 2 tablespoons of your cooled curry filling into the center of each flattened dough ball. It’s crucial that the filling is completely cool; warm filling can prematurely activate the yeast or make the dough sticky and hard to handle. Avoid overfilling, as this is the most common reason for buns to split during cooking. Leave a clear border of dough around the edges, approximately 1/2 to 3/4 inch (1.5-2 cm), to allow for proper sealing. This margin is essential for creating a secure pouch that will hold the flavorful curry safely inside as the bun cooks. For more cooking inspiration, check out our Pinterest page for diverse recipes and ideas.
Sealing Each Japanese Curry Bun
Sealing your Japanese curry bun correctly is a crucial step that ensures the filling stays securely inside during both the second rise and the cooking process. A poorly sealed bun can lead to messy leaks of curry, compromising the bun’s integrity and aesthetic. This stage requires a bit of dexterity, but with a few simple techniques, you’ll be able to create neat, tightly sealed buns that look as good as they taste. Think of it as creating a perfect little package for your flavorful curry. The goal is to form a sturdy closure that can withstand the heat of frying or baking without rupturing, preserving the delicious experience of biting into a perfectly intact karē pan.
Pinch Edges to Seal
To seal the bun, carefully bring the edges of the dough up and over the filling, meeting in the center. Pinch the edges firmly together to create a secure seam. Work your way around the entire bun, ensuring there are no gaps or openings where the curry could escape. Think of it like gathering the edges of a small cloth pouch. A tight seal is absolutely essential, so don’t be afraid to apply a little pressure. You can even moisten your fingertips with a tiny bit of water if the dough seems too dry to stick. This method helps to create a strong closure, crucial for holding the generous amount of savory curry filling.
Form Bun Shape Neatly
After pinching the edges together, you’ll want to refine the shape of your curry bun. Gently reshape the bun into a smooth, slightly flattened oval or a round shape, whatever your preference. Place the sealed side down on a lightly floured or parchment-lined surface. This helps maintain the bun’s integrity and prevents it from sticking. Some recipes call for rolling the sealed bun in panko breadcrumbs at this stage to achieve an extra crispy exterior when fried. This additional coating adds a delightful crunch that is characteristic of traditional karē pan. Ensure the bun’s shape is neat and uniform for even cooking and an appealing presentation.
Second Rise for Fluffy Curry Buns
The second rise is just as important as the first, if not more so, for achieving truly fluffy and light Japanese curry buns. After all the handling and shaping, the dough needs another period of rest to recover, relax, and expand once more. This final proofing phase allows the yeast to produce a last burst of carbon dioxide, contributing to the airy texture that makes karē pan so enjoyable. Skipping or shortening this step can result in dense, heavy buns, which is far from the desired outcome. Proper proofing before cooking ensures that your buns will be tender and soft, a delightful contrast to their crispy exterior.
Let Buns Rise 30 Minutes
Arrange your shaped curry buns on a baking sheet lined with parchment paper, leaving some space between each bun to allow for expansion. Cover the buns loosely with plastic wrap or a light kitchen towel to prevent them from drying out. Let them rise in a warm, draft-free place for about 30 minutes, or until they look noticeably puffy. They won’t double in size like the first rise, but they should appear fuller and lighter. This final proofing is vital for achieving a light, airy texture when cooked. Ensure the environment is warm but not too hot, as excessive heat can cause the yeast to overproof or die off. This careful attention to the second rise will pay off in the form of tender, well-risen curry buns, ready for their final cooking stage.
Cooking Japanese Curry Buns: Frying or Baking
One of the great choices when making Japanese curry buns is how you decide to cook them. Both frying and baking offer distinct advantages and result in slightly different textures. Traditionally, karē pan is deep-fried, which gives it that iconic crispy, golden-brown crust that many adore. However, if you’re looking for a healthier alternative without sacrificing too much on flavor, baking is an excellent option that still yields a delicious, albeit softer, bun. Understanding the nuances of each method will help you choose the best approach for your desired outcome and dietary preferences. No matter which cooking method you select, the goal is a perfectly cooked bun with a warm, flavorful curry filling.
Fry Until Golden Brown
For a truly authentic and crispy Japanese curry bun, deep-frying is the way to go. Heat about 2-3 inches of vegetable oil in a large, heavy-bottomed pot or deep fryer to 340-350°F (170-175°C). Carefully place 2-3 buns into the hot oil, being careful not to overcrowd the pot. Fry for about 2-3 minutes per side, or until they are a beautiful golden brown and cooked through. Use a slotted spoon or tongs to gently turn them. The panko breadcrumbs (if used) will become wonderfully crisp and golden. Monitor the oil temperature constantly; if it gets too hot, the buns will brown too quickly on the outside and remain raw inside. If it’s too cool, they’ll absorb too much oil and become greasy. For safety and best results in frying, ensure your oil temperature is stable.
Bake for Healthier Option
If you prefer a lighter, less oily version of Japanese curry buns, baking is an excellent alternative. Preheat your oven to 375°F (190°C). Lightly brush the tops of your proofed buns with an egg wash (one egg beaten with a tablespoon of water) for a golden finish, and optionally sprinkle with panko breadcrumbs for some added texture. Bake for 18-22 minutes, or until the buns are golden brown and sound hollow when tapped on the bottom. While baked buns won’t have the exact same deep-fried crispiness, they will still be deliciously soft and flavorful with a slightly firmer crust. This method significantly reduces the fat content, making it a popular choice for those mindful of their diet without wanting to compromise on taste. For more healthy cooking options, explore our Instagram page.
Serving Your Delicious Japanese Curry Bun
The moment has arrived: your homemade Japanese curry buns are cooked to perfection, radiating a comforting aroma. Serving them correctly ensures that every bite is enjoyed at its peak. These buns are best savored fresh and warm, allowing the soft dough and rich, savory filling to provide maximum comfort and flavor. Whether you’ve fried them to a crispy golden hue or baked them to a soft finish, the final steps before enjoyment are simple yet important. Prepare to present your culinary masterpiece and delight in the satisfaction of creating these popular savory pastries from scratch. They are perfect for a light lunch, a hearty snack, or even a unique side dish with your favorite dinner. Just like a southern-style collard green and potato stew, sometimes the simplest dishes are the most comforting.
Drain Excess Oil First
If you opted to fry your Japanese curry buns, it’s crucial to drain any excess oil immediately after removing them from the pot. Transfer the hot buns to a wire rack lined with paper towels. The paper towels will absorb any lingering oil, preventing the buns from becoming greasy and ensuring their exterior remains delightfully crisp. Allowing them to cool on a wire rack also promotes air circulation, which helps maintain the bun’s texture and prevents the bottom from becoming soggy. This simple step makes a significant difference in the overall eating experience, ensuring your fried buns are perfectly crisp and not oily.
Enjoy Buns While Warm
Japanese curry buns are truly at their best when served warm, shortly after they’ve been cooked. The heat enhances the flavors of the curry filling and keeps the dough soft and inviting. While they are still delicious cooled, the texture and aroma are most appealing when warm. Be cautious, as the curry filling can be very hot immediately after cooking. Allow them to cool for a few minutes before taking your first bite to avoid burning your mouth. These buns make a fantastic snack, a light lunch, or even an interesting appetizer. Pair them with a simple side salad or enjoy them on their own for a satisfying treat.
Helpful Tips for Your Curry Buns
Making Japanese curry buns at home is a rewarding experience, and a few helpful tips can elevate your results even further. Customization is a key element of home cooking, allowing you to tailor the recipe to your personal preferences and available ingredients. Don’t feel confined to a strict set of rules; rather, view the recipe as a framework upon which you can build. These suggestions aim to inspire creativity and ensure that each batch of your karē pan is a resounding success, perfectly suited to your taste buds. Experimentation can lead to delightful discoveries and make the cooking process even more enjoyable. These simple adjustments can truly transform your curry bun experience.
Use Any Curry Filling
The beauty of homemade Japanese curry buns lies in their adaptability, particularly when it comes to the filling. While a traditional Japanese beef or chicken curry is classic, you are absolutely free to use any curry filling you love. This could be a vegetarian curry with chickpeas and spinach, a spicier Thai-inspired curry, or even a milder Indian-style curry. Leftover curry is an excellent choice, as it’s already cooked and often thicker, making it ideal for bun filling. Just ensure your chosen curry is thick enough to hold its shape and has cooled completely before use. This flexibility makes karē pan a wonderful way to repurpose leftovers or simply enjoy your favorite curry in a new, exciting format.
Adjust Sugar to Your Taste
Japanese curry, and by extension, Japanese curry buns, often have a subtle sweetness that balances the savory and spicy notes. However, individual preferences for sweetness vary greatly. The recipe usually calls for a certain amount of sugar in the dough, but feel free to adjust this to your liking. If you prefer a less sweet dough, reduce the amount of granulated sugar by a quarter or a half. Conversely, if you enjoy a touch more sweetness, you can slightly increase it. Taste a small piece of the raw dough (before adding yeast and allowing to rise, if possible) or simply rely on your experience with similar bread recipes. Experiment with these minor tweaks to find the perfect balance that suits your palate, making your homemade curry buns truly unique to you.
Understanding Japanese Curry Bun Nutrition
When indulging in delicious homemade Japanese curry buns, it’s natural to wonder about their nutritional content. Like many baked or fried goods, karē pan can be a calorie-dense treat, but understanding the components can help you make informed choices. The nutritional profile can vary significantly based on the ingredients used in both the dough and the filling, as well as the cooking method. Baking, for instance, typically results in a lighter bun compared to deep-frying. This section offers a general overview to give you an idea of what goes into your savory pastry, helping you appreciate it as part of a balanced diet.
Calories Per Serving Noted
A typical Japanese curry bun can range from approximately 250 to 400 calories per serving, depending on its size, ingredients, and whether it’s fried or baked. Fried versions, especially those coated in panko breadcrumbs, tend to be on the higher end due to oil absorption. Baked versions generally contain fewer calories. This figure is an estimate and can change with specific curry fillings (e.g., lean chicken vs. fatty beef, vegetable-heavy vs. cheese-filled). If calorie counting is a concern, consider opting for a baked bun and a lean, vegetable-rich curry filling. Precise calorie counts would require specific ingredient measurements and calculation.
Fat and Protein Content
Japanese curry buns typically contain a moderate amount of fat, again heavily influenced by the cooking method and filling. Fried buns will have higher fat content due to the oil. The dough itself also contains fat from butter and egg. Protein content varies with the curry filling; a bun with meat (chicken, beef) or legumes (lentils, chickpeas) will naturally have more protein than a purely vegetable-based one. Generally, you can expect around 10-20 grams of fat and 8-15 grams of protein per bun. For a comprehensive understanding of general nutrition, you may refer to the Wikipedia page on Nutrition. Remember that these are estimates, and home cooking allows you to control these factors by choosing leaner ingredients and cooking methods.
