
Homemade cinnamon rolls bring warmth and joy to any kitchen. This easy-to-follow guide breaks down the process into 7 simple steps, ensuring pure bliss with every fluffy, sweet bite. Get ready to bake delightful treats at home, mastering the art of yeast dough with confidence.
Key Takeaways
- Gathering all ingredients before starting simplifies the baking process.
- Proper yeast activation is crucial for creating light, airy dough.
- Kneading develops the dough’s structure, ensuring a perfect texture.
- Allowing two rises produces incredibly soft and fluffy cinnamon rolls.
- A homemade cream cheese frosting completes the pure bliss experience.
Baking these sweet rolls is rewarding. Each step brings you closer. The aroma fills your home. Share warmth with loved ones. Enjoy pure, delicious comfort.
Homemade Cinnamon Rolls: Gather Ingredients
Starting your journey to pure bliss homemade cinnamon rolls begins with careful ingredient preparation. Gathering everything beforehand ensures a smooth and enjoyable baking process, preventing any last-minute searches. A well-stocked pantry and fresh components are your best friends in creating these delightful treats. Think of this stage as laying the groundwork for your fluffy cinnamon rolls, making sure every element is accounted for.
Pantry Staples You’ll Need
Before you dive into the mixing, check your pantry for common baking staples. You’ll definitely need all-purpose flour, granulated sugar, and salt. Vanilla extract is also key for adding a depth of flavor to both the dough and the frosting. These foundational ingredients are the unsung heroes of many a delightful dessert, including this pure bliss recipe. Having them measured and ready makes a significant difference in efficiency and reduces stress in the kitchen.
Key Ingredients for Dough
The heart of your homemade cinnamon rolls lies in their soft, pillowy dough. For this, you’ll need active dry yeast, which is responsible for the rolls’ characteristic rise and fluffy texture. Warm milk (dairy or non-dairy) is essential for activating the yeast, along with a touch of granulated sugar to feed it. Unsalted butter, melted and cooled, adds richness and tenderness, while an egg helps bind the dough and contributes to its golden color. Ensuring these ingredients are at room temperature can greatly improve the dough’s consistency and rise.
Frosting Essentials
No homemade cinnamon roll is complete without a luscious cream cheese frosting. For this, you’ll primarily need softened cream cheese, unsalted butter (also softened), and powdered sugar. A splash of vanilla extract brightens the flavor profile. Sometimes a tiny bit of milk or cream is used to adjust consistency. The balance of tangy cream cheese and sweet sugar is what makes this frosting so irresistible and a perfect complement to the warm, spiced rolls.
The Pure Bliss Dough Foundation
Creating the perfect dough is the most crucial step in making pure bliss homemade cinnamon rolls. It’s where the magic truly begins, transforming simple ingredients into a living, breathing foundation for your sweet treats. This section focuses on developing a soft, pliable dough that will rise beautifully, giving your fluffy cinnamon rolls their signature texture. Pay close attention to each stage, as precision here ensures a truly blissful outcome.
Activating the Yeast Properly
The first vital step is activating your active dry yeast. Combine the yeast with warm milk (between 105-115°F or 40-46°C) and a pinch of sugar in a small bowl. The sugar acts as food for the yeast, encouraging it to bloom. Let this mixture sit for 5-10 minutes. You’ll know your yeast is active when it becomes foamy and frothy on the surface. If it doesn’t foam, your yeast might be old or the milk temperature was off, and it’s best to start again. Properly activated yeast is the secret to light and airy rolls. For more on yeast, you can visit Wikipedia’s page on yeast.
Combining Wet and Dry Mix
In a large mixing bowl, whisk together your dry ingredients: flour, remaining sugar, and salt. In a separate bowl, combine the activated yeast mixture with melted and cooled butter and the egg. Once these wet ingredients are well combined, gradually add the wet mixture to the dry ingredients. Mix with a wooden spoon or a stand mixer with a dough hook attachment until a shaggy dough forms. Be careful not to overmix at this stage; we’re just bringing everything together.
Forming Your Soft Dough
After the ingredients are combined, the dough will likely be sticky. Turn it out onto a lightly floured surface. Now, you’ll begin the process of forming a cohesive, soft dough. This initial forming involves gently working the dough until it comes together into a rough ball. This preps it for the crucial kneading stage that follows. The goal is to create a dough that is not too dry and not too sticky, finding that perfect balance for optimal texture and rise.
Kneading Your Way to Perfection
Kneading is perhaps the most therapeutic and crucial step in developing the structure of your pure bliss homemade cinnamon rolls. It’s during this process that gluten, the protein in flour, is developed, giving your dough its elasticity and strength. This elasticity is what allows the dough to stretch and capture the gases produced by the yeast, resulting in those wonderfully fluffy cinnamon rolls we all crave. Whether by hand or with a stand mixer, patience and proper technique here will make all the difference in the final texture of your sweet treats.
If you’re kneading by hand, lightly flour a clean surface. Press the heel of your hand into the dough, pushing it away from you, then fold the far edge of the dough back over itself. Rotate the dough a quarter turn and repeat. Continue this motion for about 8-10 minutes. The dough will start sticky but will become smoother, more elastic, and less tacky as you knead. You’ll notice it takes on a silky sheen and springs back when gently poked. If using a stand mixer with a dough hook, knead on medium-low speed for 5-7 minutes. The dough should eventually pull away from the sides of the bowl and gather around the hook. A well-kneaded dough is the foundation for an exceptional batch of rolls, making this a pivotal step in your baking steps journey. For another delightful dessert that benefits from careful mixing, try our Snickerdoodle Cobbler.
First Rise: Dough Development Secrets
The first rise, often called bulk fermentation, is a pivotal stage in creating light and airy homemade cinnamon rolls. This is where the yeast actively works, consuming sugars and producing carbon dioxide, which causes the dough to expand and develop flavor. Rushing this step will result in dense, less flavorful rolls, so patience is truly a virtue here. Allowing the dough to fully develop during this phase is one of the key baking steps for achieving that pure bliss texture.
Letting Dough Rest One Hour
Once your dough is thoroughly kneaded and smooth, shape it into a ball and place it in a lightly greased bowl. Turn the dough over once to coat the top with a thin layer of oil, which prevents it from drying out. Cover the bowl tightly with plastic wrap or a clean kitchen towel. The standard recommendation is to let the dough rest for at least one hour, or until it has roughly doubled in size. This time allows the gluten to relax and the yeast to perform its magic, creating pockets of air that will contribute to the rolls’ fluffy texture. The actual time may vary depending on the temperature of your environment.
Finding a Warm Spot
For the most efficient and effective rise, your dough needs a warm, draft-free environment. Ideal temperatures are typically between 75-85°F (24-30°C). Good spots in your home might include:
- A sunny windowsill (but avoid direct, scorching sun)
- Near a pilot light on a gas stove
- Inside a microwave or oven (turned OFF) with a cup of hot water beside it to create humidity
- On top of a preheating oven (just be careful not to overheat)
A consistent warm temperature ensures the yeast remains active and the dough rises uniformly. A slow, steady rise is often preferable to a quick one, as it allows more flavor to develop in your fluffy cinnamon rolls.
Crafting the Cinnamon Swirl Filling
The cinnamon swirl filling is the heart of what makes homemade cinnamon rolls so incredibly appealing. It’s the sweet, spiced core that defines their flavor and gives them their iconic appearance. A perfectly balanced filling provides a warm, aromatic contrast to the tender, fluffy dough. Crafting this layer with care ensures every bite of your pure bliss recipe is bursting with deliciousness, making it one of the most anticipated baking steps.
Spreading Butter Evenly
After your dough has completed its first rise, gently punch it down and roll it out into a large rectangle, approximately 18×12 inches, on a lightly floured surface. The key to an even cinnamon swirl is to spread a generous, even layer of softened (but not melted) unsalted butter over the entire surface of the dough, leaving a small border free along one of the long edges. This butter acts as the adhesive for the sugar and cinnamon mixture, ensuring it sticks and doesn’t fall out during rolling and baking. Make sure the butter is easily spreadable, but not so soft that it creates a greasy mess.
Mixing Sugar and Cinnamon
In a small bowl, whisk together granulated sugar (or brown sugar for a richer flavor) and ground cinnamon. For an extra layer of flavor, some bakers like to add a pinch of nutmeg or cardamom. This mixture is the essence of the cinnamon swirl filling. Once thoroughly combined, sprinkle this sweet spice mixture evenly over the buttered dough. Gently pat it down with your fingers or the back of a spoon to help it adhere to the butter. Ensure an even distribution across the entire buttered surface. The aroma alone at this stage is truly pure bliss, promising deliciousness to come. You can learn more about this aromatic spice at Wikipedia’s page on cinnamon.
Homemade Cinnamon Rolls: Shaping Steps
The shaping of your homemade cinnamon rolls is where all your hard work on the dough and filling comes together to create their signature appearance. This stage requires a gentle touch and some precision, but don’t worry—even imperfectly shaped rolls taste absolutely delicious. Proper shaping ensures an even bake and that beautiful cinnamon swirl in every slice of your fluffy cinnamon rolls, moving you closer to pure bliss.
Rolling Out Dough Flat
Once your dough has completed its first rise, gently punch it down to release the air. Transfer the dough to a lightly floured surface. Using a rolling pin, carefully roll the dough into a large rectangle. Aim for dimensions around 18×12 inches (45×30 cm) and an even thickness across the entire surface. This uniform thickness is important for consistent rolls. Avoid over-flouring your surface, as too much flour can make the dough tough. The goal is a smooth, flat canvas for your cinnamon swirl filling.
Cutting Into Perfect Slices
With the butter and cinnamon-sugar spread, it’s time to roll up your dough. Starting from one of the long edges, tightly roll the dough into a log. The tighter you roll, the more distinct your cinnamon swirl will be. Once rolled, use a sharp, un-serrated knife or, even better, unflavored dental floss to cut the log into individual rolls. For dental floss, slide a piece under the log, cross the ends over the top, and pull to slice cleanly. Aim for slices about 1 to 1.5 inches (2.5-3.8 cm) thick. This cutting method prevents squashing the rolls and keeps their shape intact. For other sweet treats that require careful shaping, consider our Peanut Butter Brownie Swirl Cookies.
Arranging in Baking Dish
Lightly grease a 9×13-inch baking dish. Arrange the cut cinnamon roll slices snugly, but not tightly packed, into the prepared dish. Leave a little space between them, as they will expand significantly during the second rise and again during baking. If you pack them too tightly, they won’t have room to become perfectly fluffy. This arrangement sets the stage for evenly baked, golden-brown rolls that will soon be smothered in cream cheese frosting.
Second Rise for Fluffy Rolls
The second rise, often called proofing, is a critical step for achieving truly fluffy homemade cinnamon rolls. After shaping, the dough needs another period of rest to allow the yeast to produce more carbon dioxide, leading to a lighter, more tender final product. This final rise contributes immensely to the pure bliss texture, ensuring your rolls are not dense but wonderfully airy. Patience during this stage is a virtue that will be greatly rewarded.
Once your shaped cinnamon rolls are arranged in the baking dish, cover the dish loosely with plastic wrap or a clean kitchen towel. Place the dish in a warm, draft-free spot, similar to where you placed the dough for its first rise. Allow the rolls to rise for another 30-45 minutes, or until they look visibly puffy and have nearly doubled in size, touching each other in the pan. Gently pressing a finger into one of the rolls should leave a slight indentation that slowly springs back; if it springs back too quickly, they might need more time. If it doesn’t spring back at all, they might be slightly over-proofed. This second rise is fundamental to the baking steps for achieving that soft, melt-in-your-mouth texture that characterizes a truly perfect cinnamon roll. Once proofed, they’re ready for the oven, destined to become glorious sweet treats.
Baking Homemade Cinnamon Rolls Perfectly
Baking your homemade cinnamon rolls is the moment all your hard work culminates into a golden-brown, aromatic masterpiece. Achieving the perfect bake ensures that the rolls are cooked through, beautifully browned on top, and still wonderfully soft and moist inside. This critical stage of the baking steps will determine whether your fluffy cinnamon rolls reach their pure bliss potential. Pay close attention to oven temperature and visual cues for the best results.
Oven Temperature Settings
Preheat your oven to the specified temperature (typically around 375°F or 190°C). It’s crucial to ensure your oven is fully preheated before placing the rolls inside, as this initial burst of heat helps activate the yeast for one last push of rising and sets the structure of the rolls. Using an oven thermometer can help verify the accuracy of your oven’s temperature, as many home ovens can vary significantly. Place the baking dish in the center rack of the preheated oven for even heat distribution. Consistent heat is key for evenly cooked sweet treats.
Checking for Golden Brown
Bake the cinnamon rolls for approximately 20-25 minutes. Baking times can vary greatly depending on your oven and the size of your rolls, so it’s important to rely on visual cues. The rolls should be beautifully golden brown on top and around the edges. If they are browning too quickly, you can loosely tent the dish with aluminum foil for the last 5-10 minutes of baking to prevent over-browning. A good indicator of doneness is also when the internal temperature of the rolls reaches about 200-205°F (93-96°C) using an instant-read thermometer, though most bakers rely on appearance. Once baked to perfection, remove them from the oven and let them cool slightly in the pan before frosting.
Whipping Up the Cream Cheese Frosting
The cream cheese frosting is the crowning glory of your homemade cinnamon rolls, transforming them from delicious baked goods into truly pure bliss sweet treats. Its tangy sweetness perfectly balances the rich, spiced rolls, adding a creamy, irresistible layer that melts slightly into the warm dough. This simple frosting comes together quickly while your fluffy cinnamon rolls are cooling, making it one of the most rewarding baking steps.
Blending Cream Cheese Smooth
Start with softened cream cheese and unsalted butter. It’s absolutely crucial that both are at room temperature to ensure a smooth, lump-free frosting. In a medium bowl, use an electric mixer to beat the cream cheese and butter together until the mixture is light, fluffy, and completely smooth. This usually takes 2-3 minutes. Scrape down the sides of the bowl occasionally to ensure everything is thoroughly incorporated. Properly blending these foundational ingredients is key to achieving a professional-looking and tasting frosting. For more delicious dessert ideas, check out our desserts category.
Adding Sweetness and Flavor
Once the cream cheese and butter are smooth, gradually add the powdered sugar (also known as confectioners’ sugar), one cup at a time, beating well after each addition until fully incorporated. This gradual addition prevents a powdery cloud from engulfing your kitchen. After all the sugar is added, beat in a splash of vanilla extract. If the frosting is too thick, you can add a tiny bit of milk or heavy cream, one teaspoon at a time, until you reach your desired spreadable consistency. Taste and adjust sweetness if necessary. This luxurious cream cheese frosting is what truly elevates your homemade cinnamon rolls to pure bliss status, offering that iconic sweet and tangy finish. Another fantastic recipe with a delightful frosting is our Quick Italian Cream Cake.
Serving Your Pure Bliss Creations
After all your dedication through the baking steps, the moment to enjoy your homemade cinnamon rolls has finally arrived! Serving them correctly can enhance the pure bliss experience, allowing the warmth and flavors to shine. These fluffy cinnamon rolls are a delight, whether for a special breakfast or a comforting dessert. Sharing these sweet treats brings joy and satisfaction.
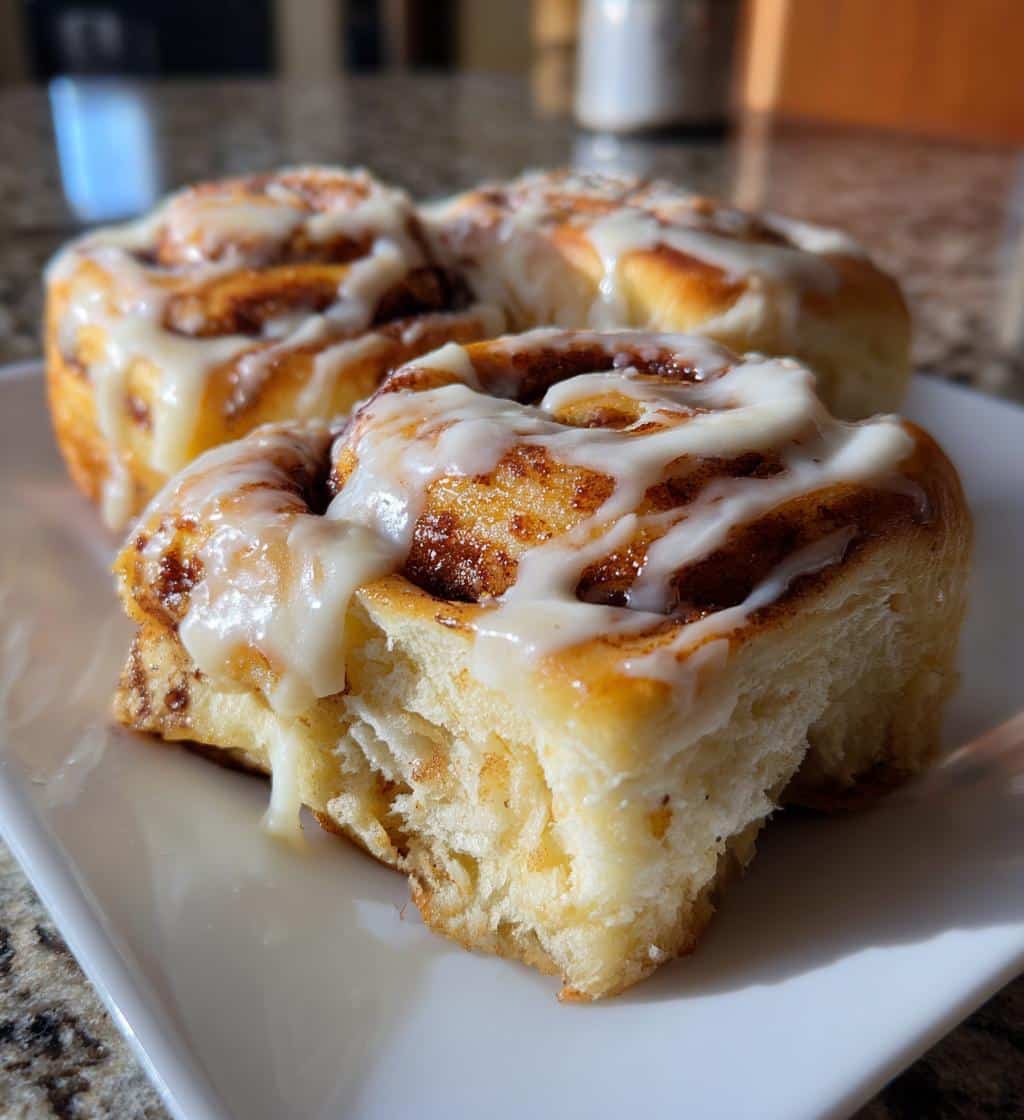
Best Served Warm
While delicious at any temperature, homemade cinnamon rolls are truly at their peak when served warm. The warmth softens the cream cheese frosting, allowing it to melt slightly into the cracks and crevices of the roll, creating an incredibly moist and flavorful bite. The cinnamon aroma is also more pronounced when warm. If your rolls have cooled, a quick reheat in the microwave for 15-30 seconds per roll, or in a low oven, can bring them back to that pure bliss state. Apply the frosting while the rolls are still warm, right before serving, for the best effect. You can find more delicious ideas on our Carina Recipes Pinterest page.
Total Recipe Time Summary
Making homemade cinnamon rolls is a labor of love, but the total time involved is manageable and well worth the effort. Typically, the active prep time, including mixing, kneading, and shaping, takes about 45-60 minutes. The two rise times together account for approximately 1.5 to 2 hours. Baking time is around 20-25 minutes, and frosting takes another 5-10 minutes. So, from start to pure bliss, you’re looking at a total recipe time of roughly 2.5 to 3.5 hours. Much of this is passive waiting, leaving you free to enjoy other activities while your sweet treats develop their incredible flavor and texture. Follow us on Instagram for more quick recipes and baking inspiration at @carinarecipes20.
Nutrition Facts for Your Rolls
Understanding the nutrition facts for your homemade cinnamon rolls can be helpful, especially if you’re mindful of your dietary intake. While these fluffy cinnamon rolls are undeniably a pure bliss treat, knowing their nutritional contribution allows for informed indulgence. Remember that homemade versions often vary in nutritional content compared to store-bought, depending on ingredient choices and portion sizes. These details provide a general overview of the sweet treats.
Per Serving Details
A typical homemade cinnamon roll serving (one medium-sized roll with frosting) generally contains:
- Calories: Approximately 300-450 calories, depending on size and amount of butter/sugar.
- Fat: Around 15-25g (including saturated fat from butter and cream cheese).
- Carbohydrates: Roughly 40-60g, primarily from flour and sugars.
- Protein: About 5-8g, from flour, milk, and egg.
- Fiber: Typically 1-2g.
These figures are estimates and can fluctuate based on exact recipe variations and ingredient brands. Using whole wheat flour or less sugar can slightly alter these values. This information assists in your overall baking steps and meal planning.
Understanding Key Values
The calorie count in homemade cinnamon rolls primarily comes from the flour, sugar, and fat (butter and cream cheese). The carbohydrates provide energy, while protein contributes to satiety. It’s important to view cinnamon rolls as an occasional treat rather than a daily staple, fitting them into a balanced diet. Enjoying these pure bliss creations in moderation is key to savoring their deliciousness without overdoing it. Remember, these are meant to be sweet treats, so savor every moment.
Tips for Perfect Cinnamon Rolls
Achieving truly perfect homemade cinnamon rolls consistently involves a few key insights beyond the basic baking steps. These tips will help you troubleshoot common issues and ensure your fluffy cinnamon rolls are always moist, tender, and utterly delicious. From managing leftovers to prepping your ingredients, these small adjustments can elevate your pure bliss recipe to new heights.
Storing Leftover Rolls
If by some miracle you have any leftover homemade cinnamon rolls, proper storage is crucial to maintain their freshness. Once cooled, store them in an airtight container at room temperature for up to 2-3 days. For longer storage, refrigerate them for up to a week. To reheat, microwave for 15-30 seconds per roll or warm in an oven at 275°F (135°C) for about 10-15 minutes until heated through. You can also freeze unfrosted rolls for up to a month; thaw and frost before serving for a pure bliss experience anytime you crave sweet treats.
Using Room Temperature Items
A golden rule for many baking recipes, especially those involving yeast dough and cream cheese frosting, is to use room temperature ingredients. This includes milk, eggs, butter, and cream cheese. Room temperature ingredients emulsify better, meaning they combine more smoothly and uniformly. For dough, warm milk activates yeast more effectively, and softened butter incorporates without clumping. For frosting, softened butter and cream cheese blend into a silky-smooth consistency, preventing lumps. Taking the time to let these items come to room temperature is a small effort that yields significant improvements in the texture and overall quality of your fluffy cinnamon rolls.
