
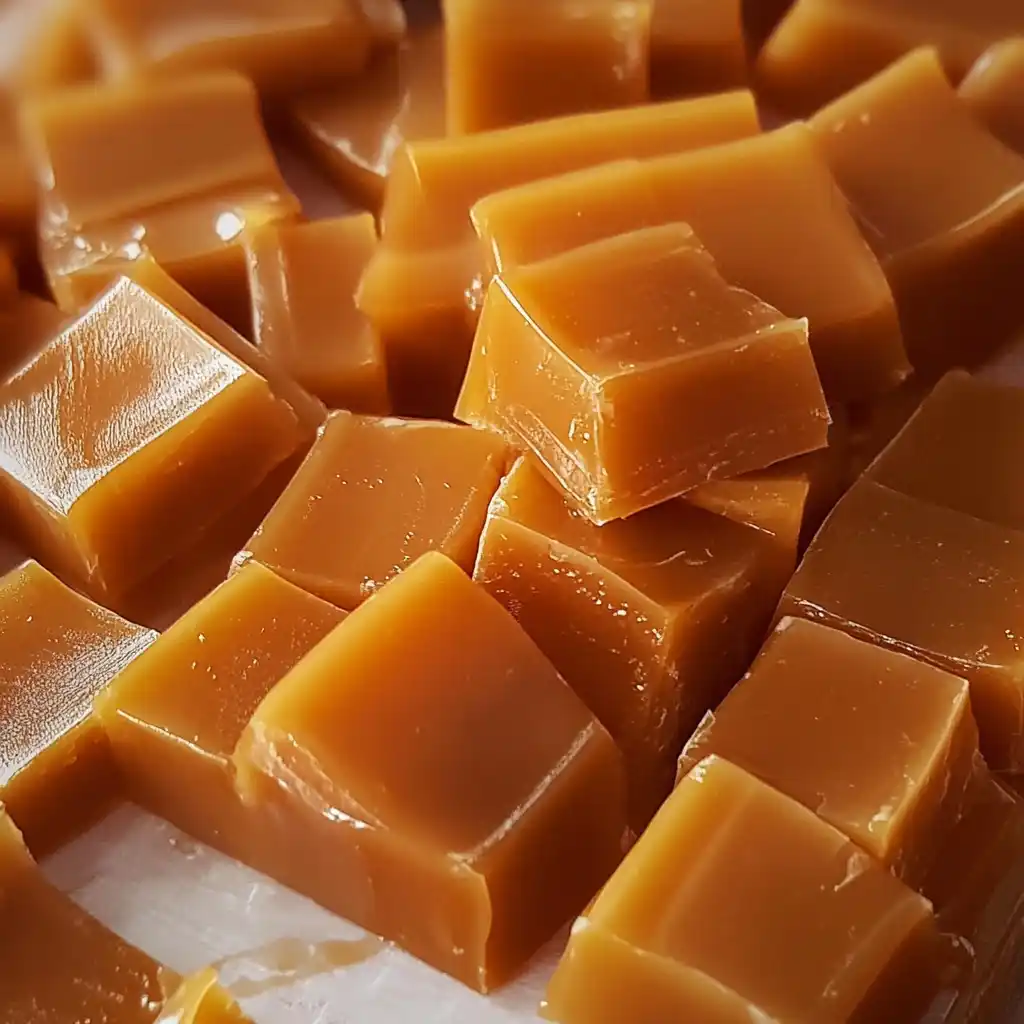
Six Minute Caramels are a fantastic way to satisfy your sweet tooth without spending hours in the kitchen. This simple recipe delivers incredibly soft and chewy homemade candy, perfect for sharing or enjoying yourself. Get ready for a delightful, speedy dessert that will impress everyone.
Key Takeaways
- Caramels can be made quickly with simple ingredients.
- Constant stirring during boiling is crucial for success and preventing burning.
- Proper cooling and cutting ensure perfect caramel squares.
- Safety with hot sugar mixtures is paramount in candy making.
Making candy at home is so rewarding. Fresh, sweet caramels bring joy to everyone. You control the flavor and texture. This quick method simplifies the process. Enjoy making your own delicious treats.
Enjoy Easy Six Minute Caramels
The allure of homemade candy often comes with the intimidating thought of lengthy processes and complex techniques. However, with this quick recipe for six minute caramels, that perception changes entirely. Imagine sinking your teeth into a wonderfully soft, chewy, and rich caramel that took mere minutes to prepare on the stovetop. This method is perfect for busy individuals, last-minute dessert cravings, or anyone who loves the taste of homemade treats without the fuss. These easy caramels are a delightful sweet treat that can brighten any day, offering a satisfying bite of buttery sweetness that’s hard to resist. They’re also an excellent homemade gift for friends and family, showcasing a thoughtful effort without requiring extensive time commitments.
Why make quick caramels?
Making quick caramels provides instant gratification. Unlike traditional caramel recipes that require precise temperature monitoring with a candy thermometer over a longer period, this method streamlines the process significantly. It’s ideal for beginners who might be hesitant to try candy making, offering a high success rate with minimal fuss. Furthermore, when unexpected guests arrive or a sudden sweet craving hits, these quick caramels can be whipped up in a flash, ensuring you always have a delightful homemade treat on hand. The simple ingredients are typically pantry staples, making impromptu caramel sessions a real possibility.
What “six minute” means
The “six minute” in “Six Minute Caramels” refers specifically to the boiling time on the stovetop once all ingredients are combined. It signifies the duration during which the mixture actively cooks to achieve the perfect caramel consistency. It’s important to understand that this six minutes doesn’t include prep time for gathering ingredients or cooling time. However, it highlights the remarkably short period required for the transformative cooking process, turning simple ingredients into a luxurious, soft caramel. This specific timing is key to getting that ideal soft, chewy texture without becoming overly hard or sticky.
Gather Simple Caramel Ingredients
The beauty of these easy caramels lies in their incredibly simple ingredients. You won’t need an extensive shopping list or exotic components; just a few fundamental items often found in a well-stocked kitchen. Using high-quality ingredients, even for a simple recipe like this, can make a noticeable difference in the final taste and texture of your homemade candy. Fresh butter and good quality sugars form the backbone of these delicious sweets, ensuring a rich and authentic flavor profile. Always check the expiration dates of your dairy products to ensure optimal freshness.
Essential butter and sugars
For truly delightful Six Minute Caramels, the quality of your butter is paramount. Opt for unsalted butter, as this allows you to control the overall saltiness of the caramels, preventing them from becoming too savory. You’ll need both granulated sugar and brown sugar. The granulated sugar provides the primary sweetness and structure, while the brown sugar adds a deeper, more complex molasses flavor and contributes to the soft, chewy texture. This combination creates a balanced sweetness and a rich, amber hue that is characteristic of classic caramel. Ensure your sugars are fresh and free-flowing for best results.
Sweetened condensed milk
Sweetened condensed milk is a star ingredient in this quick caramel recipe, acting as both a sweetener and a thickener. Unlike evaporated milk, which is unsweetened, sweetened condensed milk is already rich and sugary, contributing significantly to the caramels’ indulgent taste and creamy consistency. It helps to achieve that desirable chewy yet melt-in-your-mouth texture without the need for additional heavy cream or lengthy reduction times. Be sure to use full-fat sweetened condensed milk for the best flavor and texture; low-fat alternatives might alter the outcome. This ingredient is crucial for the “six minute” aspect, as it speeds up the thickening process dramatically. For more information on what makes this ingredient special, you can read about condensed milk on Wikipedia.
Prepare Your Baking Dish
Proper preparation of your baking dish is a critical step that often gets overlooked but is essential for easy removal and perfect caramel squares. Skipping this step can lead to your delicious homemade candy sticking to the pan, making cutting and serving a frustrating ordeal. A well-prepared dish ensures that once your six minute caramels have cooled, they lift out cleanly and maintain their beautiful shape. Taking a moment to do this correctly will save you considerable time and effort later on, guaranteeing a smooth and enjoyable candy-making experience from start to finish.
Line with parchment paper
To prevent sticking and ensure effortless removal, always line your baking dish with parchment paper. Cut the parchment paper so that it overhangs the sides of the dish, creating “handles” that you can use to lift the entire slab of cooled caramel out. This simple trick makes cutting the caramels much easier and tidier. Avoid wax paper, as it can stick to the hot caramel. If you don’t have parchment paper, you can thoroughly grease and flour the dish, but parchment paper is by far the most reliable method for non-stick results. A thin layer of cooking spray under the parchment can help it adhere to the dish.
Use an 8×8 inch dish
An 8×8 inch (20×20 cm) square baking dish is the ideal size for this six minute caramel recipe. This size provides the perfect depth for the caramel mixture, resulting in squares that are neither too thin nor too thick. If you use a larger dish, your caramels might be too thin and harder to cut into neat squares. Conversely, a smaller dish might result in overly thick caramels that take longer to cool and set. Consistency in size ensures even cooling and a uniform texture throughout the batch. Make sure your dish is clean and dry before lining it.
Melt Butter in Saucepan
The initial step in creating these delicious soft caramels involves melting butter, which serves as the rich foundation of the entire recipe. The way you melt the butter and the type of pan you use are more important than you might think. This foundational step sets the stage for the smooth integration of other ingredients and contributes to the overall success of the caramel-making process. Proper technique here helps prevent scorching and ensures a consistent, creamy base for your sweet treat. It’s a simple step, but one that warrants careful attention to detail for optimal results.
Choose heavy-bottomed pan
Selecting the right saucepan is crucial for making Six Minute Caramels successfully. A heavy-bottomed pan is highly recommended because it distributes heat more evenly across its surface. This even heat distribution significantly reduces the risk of the caramel mixture scorching or burning at the bottom, which can happen quickly with sugary concoctions. Stainless steel or enameled cast iron pans work well. Avoid thin-bottomed pans, as they are prone to hot spots that can ruin your caramels. A 2 or 3-quart saucepan is typically sufficient for a single batch of this recipe, allowing enough room for stirring without overflowing.
Use medium heat
When melting the butter, always use medium heat. Starting with a moderate temperature allows the butter to melt gradually and evenly without browning or burning. High heat can cause the butter to brown too quickly, introducing a nutty flavor that might not be desired for a classic caramel, and it also increases the risk of scorching the sugars later on. Medium heat provides a gentle melt, ensuring the butter is fully liquid and ready to combine with the other ingredients smoothly. Patience at this stage will pay off in the final texture and taste of your easy caramels.
Combine All Caramel Ingredients
Once the butter is perfectly melted, the next step is to introduce the remaining core ingredients into the saucepan. This combination forms the raw caramel mixture that will soon transform into soft, chewy goodness. The order of adding ingredients is less critical than ensuring they are thoroughly combined before the boiling process begins. Proper mixing at this stage helps create a homogenous solution, preventing any lumps of sugar and ensuring an even cooking process. This methodical approach contributes to the smooth, consistent texture that makes these homemade candy so appealing. It’s a simple, yet important, moment in your quick recipe journey.
Add sugars and liquids
After the butter has melted, add both the granulated sugar and brown sugar directly to the saucepan. Follow this by pouring in the sweetened condensed milk and any other liquid ingredients specified in your full recipe (like corn syrup, if used, though this recipe often omits it for simplicity). Ensure all ingredients are added to the pan before moving to the next stage. This creates a complete mixture ready for the cooking phase. The sugars will begin to dissolve in the warm, buttery liquid, preparing them for the transformation into rich caramel.
Stir until well mixed
Once all the sugars and liquids are in the pan, stir the mixture constantly until all ingredients are well combined and the sugars have dissolved. This initial stirring is vital to ensure an even consistency before the mixture comes to a boil. Use a sturdy wooden spoon or a heat-resistant spatula for this task. You want to see a smooth, uniform liquid without any visible sugar granules remaining at the bottom of the pan. This thorough mixing helps prevent crystallization and guarantees a smooth, homogenous caramel. Continue stirring over medium heat until it starts to simmer.
Boil Six Minute Caramels
This is where the magic truly happens and the “six minute” aspect of the recipe comes into play. Boiling the caramel mixture correctly is the most critical step for achieving the desired soft, chewy texture. It’s a short but intense cooking period that requires your full attention. The sugars undergo a transformation, caramelizing and thickening to create that signature sticky, golden consistency. Getting this part right ensures your homemade candy sets properly and has that perfect bite. For more ideas on various desserts, feel free to browse our collection.
Stir constantly, prevent burning
Once the mixture comes to a full, rolling boil, set a timer for exactly 6 minutes. During this entire boiling period, it is absolutely crucial to stir the mixture constantly and vigorously. Caramels are prone to scorching, especially at the bottom of the pan, and constant stirring prevents this by evenly distributing the heat and ensuring no part of the mixture cooks too quickly. Pay particular attention to the corners and bottom of the pan. If you stop stirring, even for a moment, the sugar can crystalize or burn, ruining the entire batch. This continuous motion is key to developing a smooth, rich caramel without any bitter burnt notes.
Cook for exactly 6 minutes
The “six minute” boiling time is not an approximation; it’s a precise duration designed for this specific quick caramel recipe. Boiling for exactly 6 minutes after the mixture reaches a full boil (while stirring constantly) ensures the caramels achieve the perfect balance of firmness and chewiness once cooled. If you cook it for too short a time, the caramels might be too soft or runny. If you cook it for too long, they could become too hard or brittle. Trust the timer and the recipe’s instructions for this critical phase. The mixture will thicken considerably during these six minutes, turning a beautiful golden brown color.
Stir in Vanilla Extract
The addition of vanilla extract is the final touch that elevates the flavor profile of these easy caramels from merely sweet to truly exceptional. While often seen as a subtle background note, vanilla plays a significant role in enhancing the richness and complexity of the caramel flavor. It adds a warm, aromatic dimension that makes the homemade candy taste more gourmet and comforting. However, timing is everything when adding delicate flavorings like vanilla to hot mixtures. Doing it incorrectly can diminish its impact or even alter its taste. This step is brief but impactful for your sweet treat.
Remove from heat first
It is essential to remove the saucepan from the heat source immediately after the 6 minutes of boiling are complete and before adding the vanilla extract. If you add vanilla while the mixture is still actively boiling or incredibly hot, the delicate alcohol base and aromatic compounds in the extract can quickly evaporate, significantly diminishing its flavor. By taking the pan off the heat, you allow the mixture to cool slightly, preserving the integrity of the vanilla’s rich taste and ensuring it truly shines through in your finished soft caramels.
Add flavor to caramels
Once the pan is off the heat, stir in one to two teaspoons of good quality vanilla extract. Use a pure vanilla extract for the best flavor; imitation vanilla can sometimes leave an artificial aftertaste. Stir it in thoroughly until it is completely incorporated into the hot caramel mixture. The vanilla will infuse the caramels with its signature warmth and sweetness, complementing the rich buttery notes. This last-minute addition ensures that the delightful aroma and taste of vanilla are prominent in every chewy bite of your homemade candy, making them irresistible.
Cool and Set Caramels
After all the cooking is done, the most challenging part of making six minute caramels for many is the waiting game. The cooling and setting phase is crucial for achieving the perfect firm yet chewy texture. Rushing this step can lead to messy, unset caramels that are difficult to cut and handle. Patience is a virtue here, as adequate cooling allows the caramel to solidify properly and develop its characteristic structure. This period of rest is just as important as the active cooking, ensuring your homemade candy turns out exactly as desired. For another satisfying dessert, consider trying our Peanut Butter Brownie Swirl Cookies.
Pour into prepared dish
Immediately after stirring in the vanilla extract, carefully pour the hot caramel mixture into your parchment-lined 8×8 inch baking dish. Use a spatula to scrape out all the delicious caramel from the saucepan. Spread the caramel evenly in the dish, ensuring a uniform thickness across the entire surface. This helps in even cooling and results in consistently sized squares when cut. Be cautious, as the caramel will be extremely hot at this stage. Avoid touching it directly. The smooth surface will contribute to the beautiful appearance of your soft caramels.
Let cool completely
Allow the caramels to cool and set completely at room temperature. This process typically takes several hours, often 4-6 hours, or even overnight. Resist the urge to refrigerate them, as rapid cooling can sometimes lead to a grainy texture or cause them to sweat when brought back to room temperature. A slow, steady cool allows the caramels to firm up gradually and evenly, resulting in that desirable smooth, chewy consistency. You’ll know they are ready when they are firm to the touch and no longer sticky or gooey in the center.
Cut and Wrap Caramels
Once your six minute caramels have fully cooled and set, the enjoyable task of cutting them into individual pieces begins. This step transforms the slab of homemade candy into ready-to-eat sweet treats. The way you cut and, optionally, wrap them not only affects their presentation but also their longevity and ease of handling. A clean cut creates professional-looking squares, while individual wrapping preserves their freshness and prevents them from sticking together. This final flourish brings your quick recipe to a delicious conclusion, making them perfect for sharing or storing. You can find more visual inspiration on our Pinterest page.
Slice into small squares
Once the caramel slab is completely firm, lift it out of the baking dish using the parchment paper overhangs. Place the caramel onto a cutting board. Using a sharp, lightly oiled knife or a pizza cutter, slice the caramel into desired small squares. For classic bite-sized caramels, aim for pieces around 1×1 inch or 1.25×1.25 inches. If the knife starts to stick, wipe it clean and oil it again. Making clean cuts will give your easy caramels a professional appearance. You can also use kitchen shears for a rustic, chewy candy look.
Wrap individually (optional)
Wrapping the caramels individually is an optional but highly recommended step, especially if you plan to store them for an extended period or give them as gifts. Individual wrapping in small pieces of wax paper, parchment paper, or cellophane prevents the soft caramels from sticking to each other, which can happen in warmer temperatures. It also helps to maintain their freshness and prevents them from drying out. This step makes them much easier to grab and enjoy, adding a thoughtful touch to your homemade candy. It makes them feel like a special sweet treat.
Tips for Perfect Easy Caramels
Achieving consistently perfect easy caramels, even with a quick recipe, often comes down to understanding a few key tips and tricks. While the “six minute” method is straightforward, paying attention to certain details can elevate your homemade candy from good to truly exceptional. These insights help ensure your soft caramels have the ideal texture and remain delicious for as long as possible. Learning these nuances will build your confidence in candy making and guarantee a successful sweet treat every time. For more inspiration, check out our latest posts on Instagram.
Watch for firmer texture
While the 6-minute boiling time is a reliable guide, factors like altitude and specific stovetop heat can slightly affect the final texture. If you prefer a firmer caramel, you can boil the mixture for an additional 30 seconds to 1 minute, always stirring constantly. Conversely, for an even softer, gooier caramel, you might reduce the boiling time by 30 seconds. However, for your first attempt at six minute caramels, stick to the exact 6 minutes. Once you’re comfortable, you can experiment with these slight timing adjustments to achieve your perfect preferred chewiness. The mixture will darken slightly as it cooks longer.
Store caramels correctly
To keep your easy caramels fresh and delicious, proper storage is essential. Once cut and optionally wrapped, store them in an airtight container at room temperature. They can last for up to 2-3 weeks this way. Avoid storing them in the refrigerator, as the cold can make them excessively hard and prone to developing a grainy texture. If storing for longer periods, they can be frozen for up to 2-3 months in a freezer-safe, airtight container. Thaw them at room temperature before serving for the best soft caramel texture.
Caramel Making Safety First
Working with hot sugar mixtures, especially when making homemade candy like six minute caramels, requires careful attention to safety. Hot caramel can reach extremely high temperatures and cause severe burns if mishandled. Taking appropriate precautions ensures a safe and enjoyable cooking experience, allowing you to focus on the delicious outcome rather than potential hazards. Prioritizing safety is paramount in any kitchen endeavor, but especially when dealing with molten sugar. Always have a clear head and a tidy workspace when undertaking this sweet treat project.
Be careful with hot mixture
The caramel mixture will be extremely hot, easily exceeding 200°F (93°C) during boiling. Never taste the hot caramel directly from the pan. When stirring, be mindful of splatters, and keep children and pets away from the stovetop. Use oven mitts or heat-resistant gloves when handling the hot saucepan or pouring the caramel into the dish. If any hot caramel splashes onto your skin, immediately run the affected area under cold water for an extended period and seek medical attention if necessary. A cautious approach ensures a safe and successful caramel-making experience.
Use a candy thermometer
While this “six minute” recipe provides a time-based cooking guide, using a candy thermometer is always a valuable safety and accuracy tool, especially if you’re experimenting or worried about texture. For a soft caramel, the target temperature is typically around 245°F (118°C), often referred to as the “firm ball” stage. Monitoring the temperature, even for a timed recipe, can give you an extra layer of confidence that your mixture has reached the correct consistency. Clip the thermometer to the side of the pan, ensuring the tip doesn’t touch the bottom.
Customize Six Minute Caramels
One of the most exciting aspects of making homemade candy is the opportunity to customize and personalize your creations. These easy caramels serve as a fantastic base for a myriad of flavor variations, allowing you to tailor them to your unique preferences or specific occasions. Moving beyond the classic vanilla, you can infuse your six minute caramels with various spices, extracts, or even add-ins for an entirely new sweet treat experience. Experimentation is encouraged, turning a simple recipe into a canvas for culinary creativity. Don’t be afraid to make these soft caramels uniquely yours.
Experiment with flavors
Beyond vanilla, there are countless ways to flavor your six minute caramels. Try stirring in a pinch of sea salt with the vanilla for a delicious salted caramel. A dash of almond extract or coffee extract can add depth, while a sprinkle of cinnamon or cardamom offers a warm, spicy twist. For a citrusy note, a tiny bit of orange or lemon zest can be added after cooking. You could also swirl in a spoonful of peanut butter or a drizzle of chocolate after pouring into the dish. The possibilities are endless for creating truly personalized easy caramels that suit any palate.
Double the batch easily
This quick caramel recipe is incredibly scalable, making it simple to double the batch if you need a larger quantity for gifting, parties, or just a bigger stash of your favorite sweet treat. When doubling, ensure you use a larger heavy-bottomed saucepan (at least 4-5 quarts) to accommodate the increased volume. While the ingredients will simply be doubled, the cooking time might need a slight adjustment, typically an additional 1-2 minutes of boiling time, as a larger volume takes longer to reach the desired consistency. Always stir constantly, as the increased volume makes scorching a higher risk. You can also explore other main course recipes like Creamy Baked Mac and Cheese for a hearty meal.
