
This no-bake pineapple cream dessert is a delightful sweet treat that comes together with minimal effort. Perfect for any occasion, it features a crisp graham cracker crust and a light, airy pineapple cream filling. Enjoy a refreshing, simple no-bake recipe that promises big flavor without turning on the oven, making it an ideal choice for a quick dessert.
Key Takeaways
- Create a delicious no-bake pineapple cream dessert with minimal effort and no oven required.
- Utilize simple, readily available ingredients for a sweet pineapple squares.
- Master the easy graham cracker crust and a light, airy pineapple cream filling.
- Understand the importance of chilling for the perfect dessert setting and texture.
- Explore fun variations and smart storage tips for this family-friendly dessert.
Creating delicious desserts is simple. No-bake treats save time. This recipe offers sweet satisfaction. Enjoy bright pineapple flavors. It’s perfect for warm days.
Why Make This Easy No-Bake Dessert?
Choosing a no-bake pineapple cream dessert is more than just a convenience; it’s a smart culinary decision for several reasons. In today’s busy world, finding a sweet treat that doesn’t demand hours in the kitchen or a hot oven is a true win. This particular dessert stands out for its straightforward process, delightful flavor, and versatility, making it a go-to for both seasoned cooks and kitchen novices alike. If you’re looking for other convenient and delicious treats, check out our collection of desserts.
Quick Prep for Sweet Treat
The beauty of this easy pineapple dessert lies in its speedy preparation. Forget about preheating, baking times, and cooling racks. With just a few simple steps, you can assemble a refreshing cream dessert that tastes like it took all day. This quick dessert recipe involves mixing a few ingredients and letting the fridge do the rest of the work. It’s ideal for those spontaneous cravings or when you need a dessert in a pinch. The minimal hands-on time means you can spend less time in the kitchen and more time enjoying your friends and family.
Perfect for Any Occasion
Whether you’re hosting a summer barbecue, a casual potluck, or simply want a delightful evening treat, this sweet pineapple squares recipe fits perfectly. Its light, tropical flavor makes it particularly appealing during warmer months, offering a cool and refreshing contrast to rich, heavy desserts. However, its universal appeal means it’s just as welcome at holiday gatherings or celebratory events. It’s a crowd-pleaser that appeals to a wide range of palates, ensuring that everyone finds something to love in its creamy, fruity layers.
Simple Ingredients, Big Flavor
One of the most remarkable aspects of this simple no-bake recipe is how such basic ingredients come together to create such a profound and satisfying taste. You don’t need an exotic pantry or specialty stores; common items like graham crackers, cream cheese, whipped topping, and canned crushed pineapple are all you need. These humble components transform into a rich, tangy, and subtly sweet dessert that feels gourmet. The combination delivers a bright, refreshing taste that belies its simple construction, proving that sometimes, the best flavors come from the most uncomplicated origins. For more insights into the world of treats, you can explore the history of no-bake desserts on Wikipedia.
Gather Ingredients for This Pineapple Cream
Before you begin creating your delightful no-bake pineapple cream dessert, it’s crucial to have all your ingredients measured and ready. This ensures a smooth and enjoyable preparation process, minimizing interruptions and making the entire experience even easier. The components for this refreshing cream dessert are generally simple to find at any grocery store, reinforcing its reputation as a stress-free, quick dessert recipe. Having everything laid out in advance also allows you to double-check quantities, ensuring the perfect balance of flavors and textures in your finished pineapple graham cracker dessert.
What You Need for the Crust
The foundation of this delicious dessert is a classic graham cracker crust, providing a buttery, slightly sweet base that complements the creamy filling beautifully. For the crust, you will need:
- Graham Cracker Crumbs: Approximately 1 ½ cups, made from about 10-12 full graham cracker sheets. You can crush them yourself using a food processor or a Ziploc bag and a rolling pin, or purchase pre-made crumbs for extra convenience.
- Granulated Sugar: About ¼ cup. This adds a touch more sweetness to the crust, enhancing its flavor profile.
- Melted Unsalted Butter: ½ cup (1 stick). The butter binds the crumbs together, creating a firm, flavorful base that holds its shape when chilled.
Ensure your butter is fully melted and slightly cooled before combining it with the dry ingredients to prevent a greasy crust.
Essential Filling Components
The heart of your creamy pineapple dessert is its luscious filling, which is both light and rich. These ingredients work in harmony to create the signature flavor and texture:
- Cream Cheese: One 8-ounce block, softened to room temperature. This is key for a smooth, lump-free filling.
- Powdered Sugar (Confectioners’ Sugar): ¾ cup. This finely milled sugar dissolves easily, contributing to the filling’s silky texture and sweetness.
- Whipped Topping: One 8-ounce container, thawed. Often found in the freezer aisle, this provides the airy, light consistency that makes the cream so delightful. Ensure it’s fully thawed but still cold.
- Canned Crushed Pineapple: One 20-ounce can, *well-drained*. This is critical for preventing a watery filling. Make sure to press out as much liquid as possible.
For another creamy dessert that’s sure to impress, consider making our peanut butter brownie swirl cookies, which also feature rich, indulgent textures.
Fun Topping Ideas
While the dessert is fantastic on its own, a few toppings can elevate its presentation and add extra layers of flavor:
- Extra Crushed Pineapple: A small amount reserved from the drained can can be scattered on top for a burst of fruity freshness.
- Shredded Coconut: Toasted or untoasted, coconut flakes add a lovely tropical aroma and textural contrast.
- Maraschino Cherries: For a pop of color and a classic “pineapple upside-down cake” aesthetic.
- Fresh Mint Sprigs: A beautiful garnish that adds a touch of freshness and elegance.
Choosing your toppings wisely can transform a simple dessert into a visually appealing and even more delicious treat, perfect for any gathering.
Simple Steps: Graham Cracker Crust Base
The foundation of any great no-bake dessert is a well-made crust. For this no-bake pineapple cream dessert, a classic graham cracker base provides the perfect sturdy, sweet, and slightly crunchy contrast to the creamy filling. Crafting this graham cracker crust base is straightforward, requiring minimal effort but ensuring maximum flavor and structural integrity for your pineapple graham cracker dessert. Following these simple steps will guarantee a perfectly pressed crust every time, setting the stage for a truly delightful chilled pineapple treat.
Combining Dry Ingredients
The first step in creating your delicious crust involves combining the dry components. Begin by gathering your graham cracker crumbs and granulated sugar. If you’re making your own crumbs, ensure they are finely crushed to prevent a crumbly or uneven crust. Place the 1 ½ cups of graham cracker crumbs into a medium-sized mixing bowl. Add ¼ cup of granulated sugar to the crumbs. Using a spoon or a whisk, mix these two dry ingredients thoroughly until they are uniformly combined. This ensures that the sweetness is evenly distributed throughout the crust, contributing to a balanced flavor in your finished easy pineapple dessert.
Adding Melted Butter
Once your dry ingredients are well-mixed, it’s time to introduce the binding agent: melted butter. Carefully pour ½ cup of melted unsalted butter over the graham cracker and sugar mixture. It’s important that the butter is melted but not piping hot, as excessively hot butter can make the crumbs soggy. Use a fork or your hands to mix the butter into the crumbs. Continue mixing until all the crumbs are moistened and resemble wet sand. Every crumb should be coated in butter, which is what helps the crust hold its shape after chilling. This step is crucial for achieving that desirable firm and flaky texture. For those interested in the origins of this versatile cracker, learn more about graham crackers on Wikipedia.
Pressing Into Your Pan
Now that your buttery graham cracker mixture is ready, it’s time to create the base in your chosen pan. This recipe typically works best in an 8×8 or 9×9 inch square baking dish, or a 9-inch pie plate for round slices. Transfer the entire mixture into the bottom of the pan. Using the back of a spoon, a flat-bottomed glass, or your fingers, firmly and evenly press the crumbs into the bottom of the pan. Pay special attention to the corners and edges to ensure a compact and uniform crust. The firmer you press, the less likely your crust is to crumble when serving. Once pressed, you can optionally chill the crust for about 10-15 minutes while you prepare the filling. This extra chill time can help solidify the butter, making the crust even more stable and ready to hold your creamy pineapple filling, making for perfect sweet pineapple squares.
Whipping Up the Pineapple Cream Filling
The heart of this no-bake pineapple cream dessert is its light, airy, and wonderfully tangy filling. This section details the steps to create a perfectly smooth and flavorful pineapple cream that complements the graham cracker crust beautifully. The key to a truly outstanding filling lies in proper mixing techniques, ensuring all ingredients are incorporated without losing the delicate texture. This creamy pineapple dessert relies on a few simple tricks to achieve its signature consistency, making it an incredibly satisfying component of your easy pineapple dessert.
Beat Cream Cheese and Sugar Smooth
Start by placing your softened 8-ounce block of cream cheese into a large mixing bowl. It’s essential that the cream cheese is at room temperature; cold cream cheese will result in lumps, making it difficult to achieve a smooth consistency. Add ¾ cup of powdered sugar to the bowl. Using an electric mixer (handheld or stand mixer with a paddle attachment), beat the cream cheese and powdered sugar together on medium speed until the mixture is light, fluffy, and completely smooth. This usually takes about 2-3 minutes. Scrape down the sides of the bowl occasionally to ensure all ingredients are well combined. This initial step is critical for a lump-free, silky filling, forming the smooth base of your refreshing cream dessert.
Fold in Whipped Topping Lightly
Once your cream cheese and sugar mixture is perfectly smooth, it’s time to incorporate the thawed whipped topping. Gently add the 8-ounce container of thawed whipped topping (like Cool Whip) to the cream cheese mixture. It’s important to *fold* the whipped topping in, rather than beat it vigorously. Use a rubber spatula to gently incorporate the whipped topping, using an upward and outward motion, until no streaks of whipped topping remain. Overmixing at this stage can deflate the airiness of the whipped topping, leading to a denser filling. The goal is a light, cloud-like consistency that makes the dessert so enjoyable. This step contributes significantly to the light and airy texture of the chilled pineapple treat.
Mix in Crushed Pineapple Gently
The final step for the filling is adding the star ingredient: the crushed pineapple. As mentioned previously, ensure your 20-ounce can of crushed pineapple is *exceptionally well-drained*. You can use a fine-mesh sieve and even press down on the pineapple with the back of a spoon to extract as much liquid as possible. Excess liquid will make your filling watery and prevent it from setting properly. Gently fold the drained crushed pineapple into the cream cheese and whipped topping mixture. Again, use a light hand to avoid deflating the filling. Mix just until the pineapple is evenly distributed throughout the cream. The bright, tangy notes of the pineapple will infuse the creamy base, creating a harmonious blend of flavors. This completes your delicious easy pineapple dessert filling, ready for assembly. For another delightful treat that showcases creamy textures, try our quick Italian cream cake.
Assembling Your Easy No-Bake Dessert Layers
With your perfectly pressed graham cracker crust and your light, fluffy pineapple cream filling ready, it’s time for the exciting part: assembling your easy no-bake dessert layers. This is where the magic happens, transforming simple components into a visually appealing and utterly delicious no-bake pineapple cream dessert. The layering process is straightforward, but attention to detail ensures a neat and attractive presentation, making each of your sweet pineapple squares look as good as it tastes. This simple assembly makes it a perfect quick dessert recipe for any home cook.
Spreading Cream Mixture Evenly
Carefully spoon the entire pineapple cream filling mixture over your prepared graham cracker crust. If you opted to chill your crust, remove it from the refrigerator before this step. Using a spatula or the back of a spoon, gently spread the cream mixture evenly across the entire surface of the crust. Take your time to ensure the layer is uniform in thickness from edge to edge. A smooth, level top layer not only looks better but also ensures that each serving gets an equal amount of the creamy deliciousness. Avoid pressing down too hard, as you want to maintain the airy texture of the filling and not disturb the crust beneath. This even spreading is key to achieving consistent slices of your refreshing cream dessert.
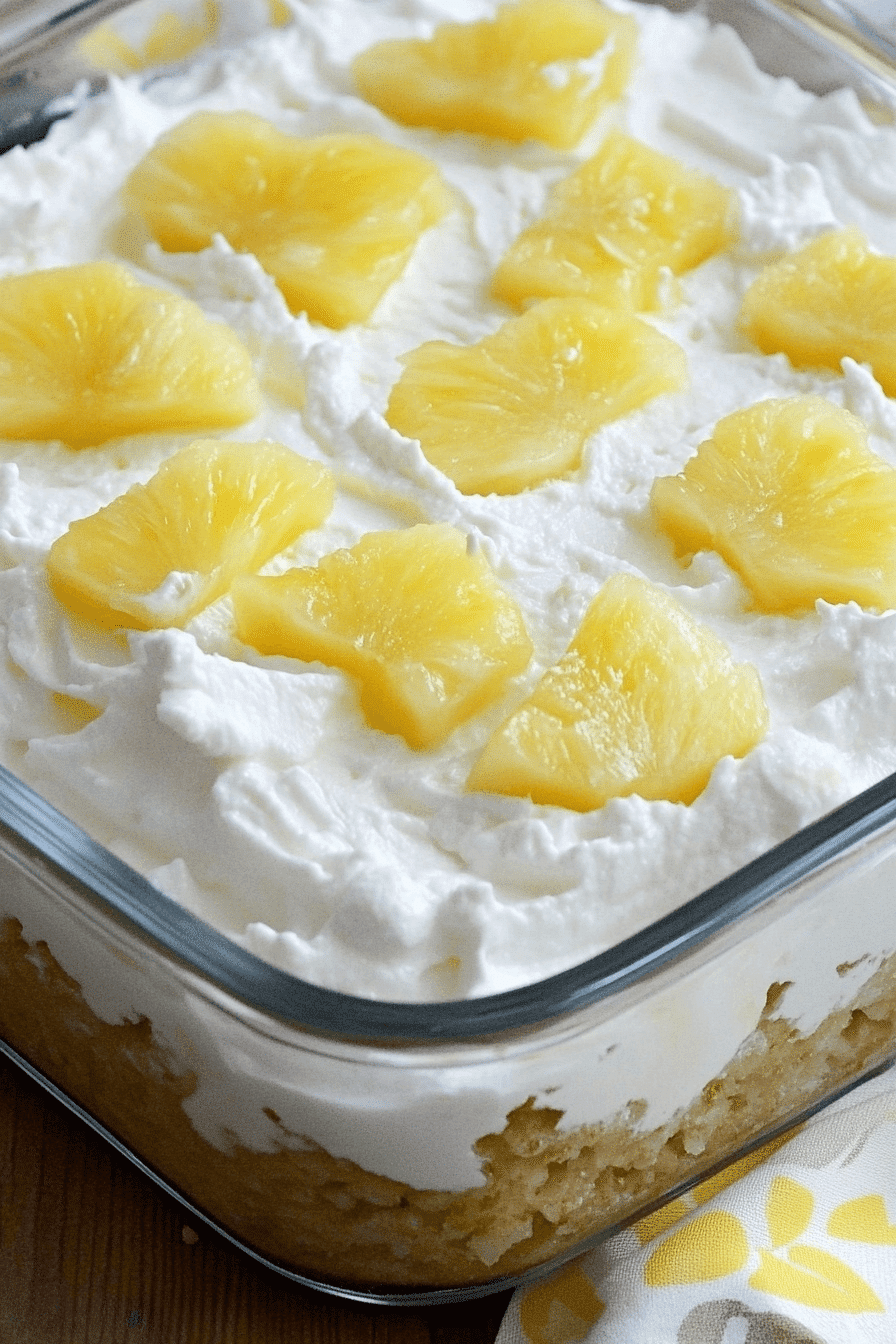
Adding Pineapple and Coconut Topping
Once the cream mixture is spread smoothly, you can add your desired toppings. For a classic look and an extra burst of tropical flavor, scatter some additional well-drained crushed pineapple evenly over the top. If you love coconut, this is the perfect time to sprinkle a generous amount of shredded coconut over the pineapple. Toasted coconut adds a lovely nutty flavor and a slight crunch, while untoasted provides a softer texture and a milder flavor. You can also add a few maraschino cherries for a vibrant color contrast, or fresh mint leaves for an elegant touch. The toppings not only enhance the visual appeal but also contribute to the overall taste and texture experience of this delicious no-bake dessert. The contrast of the smooth cream with the textured toppings is what makes this tropical dessert flavor so memorable.
Chill Time for Perfect Dessert Setting
After assembling your beautiful layers, the most important step for this no-bake pineapple cream dessert is allowing it sufficient chill time. This period in the refrigerator is not merely a suggestion; it’s a critical component of the recipe that ensures your dessert sets properly, develops its full flavor, and achieves that desirable firm yet creamy texture. Without adequate chilling, your refreshing cream dessert may be too soft to cut neatly, and its flavors won’t have fully melded. This crucial step transforms your assembled ingredients into a true chilled pineapple treat, ready to be enjoyed.
How Long to Refrigerate
For optimal results, your pineapple graham cracker dessert needs to chill in the refrigerator for at least 4 hours. However, for the best possible consistency and easiest slicing, chilling it for 6 hours or even overnight is highly recommended. The longer it chills, the firmer the cream cheese filling will become, and the more stable your dessert will be. If you’re preparing this for a party, plan to make it the day before or early in the morning to allow ample setting time. This extended chill time guarantees your sweet pineapple squares will hold their shape beautifully when cut, preventing any crumbly crust or runny filling mishaps, making it a perfect make-ahead dessert.
Why Chilling is Important
Chilling plays several vital roles in the success of this simple no-bake recipe. Firstly, it allows the melted butter in the graham cracker crust to solidify, binding the crumbs together and creating a firm base that won’t fall apart. Secondly, the refrigeration solidifies the cream cheese and helps the whipped topping mixture firm up, transforming it from a soft, spreadable cream into a sliceable, stable filling. This setting process is essential for the structure of the dessert. Thirdly, chilling allows the flavors to meld and deepen. The tang of the pineapple, the sweetness of the cream, and the buttery notes of the crust become more harmonious and pronounced after a few hours in the cold. Finally, serving this dessert cold enhances its refreshing qualities, especially on a warm day, making it a true easy summer dessert. Stay updated on our latest creations and chilling tips by following us on Pinterest and Instagram!
Best Ways to Serve Pineapple Squares
Once your no-bake pineapple cream dessert has fully chilled and set, the final step is to serve it in a way that highlights its deliciousness and appealing presentation. Getting clean, neat slices of these sweet pineapple squares can make all the difference, especially if you’re serving it for guests or at a special event. This section will guide you through the best techniques for cutting and garnishing, ensuring that each piece of your refreshing cream dessert is perfect and ready to impress. These serving tips ensure your party-ready dessert looks as good as it tastes.
Cutting Neat Dessert Slices
To achieve perfectly neat slices, there are a few tricks you can employ. First, ensure the dessert is thoroughly chilled – this is paramount for clean cuts. Remove the pan from the refrigerator just before you plan to serve. Use a sharp, thin-bladed knife, preferably one that has been run under hot water and wiped dry between each cut. The warm blade will glide through the creamy filling and crust more easily. Make your initial cuts to divide the dessert into squares or rectangles of your desired size. For an 8×8 inch pan, cutting into 9 or 12 squares is common. For a 9×9 inch pan, 16 squares are usually a good size. Wipe the knife clean after each slice to prevent crumbs or cream from transferring to the next piece. This simple tip will result in beautifully defined edges for every slice of your pineapple graham cracker dessert.
Extra Garnish Ideas
While the no-bake pineapple cream dessert is delicious on its own, a thoughtful garnish can elevate its visual appeal and add an extra layer of flavor or texture. Consider these ideas:
- Fresh Pineapple Chunks or Wedges: A small piece of fresh pineapple placed on top of each square immediately signals the star flavor of the dessert and adds a vibrant, tropical touch.
- Toasted Coconut Flakes: Lightly toast shredded coconut in a dry pan until golden brown. This intensifies its flavor and adds a delightful crunch and aroma. Sprinkle a pinch over each square just before serving.
- Maraschino Cherries: A classic pairing with pineapple, a single maraschino cherry provides a pop of bright red color and a hint of sweetness.
- Lime or Lemon Zest: A fine dusting of citrus zest can brighten the flavors and add a subtle, fragrant aroma.
- Whipped Cream Dollop: A small swirl of fresh whipped cream (homemade or store-bought) on top of each square adds an extra touch of decadence and creamy texture.
- Mint Leaves: A small sprig of fresh mint offers a beautiful green contrast and a refreshing aromatic element.
Choose garnishes that complement the tropical theme and enhance the overall experience, turning your homemade dessert into a masterpiece.
Tips for Best No-Bake Dessert Results
Achieving the perfect no-bake pineapple cream dessert is largely about paying attention to a few key details. While this is an easy pineapple dessert, small considerations can make a big difference in the final taste and texture of your refreshing cream dessert. These expert tips are designed to help you avoid common pitfalls and ensure your quick dessert recipe turns out flawlessly every single time, making your homemade dessert truly delicious and professional-looking. Following these guidelines will guarantee a successful and satisfying outcome for your tropical treat.
Draining Pineapple Fully
This tip cannot be overstated: drain your crushed pineapple completely. Excess liquid is the number one culprit for a runny, unset filling. When you open the can of crushed pineapple, pour it into a fine-mesh sieve set over a bowl. Let it sit for at least 15-20 minutes, allowing as much liquid as possible to drip out. For even better results, press down on the pineapple with the back of a spoon or a spatula to extract additional moisture. You might be surprised how much liquid can be squeezed out! Some people even lightly blot the pineapple with paper towels for extra assurance. A well-drained pineapple ensures a firm, stable, and perfectly textured filling, essential for your creamy pineapple dessert to hold its shape and provide that delightful mouthful of flavor.
Softening Cream Cheese Correctly
The texture of your cream cheese is crucial for a smooth filling. Always ensure your cream cheese is softened to room temperature before you begin mixing. Cold cream cheese will be stiff and will create lumps in your filling, no matter how long you beat it. To properly soften cream cheese, remove it from the refrigerator at least 30-60 minutes before you plan to use it. If you’re short on time, you can unwrap the block and microwave it on low power (e.g., 50% power) for 15-30 seconds, checking and flipping it halfway through, until it’s pliable but not melted. The goal is a soft, spreadable consistency that blends effortlessly with the powdered sugar, resulting in a silky, lump-free base for your delicious no-bake dessert. This attention to detail will elevate the quality of your pineapple graham cracker dessert, making it smoother and more enjoyable with every bite.
Fun Variations for Your Cream Dessert
While the classic no-bake pineapple cream dessert is absolutely delightful on its own, one of its greatest strengths is its versatility. This easy pineapple dessert provides a fantastic base for creativity, allowing you to customize the flavors and textures to suit your preferences or the occasion. Exploring fun variations can transform this simple no-bake recipe into an entirely new experience, adding your personal touch to a beloved classic. These ideas offer ways to enhance the tropical flavor or introduce exciting new elements, making each batch of your homemade dessert uniquely yours.
Adding Coconut to the Crust
For an extra layer of tropical flavor and texture right from the base, consider adding shredded coconut to your graham cracker crust. Before adding the melted butter, mix about ½ cup of finely shredded unsweetened coconut in with your graham cracker crumbs and granulated sugar. The coconut will toast slightly as the butter binds the crust, releasing a wonderful aroma and adding a subtle chewiness. For an even richer coconut flavor, you can lightly toast the shredded coconut in a dry pan for a few minutes until golden brown before incorporating it into the crust mixture. This simple addition elevates the overall tropical profile of your pineapple graham cracker dessert, creating a delightful surprise in every bite and complementing the creamy filling.
Flavor Boosts for Filling
Beyond the classic pineapple, there are several ways to infuse additional flavor into your creamy filling, turning it into an even more complex and intriguing tropical dessert flavor. Consider these ideas:
- Citrus Zest: A teaspoon of fresh lime or lemon zest folded into the cream cheese mixture along with the powdered sugar can brighten the pineapple flavor and add a zesty kick. Lime, in particular, pairs wonderfully with pineapple for a truly refreshing twist.
- Vanilla Extract: While not typically included, a half teaspoon of pure vanilla extract can deepen the overall sweetness and add a comforting warmth to the cream filling.
- Cream of Coconut: For an intensely tropical and rich flavor, replace a small portion (e.g., ¼ cup) of the whipped topping with cream of coconut. Be mindful that this will add extra sweetness and moisture, so adjust other ingredients as needed. This creates a Piña Colada-like essence.
- Spices: A tiny pinch of ground ginger or cardamom can add an unexpected but delightful warmth and complexity to the pineapple cream, especially if you enjoy more adventurous flavor combinations.
- Other Fruits: While pineapple is key, you can swirl in a small amount of another fruit purée (like mango or passion fruit) or finely diced fruit (like kiwi or mandarin orange segments, well-drained) into a portion of the filling for multi-fruit layers, turning it into an even more versatile party-ready dessert.
Experiment with these additions to find your favorite personalized version of this versatile creamy pineapple dessert. For other delicious creamy treats, consider our vanilla bean creme brulee cheesecake cupcakes.
How to Store Pineapple Cream Dessert
Proper storage is essential to keep your delightful no-bake pineapple cream dessert fresh, safe, and delicious for as long as possible. Given its creamy, perishable ingredients, understanding the best way to store this chilled pineapple treat is just as important as knowing how to make it. By following these simple guidelines, you can ensure that your easy pineapple dessert maintains its wonderful texture and flavor, allowing you to enjoy your sweet pineapple squares for days to come. This makes it a fantastic make-ahead dessert option for any busy schedule.
Keeping it Fresh in the Fridge
Once your refreshing cream dessert has fully set, it must be stored in the refrigerator. To keep it fresh and prevent it from absorbing odors from other foods in your fridge, cover the dessert tightly. You can do this by:
- Using Plastic Wrap: Place a layer of plastic wrap directly onto the surface of the dessert, ensuring it touches the cream to prevent a skin from forming, and then another layer over the top of the pan.
- Using Aluminum Foil: A tight layer of aluminum foil over the top of the pan works well, especially if your pan doesn’t have a lid.
- Using an Airtight Container: If you’ve cut individual squares, transfer them to an airtight food storage container. This is ideal for portion control and easy access.
Storing it correctly not only preserves its taste and texture but also keeps it safe from spoilage. Always return any leftover dessert to the refrigerator promptly after serving to maintain its quality. This careful storage ensures your homemade dessert stays delicious.
How Long it Lasts
When stored properly in the refrigerator, this no-bake pineapple cream dessert will typically last for 3 to 4 days. While it might still be edible beyond that, its quality, especially the freshness of the whipped topping and the integrity of the crust, will start to diminish. The graham cracker crust can begin to soften over time due to moisture from the filling, and the flavors might not be as vibrant. For the best taste and texture, it’s always recommended to consume it within the first two or three days. It is generally not recommended to freeze this dessert, as the texture of the cream cheese and whipped topping can change significantly upon thawing, often becoming watery or grainy. Enjoy your delicious no-bake dessert while it’s at its peak freshness!
Quick Look at Dessert Nutrition Facts
When indulging in a delightful treat like this no-bake pineapple cream dessert, it’s natural to have a curiosity about its nutritional profile. While this easy pineapple dessert is certainly a treat, understanding its general components can help you fit it into your dietary preferences. Please note that exact nutrition facts can vary significantly based on specific brands of ingredients used, portion sizes, and any modifications or additional toppings you choose. This overview provides a general idea, emphasizing that this is a delicious, occasional indulgence rather than an everyday staple, perfect for enjoying as part of a balanced diet. It’s a sweet satisfaction that can be mindfully enjoyed.
Calories Per Serving
A typical serving of this creamy pineapple dessert, when divided into 9 to 12 squares from an 8×8 or 9×9 inch pan, will likely range from approximately 250 to 350 calories per serving. This approximation considers the primary ingredients:
- Graham Crackers: Contribute carbohydrates and some fat from the butter.
- Butter: Adds a significant amount of fat and calories to the crust.
- Cream Cheese: A rich source of fat and calories, providing the dessert’s creamy texture.
- Powdered Sugar: Primarily provides carbohydrates and sweetness.
- Whipped Topping: Adds a lighter texture but still contributes fats and sugars.
- Crushed Pineapple: Contributes natural sugars and a small amount of fiber.
Factors that could increase the calorie count include using full-fat cream cheese, adding extra sugar, or generously applying high-calorie toppings like toasted coconut or extra whipped cream. Conversely, opting for reduced-fat cream cheese or light whipped topping could slightly lower the calorie count. Regardless, this delicious no-bake dessert offers a satisfying experience, and knowing the approximate calorie range allows you to enjoy it responsibly. It’s a rewarding treat, especially after a satisfying meal or as a delightful pick-me-up during the day.
Common Questions About This Dessert
Even with an easy pineapple dessert like the no-bake pineapple cream dessert, questions often arise, especially for those new to no-bake recipes or looking to customize their treats. Addressing these common inquiries can help clarify uncertainties and empower you to confidently make this refreshing cream dessert your own. From ingredient substitutions to planning ahead for events, these answers aim to provide practical advice for mastering this simple no-bake recipe, ensuring your chilled pineapple treat is always a success. These tips are especially useful for turning this into a convenient party-ready dessert.
Can I Use Fresh Pineapple?
While canned crushed pineapple is specified for its convenience and consistent moisture content, you technically *can* use fresh pineapple, but with a significant caveat. Fresh pineapple contains an enzyme called bromelain, which can prevent gelatin and dairy products (like the cream cheese and whipped topping) from setting properly, leading to a runny filling. To use fresh pineapple successfully, you must first cook it to deactivate the enzyme. Dice fresh pineapple very finely, then simmer it gently on the stovetop for about 10-15 minutes until softened. Drain it exceptionally well (even more thoroughly than canned pineapple) and allow it to cool completely before folding it into the cream cheese mixture. For most people, the ease and reliability of well-drained canned crushed pineapple make it the preferred choice for this creamy pineapple dessert. If you do choose fresh, ensure you’ve taken the necessary steps to cook and drain it to avoid a dessert disaster, preserving the integrity of your sweet pineapple squares.
Making Ahead for Parties
Absolutely! This no-bake pineapple cream dessert is an ideal make-ahead option, which is one of its most appealing qualities for entertaining. Preparing it in advance actually enhances its flavor and ensures it’s perfectly set and ready to serve when your guests arrive. You can assemble the entire dessert, including any toppings (excluding fresh garnishes like mint or delicate fresh fruit slices), up to 1-2 days before your party. Simply cover it tightly with plastic wrap or aluminum foil and store it in the refrigerator. This advance preparation frees up your time on the day of the event, allowing you to focus on other preparations or simply enjoy your guests. Just before serving, you can add any last-minute fresh garnishes for a beautiful presentation. This convenience makes it a truly stress-free and delicious party-ready dessert, making entertaining a breeze. Enjoy your perfectly planned and delicious homemade dessert.
