
Coconut Lime Ice Cream is a wonderfully refreshing treat, perfect for cooling down on a warm day. This homemade dessert combines the richness of coconut with the bright zest of fresh lime, creating a tropical flavor profile. It’s a surprisingly simple recipe to prepare, yielding a creamy, dairy-free scoop that everyone will love.
Key Takeaways
- Make creamy, dairy-free ice cream with coconut milk and fresh lime.
- An ice cream maker simplifies churning for the best texture.
- Proper freezing and storage are vital for scoopable ice cream.
- Creative variations and serving ideas enhance the experience.
Creating homemade ice cream is deeply rewarding. Fresh ingredients make all the difference. The vibrant lime brightens rich coconut. Chill time develops flavors perfectly. Enjoy your cool, tropical dessert.
Coconut Lime Ice Cream: A Cool Treat
Why You’ll Love This Recipe
This creamy coconut lime ice cream offers a refreshing escape, perfect for those seeking a delightful tropical flavor without dairy. It’s an incredibly straightforward recipe, designed to deliver a wonderfully smooth texture and vibrant taste that will quickly become a household favorite. Unlike store-bought options, making your own allows for complete control over ingredients, ensuring freshness and the perfect balance of sweet and tart. This dessert is also naturally vegan and gluten-free, making it accessible for many dietary needs. The bright, zesty lime beautifully complements the rich, subtle sweetness of coconut milk, resulting in a scoopable, irresistible treat that’s ideal for summer gatherings, backyard BBQs, or simply an evening indulgence. It’s a fantastic way to enjoy a guilt-free dessert that tastes incredibly decadent. Plus, the satisfaction of creating such a delicious homemade dessert is truly rewarding. Whether you’re a seasoned chef or a kitchen novice, this recipe is designed for success, yielding perfectly scoopable ice cream every time.
Quick Overview of the Process
The journey to homemade coconut lime ice cream begins with preparing a simple base. You’ll combine all your liquid and dry ingredients, ensuring the sugar fully dissolves to prevent a grainy texture in the final product. This mixture then needs to be thoroughly chilled in the refrigerator, a crucial step that helps the ice cream achieve its desired consistency during churning. Once the base is perfectly cold, it goes into your ice cream maker. The machine works its magic, slowly transforming the liquid base into a soft-serve consistency. Finally, the soft ice cream is transferred to an airtight container and placed in the freezer for several hours to firm up. This freezing period is essential for developing that firm, yet scoopable, texture we all crave from a refreshing treat like ice cream. Each step is simple, leading to a delicious result.
Ingredients for Your Coconut Lime Ice Cream
Pantry Staples for Creamy Goodness
Crafting truly delicious homemade coconut lime ice cream relies on a few key pantry ingredients that come together to form its luscious base. Beyond the star ingredients, you’ll need granulated sugar to provide the necessary sweetness, balancing the tartness of the lime. A touch of salt is also essential; it doesn’t make the ice cream salty, but rather enhances all the other flavors, bringing out the subtle nuances of both coconut and lime. Vanilla extract is often included to add a layer of complexity and warmth, complementing the tropical notes without overpowering them. Some recipes might call for a small amount of cornstarch or arrowroot powder as a thickener, which can help create an even smoother, creamier texture and prevent iciness, though it’s often optional if using high-quality full-fat coconut milk. Always check your recipe for specific quantities, but these common pantry items form the foundation of a truly exceptional frozen dessert.
Fresh Lime: The Key Flavor
The vibrant flavor of this ice cream truly hinges on the quality of your lime. Using fresh lime juice and zest is non-negotiable for achieving that authentic, bright, and tangy profile that makes this treat so refreshing. Bottled lime juice simply doesn’t compare; it often lacks the aromatic oils found in fresh zest and can have a duller, sometimes metallic taste. When selecting limes, look for ones that are firm, heavy for their size, and have smooth, bright green skin. Before juicing, roll them firmly on your counter to release more juice. The zest, in particular, carries a significant amount of the lime’s essential oils, contributing a concentrated burst of citrus aroma and taste that permeates the entire ice cream base. Don’t skimp on this ingredient; it’s what elevates this ice cream from good to absolutely extraordinary, delivering a powerful tropical flavor.
Full-Fat Coconut Milk is Best
For a truly rich and creamy coconut lime ice cream, full-fat coconut milk is the unequivocal choice. This ingredient is the backbone of its luscious texture and dairy-free composition. Unlike its light counterpart, full-fat coconut milk contains a higher percentage of coconut cream, which translates directly into a more decadent, velvety mouthfeel in your finished ice cream. The fat content is crucial for preventing the formation of large ice crystals, which can lead to a grainy or icy texture. When shopping, look for cans that specify “full-fat” or “premium” coconut milk, and avoid “light” or “reduced-fat” versions if you want the best possible consistency. Chill the cans overnight in the refrigerator before using; this allows the thick coconut cream to separate and rise to the top, making it easier to scoop out and incorporate into your base for maximum richness. This single ingredient decision significantly impacts the success of your homemade dessert.
Essential Equipment for Smooth Ice Cream
Your Ice Cream Maker Setup
Having the right equipment is crucial for achieving that perfectly smooth, scoopable homemade ice cream. A good quality ice cream maker is your most important tool. There are several types: freezer bowl models, compressor models, and those requiring ice and salt. For most home cooks, a freezer bowl model is popular and affordable. The key to success with these models is ensuring the freezer bowl itself is completely frozen before use, typically requiring 12-24 hours in a freezer that’s set to 0°F (-18°C) or colder. A properly frozen bowl will ensure efficient churning and prevent the base from warming too quickly. Compressor models are more expensive but offer the convenience of not needing pre-frozen bowls, allowing for back-to-back batches. Regardless of the type, familiarize yourself with your machine’s specific instructions for optimal performance. You can find many recipes for various main course meals that benefit from specialty equipment, like this creamy baked mac and cheese which requires an oven.
Bowls and Whisk for Mixing
Beyond the ice cream maker, you’ll need a few basic kitchen tools for preparing your base. A large mixing bowl, preferably one that is heat-safe if you need to warm any ingredients, is essential for combining everything. A sturdy whisk is perfect for ensuring all ingredients, especially sugar, are fully dissolved and evenly incorporated into the liquid base. This prevents any grittiness in your final product. For chilling the base, having an additional bowl or a large liquid measuring cup with a lid is ideal. You’ll also want a flexible spatula to scrape down the sides of the bowl and later to transfer the churned ice cream to its freezing container. These simple tools, when used correctly, pave the way for a beautifully blended and smooth coconut lime ice cream base, setting you up for success even before the churning begins.
How to Prepare Your Ice Cream Base
Mixing Wet and Dry Ingredients
The foundation of any great ice cream lies in its base, and for this creamy coconut lime version, careful mixing is paramount. Begin by combining the full-fat coconut milk, fresh lime juice, and any other liquid elements in your large mixing bowl. Next, gradually incorporate the granulated sugar, lime zest, and a pinch of salt. It’s often helpful to whisk the dry ingredients together first in a separate small bowl before adding them to the wet ingredients to ensure even distribution and prevent clumps. Pouring the wet ingredients into the dry while whisking continuously can also help. The goal here is to create a homogenous mixture where all flavors are uniformly distributed. Some recipes might suggest gently warming a portion of the coconut milk to help dissolve the sugar more effectively, but for many dairy-free recipes, room temperature or slightly chilled liquids work perfectly fine. A well-mixed base is the first step towards a smooth, inviting texture for your refreshing treat.
Dissolving Sugar for Smoothness
Ensuring the sugar is completely dissolved is a critical step in preparing your ice cream base. Undissolved sugar crystals can lead to a gritty, unpleasant texture in your final frozen dessert. To avoid this, after combining all ingredients, continue to whisk the mixture until you can no longer feel any granules when you rub a small amount between your fingers. If you’re using a method that involves gentle heating, such as warming a portion of the coconut milk on the stovetop, this process becomes much easier. Heat just until the sugar dissolves, being careful not to boil, then remove from heat and combine with the remaining chilled ingredients. Once dissolved, the base must be thoroughly chilled in the refrigerator for at least 2-4 hours, or preferably overnight. This chilling process is vital; a very cold base churns more efficiently and results in a creamier, less icy ice cream. Proper chilling reduces the time required in the ice cream maker and prevents premature melting, giving you the best possible starting point for a truly smooth and delightful frozen dessert.
Churning to Coconut Lime Ice Cream Perfection
Starting Your Ice Cream Maker
Once your coconut lime ice cream base is perfectly chilled, it’s time for the exciting churning phase. Make sure your ice cream maker’s freezer bowl is completely frozen, or your compressor model is ready. Turn on your machine before pouring in the mixture. This is a common and important tip; adding the liquid to a running machine prevents it from freezing instantly to the bottom of the bowl, which can hinder the churning process and potentially damage your paddle. Slowly pour the chilled base into the center opening of the running machine. The paddle will immediately begin to agitate the mixture, incorporating air and preventing large ice crystals from forming. As the machine churns, you’ll notice the liquid gradually thicken and expand, transforming into a delicious frozen treat. The churning time varies depending on your machine and the initial temperature of your base, but it typically takes between 20-30 minutes for most home models.
Observing Soft-Serve Consistency
During the churning process, keep a close eye on the consistency of your developing ice cream. The goal is to reach a texture similar to that of soft-serve ice cream – firm enough to hold its shape, yet still pliable and somewhat fluid. It should have significantly increased in volume and appear light and airy. You’ll notice the paddle might start to labor slightly as the mixture thickens. If your machine sounds strained or stops churning altogether, it’s a sign that your ice cream has reached its maximum thickness for the churning phase. At this point, the ice cream is ready for its final freeze. Resist the urge to over-churn, as this can sometimes lead to a less creamy texture. The soft-serve consistency is delicious on its own, but for a truly firm, scoopable ice cream, the next step of freezing is crucial. For more delicious desserts, visit our collection.
Freezing for the Best Scoopable Ice Cream
Transferring to an Airtight Container
After your coconut lime ice cream has reached a soft-serve consistency in the churner, the next critical step is to transfer it carefully to an appropriate container for final freezing. Choose a freezer-safe container that is specifically designed for storing ice cream or other frozen foods. Glass or durable plastic containers with tight-fitting lids work best. Avoid containers that are too wide and shallow, as this can expose more surface area to air, potentially leading to freezer burn. Use a flexible spatula to gently scrape all the ice cream from the churner into your chosen container. Smooth the top surface of the ice cream with the spatula to create an even layer. Before sealing, you can also place a piece of parchment paper or plastic wrap directly on the surface of the ice cream, pressing it down to remove any air pockets. This extra layer provides an additional barrier against ice crystal formation and freezer burn, helping maintain that smooth, creamy texture.
Minimum Four Hours Freezing Time
Once transferred and sealed, your soft coconut lime ice cream needs sufficient time in the freezer to firm up properly. A minimum of four hours is generally recommended, but for the firmest, most scoopable results, freezing overnight is ideal. Place the container in the coldest part of your freezer, ideally towards the back, where temperature fluctuations are minimal. During this period, the ice cream will continue to harden, allowing the flavors to meld and mature further. While it’s tempting to sample it earlier, patience truly pays off here. Rushing the freezing process can result in a softer, less satisfying texture. A properly frozen homemade dessert will be firm enough to scoop beautifully, yet still creamy and rich, offering the perfect contrast to its bright, tangy flavor. This final chill ensures your refreshing treat is ready for optimal enjoyment.
Expert Tips for Creamy Ice Cream
Always Use Full-Fat Coconut Milk
To achieve the most luxurious, creamy coconut lime ice cream, committing to full-fat coconut milk is non-negotiable. This isn’t just a suggestion; it’s a fundamental principle for dairy-free ice cream success. The higher fat content in full-fat coconut milk provides the richness and body that mimics traditional dairy-based ice creams. This fat helps to interfere with the formation of large ice crystals, which are responsible for an icy or grainy texture. Light coconut milk, with its reduced fat and increased water content, will inevitably produce an icier, less satisfying result. For the best outcome, choose high-quality brands and ensure the cans are well-chilled before opening, allowing the thick cream to separate. This cream is where the magic happens, contributing immensely to the smooth, velvety mouthfeel of your homemade dessert.
Fresh Lime for Vibrant Flavor
While convenience might tempt you to reach for bottled lime juice, the difference in flavor when using fresh lime is monumental. Freshly squeezed lime juice and, crucially, lime zest, infuse the ice cream with a vibrant, aromatic, and tangy punch that bottled versions simply cannot replicate. The zest contains concentrated essential oils that release a powerful burst of citrus, deepening the tropical flavor profile. Always wash your limes thoroughly before zesting and juicing. A microplane zester works wonderfully to extract only the bright green zest, avoiding the bitter white pith. The quantity of lime can also be adjusted to your preference; some love a strong, tart kick, while others prefer a more subtle hint. Experimentation is welcome, but always start with fresh. This commitment to fresh ingredients is key for a truly refreshing treat.
Proper Storage Prevents Freezer Burn
Proper storage is just as important as the preparation steps for maintaining the quality of your homemade ice cream. Freezer burn occurs when ice cream is exposed to air, causing moisture to evaporate and leading to large ice crystals and a dry, flavorless texture. To prevent this, always store your coconut lime ice cream in an airtight container. Press a piece of plastic wrap or parchment paper directly onto the surface of the ice cream before securing the lid. This creates an extra barrier against air. Furthermore, try to keep the container towards the back of your freezer, where temperatures are more consistent and less prone to fluctuations from opening and closing the freezer door. For ideas on serving, don’t forget to check out our Carina Recipes Pinterest page for inspiration.
No Ice Cream Maker? Try This!
Manual Stirring for Creamy Results
Even without an ice cream maker, you can still achieve a surprisingly creamy texture for your coconut lime ice cream, though it requires a bit more effort. The key is frequent manual stirring during the initial freezing process. Pour your well-chilled ice cream base into a shallow, freezer-safe metal or glass dish. Place it in the freezer. After about 30-45 minutes, when the edges begin to freeze and ice crystals start to form, remove the dish and vigorously stir the mixture with a whisk or a sturdy fork. Break up any ice crystals and incorporate the semi-frozen edges into the still-liquid center. Return it to the freezer and repeat this stirring process every 30 minutes for the next 2-3 hours. This continuous agitation mimics the action of an ice cream maker, breaking down ice crystals as they form and incorporating air, which helps create a smoother, less icy consistency. It’s a labor of love, but the results are worth the effort for a delicious dairy-free ice cream.
Shallow Dish Freezing Method
The shallow dish method complements manual stirring perfectly by maximizing the surface area exposed to the cold, allowing for faster and more even freezing. Instead of a deep container, opt for a baking dish (like a 9×13 inch pan) or a similar wide, flat freezer-safe container. This design helps the mixture to chill quickly, facilitating the formation of smaller ice crystals when you stir. Ensure the dish is clean and dry before pouring in the base. Once the base is in the shallow dish, cover it tightly with plastic wrap to prevent freezer burn and absorption of freezer odors. Place it flat in the freezer. This method speeds up the initial freezing process, making the manual stirring more effective and less time-consuming overall. Remember, even with this method, you’ll still need to allow for a final undisturbed freezing period of several hours once the desired consistency is achieved through stirring, similar to the traditional churned method. For other quick and simple recipes, try a quick Italian cream cake for another satisfying dessert.
Serving Ideas for Coconut Lime Ice Cream
Softening for Easy Scooping
To fully appreciate the creamy texture and refreshing tropical flavor of your coconut lime ice cream, it’s often best to allow it to soften slightly before serving. Straight from the freezer, homemade ice cream can be quite hard due to the absence of commercial emulsifiers and stabilizers. To achieve perfect scoopability, remove the container from the freezer about 10-15 minutes before you plan to serve. Place it on the counter at room temperature. For an even thaw, avoid microwaving, as this can create inconsistent patches of melted and rock-hard ice cream. During this short waiting period, the ice cream will soften just enough to allow your scoop to glide through effortlessly, creating those beautiful, smooth scoops everyone loves. This little bit of patience makes a big difference in the serving experience.
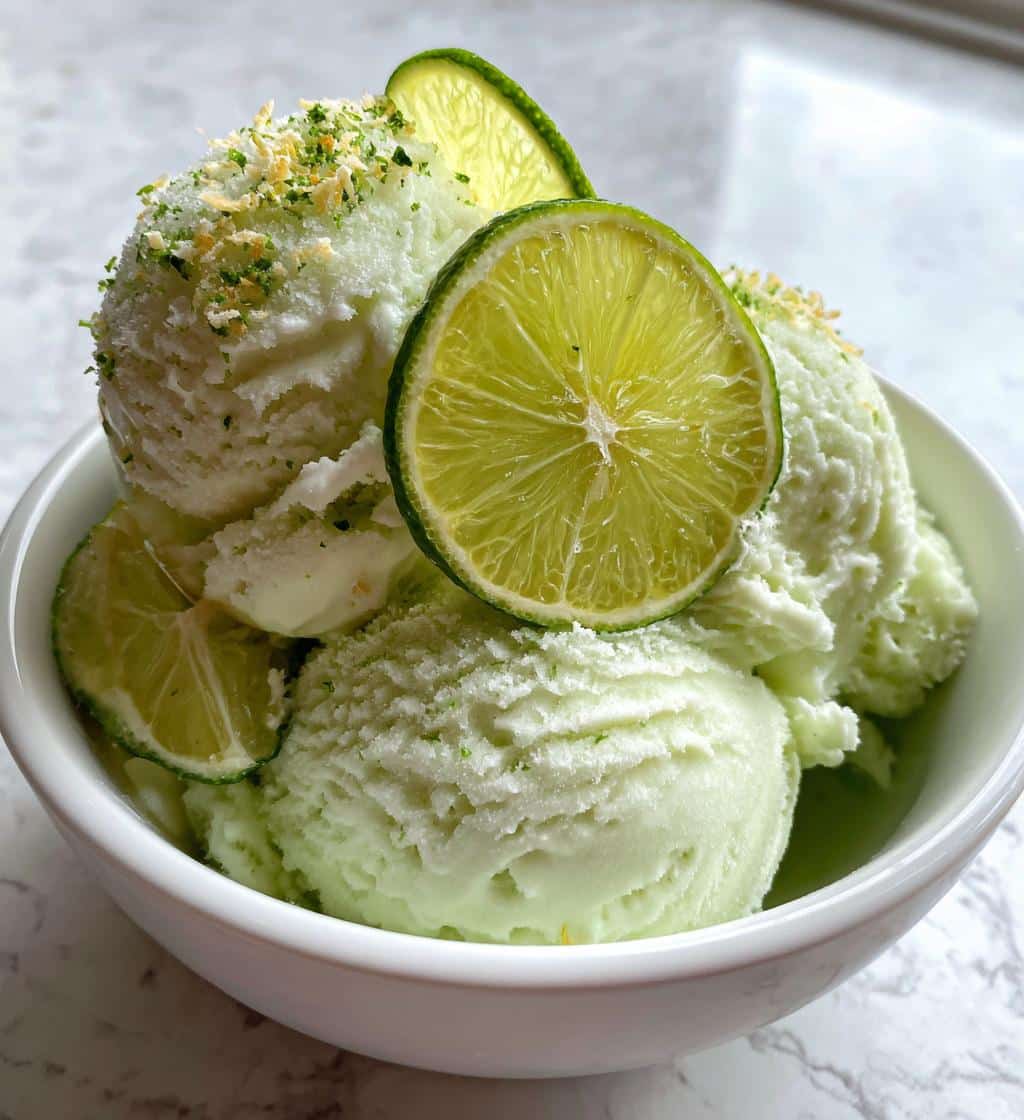
Delicious Garnish Suggestions
Enhance the visual appeal and flavor of your coconut lime ice cream with simple yet delicious garnishes. A sprinkle of fresh lime zest immediately signals the key flavor and adds a beautiful pop of color. Toasted coconut flakes, lightly browned in a dry pan until fragrant, offer a delightful crunch and intensify the coconut notes. A sprig of fresh mint provides a refreshing herbal counterpoint and vibrant green contrast. For a touch of sweetness and texture, consider a drizzle of honey, agave nectar, or a light coconut caramel sauce. Edible flowers like orchids or hibiscus petals can also add an elegant, tropical touch, perfect for special occasions. These garnishes not only make your dessert look more inviting but also add layers of flavor and texture, elevating the simple recipe to a gourmet experience.
Pair with Tropical Fruits
The bright, tangy profile of coconut lime ice cream makes it an ideal companion for a variety of tropical fruits. Fresh mango slices or diced pineapple add natural sweetness and juicy texture, complementing the ice cream’s flavors beautifully. Sliced kiwi offers a tart and vibrant contrast, while a handful of fresh berries like raspberries or blueberries can introduce a lovely pop of color and a different fruity dimension. For an extra tropical punch, consider serving scoops alongside grilled or roasted pineapple, which caramelizes its sugars and intensifies its flavor. A simple fruit salad featuring these tropical delights can turn your ice cream into a more substantial and visually stunning dessert, perfect for a summer gathering. You can also get more inspiration from our Instagram page.
Storing Your Homemade Ice Cream Safely
Airtight Container is Key
The single most important rule for safely storing your homemade ice cream and preserving its quality is to use an airtight container. Exposure to air is the primary cause of freezer burn, which manifests as icy crystals and a degraded texture and flavor. Invest in good quality, freezer-safe containers specifically designed for ice cream or other frozen goods. These containers often have a specific shape that minimizes air pockets. If you don’t have dedicated ice cream containers, any plastic or glass container with a very tight-fitting lid will suffice. For added protection, always press a piece of plastic wrap or parchment paper directly onto the surface of the ice cream before sealing the lid. This creates an additional barrier against circulating air and helps prevent ice crystals from forming on top, keeping your coconut lime ice cream creamy and delicious longer.
Shelf Life in the Freezer
While commercial ice creams can last for months due to stabilizers and preservatives, homemade dairy-free ice cream typically has a shorter optimal shelf life. For the best flavor and texture, it’s recommended to consume your coconut lime ice cream within 1 to 2 weeks. Beyond this timeframe, even with proper storage, the texture may start to degrade, becoming icier, and the vibrant fresh lime flavor might diminish. While it will still be safe to eat for up to 1-3 months, the quality won’t be as high. To ensure you enjoy it at its peak, consider making smaller batches if you don’t plan to consume the entire amount quickly. This allows you to always have a fresh supply of your favorite refreshing treat without compromising on quality or flavor.
Avoid Temperature Fluctuations
One of the silent enemies of homemade ice cream quality is temperature fluctuation. Every time your freezer door is opened, or the ice cream container is moved to a warmer part of the freezer, the ice cream experiences a slight thaw and refreeze cycle. These cycles encourage the growth of larger ice crystals, leading to a grittier, less creamy texture over time. To minimize this, store your coconut lime ice cream in the coldest part of your freezer, usually towards the back, rather than in the door, which experiences the most significant temperature changes. Additionally, try to retrieve the ice cream quickly when you want a scoop, and return it to the freezer promptly. This attention to consistent temperature will help maintain the smooth, creamy consistency you worked hard to achieve, ensuring every spoonful is as delightful as the first. This is similar to preserving the freshness of ingredients in dishes like salmon spinach pasta dish.
Creative Variations to Your Favorite Treat
Experiment with Other Citrus
While lime is the star of this refreshing treat, the base recipe is incredibly versatile, inviting you to experiment with other citrus fruits. Lemon can offer a brighter, tangier profile, creating a lemon-coconut sorbet-like experience. For a slightly sweeter, more aromatic twist, consider using oranges or tangerines, which would introduce a sunny, mellow citrus note. Grapefruit, especially pink grapefruit, could add a lovely bitterness and complexity, balancing the sweetness of the coconut milk beautifully. When substituting, remember that different citrus fruits have varying levels of acidity and sweetness. You might need to adjust the amount of sugar in the recipe slightly to achieve your desired balance. Always use fresh juice and zest for any citrus variation to capture the authentic and vibrant flavors, ensuring your homemade dessert is always a hit.
Adjusting Sweetness and Tartness
One of the greatest advantages of making homemade ice cream is the ability to customize it precisely to your taste. The sweetness and tartness of your coconut lime ice cream can be easily adjusted. If you prefer a more tart ice cream, you can slightly increase the amount of lime juice or reduce the sugar. Conversely, for a sweeter profile, add a bit more sugar to the base mixture. It’s crucial to taste the base mixture before chilling and churning. While the cold dulls flavors somewhat, a base that tastes perfectly balanced when liquid will generally translate well once frozen. If you’re sensitive to sugar, you can also experiment with natural sweeteners like agave nectar or maple syrup, keeping in mind that these might slightly alter the texture due to their different sugar compositions. Remember that the full-fat coconut milk provides a rich background that can handle both bolder tartness and increased sweetness, making this a truly adaptable simple recipe. For general information on ice cream, you can visit Wikipedia’s ice cream page.
Understanding Your Ice Cream’s Nutrition
Calories Per Serving
When enjoying homemade coconut lime ice cream, understanding its nutritional aspects can be helpful for those monitoring their intake. The exact calorie count per serving will depend heavily on the specific ingredients and quantities used, as well as the serving size. However, generally, full-fat coconut milk contributes a significant portion of the calories due to its fat content. Sweeteners like granulated sugar also add substantially to the calorie count. A typical serving (around ½ cup or 100g) of this dairy-free ice cream might range from approximately 180 to 250 calories, depending on the recipe and additions. It’s a treat, so while it can be part of a balanced diet, moderation is key, especially if you’re mindful of calorie intake. For detailed information on food science, consider exploring coconut milk on Wikipedia.
Fat and Sugar Content
The fat content in coconut lime ice cream primarily comes from the full-fat coconut milk, which is rich in medium-chain triglycerides (MCTs). While these fats are different from animal fats, they are still caloric. A typical serving might contain 15-20 grams of fat. The sugar content, largely from granulated sugar, will also be notable, usually ranging from 20-30 grams per serving, depending on how much sweetness you prefer. For a simple recipe, it is still a dessert, and its nutritional profile reflects that. Those looking to reduce sugar can experiment with alternative sweeteners, as discussed in creative variations, though this can sometimes impact texture. Being aware of these components allows for informed enjoyment of this delicious tropical dessert.
