

Cheesecake Crescent Rolls offer a creamy and flaky shortcut to a stunning dessert, requiring minimal effort for maximum payoff. This recipe is fast and perfect for beginners, combining buttery dough with a tangy cheesecake filling for a crowd-pleasing treat.
Cheesecake Crescent Rolls combine the convenience of canned dough with a rich, velvety filling. You get the classic taste of cheesecake without the complicated water bath or long chilling times required for traditional recipes. This simple approach means you can enjoy a decadent dessert quickly and with total confidence in your baking skills.
This recipe is an ideal option when you need a fast treat for guests or a simple dessert for your family on a weekday evening. By using refrigerated crescent roll dough, you save significant time while still achieving a delightful, flaky crust. Let’s look at the key steps and ingredients needed to make this sweet creation.
Key Takeaways
- These rolls use just a few pantry staples for a rich cheesecake flavor.
- The total preparation and bake time is less than one hour.
- You can customize the filling with fruit jam, spices, or lemon zest.
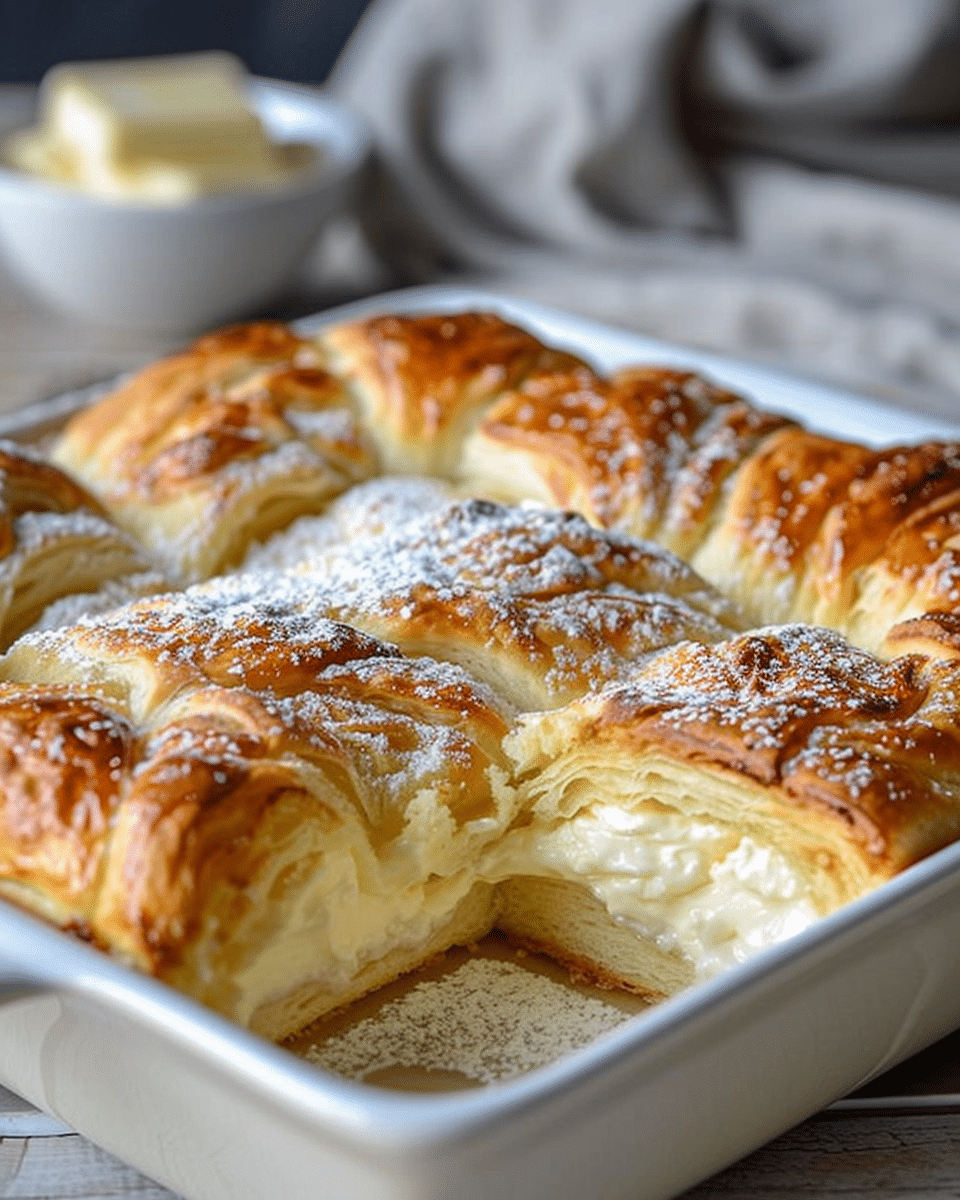
Cheesecake Crescent Rolls are prepared by layering a cream cheese filling between two sheets of refrigerated crescent dough and baking until golden brown. This method delivers a soft, tangy cheesecake center encased in a buttery, flaky pastry shell that’s ready to serve in about an hour.
Understanding the Core Ingredients
To create perfect Cheesecake Crescent Rolls, you need quality, room-temperature ingredients that blend together smoothly. The foundation of this treat relies heavily on the proper preparation of the cream cheese and sour cream mixture. Always ensure your dairy components are completely softened before you begin mixing.
The Role of Cream Cheese and Sour Cream
The cream cheese provides the essential dense, rich, and slightly savory base of the filling, mimicking a true cheesecake texture. Sour cream is added to introduce a crucial tangy element that cuts through the sweetness and richness of the cheese. Together, these two ingredients create a balanced and irresistibly creamy center.
Using full-fat cream cheese is highly recommended, as it delivers the best texture and flavor for the filling. If you choose low-fat options, the filling might become slightly softer and won’t set up as firmly during the baking process. Making sure both are at room temperature ensures a smooth, lump-free filling.
Secrets to a Flaky Crescent Crust
The crescent roll dough is a fantastic shortcut, providing that buttery, layered pastry texture without the effort of making laminated dough from scratch. Learning how to handle the refrigerated dough correctly is the most important step for a successful final presentation.
Handling the Dough with Care
When you unroll the first can for the bottom crust, you must gently press all the pre-cut seams together to form a solid sheet. Do this lightly, as overworking the dough can make it tough instead of flaky. A little dusting of all-purpose flour on your work surface helps prevent sticking when rolling the second sheet for the top.
For the top layer, handle the dough with even more care, simply laying it gently over the filling rather than pressing it down firmly. This light touch allows the pastry layers to puff up beautifully as they bake. You can find more helpful baking techniques in my post on baking.
Mixing and Preparing the Cheesecake Filling
Creating the cheesecake layer is straightforward, but it requires patience to achieve that signature silky-smooth texture. You should use a hand mixer or stand mixer to fully incorporate the ingredients, scraping down the bowl as you go.
Achieving a Smooth, Creamy Texture
Begin by beating the softened cream cheese and sour cream together until they are completely smooth, which prevents any lumps from being trapped. Next, slowly add the granulated sugar, beating the mixture until it becomes noticeably lightened and fluffy in texture. This aeration is important for the filling’s overall consistency.
You should incorporate the eggs one at a time, mixing just until each one is combined before adding the next egg. Over-mixing the eggs can result in a tougher filling, so always use medium speed and stop mixing once everything looks uniform. The final additions of vanilla extract and lemon juice will finish the classic cheesecake flavor.
Assembly: Layering the Cheesecake Crescent Rolls
The assembly process for your Cheesecake Crescent Rolls is fast and efficient, which is the main advantage of this recipe. Proper layering ensures that the filling stays contained and the rolls bake evenly without leaking out the sides.
Spreading the Filling Evenly
After placing the bottom dough layer in your greased 9×13-inch pan, pour the cheesecake mixture directly over it. Use an offset spatula or the back of a large spoon to spread the filling all the way to the edges of the dough. Ensuring the filling is a consistent thickness promotes uniform baking.
Carefully place the second sheet of crescent dough over the filling, aligning the edges with the bottom layer as best you can. You can gently pinch the two dough layers together around the perimeter of the baking dish to seal the filling. This small step helps prevent the cheesecake mixture from bubbling out while it bakes.
Baking Instructions for Golden Perfection
Baking these rolls requires a consistent oven temperature and watchful timing to achieve a deeply golden top crust and a fully set filling. The goal is a flaky pastry exterior with a creamy, firm interior.
Ideal Temperature and Timing
You should preheat your oven to $350^\circ\text{F}$ as specified, allowing it ample time to reach and maintain this temperature before placing the rolls inside. The sweet spot for baking time is approximately 30 minutes. Keep an eye on the top of the pastry; it should turn a beautiful golden-brown color.
To check for doneness, look for the edges of the dough to be crisp and the center filling to appear set, without excessive jiggle when you gently shake the pan. If the dough seems to be browning too fast, you can loosely tent the pan with foil for the last 5-10 minutes of baking.
Cooling and Serving the Cheesecake Delight
Patience is key after taking the Cheesecake Crescent Rolls out of the oven, as they need proper cooling time. Cutting them too soon can cause the warm filling to run out, ruining the perfect slice.
The Importance of Complete Cooling
You must allow the cheesecake rolls to cool completely to room temperature before you consider slicing them. This cooling time allows the structure of the eggs and flour in the filling to fully set, guaranteeing neat and clean slices. Placing the pan on a wire rack speeds up this process.
Once cooled, a generous dusting of powdered sugar over the top layer of the pastry adds a professional, elegant finish and extra sweetness. Use a sharp knife to cut the dessert into squares or triangles, making them easy to pick up and serve for any occasion, from an afternoon snack to a holiday treat.
Flavor Variations to Customize Your Rolls
While the classic recipe for Cheesecake Crescent Rolls is wonderful, you have many opportunities to add your personal touch. Changing the flavor profile is simple and can turn this recipe into an entirely new dessert experience for your guests.
Adding Fruit or Spice to the Filling
Consider swirling in a few tablespoons of raspberry, strawberry, or apricot jam right over the cream cheese filling before adding the top layer of dough. This adds a delightful fruity burst of flavor and a beautiful color contrast when sliced. You can also mix in 1/2 teaspoon of lemon zest with the lemon juice for a brighter, more pronounced citrus note.
For a warm, comforting twist, try sprinkling a mixture of cinnamon sugar over the entire top crust right before baking. The cinnamon will toast and caramelize, adding a crunchy texture and an aromatic depth that is reminiscent of a traditional Sopapilla dessert. This pairs nicely with a cozy hot soup or stew on a chilly evening.
Pairing and Presentation Ideas
The beauty of the Cheesecake Crescent Rolls lies in their versatility for different occasions. Whether serving them as a hearty breakfast item or an elegant dessert, you can enhance their appeal with simple additions.
Serving Suggestions for Brunch and Dessert
For an elevated dessert presentation, serve each slice with a simple dollop of freshly whipped cream or a scoop of vanilla bean ice cream. Drizzling a light caramel or chocolate sauce over the top can make this dish feel even more indulgent. Consider adding this recipe to your next gathering by checking out more ideas on our Desserts category page.
If you plan to serve them for brunch, pair them with fresh berries like raspberries, blueberries, or sliced strawberries. A hot beverage, such as a strong black coffee or a delicate cup of black tea, perfectly balances the richness of the cream cheese filling. For more food inspiration, check out our Pinterest.
Troubleshooting Common Baking Issues
Even with an easy recipe like this one, you might encounter a few minor hiccups during the baking process. Knowing how to quickly fix these problems ensures you still end up with a flawless dessert.
Fixing a Soggy Bottom Crust
A soggy bottom crust is usually caused by the filling moisture seeping into the dough during the baking time. To prevent this, make sure you press the seams of the bottom crescent dough layer together tightly. For extra security, you can lightly pre-bake the bottom dough layer for about 5 minutes before adding the filling and the top dough layer.
Another common issue is an overly brown top layer before the center filling has fully set. If the top begins to darken prematurely, simply cover the pan loosely with aluminum foil for the remainder of the baking time. This shield will reflect heat and allow the inside to finish cooking without burning the pastry.
The History of Crescent and Cheesecake
While this recipe is modern and Americanized, its components trace back through centuries of pastry and dairy history. Understanding the origins of the ingredients adds a fascinating layer to your baking experience.
Tracing the Pastry’s Roots
The crescent shape of the dough, known as a ‘kipferl,’ is a pastry that originated in Austria dating back to the 13th century. The modern croissant, which is the French refinement of the kipferl, was made popular in Paris in the 19th century. Today’s convenient refrigerated crescent dough is an American invention that makes quick work of this traditional shape.
Cheesecake, meanwhile, is much older, with roots tracing all the way back to ancient Ancient Greece. Over time, it evolved from a simple cake made with cheese curd and honey to the creamy, sugar-rich dessert we know today, especially after American dairymen created modern cream cheese in the late 19th century.
Storing Leftovers and Making Ahead
Proper storage is essential to keep your baked Cheesecake Crescent Rolls fresh and delicious for several days. Planning ahead also makes this simple recipe even more convenient for entertaining.
Best Methods for Freshness
Because these rolls contain a cream cheese filling, they must be stored in the refrigerator after they have completely cooled. Place any leftovers in an airtight container or cover the baking pan tightly with plastic wrap to protect them from drying out. They will keep well for up to 3 days, maintaining their flavor and texture.
You can prepare the cheesecake filling up to one day in advance and store it in the refrigerator. When you are ready to bake, just let the filling sit at room temperature for about 30 minutes before assembling the dish with the refrigerated crescent dough. This makes quick work of the assembly process on the day you plan to serve them. For more quick meals, check out this dinner recipe.
Conclusion
Cheesecake Crescent Rolls truly are the perfect marriage of rich dessert flavor and practical convenience for any home baker. You can easily achieve a flaky, golden crust that surrounds a warm, creamy, and tangy cheesecake filling with minimal fuss. This straightforward recipe ensures a delightful, professional-quality treat that you’ll want to make again and again.
This simple process makes creating a stunning dessert accessible to everyone, no matter your experience level in the kitchen. Remember to let the rolls cool completely before slicing, then dust them with powdered sugar for the perfect finish. For more great ideas and daily cooking inspiration, feel free to visit us on Instagram.
Print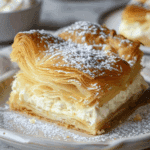
Cheesecake Crescent Rolls
- Total Time: 1 hour 10 minutes
Description
Cheesecake Crescent Rolls are a delightful pastry that combines the creamy richness of cheesecake with the buttery flakiness of crescent rolls. They’re perfect for breakfast, dessert, or a special treat any time of the day.
Ingredients
The Filling
- 16 oz. cream cheese softened
- 1/4 cup sour cream
- 1 cup granulated sugar
- 2 large eggs
- 1 tablespoon lemon juice
- 1 teaspoon vanilla extract
- 1/4 teaspoon kosher salt
- 1/4 cup all-purpose flour plus more for dusting
The Crust
- 2 cans 8 oz. each crescent roll dough
- Powdered sugar for dusting
Instructions
- Prepare the oven and baking pan: Preheat the oven to 350°F. Grease a 9- x 13-inch baking pan with cooking spray and set aside.
- Make the cheesecake filling: In a large mixing bowl, beat the cream cheese and sour cream until smooth. Add the sugar and mix until light and fluffy. Add the eggs one at a time, beating well after each addition. Mix in the lemon juice, vanilla extract, and salt. Add the flour and mix until fully incorporated.
- Roll out the dough: Unroll one can of crescent roll dough, keeping it in a rectangular sheet. Press it into the bottom of the prepared baking pan.
- Add the filling and top layer: Spread the cheesecake filling evenly over the dough in the pan. Unroll the second can of crescent roll dough and place it on top of the filling.
- Bake: Bake in the preheated oven for about 30 minutes, or until the top is golden brown and the filling is set. Allow to cool completely.
- Finish and serve: Dust the cooled rolls with powdered sugar and cut them into your desired shapes. Enjoy!
Notes
Serving Suggestions: Serve these Cheesecake Crescent Rolls dusted with powdered sugar and a dollop of whipped cream. They pair perfectly with a hot cup of coffee or tea, making them an ideal choice for breakfast, brunch, or dessert.
Enjoy baking and savoring these delicious rolls!
- Prep Time: 20 minutes
- Cook Time: 30 minutes
Keywords: Cheesecake, Crescent Rolls, Dessert, Easy Baking, Brunch
