
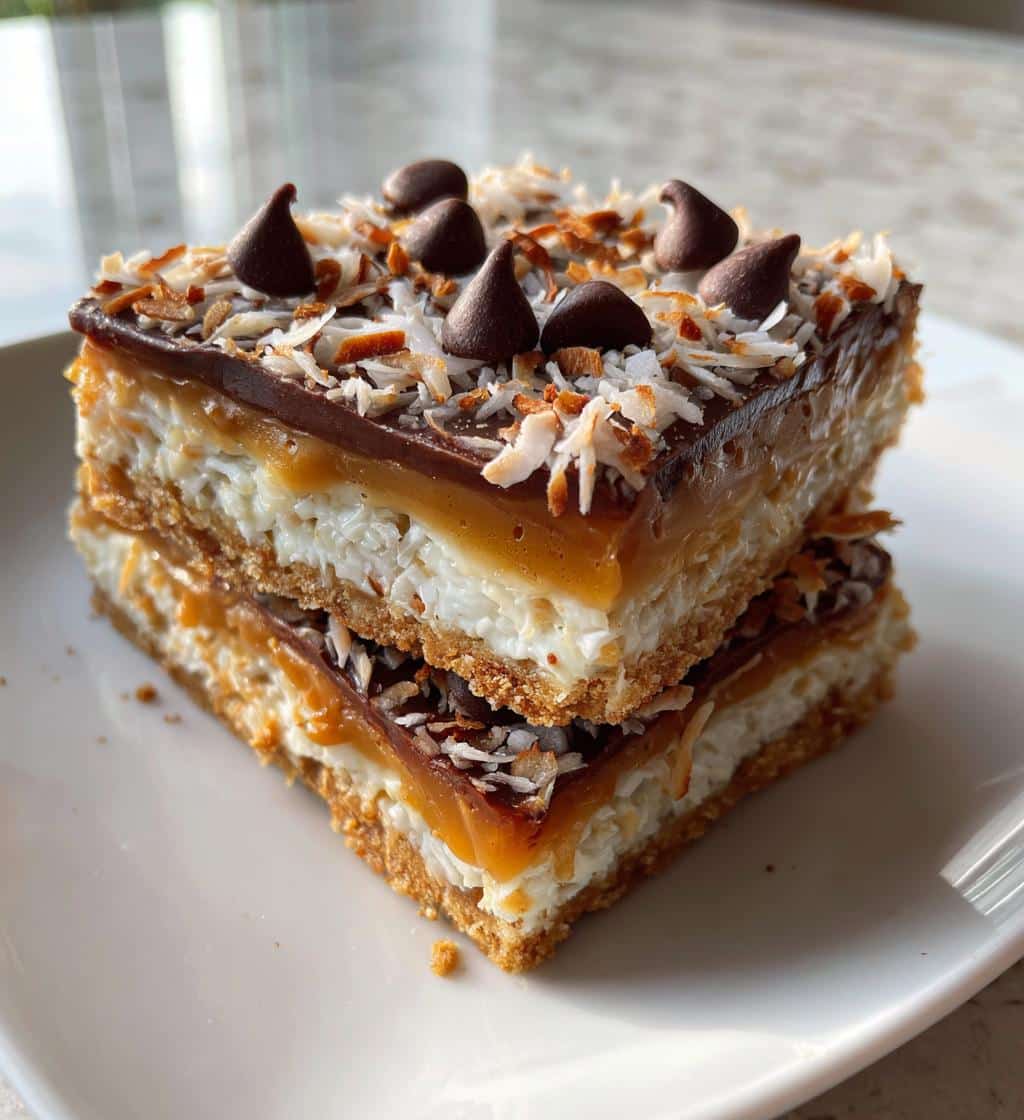
Caramel Coconut Bars are a beloved sweet treat, perfect for any occasion. This recipe simplifies the baking process, ensuring delightful homemade caramel bars with a perfect balance of flavors. Prepare to impress your family and friends with this easy-to-follow chocolate coconut delight, a truly satisfying dessert bar.
Key Takeaways
- Bake delicious caramel coconut bars with simple tools and ingredients.
- Follow clear, step-by-step instructions for a perfect crust and layers.
- Learn expert tips for baking, cooling, and slicing for clean servings.
- Discover how to customize flavors and store bars for lasting freshness.
These bars bring joy. Simple ingredients create magic. Sweet caramel meets tropical coconut. A perfect bite every time. Everyone will ask for more.
Making Caramel Coconut Bars Easier
Crafting delightful Caramel Coconut Bars doesn’t have to be a daunting task. This recipe is designed to streamline the process, allowing even novice bakers to achieve a professional-looking and tasting dessert. The key to making these homemade caramel bars truly easy lies in clear instructions and understanding each component before you begin. From preparing the golden graham cracker crust to layering the gooey caramel and shredded coconut, every step is broken down for simplicity. We focus on efficiency without compromising on the rich flavors that make these sweet treat recipes so popular. With a little preparation and these straightforward methods, you’ll be enjoying your delicious dessert bars in no time. Making them from scratch is always more rewarding, and this approach ensures minimal fuss and maximum enjoyment, making these a standout among quick dessert ideas for any gathering.
Essential Tools for Baking Bars
Before you dive into mixing and baking, gathering your essential tools will make the entire process smoother and more enjoyable. A good quality 9×13-inch baking pan is crucial; opting for a non-stick version or lining it with parchment paper will ensure your caramel coconut bars release cleanly. You’ll need a large mixing bowl for combining crust ingredients and another for the wet layers. Measuring cups and spoons are indispensable for accurate ingredient portions, while a sturdy spatula or spoon will aid in pressing the crust and spreading the toppings. A small saucepan for melting butter and warming caramel sauce is also vital. Lastly, a cooling rack is necessary for allowing your baked bars to set properly, preventing them from becoming soggy. Having these items ready at hand will contribute significantly to an easy baking experience, ensuring a successful chocolate coconut delight.
Gather Ingredients for Delightful Bars
The magic of delicious Caramel Coconut Bars begins with a careful selection of ingredients. Each component plays a vital role in creating the irresistible texture and flavor profile that makes these homemade caramel bars a favorite. We’ll break down the specific items needed for the sturdy base and the luscious layers, ensuring you have everything ready for a seamless baking session. Using quality ingredients can genuinely enhance the final taste, making your sweet treat recipe shine. This comprehensive list helps prevent last-minute trips to the store, allowing you to focus on the enjoyable process of creating this quick dessert idea. The simplicity of the ingredient list also contributes to the “easy caramel bars” aspect, proving that extraordinary flavor doesn’t always require an extensive pantry. For more amazing dessert recipes, check out our collection.
The Crust: Graham and Butter
For the foundational crust, you’ll need two primary ingredients: graham cracker crumbs and unsalted butter. Approximately 1 ½ cups of finely crushed graham cracker crumbs provide the perfect crumbly texture and sweet base. You can achieve this by crushing whole graham crackers in a food processor or placing them in a Ziploc bag and crushing them with a rolling pin. About ½ cup (one stick) of unsalted butter, melted, will bind these crumbs together beautifully. The butter not only adds richness but also helps the crust become firm when chilled and baked. Some recipes might call for a touch of sugar in the crust, but the natural sweetness of the graham crackers often suffices, especially with the rich layers to come. Ensuring the crumbs are consistent in size helps create an even and sturdy base for your delightful caramel coconut bars.
Sweet Layers: Coconut, Caramel, Chocolate
The heart of these easy caramel bars lies in their sweet, decadent layers. You’ll need roughly 1 ½ cups of sweetened shredded coconut, which will toast beautifully and offer a delightful chewiness. For the star of the show, about 1 cup of store-bought caramel sauce is ideal for convenience, though homemade caramel can be used if you prefer a more involved process. If using store-bought, ensure it’s a thicker sauce for better layering and less spreading during baking. Finally, approximately 1 cup of semi-sweet chocolate chips will crown your dessert, melting into glorious pockets of chocolatey goodness. Some variations might call for milk chocolate or dark chocolate chips, depending on your preference. These ingredients combine to create the quintessential chocolate coconut delight, a truly irresistible combination that makes these homemade caramel bars a standout sweet treat recipe.
Simple Steps for Caramel Coconut Bars
Making Caramel Coconut Bars involves a straightforward series of steps, ensuring that even a beginner baker can achieve a fantastic result. This section outlines the general flow of the baking process, from preparing the base to adding the luscious toppings, setting the stage for a successful baking adventure. The beauty of this recipe lies in its simplicity, making it a perfect quick dessert idea for busy schedules or impromptu cravings. By following these steps, you’ll learn how to transform basic ingredients into a stunning chocolate coconut delight. We’ve broken down the assembly process into clear, manageable actions, ensuring each layer contributes perfectly to the overall flavor and texture of your delicious dessert bars. The focus remains on making these easy caramel bars accessible to everyone, ensuring a delightful outcome every time.
Assembling Your Delicious Dessert Bars
The assembly phase is where your individual ingredients come together to form the structure of your delicious dessert bars. This process is relatively quick and simple, but paying attention to detail here ensures even layers and a cohesive texture for your caramel coconut bars. Once you have all your ingredients prepped and your baking pan ready, you can move efficiently through these steps. The key is to create distinct, yet harmonious layers that bake into a cohesive and delightful treat. Remember, the goal is not just to layer ingredients, but to build a foundation that supports the rich flavors and textures, making these homemade caramel bars truly special. For other amazing baked treats, try our Peanut Butter Brownie Swirl Cookies.
Pressing the Crumb Crust Base
Begin by preheating your oven to 350°F (175°C). In a medium bowl, combine the graham cracker crumbs with the melted butter. Stir thoroughly until all crumbs are moistened. Pour this mixture into your prepared 9×13-inch baking pan. Using the bottom of a flat-bottomed glass or a clean hand, firmly press the crumb mixture evenly across the bottom of the pan. It’s crucial to create a compact and uniform layer; this will prevent the crust from crumbling excessively once baked and cut. Ensure the edges are just as firm as the center. Bake the crust for 8-10 minutes, just until it’s lightly golden and fragrant. This pre-baking step helps set the crust and gives it a nice crispness, forming a sturdy foundation for your easy caramel bars.
Layering Coconut and Caramel Sauce
Once your crust is lightly baked, remove it from the oven and set it aside to cool slightly. While still warm, evenly sprinkle the sweetened shredded coconut over the pre-baked graham cracker crust. Try to get an even distribution across the entire surface. Next, carefully pour the caramel sauce over the coconut layer. You can gently spread it with a spatula if needed, but the warmth of the crust and coconut will help it settle. Be gentle to avoid disturbing the coconut layer too much. The caramel will seep down, creating that gooey, chewy texture synonymous with homemade caramel bars. This double layer is what gives these sweet treat recipes their signature appeal.
Topping with Chocolate Chips
The final touch before baking involves adding the chocolate chips. Evenly scatter the semi-sweet chocolate chips over the caramel and coconut layers. The warmth from the underlying layers will slightly soften the chocolate, helping it adhere and melt beautifully during the final bake. Don’t worry if they don’t look perfectly arranged; they will melt and spread as they bake, creating a delightful mosaic of chocolate. This topping transforms the dessert into a rich chocolate coconut delight, adding another dimension of flavor and texture that makes these quick dessert ideas incredibly satisfying. For a twist, you could even try a mix of chocolate and butterscotch chips.
Baking Your Perfect Coconut Creation
Baking is the stage where all the carefully assembled layers of your Caramel Coconut Bars transform into a cohesive, golden-brown sweet treat. Proper oven temperature and timing are critical to achieving the ideal texture – a firm crust, gooey caramel, chewy coconut, and perfectly melted chocolate. Over-baking can lead to a dry crust and hard caramel, while under-baking might result in a too-soft, crumbly bar. Pay close attention to visual cues, as oven temperatures can vary. The goal is a beautifully set dessert that holds its shape while still being wonderfully tender and rich. This step finalizes the magic of these easy caramel bars, bringing out the best in every ingredient.
Oven Temperature and Timing
With your oven still preheated to 350°F (175°C), carefully place your assembled pan of caramel coconut bars into the oven. Bake for approximately 25-30 minutes. You’re looking for a few key indicators that they are done: the edges of the bars should be lightly golden brown, the coconut should appear toasted, and the chocolate chips should be melted and slightly glossy. If the chocolate chips seem to be browning too quickly, you can loosely tent the pan with aluminum foil for the last 5-10 minutes of baking. A slight wobble in the center is acceptable, as the bars will continue to set as they cool. This precise timing ensures a perfect homemade caramel bar, achieving that irresistible balance of textures and flavors.
Cooling and Slicing Caramel Coconut Bars
The cooling and slicing process for your Caramel Coconut Bars is just as important as the baking itself. Rushing this stage can lead to messy cuts and bars that fall apart. Patience is truly a virtue here, as adequate cooling allows the caramel to firm up and the layers to fully set, resulting in clean, beautiful servings. This step ensures that your delicious dessert bars not only taste fantastic but also look appealing, making them a true chocolate coconut delight that’s easy to handle and enjoy. Proper cooling also contributes to the longevity and texture of these homemade caramel bars, solidifying them into a perfect quick dessert idea for any occasion.
Letting Bars Cool Completely
Once your caramel coconut bars are out of the oven, resist the urge to cut into them immediately. Allow the pan to cool on a wire rack at room temperature for at least 1-2 hours. For the cleanest cuts and best set, it’s highly recommended to chill the bars in the refrigerator for an additional 2-3 hours, or even overnight. This extended cooling period allows the gooey caramel to firm up properly, preventing the layers from oozing out when sliced. A thoroughly cooled bar will be much easier to handle and will maintain its structure, ensuring each sweet treat recipe portion is perfect. Don’t skip this step for the best results!
Cutting for Clean Servings
Once your bars are completely chilled and firm, they are ready for slicing. For the cleanest cuts, use a large, sharp knife. An expert tip is to run your knife under hot water for a few seconds and then wipe it dry before each cut. This slight warmth helps glide through the sticky caramel and chocolate without dragging. Cut the bars into your desired serving sizes, typically 2×2 inch squares or rectangular bars. You can also clean the knife between each slice for an even neater appearance. This technique ensures that your easy caramel bars present beautifully, ready to be enjoyed by your guests. For a variety of main course options, explore our recipes.
Quick Facts: Prep and Cook Time
Understanding the time commitment for any recipe is crucial, especially when planning for events or simply looking for quick dessert ideas. These Caramel Coconut Bars, while requiring some waiting time for cooling, are relatively quick to prepare and bake, making them an accessible sweet treat recipe. This section provides a concise overview of the total time you’ll need from start to finish, including active preparation and baking, as well as an estimate of the serving size. Knowing these quick facts upfront helps you manage your time effectively and ensures you’re prepared for making these delicious dessert bars without any surprises. They are truly an easy caramel bar option for busy bakers.
Total Time from Start to Finish
The active preparation time for these homemade caramel bars is surprisingly short, typically around 15-20 minutes. This includes crushing graham crackers, melting butter, and layering all the components. The baking time in the oven is approximately 25-30 minutes. However, the most significant portion of the “total time” will be dedicated to cooling and chilling. To achieve perfectly set and sliceable chocolate coconut delight bars, you’ll need a minimum of 3-4 hours of cooling (1-2 hours at room temperature, plus 2-3 hours in the refrigerator). If you choose to chill them overnight, which is highly recommended for the best results, the total time will extend. So, plan accordingly if serving them on the same day.
Serving Size for Your Guests
A standard 9×13-inch pan of Caramel Coconut Bars typically yields between 16 to 24 servings, depending on how you cut them. Cutting into 2×2-inch squares will give you 24 bars, perfect for a larger gathering or for individual portions. If you prefer slightly larger, more generous servings, cutting them into 16 rectangles (4×4 arrangement) is also an option. These bars are quite rich, so even smaller portions tend to be satisfying. This makes them an economical and efficient sweet treat recipe for parties, potlucks, or family desserts. Consider your audience and their appetites when determining the ideal serving size for your delicious dessert bars.
Caramel Coconut Bars: Storage Tips
Proper storage is key to maintaining the freshness and deliciousness of your homemade caramel bars. Because these bars contain moisture-rich ingredients like caramel and coconut, how you store them can significantly impact their texture and shelf life. Whether you plan to enjoy them over a few days or save some for later, understanding the best storage practices will ensure that every bite of your Caramel Coconut Bars remains as enjoyable as the first. These tips will help you preserve the quality of your easy caramel bars, making them a convenient quick dessert idea to have on hand for when cravings strike. Visit Carina Recipes on Pinterest for more sweet ideas.
Keeping Bars Fresh Longer
To keep your caramel coconut bars fresh, store them in an airtight container at room temperature for up to 3-4 days. For extended freshness, especially in warmer climates, it’s best to store them in the refrigerator. In the fridge, they will maintain their quality for up to a week. If stacking, place parchment paper between layers to prevent them from sticking together. For longer storage, you can also freeze these delicious dessert bars. Wrap individual bars tightly in plastic wrap, then place them in an airtight freezer-safe container or bag. They can be frozen for up to 1-2 months. Thaw them at room temperature or in the refrigerator before serving. This flexibility makes them an excellent sweet treat recipe for meal prepping desserts.
Storing in Different Climates
The optimal storage method for your homemade caramel bars can vary depending on your local climate. In humid environments, the caramel might become softer and stickier more quickly. In such cases, refrigerating the bars in an airtight container is highly recommended to maintain their structure and prevent them from becoming overly moist. Conversely, in very dry climates, storing them at room temperature might lead to them drying out faster. Always use an airtight container to protect them from air exposure, which causes staleness. Regardless of the climate, ensuring they are kept away from direct sunlight or heat sources will help preserve their quality and texture, making them a consistent chocolate coconut delight.
Enjoying Your Bars Warm or Cold
One of the delightful aspects of Caramel Coconut Bars is their versatility in serving temperature. While they are perfectly delicious chilled, a gentle warming can bring out different nuances of flavor and texture, transforming them into an even more indulgent sweet treat recipe. This flexibility makes them suitable for various occasions and personal preferences. Whether you prefer a firm, chewy bar or a soft, melty experience, these easy caramel bars deliver. Experimenting with serving temperatures can truly enhance your enjoyment of this quick dessert idea, offering a slight variation to a classic homemade caramel bar.
Warming for a Melty Treat
For a truly decadent experience, try warming your caramel coconut bars slightly. A quick zap in the microwave for 10-15 seconds per bar is often enough to soften the caramel and slightly melt the chocolate, creating a gooey, irresistible texture. Alternatively, you can place them on a baking sheet and warm them in a preheated oven at 250°F (120°C) for 5-7 minutes. Be careful not to overheat, as the caramel can become too runny. This warming method enhances the flavors, making the chocolate richer and the coconut more fragrant. Served warm, these delicious dessert bars are especially comforting, making them a chocolate coconut delight that feels like a freshly baked indulgence. For more culinary inspiration, check out our Instagram at @carinarecipes20.
Customize Your Delicious Dessert Bars
The beauty of these Caramel Coconut Bars lies not just in their inherent deliciousness but also in their adaptability. Customizing your delicious dessert bars allows you to tailor them to your personal taste, dietary preferences, or even holiday themes. This section explores various ways to modify the recipe, adding different textures and flavors that can elevate your homemade caramel bars even further. Think beyond the basic ingredients to truly make this sweet treat recipe your own. These quick dessert ideas are a fantastic canvas for culinary creativity, ensuring every batch is a unique chocolate coconut delight. Another great option for customization is our Quick Italian Cream Cake.
Adding Nuts for Extra Crunch
For those who love an added textural element, incorporating nuts is a fantastic way to customize your easy caramel bars. Chopped pecans, walnuts, or almonds can be sprinkled over the coconut layer before adding the caramel. Toasting the nuts lightly beforehand can deepen their flavor, adding a warm, nutty aroma and a satisfying crunch that beautifully complements the chewy coconut and gooey caramel. This simple addition transforms the texture profile, offering a delightful contrast to the softness of the other layers. It’s an easy modification that significantly enhances the gourmet feel of these homemade caramel bars, making them even more irresistible.
Other Chip and Fruit Ideas
Beyond traditional chocolate chips, consider experimenting with other varieties. White chocolate chips or butterscotch chips can offer a different sweetness profile. For a hint of tanginess, dried cranberries or chopped dried apricots can be a delightful addition, cutting through the richness of the caramel. You could even use a combination of different chips for a multi-flavored chocolate coconut delight. Mini peanut butter cups, chopped into smaller pieces, could also be scattered on top for a fun twist. These simple swaps allow you to personalize your sweet treat recipe, making each batch of delicious dessert bars a unique quick dessert idea tailored to your cravings.
Nutrition Information for Each Bar
Understanding the nutrition information for your Caramel Coconut Bars can be helpful, especially if you’re mindful of your dietary intake. While these delicious dessert bars are undeniably a sweet treat, a general idea of their caloric and macronutrient content can help in making informed choices. It’s important to remember that these figures are estimates and can vary based on specific ingredient brands, exact measurements, and serving sizes. This section provides a basic overview, allowing you to enjoy your homemade caramel bars responsibly, knowing the general impact of this delightful chocolate coconut treat.
Calories and Macronutrient Details
Given the rich ingredients – graham crackers, butter, sweetened condensed milk (or caramel sauce), coconut, and chocolate – Caramel Coconut Bars are typically high in calories, sugar, and fat. A single serving (approximately a 2×2 inch bar) can range from 250 to 350 calories. In terms of macronutrients, each bar will generally contain about 25-35g of carbohydrates (mostly from sugar), 15-25g of fat (primarily saturated), and 2-4g of protein. Fiber content is usually low, unless additions like nuts are made. These figures are approximations, and for precise nutritional values, it’s recommended to use a recipe calculator with your specific ingredients. Enjoy these easy caramel bars as an occasional indulgence!
Expert Tips for Best Results
Achieving truly outstanding Caramel Coconut Bars goes beyond just following the steps; it involves incorporating a few expert tips that can elevate your baking experience and the final product. These insights are gathered from years of baking wisdom, designed to help you avoid common pitfalls and ensure your homemade caramel bars are nothing short of perfect. From ingredient selection to the final presentation, these tips aim to refine your technique and guarantee a delicious dessert that everyone will rave about. Implementing these small details can make a significant difference, turning a good sweet treat recipe into an exceptional one, making your chocolate coconut delight truly memorable.
Quality Ingredients Matter
The foundation of any truly exceptional baked good, including these easy caramel bars, lies in the quality of its ingredients. Using fresh, high-quality graham crackers for the crust will yield a superior base texture and flavor. Opt for a good brand of sweetened shredded coconut for maximum sweetness and chewiness. When it comes to caramel, whether you’re using store-bought or making it from scratch, choose a rich, buttery caramel sauce for the best depth of flavor. Similarly, a reputable brand of chocolate chips will melt more smoothly and provide a better chocolate experience. High-quality ingredients don’t necessarily mean expensive, but selecting fresh and flavorful components will genuinely make your delicious dessert bars shine. To learn more about caramel or coconut, check out Wikipedia.
Using Hot Knife for Slices
For perfectly clean, professional-looking slices of your Caramel Coconut Bars, a hot knife is your secret weapon. After the bars have thoroughly chilled and firmed up (preferably overnight in the refrigerator), fill a tall glass with hot water. Dip a large, sharp chef’s knife into the hot water for 15-20 seconds, then wipe it completely dry. The warmth from the blade will melt through the caramel and chocolate without dragging, creating smooth, crisp edges. Repeat this process for each cut, wiping the blade clean and re-warming it every time. This simple technique prevents sticking and ensures each sweet treat recipe bar is visually appealing, making your homemade caramel bars look as good as they taste.
