
Black Forest Cake recipe brings joy with its rich chocolate layers, sweet cherries, and airy whipped cream. This classic dessert is easier to make than you might think. Follow our detailed steps to create a beautiful, delicious cake that will impress family and friends. Get ready to bake a memorable sweet treat today.
Key Takeaways
- This guide covers making a classic Black Forest Cake from scratch.
- Learn to bake perfect chocolate cake layers, prepare cherry filling, and whip cream.
- Detailed instructions ensure success for both novice and experienced bakers.
- Discover tips for assembly, frosting, and garnishing this delightful dessert.
Baking this cake is pure joy. Layers of chocolate await. Cherries add bright flavor. Light cream completes it. Share a slice of happiness.
Make This Delicious Black Forest Cake
Why bake this classic
The Black Forest Cake recipe is more than just a dessert; it’s a celebration of flavors and a timeless tradition. Known in Germany as Schwarzwälder Kirschtorte, this iconic cake combines rich, moist chocolate cake layers with a tart cherry filling and generous clouds of fresh whipped cream. Often infused with kirsch (cherry liqueur), it offers a sophisticated balance of sweet and slightly boozy notes that is simply irresistible. Baking this classic German cake from scratch allows you to control the quality of ingredients and tailor it perfectly to your taste, ensuring a truly authentic and delicious experience. It’s a dessert that evokes nostalgia and creates new fond memories.
Impress everyone with cake
Imagine presenting a beautifully decorated homemade Black Forest Cake at your next gathering. Its striking appearance, with dark chocolate, vibrant red cherries, and pristine white cream, makes it a centerpiece dessert that always draws compliments. This chocolate cherry cake is ideal for special occasions, holidays, or simply as a luxurious sweet treat to share with loved ones. While its layered structure might seem daunting, our detailed baking instructions simplify the process, empowering you to create a show-stopping cake that tastes as incredible as it looks. Your efforts will be richly rewarded by appreciative smiles and requests for “just one more slice.”
Ingredients for Black Forest Cake
What goes in cake
For the decadent chocolate cake layers, you’ll need standard baking staples. Start with all-purpose flour, granulated sugar, unsweetened cocoa powder for that deep chocolate flavor, baking soda and baking powder for lift, and a pinch of salt. Wet ingredients include large eggs, milk, vegetable oil, and vanilla extract. A crucial component for extra moistness and flavor depth is boiling water, which helps to bloom the cocoa powder, enhancing its richness. If you want to make a delightful Quick Italian Cream Cake instead, the ingredient list would vary significantly.
Whipped cream needs
The light, airy whipped cream frosting is a signature element of a Black Forest Cake. For this, you will need heavy whipping cream (at least 36% milk fat content), powdered sugar (also known as confectioners’ sugar) to sweeten it, and a touch of vanilla extract for flavor. Ensuring your cream, bowl, and beaters are well-chilled before whipping is a key baking tip for achieving stiff peaks and preventing the cream from deflating quickly. This frosting provides a beautiful contrast to the dark chocolate layers and tangy cherries.
Cherry filling supplies
The heart of our Black Forest Cake recipe is the luscious cherry filling. Fresh or frozen sweet cherries are preferred. If using frozen, thaw and drain them well. You’ll also need granulated sugar, cornstarch to thicken the sauce, and water. For an authentic taste, a splash of kirschwasser, a clear cherry brandy, is traditionally added. However, you can omit it or substitute with cherry juice for a non-alcoholic version. This vibrant, fruity filling perfectly complements the rich chocolate and creamy frosting, making the overall dessert truly special. Try another amazing dessert, our Desserts category has many options like our Peanut Butter Brownie Swirl Cookies.
Prepare Oven and Pans
Oven temperature setting
Before you begin mixing your batter, it’s vital to preheat your oven. Set your oven to the specified temperature in the recipe, typically around 350°F (175°C). Allowing the oven to reach and maintain the correct temperature ensures even baking and proper rising of your cake layers. Always use an oven thermometer to verify accuracy, as many ovens can fluctuate from their set temperature. This simple step is crucial for achieving perfect, consistently baked results for your homemade cake layers. Proper preheating is a cornerstone of good baking instructions.
Grease two cake pans
Next, prepare your cake pans. For this Black Forest Cake recipe, you will typically need two 8 or 9-inch round cake pans. Generously grease the bottoms and sides of each pan with butter or baking spray. For extra assurance against sticking, you can also flour the greased pans or line the bottoms with parchment paper. Parchment paper creates an easy release and prevents the cake from tearing when inverted. Proper pan preparation ensures your beautiful chocolate layers will come out cleanly and without hassle after baking, setting you up for smooth assembly later.
Mix Your Cake Batter
Combine dry ingredients
In a large mixing bowl, whisk together all your dry ingredients. This includes the all-purpose flour, granulated sugar, unsweetened cocoa powder, baking soda, baking powder, and salt. Sifting these ingredients together is often recommended to remove any lumps and ensure they are thoroughly combined, which leads to a more uniform cake texture. This initial step is fundamental for evenly distributing the leavening agents and cocoa, laying the groundwork for truly delicious chocolate cake layers. Make sure your cocoa powder is fresh for the best flavor.
Beat in wet ingredients
Once your dry ingredients are ready, create a well in the center. Add the wet ingredients: eggs, milk, vegetable oil, and vanilla extract. Using an electric mixer on medium speed, beat the mixture until just combined. Be careful not to overmix, as this can develop the gluten too much, resulting in a tough cake. The batter should be smooth, but a few small lumps are acceptable. This stage is where the magic starts to happen, bringing together the flavors that will define your Black Forest Cake recipe.
Stir in boiling water
Finally, carefully pour in the boiling water. Stir it gently by hand until the batter is smooth and thin. The boiling water serves multiple purposes: it blooms the cocoa powder, intensifying its chocolate flavor, and also contributes to the cake’s incredibly moist texture. The batter will be quite thin at this point, which is perfectly normal for this type of chocolate cake. This crucial step is key to developing that rich, deep chocolate profile characteristic of a classic Black Forest Cake. For other delightful main course options, consider making Ground Turkey and Peppers.
Bake Perfect Cake Layers
Pour batter evenly
Divide the thin Black Forest Cake batter evenly between your two prepared cake pans. You can use a kitchen scale for precise measurement, ensuring both layers bake uniformly. Even layers are important for a stable and aesthetically pleasing assembled cake. Gently tap the pans on the counter a few times to release any large air bubbles, which helps prevent craters in your baked layers. This careful distribution contributes to the professional look of your homemade cake.
Bake until toothpick clean
Place the pans in your preheated oven and bake for the time specified in the recipe, typically around 30-35 minutes. Baking times can vary depending on your oven, so it’s always best to rely on visual cues. The cake layers are done when they spring back lightly to the touch in the center, and a wooden toothpick inserted into the middle comes out clean or with only a few moist crumbs attached. Avoid opening the oven door too frequently, especially in the first 20 minutes, to prevent the cakes from sinking. Overbaking can lead to dry cake, so keep a close watch.
Cool Cakes Completely
Rest in pans briefly
Once baked, remove the cake pans from the oven. Allow the Black Forest Cake layers to rest in their pans on a wire rack for about 10-15 minutes. This brief resting period allows the cakes to firm up slightly, making them less fragile and easier to handle. It also helps to prevent them from sticking to the pan when inverted. Resist the urge to remove them sooner, as warm cakes are more prone to breaking or crumbling, which could compromise the structure of your beautiful homemade cake.
Completely cool on rack
After the initial rest, carefully invert the cake layers onto the wire rack. Gently remove the pans and peel off any parchment paper. Let the cakes cool completely on the rack before you attempt to slice or frost them. This step is crucial; attempting to frost warm cakes will cause the whipped cream frosting to melt and slide off, creating a messy result. Patience is a virtue in baking, and ensuring your chocolate layers are fully cooled, ideally at room temperature, will set you up for successful assembly of your Black Forest Cake recipe. This might take 1-2 hours.
Assemble the Black Forest Cake
Slice layers horizontally
Once your chocolate cake layers are completely cool, it’s time to prepare them for assembly. Using a long, serrated knife, carefully slice each cake layer horizontally in half, creating four thinner layers in total. For a neater cut, you can use a cake leveler or mark the sides with toothpicks as a guide. Take your time with this step to ensure even layers, which are essential for a stable and visually appealing Black Forest Cake. A steady hand and sharp knife make all the difference for this classic layer cake.
Add cherries and cream
Now for the delicious filling! Place one cake layer on your serving plate or cake stand. If using kirsch, lightly brush the layer with it. Spread a generous amount of your prepared cherry filling over the cake layer, leaving a small border. Then, pipe or spread a layer of whipped cream frosting over the cherries. Repeat this process with the next two cake layers, stacking them carefully. Place the final cake layer on top. This sequential layering of chocolate, cherries, and cream creates the iconic flavor profile of a Black Forest Cake, making it a truly indulgent sweet treat. For similar dessert ideas, our Pinterest page offers many inspirations.
Frost and Garnish Cake
Cover with whipped cream
With the layers stacked, it’s time to frost your Black Forest Cake. Generously cover the entire cake – top and sides – with the remaining whipped cream frosting. Use an offset spatula or a bench scraper to smooth the cream evenly. Don’t worry about perfection; a rustic, hand-piped look is also charming. Ensure the cake is fully enveloped in cream, creating a pristine white canvas that contrasts beautifully with the dark cake beneath. This step completes the luxurious texture and presentation of your homemade cake.
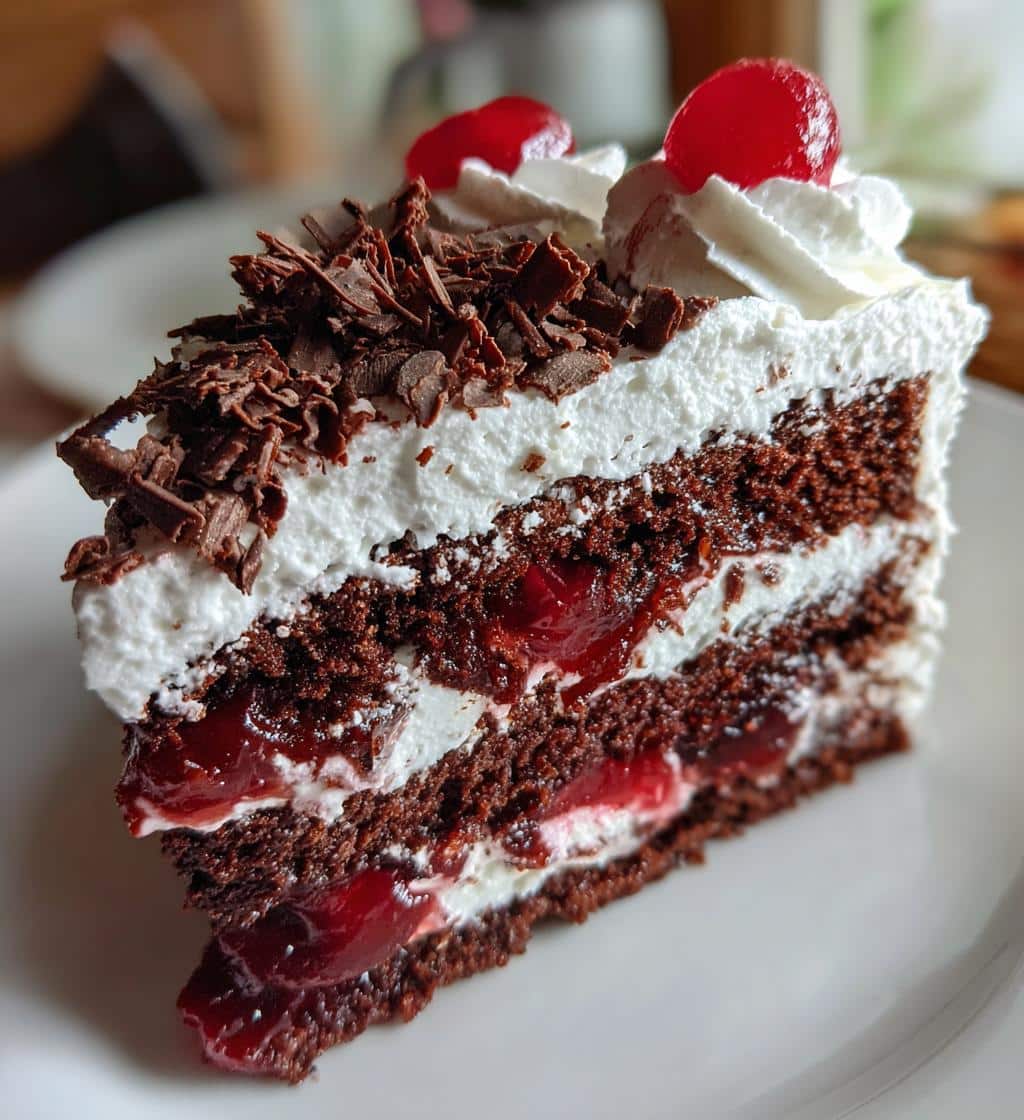
Add chocolate shavings
The final touch for an authentic Black Forest Cake recipe is the chocolate shavings. You can make these by gently scraping a bar of good quality dark chocolate with a vegetable peeler or a sharp knife. Alternatively, use pre-made chocolate curls. Sprinkle the shavings generously over the top and sides of the cake. For extra flair, you can pipe a few rosettes of whipped cream around the top edge and place a fresh cherry on each. This garnishing step elevates your chocolate cherry cake into a visually stunning classic German cake, ready to be admired and enjoyed. You can find more visual inspiration on our Instagram page.
Tips for Your Recipe Success
Use fresh sweet cherries
While canned or frozen cherries can work, using fresh, sweet cherries (like Bing or Rainier) will significantly elevate the flavor of your Black Forest Cake. If fresh cherries are not in season, high-quality frozen cherries are a good alternative; just be sure to thaw and drain them thoroughly to prevent excess moisture in your filling. The vibrancy and natural sweetness of good cherries truly make this chocolate cherry cake shine. You could learn more about the history of cherries on Wikipedia’s Cherry page.
Chill cream bowl, beaters
For perfectly whipped cream frosting that holds its shape, chill your mixing bowl and beater attachments in the freezer for 10-15 minutes before whipping the heavy cream. Cold equipment helps the cream whip up faster and achieve stiffer peaks, resulting in a more stable and airy frosting that won’t weep or deflate quickly. This simple kitchen tip is a game-changer for any recipe involving whipped cream, ensuring your Black Forest Cake recipe remains beautiful.
Refrigerate before serving cake
After assembly and garnishing, it’s highly recommended to refrigerate your Black Forest Cake for at least 1-2 hours before serving. This chilling time allows the flavors to meld together beautifully and helps the whipped cream frosting to set firmly, making for cleaner slices. A well-chilled cake is much easier to cut and serve, and the cool temperature enhances the entire sweet treat experience. Learn more about the origins of this classic dessert on Wikipedia’s Black Forest Gateau article.
Enjoy Your Delicious Cake
Share this sweet treat
Congratulations! You’ve successfully created a magnificent Black Forest Cake from scratch. Now comes the most rewarding part: enjoying your culinary masterpiece and sharing it with loved ones. Slice generously and serve this delightful sweet treat to your family and friends, perhaps with a cup of coffee or a glass of milk. Each bite offers a harmonious blend of moist chocolate cake, tart cherry filling, and light, ethereal whipped cream, making for an unforgettable dessert experience. It’s a dessert that speaks volumes of comfort, celebration, and your baking skill. Don’t forget to savor every moment and share the joy that this homemade cake brings. This classic German cake is truly a labor of love worth every effort, promising delightful memories with every shared slice. Allow yourself to bask in the compliments and the satisfaction of having baked such a stunning and delicious Black Forest Cake. It’s the perfect end to any meal or the highlight of any special occasion.
Black Forest Cake Recipe Facts
Prep, cook, total times
Understanding the time commitment helps in planning your baking schedule. For this Black Forest Cake recipe, the preparation time typically ranges from 45 to 60 minutes, which includes mixing the batter, preparing the cherry filling, and whipping the cream. The actual baking time for the cake layers is usually around 30-35 minutes. However, remember to factor in crucial cooling time, which can take 1-2 hours for the cakes to reach room temperature. Therefore, the total time from start to serving, including all cooling and assembly, can be approximately 3-4 hours, though active hands-on time is much less.
Servings per whole cake
A standard 8 or 9-inch Black Forest Cake, prepared with two layers (which are then sliced into four thinner layers), typically yields 12 generous servings. If serving smaller portions or for a larger gathering, you can easily get 16 slices. This rich chocolate cherry cake is quite decadent, so a modest slice is often satisfying. Plan accordingly based on your event and guest count, but rest assured, this impressive homemade cake will be a highlight for everyone.
Cake Nutrition Information
Calories per slice
Estimating precise calorie counts for a homemade Black Forest Cake recipe can be challenging, as it depends heavily on specific ingredients and portion sizes. Generally, a slice of this rich chocolate cherry cake can range from 350 to 500 calories. This figure will vary based on the amount of sugar, fat from cream and oil, and whether kirsch is used. If you are tracking your caloric intake, using a reliable recipe calorie calculator with your exact ingredient quantities would provide the most accurate estimate for your specific dessert recipe.
Fat, sugar, protein
Beyond calories, the nutritional breakdown of a Black Forest Cake includes varying levels of fat, sugar, and protein. The majority of the fat comes from the heavy whipping cream and vegetable oil in the cake batter. Sugar content will be significant due to granulated sugar in the cake and filling, plus powdered sugar in the frosting. Protein is present from the eggs and milk in the cake, but in smaller amounts compared to fats and carbohydrates. For detailed macronutrient information, consider inputting your recipe into a nutrition analysis tool, which can give a more precise understanding of this delightful sweet treat’s composition.
