
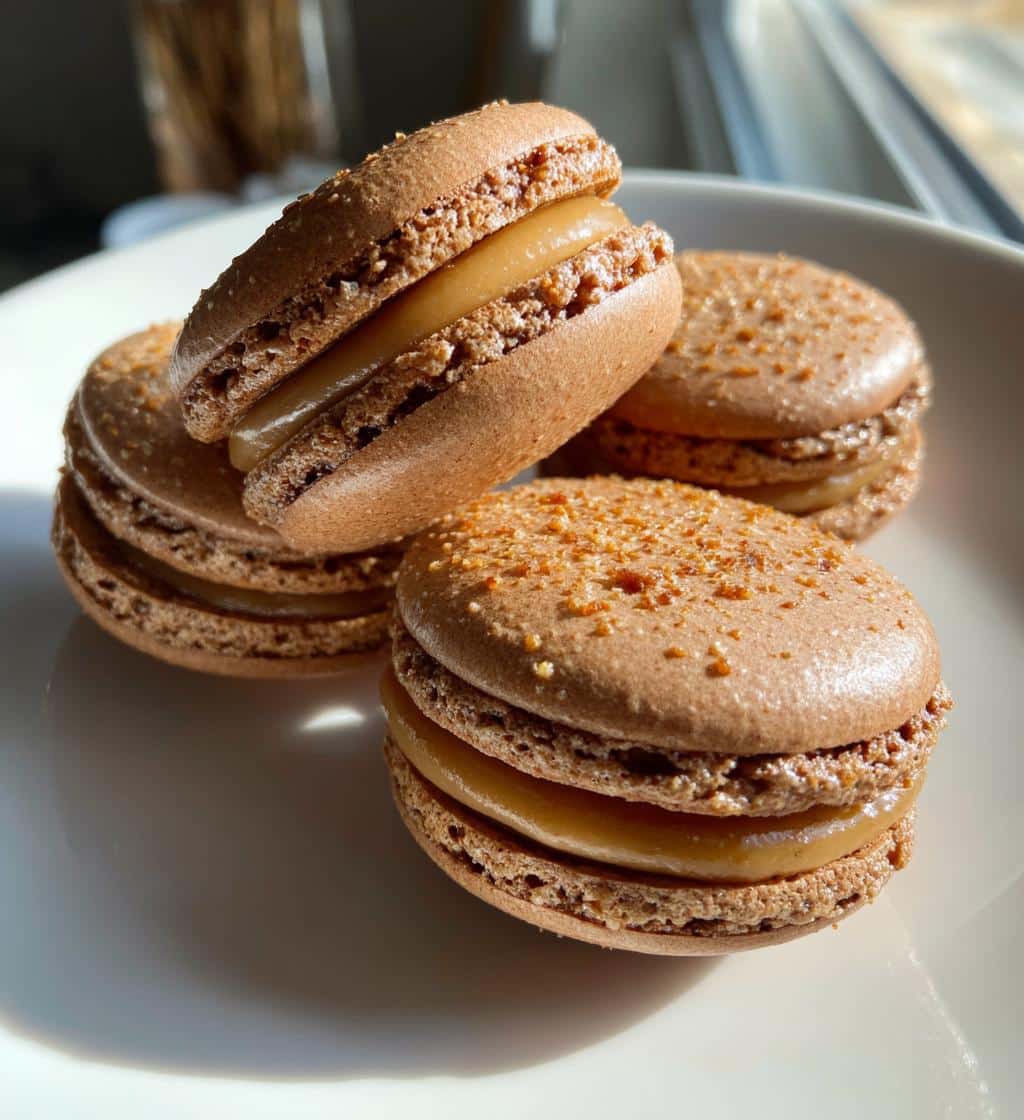
desserts, offering a sophisticated twist on the classic French confection. Their allure lies in the harmonious contrast: delicate, crisp shells that yield to a soft, chewy interior, all infused with the robust and aromatic notes of coffee. Unlike a simple cookie, these macarons boast an elegant texture known as the “foot” – a ruffled edge that forms during baking, signifying a perfectly crafted shell. The combination of bittersweet coffee and sweet, airy meringue creates a balanced flavor profile that appeals to both coffee lovers and connoisseurs of fine pastries. Each bite is a luxurious experience, a testament to the art of macaron making.
Why bake Coffee Macarons?
Baking homemade macarons recipe offers immense satisfaction, and choosing coffee as your flavor adds an extra layer of gourmet appeal. Beyond the sheer joy of creating something beautiful and delicious, coffee macarons provide a unique opportunity to showcase your baking skills. They are perfect for special occasions, elegant gifts, or simply a sophisticated treat for yourself and loved ones. The process of making them, while requiring precision, is incredibly rewarding. Imagine the aroma of freshly baked coffee macaron shells filling your kitchen, followed by the rich scent of the coffee buttercream filling. It’s a sensory experience that elevates home baking, providing a delightful challenge with a truly decadent outcome. Plus, once you master them, you can adapt the recipe to countless other flavors, much like exploring different variations of peanut butter brownie swirl cookies or a quick Italian cream cake.
Essential Ingredients for Coffee Macarons
Crafting perfect macarons starts with understanding the role of each ingredient. Quality matters significantly when making these delicate pastries. Precision in measurement is non-negotiable, so ensure you have a reliable kitchen scale. Using the right type and freshest ingredients will make a noticeable difference in the final texture and flavor of your decadent coffee macarons. This list breaks down what you’ll need, separating components for the shells and the luxurious filling.
Dry ingredients needed first
For the core structure of your coffee macaron shells, you will need two primary dry ingredients:
- Almond Flour: Super-fine almond flour is crucial. It should be blanched and finely ground, ideally without any large bits of almond skin, as this can affect the smoothness of your shells. Sift it thoroughly to remove any lumps and ensure an even texture.
- Powdered Sugar (Confectioners’ Sugar): This provides sweetness and helps stabilize the meringue. Like almond flour, it should be sifted to prevent lumps in your batter, contributing to the desired smooth finish of the macaron.
Wet ingredients for shells
The meringue foundation for your macaron shells relies on just a few simple wet ingredients:
- Egg Whites: Aged egg whites (separated from yolks a day or two in advance and stored in the fridge, then brought to room temperature) are often recommended, as they reportedly whip up more stably. However, fresh, room temperature egg whites also work well. Ensure no trace of yolk is present.
- Granulated Sugar: This sugar is incorporated gradually into the egg whites to create a stable meringue. It adds sweetness and helps build the necessary structure for the macaron shells.
- Instant Coffee Powder: For that distinct coffee flavor, a high-quality instant coffee powder or espresso powder is dissolved into a small amount of water or added directly to the dry ingredients, depending on the method. This gives your shells their characteristic taste.
Filling components listed
The rich coffee filling is the heart of your macaron, providing moisture, flavor, and a delightful contrast to the crisp shell. Here’s what you’ll need for a classic coffee buttercream:
- Unsalted Butter: Softened to room temperature, this forms the creamy base of your buttercream.
- Powdered Sugar: Sifted for a smooth consistency, it sweetens the filling.
- Brewed Coffee or Espresso: Chilled and concentrated, this provides the intense coffee flavor for the buttercream. You can adjust the strength to your preference.
- Vanilla Extract (Optional): A touch of vanilla can enhance the overall flavor profile without overpowering the coffee.
Preparing Macaron Shell Batter
The initial steps in creating homemade macarons recipe shells are foundational to their success. Attention to detail here will pave the way for beautifully formed and consistently textured macarons. This stage involves carefully preparing your dry ingredients and perfectly whipping your egg whites, two critical components that define the ultimate quality of your shells.
Mixing almond flour, sugar
The first step in preparing the macaron batter involves combining your dry ingredients. Take your super-fine almond flour and sifted powdered sugar. It’s absolutely vital to sift these ingredients together at least once, and ideally twice. This process ensures that there are no lumps, creating a uniform, airy mixture that will result in smooth, professional-looking macaron shells. Any large particles or lumps can interfere with the delicate structure of the macaron, potentially leading to cracked shells or an uneven texture. Many bakers even pulse these ingredients briefly in a food processor with a few additions of instant coffee powder to ensure an ultra-fine consistency, though sifting is often sufficient for home bakers.
Whipping egg whites right
Whipping the egg whites to the correct consistency is perhaps the most crucial step for perfect macarons. Begin with clean, grease-free bowls and whisks – any fat residue can prevent the egg whites from whipping properly. Start by whipping room temperature egg whites on a medium-low speed until they become foamy. Gradually add the granulated sugar, a little at a time, while increasing the speed to medium-high. Continue whipping until the meringue reaches stiff, glossy peaks. When you lift the whisk, the meringue should hold its shape firmly, and the tip of the peak should curl slightly but not flop over. This stable meringue provides the necessary structure and aeration for your macaron shells to rise and develop their signature “feet.” Over-whipping can lead to a dry, crumbly meringue, while under-whipping will result in a weak, unstable batter.
Folding in Coffee Flavor
The process of combining the meringue with the dry ingredients and then incorporating the coffee flavor is known as macaronage. This technique is arguably the most challenging but also the most rewarding step in creating decadent coffee macarons. Mastering it ensures you achieve the ideal consistency for piping and baking.
Gently combine dry, wet
Once your meringue is stiff and glossy, it’s time to gently fold in the almond flour and powdered sugar mixture. This step requires a delicate hand to prevent deflating the air you’ve worked so hard to incorporate into the egg whites. Add the dry ingredients to the meringue in two or three additions. Use a silicone spatula to fold the mixture, starting from the center and sweeping up the sides of the bowl, then gently folding over. Continue this motion, turning the bowl as you go. The goal is to fully incorporate the dry ingredients without overworking the batter. You’ll notice the mixture gradually becoming smoother and less lumpy. The initial folds will look quite thick, but don’t be tempted to add the coffee flavor just yet; focus on a homogenous base.
Add instant coffee smoothly
After the dry ingredients are mostly incorporated, it’s time to add the instant coffee powder or espresso powder to give your shells that distinctive taste. Some recipes call for dissolving the coffee powder in a tiny bit of hot water first to ensure it blends seamlessly, while others allow it to be added directly with the dry ingredients. If adding directly, ensure it’s finely ground. Incorporate the coffee by continuing the macaronage process. As you fold, the batter will start to thin out and become more fluid. You’re looking for a consistency often described as “lava-like” or “ribbon-like.” When you lift your spatula, the batter should fall off in a slow, continuous ribbon that eventually reincorporates back into the main batter within 20-30 seconds. This is the perfect macaron consistency – not too thick, not too runny – ready for piping.
Piping Coffee Macaron Shapes
Once your macaron batter has reached the ideal “lava-like” consistency, the next exciting step is piping macarons onto your baking sheets. This stage requires a steady hand and a bit of practice, but with the right preparation, you’ll be creating beautiful, uniform shells for your decadent coffee macarons.
Prepare baking sheet
Proper preparation of your baking sheets is crucial for preventing your macaron shells from sticking and for ensuring they cook evenly. First, line your heavy-gauge baking sheets with either parchment paper or a silicone baking mat (like Silpat). Silicone mats are often preferred by macaron bakers as they provide excellent heat distribution and a non-stick surface, leading to more consistent results and easier removal. If using parchment paper, you might want to lightly secure it to the baking sheet with a tiny dab of batter in each corner underneath the paper to prevent it from sliding. Many bakers also place a template underneath their parchment or silicone mat – a printed sheet with evenly spaced circles (typically 1.5 to 2 inches in diameter) – to help guide them in piping uniform shapes. This ensures all your coffee macaron shells are roughly the same size, which is important for even baking and aesthetic assembly.
Form small, round circles
Transfer your macaron batter to a piping bag fitted with a round tip, typically a Wilton 1A or Ateco 805. Twist the top of the bag to secure the batter and prevent it from spilling out. Hold the piping bag perpendicular to the baking sheet, about half an inch above the surface. Apply even, consistent pressure to pipe out small, round circles according to your template. Aim for quick, confident presses. Once your desired size is reached, stop applying pressure and quickly flick your wrist to create a clean break from the batter. Try to keep all your piped circles as consistent in size as possible. After piping, firmly tap the baking sheets against your counter several times. This crucial step helps to release any trapped air bubbles within the batter, which can cause cracking during baking, and encourages the shells to settle into a perfectly smooth, round shape. You’ll often see small air bubbles rise to the surface; these can be popped with a toothpick for an even smoother finish. After tapping, allow the piped macarons to “rest” at room temperature for 30-60 minutes, or until a skin forms on top. This skin helps develop the characteristic “feet” during baking.
Baking Macaron Shells to Perfection
After the delicate work of macaronage and piping, the baking stage for homemade macarons recipe shells is where the magic truly happens, transforming simple batter into those iconic, perfectly footed confections. Precise oven temperature and baking time are critical to achieving the desired crisp exterior and chewy interior.
Preheat oven correctly
One of the most common pitfalls in macaron baking is an improperly preheated oven. It is absolutely essential to preheat your oven to the specified temperature (typically between 285°F to 325°F, depending on your oven and recipe) for at least 20-30 minutes before placing your macarons inside. This extended preheating time ensures that the oven has reached and stabilized at the desired temperature throughout, not just at the set point. An oven thermometer placed inside can provide an accurate reading, as many home ovens can fluctuate significantly from their display. A stable and consistent temperature is vital for the development of the macaron’s “feet” – the ruffled base that lifts the shell – and for preventing cracks. If the oven is too hot, the shells might crack or brown too quickly; if it’s too cool, the feet might not form properly, and the macarons might remain soft.
Bake for specific time
The baking time for coffee macaron shells typically ranges from 12 to 18 minutes, but this can vary based on your oven, the size of your macarons, and even humidity levels. Begin by baking one tray at a time in the center rack for optimal air circulation. After about 6-8 minutes, you should start to see the “feet” appear. At this point, it’s often recommended to quickly open the oven door for a few seconds to release any steam, then rotate the baking sheet 180 degrees to ensure even baking. The macarons are done when they lift easily from the baking mat or parchment paper without the shell sticking. If they are still wobbly or stuck, continue baking for another 1-2 minutes. Overbaking can lead to dry, brittle shells, while underbaking results in a sticky, soft interior. Remember, consistency is key; always keep a close eye on your macarons during this stage. Baking these delicate sweet treats takes practice, much like mastering other complex dessert recipes.
Cooling Macarons for Best Results
After successfully baking your coffee macaron shells, the cooling process is just as important as baking for achieving their ideal texture and ensuring easy removal from the baking surface. Patience at this stage is absolutely key to preventing breakage and preserving their delicate structure.
Let them cool fully
Once your macarons are out of the oven, resist the urge to immediately try and peel them off the baking sheet. They will be soft and fragile at this point. Instead, slide the parchment paper or silicone mat, with the macarons still attached, directly onto a wire cooling rack. Allow them to cool completely at room temperature. This can take anywhere from 15 to 30 minutes, or even longer depending on the ambient temperature and humidity. As they cool, the shells will firm up and naturally release from the baking surface. Trying to remove them too soon will likely result in the bottoms sticking and the shells breaking. Once fully cooled, they should peel off effortlessly, revealing a smooth, slightly concave bottom ready for your macaron filling. Proper cooling ensures your perfect macarons maintain their integrity and characteristic chewiness, making them ready for the final assembly stage.
Crafting the Rich Coffee Filling
No decadent coffee macarons are complete without a luxurious, flavorful filling that complements the delicate shells. A rich coffee buttercream is the perfect choice, adding moisture, depth, and an intensified coffee experience. This section guides you through creating a smooth and creamy rich coffee filling that will elevate your homemade macarons.
Soften butter properly
The foundation of any good buttercream is properly softened butter. For the best results, your unsalted butter should be at true room temperature, which means it’s soft enough to indent easily with a finger but not melted or greasy. If your butter is too cold, it won’t cream properly with the powdered sugar, leading to a lumpy filling. If it’s too warm or melted, the buttercream will be runny and difficult to work with. To achieve the perfect consistency, take your butter out of the refrigerator at least an hour or two before you plan to start making the filling. If you’re short on time, you can cut the butter into smaller cubes to speed up the softening process, or even gently warm it in the microwave for a few seconds, being very careful not to melt it.
Mix with powdered sugar
Once your butter is perfectly softened, place it in a large mixing bowl. Using an electric mixer (either a stand mixer with a paddle attachment or a hand mixer), beat the butter on medium speed until it’s light and fluffy, usually for 2-3 minutes. This aerates the butter, contributing to a lighter buttercream. Next, gradually add the sifted powdered sugar. Start on a low speed to avoid a cloud of sugar, then increase to medium once it’s incorporated. Beat until the mixture is well combined and creamy. The sugar not only sweetens the filling but also helps to create the smooth texture. If the mixture seems too thick, resist the urge to add liquid until the coffee is incorporated.
Add brewed coffee flavor
The star of this filling is, of course, the coffee. For an authentic and intense flavor, use strong, freshly brewed coffee or espresso that has been cooled completely. Adding warm liquid will melt your butter and ruin the buttercream consistency. Gradually add the cooled coffee, one tablespoon at a time, beating after each addition until fully incorporated. You can adjust the amount of coffee to your taste preference, aiming for a flavor that is pronounced but not overwhelming. If the filling seems too thin, you can add a bit more sifted powdered sugar; if it’s too thick, a tiny splash more coffee will do the trick. Beat the mixture for another minute or two on medium-high speed until it’s light, fluffy, and boasts a rich coffee aroma, creating the ultimate coffee-flavored dessert experience.
Assembling Your Decadent Coffee Macarons
The final step in your journey to create decadent coffee macarons is the assembly, where the crisp shells meet the luscious filling. This is where your hard work truly comes together to form a beautiful and delicious coffee-infused treat.
Sandwich with delicious filling
Once your coffee macaron shells are completely cooled and your rich coffee filling is ready, it’s time to bring them together. Carefully pair up macaron shells of similar sizes. This ensures a neat and aesthetically pleasing final product. You can do this by laying out all your cooled shells and matching them by eye. Transfer your coffee buttercream filling to a piping bag fitted with a round tip (or simply snip off the corner of a Ziploc bag for a homemade piping tool). Pipe a generous dollop of filling onto the flat side of one macaron shell, leaving a small border around the edge. Don’t be shy with the filling; it adds moisture and richness. Then, gently place a second matched shell on top, twisting slightly to distribute the filling evenly. Avoid pressing too hard, as this can crack the delicate shells. Continue this process until all your shells are paired and filled. Once assembled, it’s best to store your macaron assembly in an airtight container in the refrigerator for at least 12-24 hours. This period, known as “maturation,” allows the filling’s moisture to soften the macaron shells slightly, resulting in that signature chewy texture that makes macarons so irresistible. Allow them to come to room temperature for about 15-20 minutes before serving for the best flavor and texture experience. You can showcase your culinary creations on Pinterest or Instagram!
Helpful Tips for Coffee Macarons
Baking perfect macarons, especially delicate ones like decadent coffee macarons, can seem daunting, but a few key tips can significantly improve your success rate. These insights address common challenges and help ensure your homemade macarons recipe yields consistent, beautiful results every time.
Room temperature egg whites
This is one of the most frequently emphasized tips for macaron success, and for good reason. Using room temperature egg whites allows them to whip up to a greater volume and create a more stable meringue. Cold egg whites are stiffer and less elastic, making it harder for them to incorporate air efficiently. For best results, separate your egg whites from the yolks a day or two in advance and store them in a small, covered container in the refrigerator. Before baking, bring them out and let them sit at room temperature for at least 30 minutes to an hour. Some bakers even suggest “aging” egg whites by leaving them uncovered in the fridge overnight to allow some moisture to evaporate, which can lead to a more stable meringue. This small step can make a big difference in the stability of your macaron batter and the formation of those coveted “feet.”
Use kitchen scale for accuracy
Unlike many other baking recipes where cup measurements might suffice, macaron baking demands precision. Investing in a good digital kitchen scale is paramount for achieving consistent results. The difference of even a few grams of almond flour or powdered sugar can drastically alter the macaron consistency and affect how your shells bake. Liquid measurements, especially for smaller quantities, are also more accurate by weight. For example, 50 grams of egg whites will always be 50 grams, regardless of how they are scooped, whereas a cup measurement can vary. Following a recipe that provides measurements in grams will significantly increase your chances of baking flawless macaron shells. This precision minimizes variables, allowing you to troubleshoot more effectively if issues arise, making it a cornerstone of successful baking delicate macarons.
Time Breakdown: Coffee Macaron Baking
Understanding the time commitment involved in baking decadent coffee macarons can help you plan your day and ensure a relaxed baking experience. While the process isn’t quick, it’s broken down into manageable stages, making it an enjoyable project for any baker.
Prep time is quick
The hands-on preparation for coffee macarons typically takes about 30-45 minutes. This includes sifting your dry ingredients, separating and preparing egg whites, and getting your workstation ready. This initial phase focuses on organization and precise measurement, which sets the stage for success. Once the ingredients are prepped, the actual mixing and macaronage can be quite swift, often completed within 15-20 minutes depending on your technique.
Cooking time details
The baking time for the macaron shells themselves is relatively short, usually 12-18 minutes per tray. However, you’ll need to account for preheating your oven thoroughly (20-30 minutes) and the crucial “resting” period for the piped shells, which can take anywhere from 30 minutes to an hour. This resting time allows a skin to form on the shells, essential for developing the characteristic “feet.” Once baked, allow another 15-30 minutes for them to cool completely before handling.
Total time estimation
Considering all stages, from initial preparation to the shells being ready for filling, you can expect the active and inactive baking process for homemade macarons recipe shells to take approximately 2 to 3 hours. The filling preparation adds another 15-20 minutes. Keep in mind that for the best flavor and texture, assembled macarons benefit from a “maturation” period in the refrigerator for 12-24 hours. So, while the immediate baking might be a few hours, the full process for these sweet treats is an overnight affair. Plan accordingly for your delicious coffee-flavored dessert.
7 Rich Ways to Indulge Macarons
Beyond simply eating them, decadent coffee macarons offer versatility for indulgence and presentation. These suggestions help you savor your homemade creations or share them elegantly.
- Coffee Break Companion: Pair your macaron with a freshly brewed cup of coffee or espresso for an elevated coffee break.
- Elegant Dessert Platter: Arrange alongside other small pastries like mini tarts or fruit skewers for a sophisticated dessert spread.
- Gift of Gourmet: Box them beautifully with ribbon for a thoughtful, homemade gift.
- Tea Time Treat: Serve with a delicate Earl Grey or black tea for a refined afternoon tea experience.
- Ice Cream Topping: Crumble a macaron over vanilla or coffee ice cream for added texture and flavor.
- Dessert Garnish: Use as an edible garnish on larger cakes or plated desserts for an artistic touch.
- Macaron Ice Cream Sandwiches: Fill larger shells with your favorite coffee-flavored ice cream for a unique frozen treat.
Serving size per macaron
Typically, one macaron is considered a serving, though their small size and irresistible flavor often lead to enjoying more! Given their richness and intricate flavor, even a single coffee macaron can be a satisfying sweet treat. When serving for an event, planning 1-2 macarons per person is usually a good estimate, depending on other desserts offered.
Macaron calorie information
The calorie content of macarons can vary significantly based on size, ingredients, and filling. Generally, a single homemade coffee macaron (about 1.5-2 inches in diameter) can contain anywhere from 70 to 120 calories. This estimation considers the almond flour, sugar, and butter-based filling. While they are a treat, they are also quite dense in calories for their size due to the sugar and fats. For precise nutritional information, it’s always best to use an online nutritional calculator with your specific recipe ingredients. However, as a delightful indulgence, enjoying a few perfect macarons occasionally is part of a balanced approach to main course and dessert enjoyment.
