
Banana bread is a beloved classic, offering a sweet, comforting taste that brightens any day. This simple, easy recipe guides you through creating a deliciously moist loaf. Perfect for breakfast, a snack, or dessert, your homemade banana bread will surely become a family favorite treat.
Key Takeaways
- Achieve perfectly moist and flavorful banana bread with ripe bananas.
- This easy recipe provides step-by-step instructions for home baking success.
- Learn storage tips to keep your homemade banana bread fresh or freeze it.
- A versatile comfort food, great for breakfast, snacks, or dessert.
Baking banana bread is truly rewarding. Its aroma fills your kitchen. This sweet treat brings pure joy. Simple ingredients make it special. Enjoy every delicious, moist slice.
Why You’ll Love This Banana Bread
Perfect comfort food anytime
There’s something uniquely heartwarming about a freshly baked loaf of banana bread. It embodies the very essence of comfort food, capable of bringing a smile to anyone’s face, no matter the time of day. Whether you need a cozy morning breakfast, a satisfying afternoon snack, or a sweet finish to your dinner, this moist bread fits every occasion. Its soft texture and naturally sweet flavor make it an irresistible homemade treat, providing that comforting hug in every bite. It’s the kind of dish that evokes fond memories and creates new ones, making it a staple in kitchens worldwide.
Simple to bake at home
One of the greatest joys of this particular banana bread recipe is how incredibly simple it is to bake at home. You don’t need any specialized equipment or advanced culinary skills to achieve fantastic results. With common kitchen staples and a few overripe bananas, you can easily whip up a batch that rivals any bakery creation. The straightforward steps are designed for home bakers of all levels, ensuring a stress-free process from start to finish. This easy recipe simplifies baking, letting you focus on the delightful aromas filling your kitchen and the anticipation of that first flavorful slice. For more simple baking ideas, check out our baking category.
Ingredients for Banana Nut Bread
What you will need
Gathering your ingredients is the first step to creating this delightful banana nut bread. You’ll need all-purpose flour, granulated sugar, baking soda, salt, and ground cinnamon for the dry components. For the wet ingredients, ensure you have eggs, melted unsalted butter, vanilla extract, and of course, your ripe bananas. A crucial addition for that classic texture and flavor is a good quantity of chopped walnuts. Make sure all your ingredients are at room temperature, especially the eggs, as this helps them incorporate better into the batter, leading to a smoother consistency and a more evenly baked loaf.
Picking best bananas
The secret to truly flavorful and moist banana bread lies in the bananas themselves. You need bananas that are beyond just ripe—they should be speckled with brown spots or even mostly brown. These ‘overripe’ bananas are significantly sweeter and softer, making them easier to mash and ensuring a richer banana flavor in your bread. The natural sugars develop intensely in very ripe fruit, contributing to both the taste and the delightful aroma. Avoid using yellow or slightly green bananas, as they lack the sweetness and moisture necessary for the best results. If your bananas aren’t quite ready, you can speed up the ripening process by placing them in a paper bag for a day or two, or even baking them in their skins at a low temperature until they turn black and soft, although this method is best for immediate use.
Making the Ultimate Banana Bread
Preheat oven and pan
Preparation is key for perfect banana bread. Start by preheating your oven to 350°F (175°C). While the oven heats, prepare your loaf pan. Lightly grease a 9×5-inch loaf pan with butter or cooking spray, then dust it lightly with flour. This ensures your banana bread won’t stick and will release easily after baking. You can also line the bottom with parchment paper, leaving an overhang on the longer sides to create ‘handles’ for lifting the baked loaf out with ease. This small step makes a big difference in presentation and prevents any frustration when it’s time to unmold your delicious creation.
Mixing wet ingredients first
With your oven preheating and pan ready, it’s time to tackle the wet ingredients. In a large bowl, mash your ripe bananas thoroughly with a fork until mostly smooth, a few small lumps are perfectly fine for added texture. Then, whisk in the melted butter, granulated sugar, beaten eggs, and vanilla extract. This ensures all the moistening and sweetening agents are well combined before introducing the dry ingredients. The order of mixing is important; combining wet ingredients first allows for even distribution of flavors and moisture, which is crucial for that characteristic moist bread texture everyone loves. This step sets the foundation for a perfectly balanced and flavorful loaf.
Combining Your Bread Batter
Mix flour gently
Once your wet ingredients are beautifully blended, it’s time to introduce the dry components. In a separate medium bowl, whisk together the all-purpose flour, baking soda, salt, and ground cinnamon. This dry mix ensures that the leavening agent and spices are evenly distributed throughout the flour before it’s added to the wet mixture. Gradually add the dry ingredients to the wet banana mixture, mixing gently with a wooden spoon or spatula until just combined. Be careful not to overmix the batter. Overmixing develops the gluten in the flour too much, which can result in a tough, dense banana bread instead of the desired tender, soft crumb. A few streaks of flour are acceptable; the goal is just to incorporate everything.
Fold in walnuts next
After the flour is just incorporated, it’s time for the delicious addition of walnuts. Gently fold in the chopped walnuts using your spatula. Ensure they are evenly distributed throughout the batter. Walnuts add a wonderful crunch and nutty flavor that complements the sweet banana perfectly. If you’re not a fan of nuts, you can certainly omit them, but they are a classic part of banana nut bread for good reason. Other optional additions, like chocolate chips, can also be folded in at this stage if you desire. Once the walnuts are mixed in, pour the batter into your prepared loaf pan. Evenly spread the top with the spatula. For another delightful dessert, consider making peanut butter brownie swirl cookies.
Baking Your Banana Nut Loaf
How long to cook
Place your filled loaf pan into the preheated 350°F (175°C) oven. The baking time for banana nut bread typically ranges from 55 to 65 minutes, but this can vary depending on your oven and the exact moisture content of your bananas. It’s helpful to set a timer for around 50 minutes and then begin checking. Baking banana bread to perfection requires patience and a watchful eye. The top should be a rich golden brown, and the edges should start pulling away slightly from the sides of the pan. If the top begins to brown too quickly, you can loosely tent the loaf with aluminum foil to prevent it from burning while the inside continues to cook.
Test if it’s done
To ensure your banana nut loaf is perfectly cooked through, perform the classic toothpick test. Insert a wooden toothpick or a thin skewer into the center of the bread. If it comes out clean, with no wet batter clinging to it, your bread is done. If there are wet crumbs or liquid batter, return the loaf to the oven for another 5-10 minutes and test again. An underbaked banana bread will be gummy, while an overbaked one can be dry. Aim for that perfect balance of moistness without being raw in the middle. Once done, carefully remove the pan from the oven. For another easy and comforting baked meal, try our creamy baked mac and cheese recipe.
Cooling Your Baked Banana Bread
Let it rest fully
Resist the urge to slice into your freshly baked banana bread immediately! Cooling is a crucial step that allows the bread to set properly and retain its moisture. First, let the loaf cool in the pan on a wire rack for about 10-15 minutes. This initial cooling period allows the bread to firm up slightly, making it easier to remove without breaking. After this time, carefully invert the loaf onto the wire rack, remove the pan, and let the banana bread cool completely, which can take anywhere from 1 to 2 hours. Cooling on a wire rack ensures air circulates around all sides, preventing the bottom from becoming soggy. This step is essential for achieving that delightful texture.
Ready for slicing
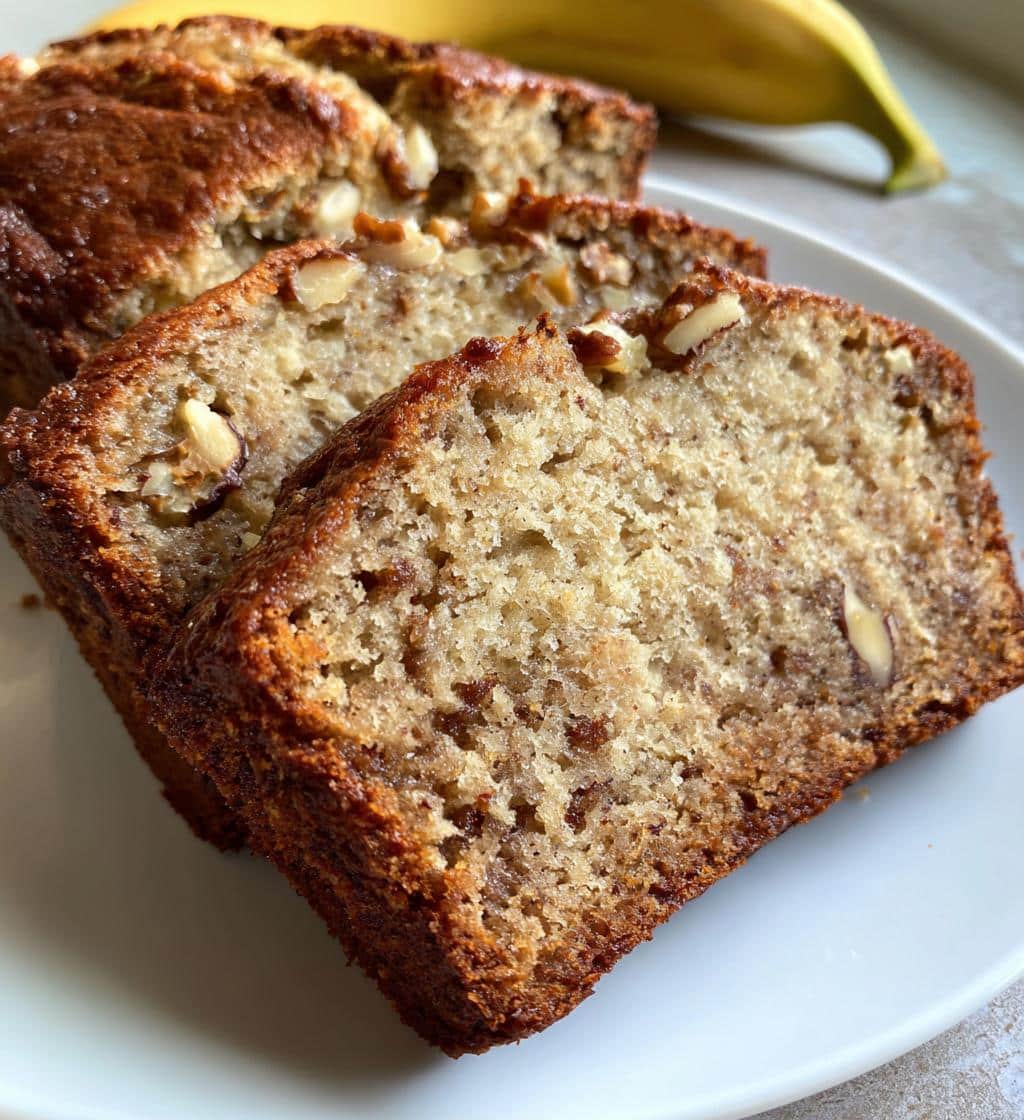
Once your banana bread has cooled completely, it’s finally ready for slicing and enjoying! Using a serrated knife, gently slice the loaf into thick, even pieces. The cool bread will be firm enough to cut cleanly, revealing its beautifully moist crumb and the inviting specks of walnuts. Serve it plain, with a smear of butter, cream cheese, or a drizzle of honey. It pairs wonderfully with a cup of coffee or tea. This homemade snack is perfect for any time of day, whether you’re craving a sweet treat after dinner or a wholesome breakfast option. Share your creations on Instagram!
Enjoying Your Ultimate Banana Bread
So moist and flavorful
The moment you take that first bite of this homemade banana bread, you’ll be met with an incredibly moist and rich flavor profile. The sweetness from the ripe bananas is perfectly balanced, creating a natural depth that’s enhanced by a hint of cinnamon and vanilla. The walnuts add a delightful textural contrast, providing a satisfying crunch against the soft, tender crumb. This bread isn’t just sweet; it’s deeply flavorful, a true testament to using simple, quality ingredients and following proper baking techniques. Its rich, aromatic essence makes it a truly special treat, far superior to store-bought versions.
Great for any time
One of the best qualities of this banana bread is its versatility. It’s genuinely a “great for any time” food. Enjoy a slice with your morning coffee for a delightful start to your day, or pack it in a lunchbox for a wholesome and satisfying midday snack. It also serves as a fantastic light dessert, perhaps warmed slightly with a scoop of vanilla ice cream. Don’t forget it’s a wonderful treat to offer guests when they visit. Its widespread appeal and comforting nature make it an ideal choice for practically any eating occasion. For more breakfast ideas, check out our recipe for Hawaiian Roll French Toast.
Tips for Best Banana Bread
Use very ripe fruit
As mentioned earlier, the most critical tip for achieving truly outstanding banana bread is to use very ripe fruit. The browner and spottier the bananas, the better. These bananas are naturally sweeter and softer, contributing significantly to the bread’s flavor, moisture, and aroma. Don’t throw away those seemingly “too ripe” bananas; they are gold for baking! If you only have yellow bananas, you can try to ripen them faster by placing them in a brown paper bag with an apple overnight, or bake them unpeeled at 300°F (150°C) for 15-30 minutes until their skins turn black.
Optional additions too
While this recipe provides a classic banana nut bread, it’s also incredibly versatile. Feel free to experiment with optional additions to customize your loaf. Chocolate chips (milk, dark, or semi-sweet) are a very popular choice, adding pockets of melty sweetness. You could also add shredded coconut for a tropical twist, dried cranberries or raisins for a chewy texture, or a sprinkle of nutmeg for extra warmth. For a more intense nutty flavor, try a mix of pecans and walnuts. Just ensure you don’t add too many extras, as this can alter the batter consistency and baking time. Generally, aim for no more than 1 cup of total additions to maintain the bread’s structure.
Storing Your Banana Bread Safely
Keep it fresh longer
Proper storage is essential to keep your homemade banana bread fresh and moist for as long as possible. Once completely cooled, wrap the loaf tightly in plastic wrap, then place it in an airtight container or a large zip-top bag. Stored at room temperature, it will remain fresh for 2-3 days. For slightly longer freshness, you can refrigerate it, where it will last for up to a week. However, refrigerated bread can sometimes dry out a little quicker, so ensure it’s well-wrapped. Before serving refrigerated bread, allow it to come to room temperature or warm it slightly for the best texture and flavor.
Freezing for later use
Banana bread is an excellent candidate for freezing, making it perfect for meal prepping or always having a delightful snack on hand. To freeze, ensure the loaf is completely cooled. You can freeze it whole, in halves, or sliced. Wrap individual slices or the entire loaf tightly in plastic wrap, then an additional layer of aluminum foil. Place the wrapped bread in a freezer-safe bag or container. It will keep well in the freezer for up to 3 months. To enjoy, simply thaw at room temperature for a few hours, or warm slices in the microwave or toaster oven. This is a great way to ensure you always have a comforting treat available!
Nutrition Facts Per Slice
Calories and other details
Understanding the nutritional value of your homemade banana bread can be helpful for dietary planning. While exact nutrition facts can vary based on specific ingredients, portion size, and additions (like nuts or chocolate chips), a typical slice of banana nut bread generally contains a moderate amount of calories, carbohydrates, and some fat. It also provides dietary fiber from the bananas and walnuts, and a small amount of protein. The natural sugars from the ripe bananas contribute to the carbohydrate content. If you’re looking to adjust the nutritional profile, you can consider reducing sugar, using whole wheat flour, or opting for fewer additions.
Understand serving sizes
When considering nutrition, it’s important to understand what constitutes a serving size. For a standard 9×5-inch loaf, slicing it into 12-14 even pieces usually provides a reasonable serving. Be mindful that thicker slices or adding extra butter, jam, or other toppings will increase the calorie and sugar content per serving. Paying attention to serving sizes helps in managing intake, especially if you’re tracking your diet. Remember that homemade banana bread, while delicious, is a treat that can be enjoyed in moderation as part of a balanced diet. For more insights into healthy eating, you can visit Wikipedia’s nutrition page.
This Recipe Fits Many Needs
Good for vegetarians
This banana bread recipe is naturally suitable for vegetarians, making it a wonderful option for many dietary preferences. It contains no meat or fish products, relying on eggs, butter, and plant-based ingredients for its structure and flavor. For those who follow a vegan diet, simple substitutions can be made: swap the eggs for flax eggs or applesauce, and use a plant-based butter alternative. This adaptability makes it a versatile recipe that can be enjoyed by a wide audience, ensuring everyone can savor a slice of this comforting baked good.
A classic American treat
Banana bread holds a cherished place in American culinary traditions, often considered a quintessential classic American treat. Its origins are tied to the Great Depression, when home bakers found creative ways to use overripe bananas rather than discarding them. This resourceful approach led to the creation of a beloved, easy-to-make bread that quickly became a household favorite. Today, it remains a nostalgic and universally adored item, gracing breakfast tables, lunchboxes, and dessert plates across the country. Its enduring popularity is a testament to its simple charm and delicious taste, making it a timeless recipe worth mastering. Discover more about its history on Wikipedia.
Share Your Homemade Banana Bread
With family and friends
There’s immense joy in sharing your culinary creations, and this homemade banana bread is no exception. It’s the perfect treat to share with family and friends, whether you’re hosting a brunch, bringing a thoughtful gift to a gathering, or simply want to spread some comfort. The warmth and care that go into baking it make it more than just food; it’s a gesture of affection. Watch their faces light up as they taste the moist, flavorful bread you’ve made with your own hands. It’s a wonderful way to connect and create shared happy moments around delicious food.
A delightful, easy snack
Beyond its role as a generous gift, this banana bread also serves as a delightful and easy snack for your everyday needs. Keep a loaf on your counter for quick grabs, or pre-slice and pack portions for on-the-go enjoyment. Its natural sweetness and satisfying texture make it an ideal pick-me-up during a busy day, providing sustained energy without feeling heavy. It’s a wholesome alternative to many processed snacks, offering both great taste and simple ingredients. So bake a batch today and keep your snack cravings happily satisfied. Don’t forget to follow us on Pinterest for more easy recipes!
