
Protein banana bread recipe offers a delightful way to enjoy a classic comfort food while boosting your protein intake. This nutritious treat is perfect for a healthy snack or post-workout fuel. We’ll walk through simple steps to make this easy bake high-protein dessert, ensuring you create a moist, flavorful loaf every time for your meal prep.
Key Takeaways
- Enjoy a wholesome protein banana bread as a healthy snack or dessert.
- Boost your daily protein intake effectively with this delicious recipe.
- Use ripe, spotty bananas for optimal sweetness and moisture.
- Gentle mixing prevents tough bread; avoid over-mixing the batter.
- Choose a high-quality protein powder for best flavor and texture results.
- Proper baking temperature and cooling are crucial for a perfect loaf.
- Store correctly for freshness, or freeze for convenient meal prep.
This bread is truly a game changer. It combines taste with great nutrition. Enjoy a delicious treat without guilt. Your body will thank you for it. Baking it is simpler than you think.
Why Bake Protein Banana Bread?
Baking a protein banana bread recipe isn’t just about satisfying a craving; it’s about making a smart, health-conscious choice. This versatile, nutritious treat transforms a classic comfort food into a powerhouse of goodness, ideal for those seeking a balanced lifestyle. Whether you’re a fitness enthusiast or simply looking for better snack options, this bread offers incredible benefits.
Enjoy a Healthy Snack
Forget processed snacks packed with sugar and unhealthy fats. Our protein banana bread is a genuinely healthy snack option that provides sustained energy. Made with wholesome ingredients, it offers a perfect balance of carbohydrates, healthy fats, and, most importantly, protein. It keeps you feeling full and satisfied, making it an excellent choice for curbing those mid-day cravings or as a nutritious treat after a workout. Consider pairing a slice with your favorite beverage, or perhaps with another healthy option like an easy honey garlic chicken dinner for a balanced day of eating.
Boost Daily Protein Intake
Incorporating more protein into your diet is vital for muscle building, repair, and overall well-being. This high-protein dessert offers a convenient and delicious way to achieve your daily protein goals without resorting to bland shakes or bars. Each slice is packed with valuable protein, contributing to a feeling of satiety and supporting muscle recovery. It’s an ideal fitness recipe that seamlessly fits into your meal prep routine, ensuring you always have a readily available source of quality protein.
Gather Protein Banana Bread Ingredients
The success of your protein banana bread recipe begins with selecting the right ingredients. Quality components ensure a moist, flavorful loaf every time. Having everything measured and ready before you start mixing will streamline the baking process, making this an easy bake project from start to finish. Pay special attention to the ripeness of your bananas—it truly makes all the difference for a sweet, naturally flavorful outcome.
List of Wet Items
For the wet ingredients, you’ll need a few key components that contribute to the bread’s moisture and richness. The stars are, of course, the ripe bananas. Beyond that, gather your eggs, a liquid fat like melted coconut oil or unsalted butter, milk (dairy or non-dairy works well), and vanilla extract for an aromatic boost. Ensure all wet ingredients are at room temperature, as this helps them combine more smoothly and prevents the batter from becoming too dense.
List of Dry Items
The dry ingredients form the structural base of your protein banana bread. You’ll need all-purpose flour (or a gluten-free blend), your chosen protein powder (which we’ll discuss in more detail later), sugar (brown sugar for moisture and a deeper flavor is often preferred), baking soda and baking powder for lift, a pinch of salt to balance the sweetness, and optionally, spices like cinnamon or nutmeg for added warmth. Sifting the dry ingredients together ensures they are well combined and free of lumps, leading to a uniform batter.
Mixing Protein Banana Bread Batter
Creating the perfect protein banana bread batter involves careful technique, especially when it comes to mashing your bananas and blending the wet ingredients. The goal is to achieve a consistent texture that will bake into a tender, moist loaf. This stage sets the foundation for the entire easy bake process, so take your time and follow these steps to ensure success.
Mash Bananas Smoothly
Start with your very ripe bananas. The riper they are, the easier they’ll be to mash and the sweeter your bread will be. In a large bowl, use a fork or a potato masher to mash the bananas. You can aim for a smooth consistency with a few small lumps remaining, which adds a lovely texture to the finished bread. Avoid leaving large chunks, as they might not integrate well into the batter and could create pockets of unbaked banana. The natural sweetness from well-mashed, ripe bananas is essential.
Blend Wet Ingredients Well
Once your bananas are mashed, it’s time to incorporate the remaining wet ingredients. Add the melted coconut oil or butter, eggs, milk, and vanilla extract to the bowl with the mashed bananas. Whisk these ingredients together until they are thoroughly combined and smooth. This step ensures that all the flavors are evenly distributed and that the eggs are fully incorporated, which is crucial for the bread’s rise and texture. A well-blended wet mix will make it easier to combine with the dry ingredients later without over-mixing.
Combine Dry and Wet Mixes
The art of combining your dry and wet ingredients is critical for a tender and moist protein banana bread. This step often determines the final texture of your loaf, emphasizing the “easy bake” aspect if done correctly. Rushing or over-mixing can lead to a dense, rubbery result, so patience and a gentle hand are your best tools here. Remember, you’re looking for just combined, not perfectly smooth.
Stir Until Just Combined
Once your wet and dry ingredients are prepped, gradually add the dry mixture to the wet ingredients. Using a spatula or a wooden spoon, gently stir until the flour streaks have almost disappeared. It’s okay, and even desirable, to have a few small lumps and streaks of flour remaining. This ensures you don’t over-develop the gluten, which leads to a tough bread. The goal is to hydrate the dry ingredients without excessive mixing, preserving the tender crumb of your healthy snack. This technique is a fundamental principle in many baking recipes.
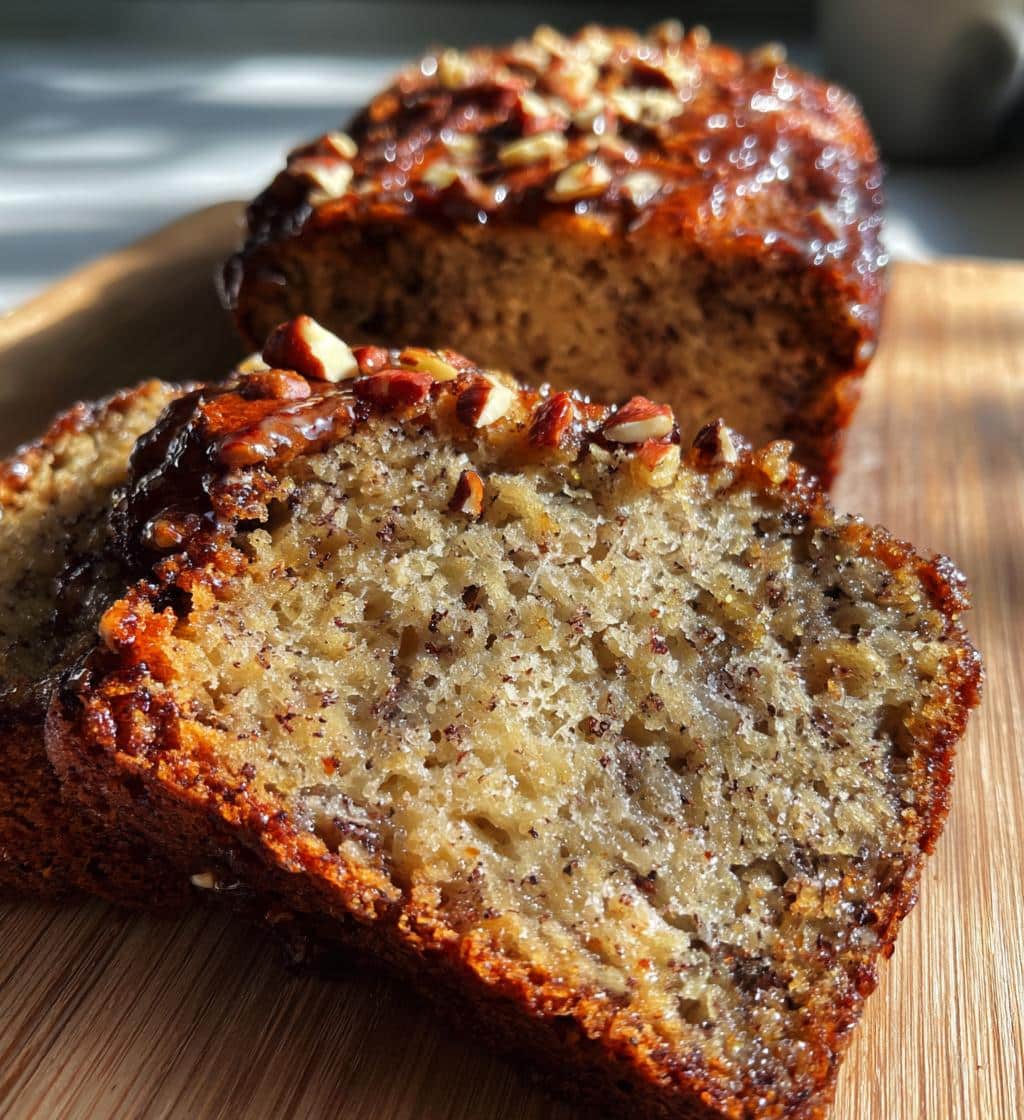
Fold in Optional Nuts
If you’re adding optional ingredients like chopped walnuts, pecans, or chocolate chips, now is the time to fold them into the batter. Do this after the dry and wet ingredients are mostly combined. Gently fold them in with your spatula until they are evenly distributed throughout the batter. Over-mixing at this stage can also lead to a tough texture, so keep it brief. These additions can enhance the flavor and texture of your nutritious treat, making each bite even more enjoyable.
Baking Your Loaf to Perfection
Achieving a perfectly baked protein banana bread loaf requires attention to detail, particularly regarding oven temperature and timing. A well-baked loaf will have a beautiful golden-brown crust and a moist, tender interior. This stage is the culmination of all your careful preparation, bringing your high-protein dessert dream to reality. Following these steps ensures your efforts are rewarded with a delicious outcome.
Preheat Oven to 350°F
Before you even think about pouring your batter, it’s crucial to preheat your oven to 350°F (175°C). An accurately preheated oven ensures that your bread starts baking immediately at the correct temperature, promoting an even rise and preventing a dense texture. Place the oven rack in the center position for optimal heat circulation. Allow your oven to fully preheat for at least 15-20 minutes, even after the indicator light suggests it’s ready, to ensure it reaches and maintains the set temperature.
Pour Batter into Pan
Once your oven is preheated and your batter is ready, lightly grease and flour a standard loaf pan, or line it with parchment paper for easy removal. This prevents sticking and ensures your beautifully baked protein banana bread comes out clean. Carefully pour the batter into the prepared loaf pan, using a spatula to ensure an even distribution. Smooth the top of the batter gently with the spatula. This preparation step is simple, but vital for an easy bake and successful release of your finished loaf.
Secret 1: Ripe Bananas Are Key
The foundation of an outstanding protein banana bread, particularly one that acts as a genuinely high-protein dessert, lies in the ripeness of its namesake fruit. This isn’t just a suggestion; it’s a non-negotiable secret for achieving the best flavor and moisture. Skipping this step means missing out on the natural sweetness and tender texture that makes this recipe truly shine as a nutritious treat.
Why Brown Spots Matter
Those seemingly unappetizing brown spots and streaks on a banana peel are actually indicators of peak ripeness. As bananas ripen, their starches convert into natural sugars, making them significantly sweeter and more flavorful. This natural sweetness reduces the need for excessive added sugar in your protein banana bread. Furthermore, very ripe bananas are softer and easier to mash, integrating seamlessly into the batter and contributing to an incredibly moist crumb. They also impart a more intense banana flavor, elevating your easy bake creation from good to extraordinary. So, next time you see bananas with brown spots, grab them for your next loaf!
Secret 2: Combine Ingredients Gently
While the quality of ingredients is paramount, the method of combining them is equally important for achieving a light, tender protein banana bread. Many home bakers, in their enthusiasm, make the mistake of over-mixing the batter, which can lead to a less than desirable result. This subtle technique is a crucial easy bake secret to a perfectly structured loaf, ensuring your healthy snack remains soft and moist.
Avoid Over-mixing Batter
Over-mixing is the enemy of tender baked goods. When you mix flour with liquid, gluten begins to develop. While some gluten development is necessary for structure, excessive mixing creates too much gluten, resulting in a tough, chewy, and sometimes dense texture. For protein banana bread, you want a delicate crumb. Therefore, once you’ve added the dry ingredients to the wet, stir only until the ingredients are just combined and no visible streaks of dry flour remain. A few small lumps are perfectly acceptable and even preferred. Think of it as a gentle fold rather than a vigorous whisk. This simple adjustment ensures your high-protein dessert remains delightfully soft.
Secret 3: Pick Best Protein Powder
The choice of protein powder is a critical element in crafting the ideal protein banana bread. It not only boosts the nutritional profile, making it a true muscle building fitness recipe, but also significantly impacts the flavor and texture of your easy bake creation. Not all protein powders are created equal, and a thoughtful selection can elevate your loaf from good to truly great, ensuring your high-protein dessert is delicious.
Consider Your Flavor Choice
When selecting a protein powder, consider both the type and the flavor. Whey protein is common, but can sometimes dry out baked goods if used in large quantities. Casein or plant-based proteins (like pea or rice protein) often work well as they tend to absorb more liquid and can contribute to a moister crumb. Vanilla or unflavored protein powder are excellent choices as they complement the banana flavor without overpowering it. Chocolate protein powder can also create a delicious variation, transforming your loaf into a decadent high-protein dessert. Experiment with small batches if you’re unsure how a specific brand or flavor will perform. For another delightful baked treat, consider how protein powder might be integrated into peanut butter brownie swirl cookies, for instance.
Secret 4: Proper Oven Temperature
Maintaining the correct oven temperature is a non-negotiable secret to successful baking, especially for your protein banana bread. While setting the dial to 350°F is a good start, ensuring your oven actually holds that temperature consistently is where the magic happens. This precision guarantees an even bake, resulting in a perfectly cooked, nutritious treat rather than an under- or over-baked disappointment.
Bake at 350°F Steadily
Baking your protein banana bread steadily at 350°F (175°C) is crucial for a consistent rise and a perfectly cooked interior. If the oven is too hot, the crust will brown too quickly before the inside has a chance to cook through, leading to a burnt exterior and a raw, gooey center. If the oven is too cool, the bread will take too long to bake, resulting in a dry, dense loaf. Consider investing in an oven thermometer to verify your oven’s accuracy, as many home ovens can fluctuate by 25-50 degrees. This steady temperature allows the batter to set gradually, letting the leavening agents work effectively to create a light, airy texture. This control over temperature is a cornerstone of every successful easy bake recipe.
Secret 5: Check Doneness Carefully
Knowing when your protein banana bread is perfectly baked is another crucial secret to achieving a moist and tender loaf. Pulling it out too early results in a raw center, while leaving it in too long can lead to a dry, crumbly texture. A reliable test ensures your high-protein dessert is cooked just right, making it a truly enjoyable healthy snack.
Toothpick Test Method
The classic toothpick test is the most accurate way to determine if your protein banana bread is fully baked. Around 50-60 minutes into baking, insert a wooden toothpick or a thin skewer into the very center of the loaf. If it comes out clean or with just a few moist crumbs clinging to it, your bread is done. If you see wet batter, continue baking for another 5-10 minutes, then test again. Remember that ovens can vary, so the baking time is often a guideline. Trust the toothpick test over the clock to guarantee a perfectly cooked, nutritious treat every time.
Secret 6: Cool Bread Completely
Once your protein banana bread emerges from the oven, fragrant and golden, the temptation to slice into it immediately is powerful. However, resisting this urge is a secret that significantly impacts the final texture and stability of your loaf. Proper cooling is not just about making it easier to handle; it’s essential for achieving that perfect slice of your healthy snack.
Important for Slicing
Allowing your protein banana bread to cool completely on a wire rack is incredibly important for several reasons. As the bread cools, the internal structure sets, and any residual moisture redistributes throughout the loaf. Slicing into a warm loaf can cause it to crumble, be difficult to cut cleanly, and appear gummy or doughy inside. A fully cooled loaf will have a much better texture, hold its shape beautifully, and allow for neat, even slices. This makes it ideal for meal prep and ensures each piece of your high-protein dessert is as appealing as it is delicious. This cooling step is as vital for a perfect finish as it is for other baked goods, like blueberry muffin cookies with streusel, ensuring a consistent texture.
Storing Your Protein Banana Bread
Once you’ve baked your delicious protein banana bread, proper storage is key to maintaining its freshness and moist texture. Whether you plan to enjoy it over a few days or save it for future meal prep, understanding the best storage methods will ensure your healthy snack remains a nutritious treat for as long as possible.
Airtight Container Storage
For short-term storage, keep your cooled protein banana bread in an airtight container at room temperature. This helps to prevent it from drying out and keeps it fresh for up to 3-4 days. You can also wrap individual slices in plastic wrap before placing them in the container for even better preservation, making them super convenient for grab-and-go healthy snacks. Avoid refrigerating your banana bread unless it contains highly perishable ingredients, as refrigeration can actually dry it out and alter its texture.
Freezing for Three Months
If you’ve made a larger batch or want to enjoy your protein banana bread for an extended period, freezing is an excellent option for meal prep. Once completely cooled, wrap the entire loaf or individual slices tightly in plastic wrap, then an additional layer of aluminum foil. Place the wrapped bread in a freezer-safe bag or container. This method helps prevent freezer burn and keeps your high-protein dessert fresh for up to three months. When you’re ready to enjoy, simply thaw at room temperature or gently warm slices in a toaster or microwave. Find more inspiration and recipes on our Instagram account!
