
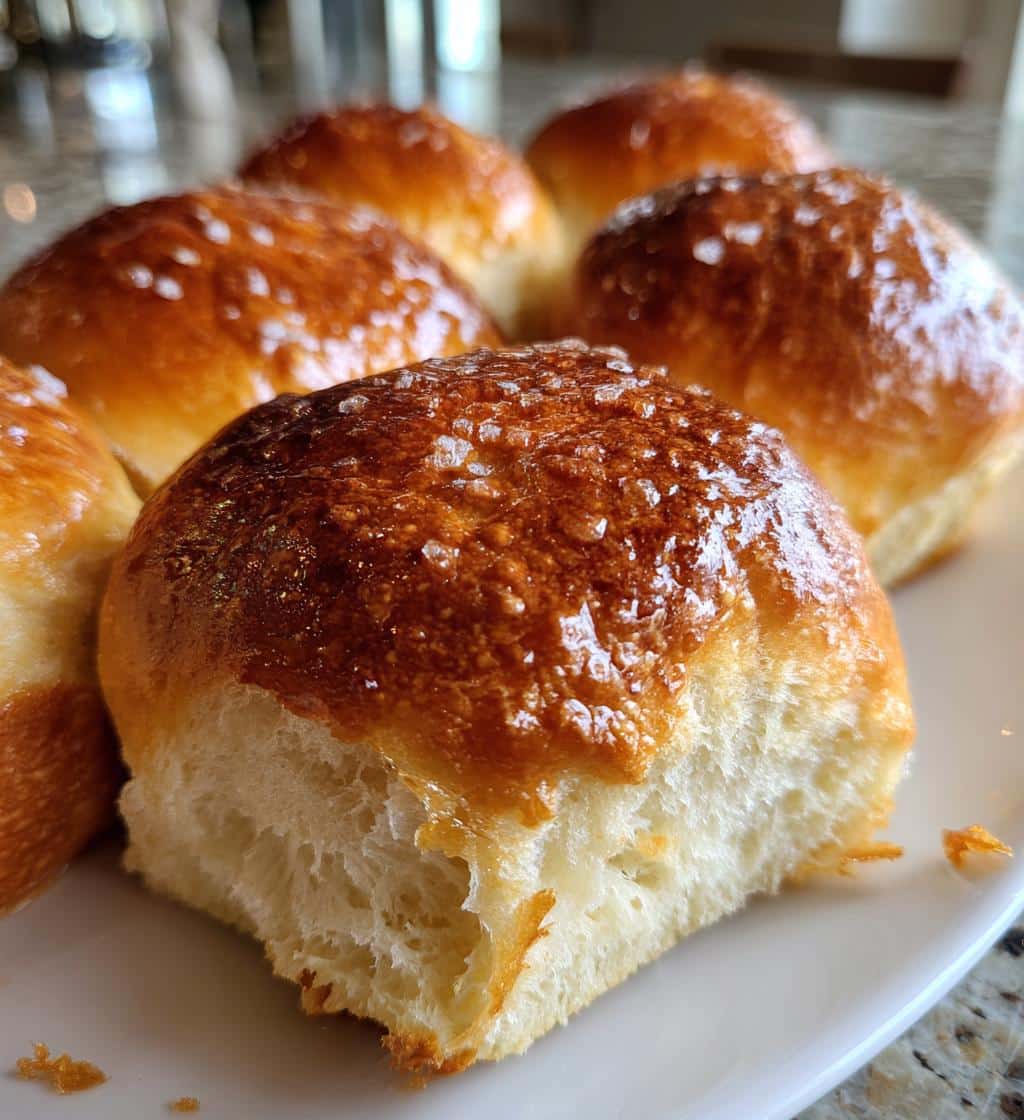
Brioche buns offer a delightful, rich taste unlike any other bread. Learning to make these soft, buttery rolls at home is a rewarding culinary adventure. Our recipe ensures you get light, airy brioche every time, perfect for any meal or as a sweet snack. Get ready for delicious results!
Key Takeaways
- Homemade brioche offers superior freshness and flavor compared to store-bought options.
- Careful measurement of ingredients is crucial for achieving the perfect brioche dough consistency.
- Proper kneading techniques and two distinct rise periods ensure a truly soft and fluffy texture.
- Cooling your brioche buns completely before serving or storing is essential for optimal enjoyment.
- Utilizing fresh yeast and avoiding over-kneading are expert tips for consistent success.
Homemade brioche is truly special. Its rich flavor stands out. The texture is incredibly soft. Making it at home is rewarding. Fresh buns are pure bliss.
Why Make Brioche Buns at Home?
Making homemade brioche buns allows you to control every ingredient, ensuring a fresh, high-quality product free from unwanted preservatives. This process is not just about baking; it’s about crafting an experience, from the aroma filling your kitchen to the first bite of a warm, tender bun. While it might seem intimidating, our simple steps break down the process, making it accessible even for novice bakers. The satisfaction of pulling a tray of golden brown, fluffy brioche from your oven is truly unparalleled, making the effort incredibly worthwhile.
Taste the fresh difference
There’s an undeniable difference between store-bought and freshly baked goods, and brioche is no exception. When you make your own brioche buns recipe, you get to experience the pure, rich flavor of real butter, fresh eggs, and quality flour. The moment they come out of the oven, their soft texture and delicate aroma are at their peak. This freshness significantly enhances any meal, whether you’re using them as brioche sandwich buns for a gourmet burger or enjoying them plain as a sweet treat. You’ll notice the superior taste and texture immediately, a richness that mass-produced versions simply cannot replicate.
Simple steps to bliss
While brioche has a reputation for being complex, our approach simplifies the process into manageable stages. We guide you through each part, from mixing the initial brioche dough to shaping and baking. You’ll find that the steps are straightforward and logical, building confidence with every stage. The “bliss” comes from seeing your dough transform and then enjoying the fruits of your labor. The effort invested in `baking brioche` at home translates into a deeply satisfying culinary achievement, proving that with a little patience, anyone can create these magnificent rolls. For another satisfying baking project, consider these Peanut Butter Brownie Swirl Cookies.
Gather Brioche Bun Ingredients List
A successful batch of soft brioche buns begins with the right ingredients, measured precisely. Each component plays a crucial role in creating the distinctive texture and flavor profile of classic brioche. Think of your ingredients as the building blocks; quality matters immensely. Using fresh, high-quality ingredients will yield the best results, so take a moment to ensure everything is at its best before you begin your journey to perfect homemade brioche. Accuracy in measurement is key for bread making, so ensure your scales and measuring cups are reliable.
All-purpose flour, sugar, salt
These are the foundational dry ingredients for your brioche bread. All-purpose flour provides the structure, and while some recipes might suggest bread flour for higher protein, all-purpose works beautifully for a tender crumb. Granulated sugar sweetens the dough, aids in fermentation, and contributes to that desirable golden crust. Salt is vital for flavor balance and also helps control yeast activity. Don’t underestimate its importance; skipping or reducing salt can lead to bland bread. Sifting your flour can also help ensure a lighter dough, preventing clumps and promoting even distribution of dry ingredients.
Eggs, milk, softened butter
These wet ingredients are what give brioche its signature richness and color. Eggs add richness, help with structure, and contribute to the dough’s golden hue. Using room-temperature eggs is important for easier incorporation into the dough. Milk, also at room temperature, moistens the dough and provides additional tenderness. Whole milk is generally preferred for its fat content, contributing to a more decadent crumb. Finally, softened butter is the star of butter brioche. It needs to be truly softened—not melted, not cold—so it can be gradually incorporated into the dough, creating its characteristic tender, almost cake-like texture. This step is what truly sets brioche apart from other breads.
Start Your Brioche Dough Mixing
The initial mixing phase is critical for developing the gluten structure that gives brioche dough its elasticity and strength. This is where your ingredients come together, transitioning from separate components into a cohesive mass. Patience during this stage will pay off in the final texture of your fluffy brioche buns. Using a stand mixer with a dough hook is highly recommended for brioche, as the dough is quite wet and sticky, making hand kneading challenging but not impossible for the determined baker. Ensure your mixing bowl is clean and ready.
Combine dry ingredients first
Before adding any liquids, it’s good practice to thoroughly combine your dry ingredients. In a large mixing bowl (or the bowl of your stand mixer), whisk together the all-purpose flour, sugar, salt, and yeast. This ensures that the yeast is evenly distributed throughout the flour, allowing for consistent activation and fermentation. Proper distribution of these elements prevents pockets of unmixed ingredients, which could lead to uneven rising or flavor in your finished sweet brioche. This simple step lays a solid foundation for the dough’s development.
Add eggs and milk
Once your dry ingredients are well combined, it’s time to introduce the liquids. Create a small well in the center of your dry mixture and pour in the room-temperature eggs and milk. Begin mixing on low speed with the dough hook, gradually increasing the speed as the ingredients start to come together. The dough will initially be very wet and sticky. Don’t be alarmed; this is perfectly normal for homemade brioche. Continue mixing until a shaggy dough forms and most of the flour has been incorporated. It might cling to the sides of the bowl, but it should begin to gather around the hook. This stage prepares the dough for the crucial next step of kneading.
Kneading Dough for Smooth Texture
Kneading is perhaps the most important stage in creating truly magnificent brioche buns recipe. It’s during this process that gluten strands develop, giving the dough its strength, elasticity, and ultimately, the characteristic chewiness and open crumb of good brioche. For the best results, patience is key. The dough will transform from a sticky mass into a smooth, pliable, and elastic ball. This development is crucial for achieving the light, airy texture associated with fluffy brioche. Proper kneading is the backbone of exceptional bread, including this rich dough.
Gradually add softened butter
After the initial mixing of dry ingredients, eggs, and milk, and once the dough has started to come together, it’s time for the butter. This is where the magic of butter brioche truly happens. Add the softened, room-temperature butter one cube at a time, allowing each piece to be fully incorporated into the dough before adding the next. This process might take a while, often 10-15 minutes or even more on a stand mixer. The dough will appear very wet and slippery at first, but as the butter is absorbed, it will become incredibly smooth, shiny, and elastic. This gradual addition ensures the fat is evenly distributed, creating a tender and rich crumb.
Achieve perfect dough texture
You’ll know you’ve achieved the perfect dough texture when it passes the “windowpane test.” To perform this, take a small piece of dough and gently stretch it between your fingers. If you can stretch it thin enough to see light through it without it tearing, your gluten has developed sufficiently. The dough should also be very smooth, elastic, and slightly tacky to the touch, but it shouldn’t stick excessively to your hands or the sides of the mixing bowl. This perfectly kneaded brioche dough is now ready for its first rise, setting the stage for wonderfully soft brioche buns. Making a batch of this bread pairs wonderfully with a hearty meal, perhaps some Crispy Parmesan Chicken with a Rich Garlic Sauce.
First Rise for Soft Brioche Dough
The first rise, often called the bulk fermentation, is a crucial stage where the yeast gets to work, producing carbon dioxide that creates air pockets within the brioche dough. This process develops flavor and contributes significantly to the final texture of your homemade brioche buns. Don’t rush this step; allowing the dough sufficient time to rise slowly at a moderate temperature will result in a more complex flavor and a lighter, airier crumb. It’s during this period that the dough truly comes alive, becoming a vibrant, living entity.
Find a warm spot
After kneading, transfer your beautifully smooth brioche dough to a lightly oiled large bowl. Turn the dough once to coat it completely with oil, then cover the bowl tightly with plastic wrap or a clean kitchen towel. Place the bowl in a warm, draft-free spot in your kitchen. Ideal temperatures are typically between 70-80°F (21-27°C). A slightly warmed oven (turned off after being briefly on) or a sunny spot on your countertop can work wonders. Consistency in temperature helps the yeast activate evenly and promotes a steady rise. This warm environment is essential for the dough to expand and become truly pliable for the next steps.
Allow an hour to rise
The first rise usually takes about 1 to 1.5 hours, but the exact time can vary depending on the ambient temperature and the activity of your yeast. You’re looking for the dough to roughly double in size. Gently poke the dough with a floured finger; if the indentation remains, it’s ready. If it springs back quickly, it needs a little more time. This patience is rewarded with truly soft brioche. Once risen, gently deflate the dough to release the accumulated gases. This step prepares the dough for shaping and encourages a more uniform texture. This rise is a testament to the power of yeast, a fascinating organism, which you can learn more about on Wikipedia.
Shape Your Heavenly Brioche Buns
Once your brioche dough has completed its first rise and has been gently deflated, it’s ready to be transformed into individual buns. This shaping stage is where you give your future fluffy brioche its characteristic form. Uniformity in size is important, not just for aesthetics but also to ensure even baking. A little practice goes a long way here, but even slightly imperfect shapes will still yield delicious results. This hands-on part of the process is quite satisfying, watching the dough come to life under your touch.
Form equal bun shapes
Turn the dough out onto a lightly floured surface. Using a bench scraper or a sharp knife, divide the dough into equal portions. For standard brioche buns, portions of about 60-80 grams (2-3 ounces) each work well. To form each bun, gently cup a piece of dough with your hand and roll it against the counter in a circular motion, creating tension on the surface. This technique helps create a smooth, tight skin on the outside of the bun, which contributes to a beautiful, rounded shape and an even rise. Aim for consistency in size and shape to ensure all your homemade brioche buns bake at the same rate.
Prepare baking sheet
As you shape your buns, arrange them on a baking sheet lined with parchment paper. Leave enough space between each bun, as they will expand significantly during the second rise and in the oven. Typically, spacing them about 2-3 inches apart is sufficient. If you want them to bake into pull-apart rolls, you can place them a bit closer, so they touch during baking. Once all the buns are shaped and placed on the baking sheet, lightly cover them again with plastic wrap or a clean kitchen towel to prevent them from drying out during their second rise. This preparation is essential for a successful baking brioche experience. Don’t forget to take photos of your beautiful creations to share on platforms like Pinterest!
Second Rise for Fluffy Brioche Buns
The second rise, also known as proofing, is a critical step that gives your shaped brioche buns their final volume and contributes significantly to their famously light and airy texture. This period allows the yeast to produce a final burst of carbon dioxide, expanding the dough once more before it goes into the oven. Rushing this stage can result in dense, heavy buns, so patience here is paramount. A properly proofed bun will bake up beautifully, showcasing the delicate crumb of perfect soft brioche.
Let buns rest again
After shaping, cover your brioche buns loosely with plastic wrap or a kitchen towel to prevent them from drying out. Place the baking sheet in a warm, draft-free spot for the second rise. This rise typically takes about 30-60 minutes, depending on the warmth of your kitchen. The goal is for the buns to become visibly puffy and increase significantly in size, but not quite double. Over-proofing can cause the buns to collapse in the oven, so keep a watchful eye on them. The buns should feel light and airy when gently touched, indicating a successful proof. This step is essential for achieving that sought-after `fluffy brioche` quality. Consider pairing these with a classic side dish like Creamy Baked Mac and Cheese for a delightful meal.
Dough gets airy light
As the buns undergo their second rise, you’ll observe the dough transforming from dense to wonderfully airy and light. This transformation is a direct result of the yeast’s activity, creating tiny gas bubbles that give brioche its signature open and tender crumb. When gently pressed, the dough should spring back slowly, indicating that it has reached optimal proofing. If it springs back too quickly, it needs more time; if it doesn’t spring back at all and feels too soft, it might be slightly over-proofed. The airy lightness achieved during this stage is what differentiates excellent homemade brioche from ordinary bread, promising a delightful eating experience with every bite. The transformation is fascinating, turning simple ingredients into a `brioche bread` masterpiece.
Baking Your Perfect Golden Brioche Buns
The moment of truth arrives when your perfectly proofed brioche buns enter the oven. Baking brioche correctly is essential for achieving that beautiful golden-brown crust and a thoroughly cooked, tender interior. Preheat your oven adequately and resist the urge to open the oven door too frequently, as this can cause temperature fluctuations that negatively impact the rise and texture of the buns. A consistent temperature is your ally for perfect results, leading to `sweet brioche` that melts in your mouth. This is the culmination of all your careful dough preparation.
Set oven temperature
Before your buns go into the oven, preheat it to the recommended temperature, typically around 375°F (190°C). It’s crucial to allow your oven to fully preheat for at least 15-20 minutes after it signals it’s ready, as this ensures the internal temperature is stable and even. An egg wash applied just before baking will contribute to a gorgeous, shiny, golden crust. A simple egg wash can be made by whisking one egg with a tablespoon of milk or water. Gently brush this mixture over the surface of each bun, being careful not to deflate them. This pre-bake preparation is key for visual appeal and an irresistible finish.
Check for golden brown
Bake the brioche buns for approximately 15-20 minutes, or until they are beautifully golden brown on top and thoroughly cooked through. The exact baking time can vary depending on your oven and the size of your buns, so it’s always best to keep a close eye on them. If they start browning too quickly, you can loosely tent them with aluminum foil. To ensure they are fully baked, an internal temperature of around 200-205°F (93-96°C) is ideal, which you can check with an instant-read thermometer. Once baked, remove the buns from the oven and transfer them to a wire rack to cool completely. This wire rack cooling is important to prevent the bottoms from becoming soggy, preserving the `fluffy brioche` texture. For a fun twist, these buns can be part of a delicious Hawaiian Roll French Toast recipe.
Cooling and Serving Fresh Brioche Buns
After all the effort of mixing, kneading, rising, and baking brioche buns, the final step—cooling—is often overlooked but incredibly important. Resisting the urge to tear into a hot bun immediately can be challenging, but proper cooling allows the internal structure to set and steam to escape, preventing a gummy texture. This patience ensures that your homemade brioche reaches its full potential in terms of flavor and texture. A perfectly cooled bun is softer, richer, and far more enjoyable, truly showcasing your baking prowess.
Let buns cool completely
Once your brioche buns emerge from the oven, transfer them immediately to a wire rack. This allows air to circulate around all sides, preventing condensation that could make the bottoms soggy. It’s crucial to let the buns cool completely to room temperature. This can take anywhere from 30 minutes to an hour, depending on their size and the ambient temperature. During this cooling period, the starches in the bread firm up, and the flavors deepen. Cutting into a hot bun too soon traps steam, resulting in a dense, doughy texture instead of the desired light and fluffy brioche. Patience yields the best reward.
Enjoy homemade goodness
Once cooled, your brioche buns are ready to be enjoyed! The aroma alone is enough to entice. Serve them plain as a delightful breakfast pastry or a sweet snack. They are also incredibly versatile as brioche sandwich buns for gourmet burgers, pulled pork, or even a sophisticated egg salad. Their rich, buttery flavor and soft texture elevate any filling. Spread with a little jam, honey, or butter for a simple yet luxurious treat. Celebrating your homemade creation with friends and family is the ultimate reward, proving that the best flavors often come from your own kitchen. You can see more beautiful food creations on Carina Recipes’ Instagram page.
Expert Tips for Amazing Brioche Buns
Achieving consistently amazing homemade brioche buns involves more than just following the recipe; it also requires understanding a few key techniques and common pitfalls. These expert tips will help you refine your process, ensuring that every batch of your brioche dough yields wonderfully soft brioche with that perfect texture and rich flavor. Baking is often about nuance, and these pointers can make a significant difference in your results, turning good brioche into truly exceptional brioche. Pay attention to the details, and your efforts will be rewarded.
Use fresh yeast
The vitality of your yeast is paramount for a good rise. Always check the expiration date on your yeast package, and if it’s nearing its end or you’re unsure, it’s worth buying a fresh packet. You can also proof your yeast before starting by dissolving it in a small amount of warm milk (from your recipe’s total) with a pinch of sugar. If it foams and becomes bubbly within 5-10 minutes, your yeast is active and ready to go. Dormant yeast will lead to a dense, unrisen dough, rendering all your other efforts futile. Fresh yeast is the foundation of easy brioche and successful baking brioche.
Avoid over-kneading dough
While kneading is crucial for gluten development, there is such a thing as over-kneading, especially when using a stand mixer. Over-kneaded dough can become tough, lose its elasticity, and be difficult to work with, resulting in a less tender final product. Once your brioche dough passes the windowpane test and feels smooth and elastic, stop kneading. Continuously mixing beyond this point will break down the gluten structure you’ve worked so hard to build. Trust your instincts and the visual cues; a perfectly kneaded dough will feel just right, promising an incredibly fluffy brioche texture.
Storing Your Homemade Brioche Buns
Once you’ve successfully baked your batch of homemade brioche buns, proper storage is key to maintaining their freshness and delicious taste. Brioche, with its rich content of butter and eggs, can dry out if not stored correctly, quickly losing its coveted soft and fluffy brioche texture. Planning how to store your `brioche bread` will help you enjoy your efforts for longer, whether it’s for a few days or even a few months. Smart storage ensures that every bite is as good as the first, preserving the integrity of your hard work.
Keep buns airtight
To keep your soft brioche buns fresh for up to 2-3 days at room temperature, it’s essential to store them in an airtight container or a heavy-duty resealable plastic bag. Make sure they are completely cooled before storing, as any trapped moisture can lead to sogginess or mold. For a slightly longer shelf life, you can store them in the refrigerator, where they will keep for up to a week. However, refrigeration can sometimes make bread dry out faster, so warming them slightly before serving will help restore their tenderness. An airtight seal is your best defense against staleness.
Freeze for later
If you’ve made a large batch or want to enjoy your brioche buns over an extended period, freezing is an excellent option. Once the buns have completely cooled, place them in a single layer on a baking sheet and freeze until solid. This prevents them from sticking together. Then, transfer the frozen buns to a freezer-safe, airtight bag or container, removing as much air as possible. They will keep well in the freezer for up to 3 months. When ready to enjoy, simply thaw them at room temperature or warm them gently in a low oven for a few minutes to bring back that freshly baked quality. For more bread recipes, check out our bread category.
Brioche Buns: Essential Nutrition Facts
While the focus of making homemade brioche is often on its delicious taste and texture, it’s also helpful to have a general understanding of its nutritional profile. Brioche buns are rich in flavor due to their generous use of butter and eggs, which also contribute to their caloric and fat content. Knowing the general nutritional information can help you incorporate these delightful treats into a balanced diet. Remember that homemade versions often have clearer ingredient lists than commercially produced ones, giving you greater control over what you consume.
Calories and fat information
Due to the significant amounts of butter and eggs, brioche bread is typically higher in calories and fat compared to leaner types of bread. A single brioche bun can range from 200-350 calories, with much of that coming from saturated and unsaturated fats. While these fats contribute to the incredible richness and tenderness of butter brioche, it’s something to be mindful of if you’re tracking your intake. Enjoying brioche in moderation allows you to savor its decadent qualities without overindulging. The specific values will vary based on the exact recipe and portion size.
Protein and carbohydrates
Brioche buns also provide a good source of carbohydrates, primarily from the flour and sugar, which serve as an energy source. The protein content is moderate, coming from both the flour and the eggs. While brioche isn’t typically considered a high-protein food, the protein it does contain contributes to satiety and muscle repair. A standard bun might offer around 5-8 grams of protein and 30-50 grams of carbohydrates. Understanding these general facts helps you appreciate sweet brioche not just as a treat, but as part of a meal, especially when paired with other nutritious foods. Always consult specific recipe calculations for precise nutritional data.
