
Brandied strawberry shortcake is a delightful dessert, marrying tender homemade shortcakes with sweet, liquor-infused strawberries and creamy malted whipped cream. This classic dessert recipe offers a perfect blend of textures and flavors, making it an ideal sweet treat for any occasion. Prepare to impress with this luscious creation.
Key Takeaways
- Learn to create tender homemade shortcakes from scratch.
- Master the art of brandying strawberries for intense flavor.
- Whip up light, airy malted whipped cream to perfection.
- Assemble a stunning, delicious dessert efficiently for any gathering.
- Gain valuable tips for optimal storage and recipe adjustments.
This dessert is simply divine. Fresh strawberries meet warm shortcakes. The brandy adds a sophisticated touch. Malted cream provides creamy bliss. It’s a perfect summer sweet treat.
Gather Your Brandied Strawberry Shortcake Ingredients
All you need to begin
Before you begin the delightful process of assembling your brandied strawberry shortcake, it’s crucial to gather all your ingredients. This ensures a smooth and enjoyable baking experience without last-minute scrambling. For the homemade shortcakes, you’ll need all-purpose flour, baking powder, a pinch of salt, granulated sugar, unsalted butter (kept very cold), and heavy cream. Using high-quality, fresh ingredients will significantly impact the final flavor and texture of your shortcakes, making them truly stand out. Remember, the butter’s temperature is key for flakiness, so keep it in the refrigerator until you’re ready to use it. Many bakers find that weighing dry ingredients offers greater precision than volume measurements, leading to more consistent results.
For the luscious brandied strawberries, select ripe, plump fresh strawberries. The natural sweetness of the berries will complement the brandy beautifully. Alongside the berries, you’ll need your preferred brand of brandy and a touch of granulated sugar to help macerate the fruit. The brandy lends a warm, sophisticated note that elevates the fruit beyond simple sugared strawberries. Finally, for the malted whipped cream, acquire heavy whipping cream, a little powdered sugar, a splash of vanilla extract, and of course, malted milk powder. This malted twist adds an unexpected depth of flavor to the classic whipped cream, making it a perfect partner for the rich strawberries and tender shortcakes. Having everything measured and ready will streamline your dessert preparation, setting you up for success in creating this exquisite sweet treat.
Creating Luscious Brandied Strawberries First
Combining berries, brandy, and sugar
The heart of these brandied strawberry shortcakes lies in the rich, flavorful strawberries. To begin, gently wash your fresh strawberries and hull them. Depending on their size, you can either halve or quarter them. If your strawberries are particularly large, smaller pieces will absorb the brandy and sugar more effectively, ensuring every bite is infused with deliciousness. Place the prepared berries into a non-reactive bowl.
Next, sprinkle granulated sugar over the strawberries. The amount of sugar can be adjusted to your preference and the natural sweetness of your berries. A good starting point is usually about a quarter cup per pound of strawberries, but taste and adjust as needed. The sugar will draw out the natural juices from the fruit, creating a wonderfully syrupy sauce. Now comes the star ingredient: the brandy. Pour your chosen brandy over the sugared strawberries. While any good quality brandy will work, consider a fruit-forward variety for a harmonious blend of flavors. The alcohol not only adds a complex warmth but also helps to tenderize the berries slightly and preserve their vibrant color.
Gently toss the strawberries, sugar, and brandy together until everything is well combined. Cover the bowl and let the mixture sit at room temperature for at least 30 minutes, or preferably for a few hours. For an even deeper flavor, you can refrigerate them overnight, allowing the flavors to meld beautifully. During this maceration process, the strawberries will soften slightly, release their juices, and fully absorb the brandy’s essence, creating those truly luscious brandied strawberries you desire. This step is crucial for the overall flavor profile of your homemade shortcakes. If you enjoy experimenting with fruit desserts, you might also like a balsamic strawberry caprese for another unique berry creation.
Mixing Dry Ingredients for Shortcakes
Flour, baking powder, and salt together
The foundation of tender, flaky shortcakes begins with the careful combination of dry ingredients. In a large mixing bowl, measure out your all-purpose flour. Precision here is key; avoid scooping flour directly from the bag, as this can compact it and lead to an excess amount. Instead, spoon the flour into your measuring cup and then level it off with the back of a knife. Many experienced bakers even prefer to weigh their flour for ultimate accuracy. Next, add the baking powder. This leavening agent is responsible for the shortcakes’ delightful rise and airy texture. Ensure your baking powder is fresh, as expired powder will result in flat, dense shortcakes. A simple test for freshness is to add a teaspoon to warm water; if it bubbles vigorously, it’s good to go.
A pinch of salt is also essential. While seemingly minor, salt plays a critical role in enhancing the flavors of the other ingredients and balancing the sweetness. Without it, your shortcakes might taste bland. Finally, incorporate granulated sugar into your dry mixture. The sugar adds sweetness and contributes to the golden-brown crust. Once all the dry ingredients are in the bowl, use a whisk to thoroughly combine them. Whisking not only ensures an even distribution of the flour, baking powder, salt, and sugar but also helps to aerate the mixture, preventing clumps and preparing it for the addition of the butter. A well-mixed dry base is the first step towards achieving those perfectly light and fluffy homemade shortcakes.
Cutting Butter into Shortcake Dough
Achieving coarse crumb texture
The secret to wonderfully flaky homemade shortcakes lies in the technique of cutting cold butter into the dry ingredients. Begin by ensuring your unsalted butter is very cold, ideally straight from the refrigerator, or even briefly frozen for easier handling. This cold temperature is vital because as the butter melts during baking, it releases steam, creating pockets of air that result in a tender, flaky texture. If the butter is too warm, it will incorporate too thoroughly into the flour, leading to a denser, cakier shortcake rather than a flaky one.
There are several effective methods for cutting butter into flour. A pastry blender is a traditional tool designed for this purpose, allowing you to quickly cut the butter into small pieces while keeping it cold. Alternatively, you can use two knives, working them in a crisscross motion, or even the tips of your fingers, quickly rubbing the butter into the flour. For a less hands-on approach, grating the cold butter on a box grater is an excellent technique that creates tiny, even flakes that are easy to work with. Whichever method you choose, the goal is to achieve a mixture that resembles coarse crumbs, with some pea-sized pieces of butter still visible. These larger pieces of butter are what will create those desirable layers and pockets of steam during baking. Avoid overworking the mixture; stop as soon as the desired texture is reached. Overmixing can develop the gluten in the flour too much, leading to tough shortcakes. This step is fundamental to the overall success of your brandied strawberry shortcake, promising a foundation of light and airy homemade goodness.
Forming Shortcake Dough with Cream
Gentle knead, pat and cut
Once your cold butter has been skillfully cut into the dry ingredients, it’s time to bring the shortcake dough together with heavy cream. Add the heavy cream gradually to the flour and butter mixture, starting with most of the liquid and adding more only if necessary. Use a fork or your hands to gently mix until the dough just comes together. The key here is to mix minimally; overworking the dough will develop the gluten, resulting in tough shortcakes rather than the tender ones you desire. The dough should be shaggy and a bit sticky, but not wet.
Turn the dough out onto a lightly floured surface. With your hands, gently bring the dough together, patting it into a round or square shape about 1-inch thick. Avoid rolling it aggressively or kneading it excessively. A gentle patting motion is usually sufficient to form a cohesive disk. For clean edges and a good rise, you can fold the dough over on itself a couple of times before patting it out again; this creates additional layers of flakiness. Once the dough is at the desired thickness, use a round biscuit cutter to cut out your shortcakes. Dip the cutter in flour between each cut to prevent sticking. Press straight down without twisting the cutter, as twisting can seal the edges of the shortcakes and inhibit their rise. Gather the scraps, gently press them together, and cut out any remaining shortcakes, keeping in mind that these might be slightly less tender than the first batch due to handling.
Place the cut shortcakes onto a baking sheet lined with parchment paper. Leaving a little space between each allows for even baking. For an extra golden top and a hint of sweetness, you can brush the tops with a little extra cream or milk and sprinkle with a touch of granulated sugar. This gentle handling and precise cutting are crucial steps in crafting those perfect homemade shortcakes that will serve as the base for your delightful brandied strawberry shortcake dessert recipe.
Baking Fluffy Shortcakes to Golden Perfection
Oven temperature and time explained
Baking the shortcakes correctly is the final crucial step to achieving that desired fluffy texture and golden perfection. First, ensure your oven is properly preheated to the specified temperature, typically around 400-425°F (200-220°C). A hot oven is essential for quick leavening, which helps the shortcakes rise rapidly and creates those airy, tender interiors. Placing shortcakes into a cold or insufficiently preheated oven can result in a dense, tough texture. The high heat also contributes to a beautiful golden-brown crust, adding a delightful contrast to the soft interior.
Carefully transfer your baking sheet with the cut shortcakes into the preheated oven. Position the baking sheet in the middle rack for even heat distribution. Baking time usually ranges from 12 to 18 minutes, but this can vary depending on your oven and the size and thickness of your shortcakes. Keep a close eye on them, especially during the last few minutes. You’ll know the shortcakes are done when they have risen significantly, are beautifully golden brown on top and bottom, and sound hollow when tapped gently on the bottom. If they’re browning too quickly on top, you can loosely tent them with aluminum foil for the last few minutes of baking. Once baked, remove the shortcakes from the oven and transfer them to a wire rack to cool slightly. While they are tempting to eat immediately, allowing them to cool for a few minutes before splitting ensures they hold their shape and are easier to handle. This baking guide ensures your homemade shortcakes are perfectly prepared to complement the brandied strawberries and malted whipped cream, creating an irresistible dessert recipe for your brandied strawberry shortcake.
Whipping Malted Whipped Cream Bliss
Soft peaks with malt magic
No brandied strawberry shortcake is complete without a generous dollop of luscious, airy whipped cream. For this recipe, we’re elevating the classic with a hint of malt, adding an unexpected depth of flavor that perfectly complements the sweet berries and tender shortcakes. To achieve the best results, start with very cold heavy whipping cream. Chilling your mixing bowl and whisk attachment (if using a stand mixer) for about 10-15 minutes beforehand can also significantly aid in the whipping process, helping the cream to aerate more quickly and maintain its structure. You can achieve similar creamy results with other desserts like a snickerdoodle cobbler.
Pour the cold heavy cream into your chilled bowl. Add powdered sugar (also known as confectioners’ sugar), which dissolves more readily than granulated sugar, ensuring a smooth texture. A splash of pure vanilla extract will enhance the overall flavor profile. Now, for the magic ingredient: malted milk powder. This powder adds a subtle, nutty, and slightly savory note that is incredibly addictive and pairs wonderfully with the fruit and pastry. Start with a modest amount, about two tablespoons per cup of cream, and adjust to your taste preference. Begin whipping the mixture on medium speed, gradually increasing to high speed. Continue whipping until soft peaks form. Soft peaks are achieved when the cream holds its shape, but the tips curl over slightly when the whisk is lifted. Be careful not to over-whip, as this can quickly turn your beautiful cream into a grainy, buttery consistency. This malted whipped cream bliss provides a light, ethereal contrast to the richness of the brandied strawberries and the comforting texture of the homemade shortcakes, making your brandied strawberry shortcake a truly memorable sweet treat.
Assembling Your Brandied Strawberry Shortcakes
Layering joy on a plate
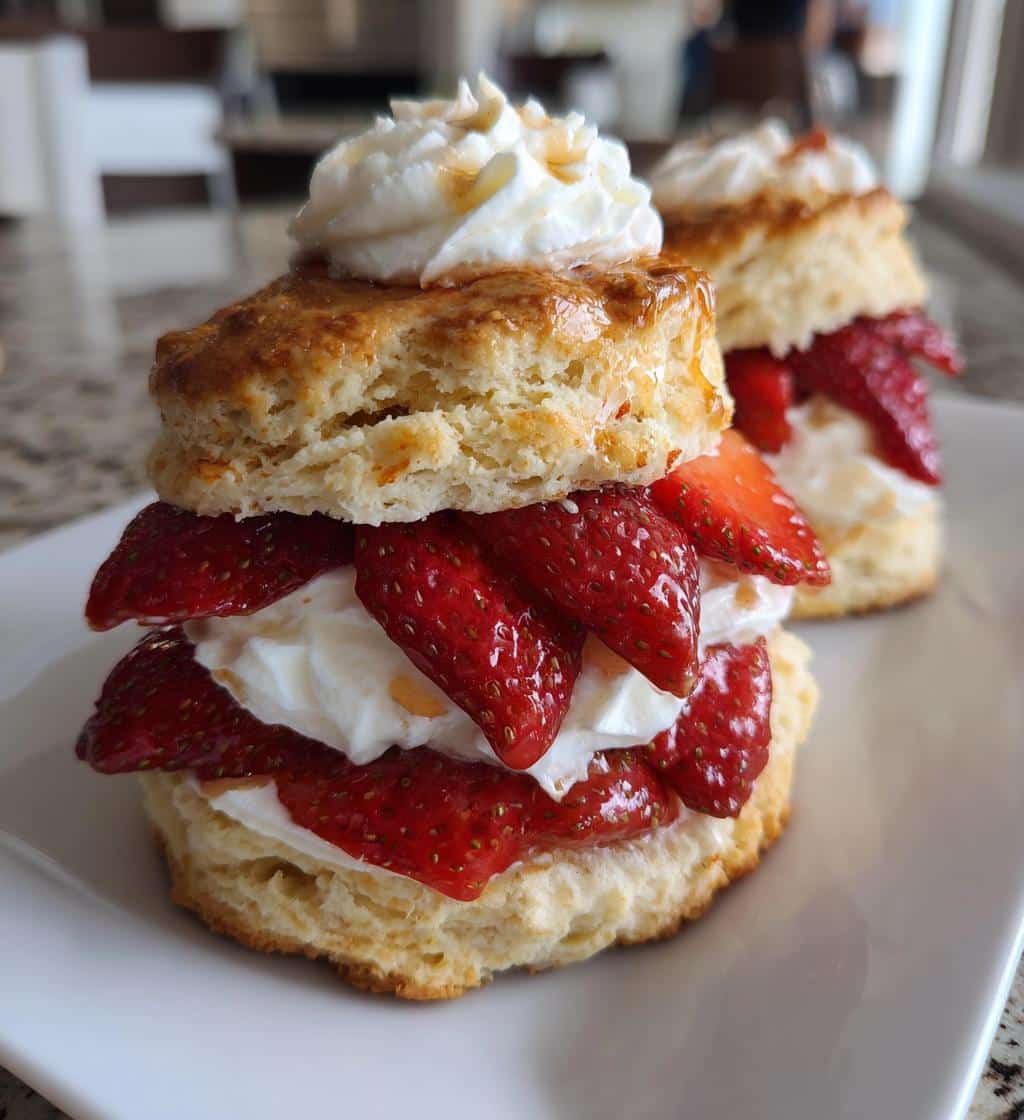
With your fluffy homemade shortcakes baked, luscious brandied strawberries macerating, and malted whipped cream whipped to perfection, it’s time for the joyous final step: assembly! This is where all your efforts come together to create a visually stunning and incredibly delicious brandied strawberry shortcake. First, choose your serving plates. While the dessert is delightful, presentation makes it even more appealing. Carefully take a cooled shortcake and, using a serrated knife, gently split it in half horizontally. The tender interior should be revealed, ready to absorb the juicy fruit. Some people like to toast the cut sides lightly for added texture, but it’s entirely optional.
Place the bottom half of the shortcake on your plate. Spoon a generous amount of your brandied strawberries over the bottom half. Make sure to include plenty of the delicious, syrupy juices, as these will soak into the shortcake, adding moisture and intense strawberry flavor. Don’t be shy here; the more strawberries, the better! Next, take a large dollop of your freshly whipped malted whipped cream and place it directly on top of the strawberries. You can use a spoon for a rustic look or a piping bag for a more refined presentation. The contrast of the rich red berries against the pristine white cream is simply beautiful. Finally, carefully place the top half of the shortcake over the whipped cream. You can add a small flourish of extra brandied strawberries and a final swirl of whipped cream on top for a truly decadent finish. Serve immediately to enjoy the best texture and flavor. This layering of joy on a plate ensures every bite of your strawberry shortcake is a delightful blend of tender cake, sweet fruit, and creamy bliss. For more delightful sweet treats, check out our other desserts.
Important Notes for Your Shortcake Success
Adjust sugar, store carefully
Achieving brandied strawberry shortcake success goes beyond just following the steps; it involves understanding a few critical nuances. One important note is sugar adjustment. The sweetness of fresh strawberries can vary significantly depending on the season and variety. Always taste your strawberries before adding sugar for the brandying process. If they are already very sweet, you might reduce the added sugar. Conversely, if they are tart, a little extra sugar will help balance the flavors. This customization ensures your dessert is perfectly tailored to your palate.
Another crucial aspect is storage. While brandied strawberry shortcakes are best enjoyed immediately after assembly, sometimes you might have leftovers or want to prepare components in advance. To avoid soggy shortcakes, it’s best to store the components separately: the shortcakes in an airtight container at room temperature, the brandied strawberries in the refrigerator, and the whipped cream also refrigerated in an airtight container. Assemble only when ready to serve. Additionally, consider variations to personalize your classic dessert. A tiny hint of lemon zest in the shortcake dough or a touch of balsamic glaze with the strawberries can add bright, unexpected notes. Some prefer to infuse their brandy with vanilla bean for an even richer flavor. Remember that making homemade shortcakes is a rewarding process, and slight variations in method or ingredients can lead to unique and equally delicious results. This shortcake dessert recipe is versatile and allows for personal touches, making it a truly adaptable sweet treat.
Quick Look at Recipe Preparation Times
Prep, cook, and total time
Understanding the time commitment for any recipe is invaluable for planning, especially when entertaining guests or simply fitting a delicious sweet treat into a busy schedule. This brandied strawberry shortcake dessert recipe, while yielding impressive results, is quite manageable time-wise, particularly if you break down the steps. The preparation for this homemade shortcakes recipe can be divided into a few key phases. Prepping the brandied strawberries, including washing, hulling, slicing, and macerating with brandy and sugar, typically takes about 15-20 minutes of active time. However, the maceration itself requires an additional 30 minutes to several hours for optimal flavor development, which is largely passive.
For the shortcakes, the active prep time involves mixing the dry ingredients, cutting in the cold butter, gently forming the dough, and cutting out the biscuits. This usually takes around 20-25 minutes. Once the shortcakes are ready for the oven, the actual cooking time for baking fluffy shortcakes to golden perfection is approximately 12-18 minutes. Meanwhile, whipping the malted whipped cream bliss is a quick task, typically taking only 5-7 minutes. Finally, the assembly of your brandied strawberry shortcakes, layering the shortcakes, strawberries, and cream, takes just a few minutes per serving. Therefore, the active preparation time for this dessert recipe totals roughly 40-50 minutes, with an additional 12-18 minutes for baking. The total time, including passive maceration, can range from about 1.5 hours to several hours if you chill the strawberries overnight, making it a flexible project. For another delightful dessert that’s worth the time, check out these vanilla bean creme brulee cheesecake cupcakes.
Nutrition Facts for Brandied Shortcake Bliss
Per serving details provided
When indulging in a delightful brandied strawberry shortcake, it’s helpful to have an understanding of its nutritional content, especially for those mindful of their dietary intake. Please note that the following nutrition facts are estimated and can vary significantly based on specific ingredient brands, exact measurements, and portion sizes. The use of full-fat dairy, sugar, and butter contributes to the caloric and fat content, making this a rich and satisfying sweet treat.
Typically, one serving of brandied strawberry shortcake, encompassing a homemade shortcake, a generous portion of brandied strawberries, and a dollop of malted whipped cream, might contain approximately:
- Calories: 350-450 kcal
- Total Fat: 20-30g (of which Saturated Fat: 12-18g)
- Cholesterol: 60-90mg
- Sodium: 200-300mg
- Total Carbohydrates: 40-55g (of which Sugars: 25-35g)
- Protein: 4-7g
These figures are rough estimates. You can influence the nutritional profile by adjusting the amount of sugar added to the strawberries and whipped cream, or by choosing lighter versions of cream if available, though this might slightly alter the texture and richness. The fresh strawberries do provide valuable vitamins, particularly Vitamin C, and dietary fiber, adding a healthful element to this otherwise decadent dessert recipe. Enjoying this brandied shortcake bliss in moderation is key, savoring every spoonful of its incredible flavor.
Storing Leftover Brandied Strawberry Shortcakes
Keeping your dessert fresh
While brandied strawberry shortcakes are undoubtedly at their peak freshness when assembled and served immediately, sometimes you might find yourself with leftovers or prefer to prepare components in advance. Proper storage is crucial for keeping your dessert fresh and maintaining its delicious taste and texture. The biggest challenge with storing assembled shortcakes is preventing the shortcakes from becoming soggy due to the moisture from the fruit and whipped cream.
For best results, it is highly recommended to store the components separately. The homemade shortcakes should be stored in an airtight container at room temperature for up to 2-3 days. If you need to keep them longer, they can be frozen for up to a month; simply thaw and warm slightly before serving. The luscious brandied strawberries should be kept in an airtight container in the refrigerator. They will remain fresh for 3-4 days, and the flavors will often deepen over time. The malted whipped cream bliss, being dairy-based, must also be stored in an airtight container in the refrigerator and is best consumed within 1-2 days, as it can lose its airy texture over time. If you know you’ll have leftovers or are preparing for a gathering, only assemble the exact number of brandied strawberry shortcakes you plan to serve. This strategy ensures each serving is as fresh and delightful as possible. When ready to enjoy leftovers, simply reassemble the components for a quick and easy sweet treat. For more recipe ideas and culinary inspiration, be sure to follow Carina Recipes on Pinterest and Instagram.
