
Irresistible Peanut Butter Balls are a delightful and simple no-bake treat cherished by many. These sweet snacks are perfect for satisfying cravings without much effort, making them a popular choice for quick desserts or a fun activity with family. Their rich flavor and easy preparation make them a household favorite, ready in minutes.
Key Takeaways
- Peanut butter balls are a quick, easy, and delicious no-bake treat for all ages.
- Selecting the right peanut butter and sweeteners is crucial for the best texture and taste.
- Preparation involves simple mixing, rolling, and chilling steps, making it ideal for beginners.
- The recipe is highly customizable with additions like nuts, fruit, or vegan swaps.
- Proper storage ensures freshness, keeping these delightful snacks ready for enjoyment.
Peanut butter balls are pure joy. They offer a quick, delightful escape. Simple ingredients combine wonderfully. Enjoy a sweet, satisfying bite. These treats always bring smiles.
Why Make Irresistible Peanut Butter Balls?
Making irresistible peanut butter balls is a fantastic way to enjoy a homemade dessert without spending hours in the kitchen. These delightful treats are not only incredibly satisfying but also offer a host of benefits that make them a go-to recipe for many busy individuals and families. Their simplicity and delicious flavor profile ensure they quickly become a favorite in any household, perfect for satisfying sweet cravings.
Quick, Easy No-Bake Treat
The beauty of peanut butter balls lies in their no-bake nature. Forget preheating ovens or waiting for cakes to rise; these delicious snacks come together with minimal fuss. This makes them an ideal choice for last-minute gatherings, spontaneous dessert cravings, or when you simply want to whip up something tasty without a lot of effort. The process is straightforward, requiring basic mixing and chilling, making them accessible to even novice cooks. If you love quick desserts, you might also enjoy other dessert recipes on our site, which also offer comforting sweetness with ease.
Delicious Snack for Anyone
From children to adults, almost everyone loves the combination of sweet and salty in a peanut butter ball. They are a versatile treat, perfect as an after-school snack, a post-dinner dessert, or even a healthier alternative to store-bought candies. Their rich, creamy texture and sweet taste make them a universally appealing option that can brighten anyone’s day. These little spheres of joy are also excellent for packing in lunchboxes or bringing to potlucks, always disappearing fast.
Ingredients for Irresistible Peanut Butter Balls
Creating truly irresistible peanut butter balls starts with selecting the right components. While the recipe is simple, the quality and type of each ingredient can significantly impact the final texture and flavor. Understanding the role of each element ensures you achieve that perfect balance of sweetness and rich peanut butter taste that everyone craves. Paying attention to these details elevates a good snack into a truly memorable homemade delicacy.
Essential Peanut Butter Choice
The foundation of your peanut butter balls is, naturally, peanut butter. For the best results, opt for a creamy peanut butter that is not too oily or too dry. Many prefer natural peanut butter for its pure flavor, though conventional brands work just as well if they offer a good consistency. Avoid varieties with excessive added sugars or oils, as these can alter the texture and sweetness of your balls. A good quality peanut butter ensures a smooth dough that binds well and delivers that authentic, nutty taste. For instance, brands like Jif or Skippy are popular for their consistent texture, while natural options provide a more wholesome base.
Sweetener and Oat Options
Sweetness is key in these delightful treats. Powdered sugar is commonly used for its fine texture, which blends seamlessly into the peanut butter mixture, preventing a grainy consistency. You can adjust the amount to suit your preference, making them sweeter or less so. Rolled oats, or old-fashioned oats, are another crucial ingredient. They provide structure, absorb excess moisture, and add a pleasant chewiness to the balls. Quick oats can also be used, but they might result in a slightly softer texture. Some recipes even substitute oats with graham cracker crumbs for a different flavor profile.
Chocolate Chip Varieties
No irresistible peanut butter ball recipe is complete without chocolate! While not always included in the base dough, chocolate chips are often melted and drizzled over, or used as a coating. You have a wide array of choices: semi-sweet chocolate chips for a classic balance, milk chocolate chips for a sweeter, creamier finish, or dark chocolate chips for a richer, more intense flavor. White chocolate chips also make a beautiful and tasty addition. Consider mixing different types or using mini chocolate chips for easier incorporation and a smoother coating. This inclusion makes for a true peanut butter brownie swirl cookies experience in ball form.
Simple Steps to Prepare Your Balls
Embarking on the creation of irresistible peanut butter balls is a delightful culinary journey that requires surprisingly little effort. The entire process is designed for simplicity, making it a perfect entry point for those new to no-bake recipes or for seasoned cooks seeking a quick dessert. The preparation can be broken down into a few distinct and easy-to-follow phases, ensuring that even with a busy schedule, you can enjoy these sweet homemade treats.
First, successful preparation begins with mindful ingredient gathering. Ensuring all components are measured out and at room temperature (especially butter or cream cheese, if your recipe calls for them) will streamline the mixing process. This initial organization prevents scrambling mid-recipe and helps maintain the smooth flow of production. Once your ingredients are ready, the magic truly begins. The main goal is to combine the wet and dry elements thoroughly but gently, forming a pliable dough that is easy to handle and shape.
Following the mixing phase, shaping the dough into uniform balls is the next crucial step. Consistency in size not only makes for an appealing presentation but also ensures even chilling. This can be a fun activity, especially for children, allowing them to get involved in the kitchen. Finally, the shaped balls undergo a chilling period. This isn’t just a suggestion; it’s a vital stage that allows the ingredients to firm up, creating that characteristic dense yet smooth texture of a perfect peanut butter ball. Without adequate chilling, the balls may be too soft or crumbly. These simple steps, when followed, promise a batch of delicious, perfectly formed peanut butter balls every time, ready to satisfy any sweet tooth.
Mixing Perfect Peanut Butter Ball Dough
Achieving the perfect consistency for your peanut butter ball dough is crucial for easy handling and a delightful finished product. The mixing process is straightforward, but paying attention to the order and technique of adding ingredients will yield the best results. A well-mixed dough should be pliable, firm enough to roll without sticking excessively, yet soft enough to melt in your mouth. This balance ensures your homemade peanut butter balls are truly irresistible, offering a satisfying texture with every bite.
Combining Wet Ingredients First
Begin by thoroughly combining your “wet” ingredients. This typically includes the peanut butter itself, softened butter (if used), and any liquid sweeteners like honey or maple syrup, though often it’s just peanut butter and a binder. If your recipe uses softened cream cheese, that also goes in here, contributing to a wonderfully rich and creamy texture. Beat these ingredients together until they are perfectly smooth and homogenous. This initial step creates a uniform base, ensuring that the flavors are evenly distributed throughout the dough. A stand mixer with a paddle attachment or a hand mixer works well for this, making the process quick and effortless.
Adding Dry Ingredients Gently
Once your wet ingredients are beautifully blended, it’s time to incorporate the dry components. This usually involves powdered sugar and rolled oats. Add the powdered sugar gradually, mixing on low speed to prevent a cloud of sugar dust in your kitchen. Once the sugar is mostly incorporated, gently fold in the rolled oats. The key here is not to overmix, as overworking the oats can make the dough tough. Mix just until everything is combined and a thick, pliable dough forms. It should pull away from the sides of the bowl slightly but still be moist enough to stick together when pressed. This careful integration ensures your peanut butter ball dough has the ideal texture for rolling.
Rolling Your Delicious Peanut Butter Balls
Once your peanut butter ball dough is perfectly mixed, the next satisfying step is rolling it into individual treats. This part of the process is tactile and enjoyable, especially if you have little helpers in the kitchen. The goal is to create uniform balls that are not only visually appealing but also ensure consistent serving sizes and even chilling. Proper rolling technique contributes significantly to the final presentation and overall enjoyment of these delightful no-bake snacks.
Ideal Ball Size
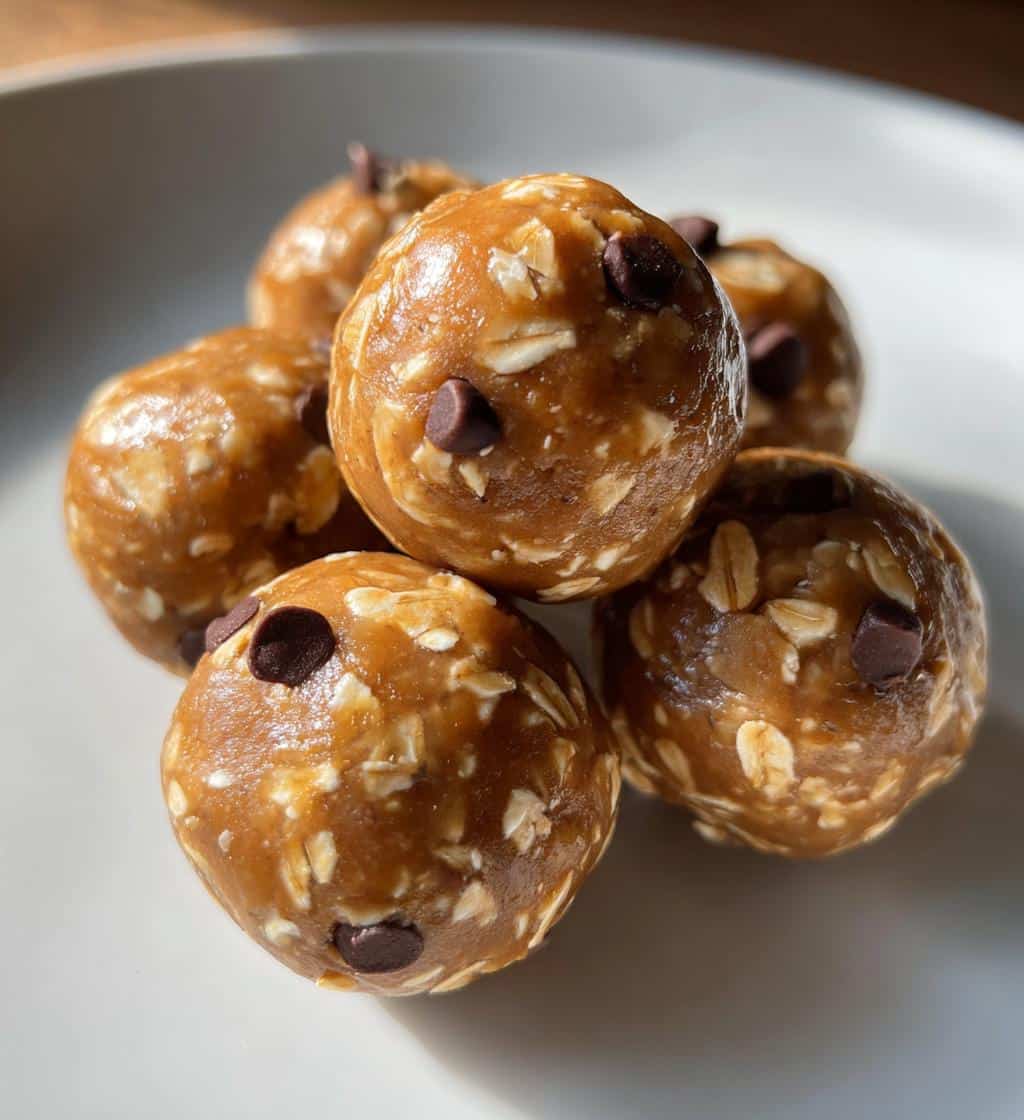
For most recipes, an ideal peanut butter ball size is about 1 to 1.5 inches in diameter, roughly the size of a golf ball or a large marble. This size is perfect for a single bite or two, making them convenient for snacking and portion control. Using a small cookie scoop (about 1-tablespoon capacity) can help achieve consistent sizing and makes the process much quicker and less messy. If you’re rolling by hand, scoop out a small amount of dough, then gently roll it between your palms until a smooth, round ball forms. Avoid pressing too hard, which can make the balls overly dense.
Prep for Chilling
After rolling, arrange your peanut butter balls on a baking sheet or a large plate lined with parchment paper. The parchment paper is crucial as it prevents the balls from sticking to the surface, especially once they are chilled and firm. Make sure to leave a little space between each ball to allow for even cooling and to prevent them from freezing together. This organized placement will make retrieving them post-chilling much easier. Once all your delicious peanut butter balls are neatly arranged, they are ready for their essential trip to the refrigerator, where they will firm up and become perfectly snackable.
Chilling for Irresistible Peanut Butter Balls
Chilling is a non-negotiable step in crafting truly irresistible peanut butter balls. While the mixing and rolling phases bring the ingredients together, it’s the cold temperature that transforms the soft dough into firm, delicious spheres with that signature melt-in-your-mouth texture. This essential stage allows the fats in the peanut butter and butter (if used) to solidify, binding all the components together tightly and preventing the balls from becoming too crumbly or soft at room temperature. Skipping or shortening the chilling time can lead to disappointment, so patience is truly a virtue here.
Minimum Refrigeration Time
For best results, your peanut butter balls should be refrigerated for at least 30 to 60 minutes. This minimum refrigeration time is typically sufficient for the balls to firm up adequately, making them easier to handle and preventing them from falling apart. If you’re coating them in melted chocolate, a well-chilled ball will also help the chocolate set more quickly and evenly, preventing it from melting the peanut butter interior. For an even firmer texture, or if you’re making a large batch ahead of time, you can extend the chilling period to a few hours. Some even prefer to freeze them briefly for 15-20 minutes for a super-quick set, especially when in a hurry. Just remember, the longer they chill, the firmer and more resilient they will become, ready for serving or storage. This step is as important as the baking process for a dish like Creamy Baked Mac and Cheese for achieving that perfect texture.
Nutrition Facts: One Ball Serving
Understanding the nutritional profile of your homemade peanut butter balls can help you enjoy them as part of a balanced diet. While they are undeniably a sweet treat, peanut butter itself offers some beneficial components. Knowing what’s in each serving allows for mindful indulgence, especially if you’re tracking your intake or customizing the recipe for specific dietary needs. These facts can help you appreciate your delicious snack even more.
Calories and Sugar Content
The caloric and sugar content of peanut butter balls can vary significantly based on the recipe and specific ingredients used. A typical ball, made with peanut butter, powdered sugar, and oats, might contain anywhere from 80 to 150 calories. The sugar content is primarily from the powdered sugar, which provides that desirable sweetness. If you’re mindful of sugar intake, you can adjust the amount of powdered sugar or opt for alternative sweeteners. For example, using less sugar or incorporating natural sweeteners can significantly reduce both calories and sugar per serving, making them a more frequent snack option.
Protein and Fiber Benefits
Beyond the sweetness, peanut butter balls also offer some nutritional upsides, mainly thanks to their core ingredients. Peanut butter is a good source of plant-based protein and healthy fats, which contribute to satiety and provide sustained energy. The rolled oats, a key ingredient, are an excellent source of dietary fiber. Fiber is beneficial for digestive health and can help keep you feeling full. While they are a dessert, these components mean that a peanut butter ball isn’t just empty calories; it provides a modest boost of protein and fiber, making it a relatively satisfying sweet treat compared to many other sugary snacks.
Customizing Your Peanut Butter Ball Recipe
One of the most exciting aspects of making irresistible peanut butter balls is the endless potential for customization. This adaptable recipe allows you to tailor the flavors and textures to your personal preferences or dietary requirements, ensuring that every batch can be a unique culinary adventure. Whether you’re looking to add extra crunch, a burst of fruitiness, or make them suitable for a vegan lifestyle, the base recipe provides a fantastic canvas for your creativity. Don’t be afraid to experiment and make these treats truly your own.
Adding Nuts or Dried Fruit
To add an extra layer of texture and flavor, consider folding in finely chopped nuts or dried fruit to your peanut butter ball dough. Crushed peanuts, almonds, or walnuts can provide a delightful crunch and a deeper nutty flavor. Dried cranberries, raisins, or chopped apricots can introduce a chewy sweetness and a touch of tartness, creating a more complex flavor profile. Ensure the additions are finely chopped to maintain the integrity of the balls and make them easier to roll. These inclusions not only enhance taste but also boost the nutritional value with extra fiber and healthy fats.
Vegan Ingredient Swaps
Making peanut butter balls vegan is remarkably simple, given that many core ingredients are already plant-based. The primary considerations are replacing dairy butter (if your recipe includes it) with a plant-based butter substitute or coconut oil, and ensuring your chocolate chips are dairy-free. Many brands now offer excellent vegan chocolate chip options. If your recipe calls for honey, substitute it with maple syrup or agave nectar. With these simple swaps, you can easily create delicious vegan peanut butter balls that everyone can enjoy, without compromising on taste or texture. This adaptability makes them a fantastic dessert for diverse gatherings. You can also make other delightful treats like Butterfinger Balls with similar dietary adjustments.
No-Bake Sweet Treat for All Ages
Irresistible peanut butter balls truly shine as a no-bake sweet treat that appeals to all ages. Their universal popularity stems from their familiar and comforting flavors, combined with a texture that is both satisfyingly dense and wonderfully creamy. There’s something inherently appealing about a small, handheld indulgence that doesn’t require complex preparation. This makes them a perfect snack for busy weeknights, special occasions, or simply as a comforting pick-me-up throughout the day. Their accessibility ensures that anyone, regardless of baking skill, can enjoy making and eating them.
Kid-Friendly Activity
One of the greatest joys of making peanut butter balls is involving children in the process. The no-bake nature means there’s no hot oven involved, making it a safe and fun kitchen activity for little hands. Kids love to help measure ingredients, mix the dough (especially getting their hands a little messy!), and, most excitedly, roll the balls. This hands-on experience not only teaches them basic culinary skills but also creates lasting memories. Plus, they get to enjoy the fruits of their labor, making the finished product even more satisfying. It’s an ideal way to spend quality time together, creating delicious memories and a delightful snack.
Storing Your Peanut Butter Balls Fresh
Once you’ve created a batch of irresistible peanut butter balls, proper storage is key to keeping them fresh and delicious for as long as possible. These no-bake treats are fantastic for making ahead, but how you store them will determine their longevity and maintain their perfect texture. Following a few simple guidelines ensures that every ball remains as delightful as the first, ready to be enjoyed whenever a craving strikes. This makes them an excellent option for meal prep or for having a sweet snack on hand throughout the week.
Airtight Container Storage
To preserve the freshness and prevent your peanut butter balls from drying out or absorbing other refrigerator odors, always store them in an airtight container. A plastic food storage container with a tight-fitting lid or a resealable freezer bag works perfectly. You can stack them in layers, but for best results, place a piece of parchment paper between each layer to prevent them from sticking together. This method ensures that the balls retain their moisture and flavor, remaining soft and chewy for days.
Refrigerator Life Span
When stored correctly in an airtight container in the refrigerator, homemade peanut butter balls typically stay fresh for up to 1-2 weeks. While they might last longer, their texture and flavor are usually at their peak within the first week. For longer storage, peanut butter balls freeze exceptionally well. Place them in a single layer on a parchment-lined baking sheet until frozen solid, then transfer them to an airtight freezer-safe bag or container. They can be stored in the freezer for up to 2-3 months. Simply thaw them in the refrigerator for a few hours or at room temperature for about 30 minutes before enjoying.
Tips for Best Peanut Butter Balls
To truly elevate your irresistible peanut butter balls from good to extraordinary, a few expert tips can make all the difference. These insights focus on optimizing flavor, texture, and ease of preparation, ensuring that every batch you make is a resounding success. Paying attention to these subtle details can transform your homemade treats into gourmet-quality delights that impress everyone who tries them. These small adjustments can significantly enhance your baking experience and the final product.
Using Natural Peanut Butter
While conventional creamy peanut butter works well, opting for natural peanut butter can significantly enhance the flavor and often the texture of your balls. Natural peanut butter, typically made with just peanuts and salt (and sometimes a little oil), offers a purer, more intense peanut flavor without the added sugars and hydrogenated oils found in some conventional brands. However, natural peanut butter can sometimes be more oily or drier depending on the brand. If it’s too oily, drain off some of the excess oil. If it’s too stiff, you might need to add a touch more liquid (like maple syrup or a tiny bit of plant milk) to achieve the right consistency. This choice can make your peanut butter balls taste fresher and more authentic. Explore more delicious ideas on our Pinterest page or check out our latest creations on Instagram.
Indulge in Irresistible Peanut Butter Balls!
Now that you’re equipped with all the knowledge to create your own batch of irresistible peanut butter balls, it’s time to indulge! These delightful no-bake treats are a testament to how simple ingredients can come together to form something truly extraordinary. Whether you’re making them for a party, a quiet evening snack, or as a fun activity with the kids, their rich flavor and easy preparation make them a guaranteed hit. They are a classic sweet snack that never fails to bring joy and satisfaction to any sweet tooth.
Don’t hesitate to experiment with the customization options, from adding your favorite nuts and dried fruits to trying out different chocolate coatings. Each variation allows you to personalize your peanut butter balls, making them uniquely yours. Remember the importance of proper chilling for that perfect firm texture, and store them correctly to enjoy their freshness for days. So, gather your ingredients, follow these simple steps, and prepare to savor the deliciousness. Enjoy every single bite of your homemade peanut butter balls, a true no-bake delight!
If you’re looking for more quick and satisfying no-bake desserts or even baked goods, a visit to Wikipedia’s no-bake dessert page offers fascinating insights into these simple, yet delicious creations. Alternatively, for a different sweet treat, why not try a Quick Italian Cream Cake?
