Irresistible Coconut Pineapple Cream Pie Bars

Are you dreaming of a tropical getaway, but stuck at home? Imagine the taste of sun-kissed pineapple and the creamy richness of coconut, all wrapped up in a delightful dessert bar. These Coconut Pineapple Cream Pie Bars are your passport to paradise, offering a taste of the tropics with every single bite. They are incredibly easy to make, perfect for any occasion that calls for a touch of sunshine.
These bars are more than just a sweet treat; they are an experience that transports you to sandy beaches and swaying palm trees. The delightful combination of textures and flavors makes them an irresistible choice for anyone looking to escape the ordinary. Prepare to be whisked away by this refreshing and utterly delicious creation.
Why You Will Love This Recipe
- Exotic Flavor Fusion: The harmonious blend of sweet pineapple and creamy coconut creates a truly tropical taste sensation that is both refreshing and satisfying.
- Effortless Preparation: With a straightforward process and readily available ingredients, these bars are surprisingly simple to whip up, making them ideal for busy bakers or those new to dessert making.
- Versatile Delight: Perfect for potlucks, picnics, birthday parties, or simply a weeknight indulgence, these bars are adaptable to any event and always a crowd-pleaser.
- No-Bake Wonder: Enjoy a delicious dessert without turning on the oven, which is especially appealing during warmer months or when you want to save on energy.
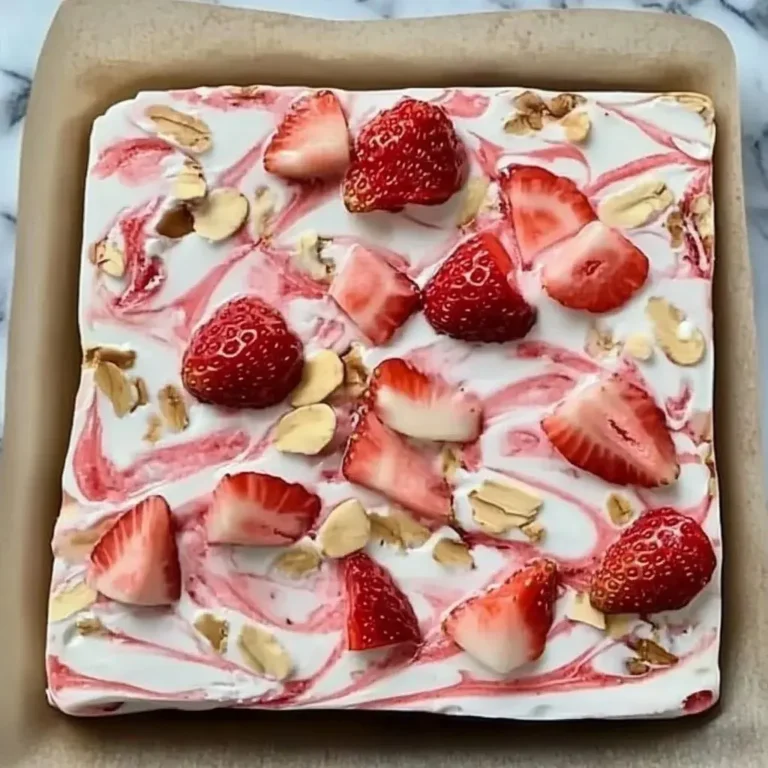
- Visually Appealing: The layers of creamy filling and the optional sprinkle of toasted coconut make these bars as beautiful to look at as they are to eat, adding a decorative touch to any table.
Ingredients You Need
Crafting these exquisite bars begins with selecting high-quality ingredients that will truly shine. The secret to their incredible flavor lies in the balance of the sweet graham cracker crust, the luscious coconut cream filling, and the vibrant burst of pineapple. Using full-fat coconut cream is essential for achieving that luxuriously smooth and rich texture that defines this dessert. Ensure your pineapple is well-drained to prevent any excess moisture from compromising the set of the bars.
Coconut Pineapple Cream Pie Bars
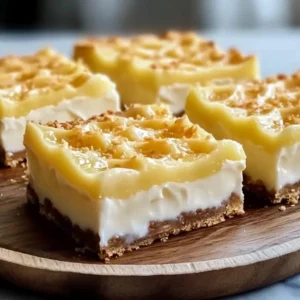
These delightful Coconut Pineapple Cream Pie Bars combine creamy coconut with zesty pineapple in a no-bake dessert that's both refreshing and indulgent. They are perfect for a tropical escape and can be made ahead of time.
- For the crust:
- 1 1/2 cups graham cracker crumbs (Can use gluten-free graham crackers for a gluten-free option.)
- 1/2 cup unsalted butter, melted (Used to bind the crust together.)
- For the filling:
- 2 cups coconut cream (Choose sweetened coconut cream for better flavor.)
- 1 cup powdered sugar (Adjust according to taste preferences.)
- 1 cup heavy whipping cream (Can substitute with plant-based cream for a dairy-free option.)
- 1/2 cup crushed pineapple, drained (Ensure to drain to avoid sogginess.)
- 1/2 cup pineapple juice (Adds flavor to the filling.)
- 1 tablespoon gelatin (optional, for setting) (Can be substituted with agar-agar for a vegan option.)
- To taste toasted coconut flakes for topping (Adds texture and flavor.)
- 1Preparation: Gather all your ingredients to make the cooking process smoother.
- 2Preheat your oven to 350°F (175°C) and mix the graham cracker crumbs with melted butter in a bowl.
- 3Press the mixture firmly into the bottom of a lined baking dish to form the crust. Bake for 8-10 minutes until lightly golden, then allow to cool completely.
- 4In another bowl, beat the coconut cream with powdered sugar until smooth and fluffy.
- 5In a separate bowl, whip the heavy cream until stiff peaks form.
- 6Gently fold the whipped cream into the coconut mixture.
- 7Fold in the drained crushed pineapple and pineapple juice (and gelatin if using).
- 8Assembly: Pour the coconut filling over the cooled graham cracker crust and spread it evenly.
- 9Chill in the fridge for at least 4 hours or until the filling is set.
- 10Serving: Once set, cut into squares using a sharp knife and sprinkle toasted coconut flakes on each bar before serving.
Keywords: Coconut Pineapple Bars, No-Bake Dessert, Pineapple Dessert, Summer Treat, tropical dessert
- graham cracker crumbs: This forms the foundation of our delightful bars, providing a satisfyingly crisp base.
- unsalted butter, melted: Used to bind the graham cracker crumbs together, creating a firm and delicious crust.
- coconut cream: The star of the filling, lending its rich, tropical flavor and velvety smooth texture.
- powdered sugar: Sweetens the coconut cream filling to perfection, ensuring a balanced taste.
- heavy whipping cream: Adds an airy lightness and extra creaminess to the filling, making it incredibly decadent.
- crushed pineapple, drained: Provides bursts of tangy sweetness and a delightful fruity contrast to the creamy filling.
- pineapple juice: Enhances the pineapple flavor and contributes to the overall moisture and taste of the filling.
- gelatin (optional, for setting): Helps to ensure the bars achieve a firm, sliceable consistency, though they will still set without it.
- toasted coconut flakes for topping: Adds a wonderful nutty crunch and an extra layer of tropical aroma and flavor.
The precise measurements for each ingredient are conveniently detailed within the accompanying recipe card, ensuring you have all the necessary information at your fingertips for a successful bake.
Variations
For those seeking a completely plant-based treat, transforming these bars into a vegan delight is remarkably simple. You can easily substitute the heavy whipping cream with a high-quality vegan whipping cream, often made from coconut or soy, ensuring it whips up to stiff peaks. If you opt to use gelatin for setting, ensure you replace it with agar-agar, a plant-based gelling agent derived from seaweed, following its specific preparation instructions carefully. This adaptation allows everyone to enjoy the tropical goodness without compromise.
If you’re looking to reduce the carbohydrate content of these already delightful bars, a low-carb variation can be achieved with a few smart ingredient swaps. For the crust, consider using finely ground almond flour or coconut flour mixed with melted butter and a sugar substitute like erythritol or stevia. In the filling, replace the powdered sugar with your preferred low-carb sweetener. The goal is to maintain the creamy texture and tropical flavors while minimizing sugar and refined carbohydrates.
Adding an extra layer of indulgence can elevate these bars to new heights of deliciousness. Imagine a thin layer of rich dark chocolate spread over the set coconut-pineapple filling before the final chill, or perhaps a swirl of caramel sauce drizzled across the top just before serving. You could also incorporate finely chopped macadamia nuts into the crust for an added nutty crunch that beautifully complements the tropical theme. These creative twists can transform an already wonderful dessert into something truly extraordinary.
How to Prepare Coconut Pineapple Cream Pie Bars
Step 1: Crafting the Foundation
Your journey to tropical paradise begins with creating the perfect crust. Begin by preheating your oven to a moderate 350°F (175°C). In a medium-sized mixing bowl, combine the graham cracker crumbs with the melted unsalted butter. Ensure that every crumb is thoroughly coated in butter; this is crucial for achieving a cohesive and satisfyingly crisp crust once baked. Some bakers like to add a tablespoon or two of granulated sugar to the crumb mixture for a hint of extra sweetness and browning, though this is entirely optional and depends on your preference.
Next, take a baking dish, typically an 8×8 or 9×9 inch square pan, and line it with parchment paper, leaving some overhang on the sides. This overhang will act as handy handles, making it much easier to lift the finished bars out of the pan later. Pour the butter-coated graham cracker crumbs into the prepared dish. Using the bottom of a glass or a flat-bottomed measuring cup, press the crumbs down firmly and evenly across the entire base of the pan. This compacting action is key to preventing a crumbly crust and ensuring a solid base for your filling. A well-pressed crust is the unsung hero of any bar dessert.
Once the crust has been meticulously pressed into place, it’s time for its brief sojourn in the oven. Place the baking dish in the preheated oven and bake for approximately 8 to 10 minutes. You’re looking for the edges to be lightly golden and the entire crust to smell wonderfully toasted. This brief baking period helps to set the crust and develop its flavor, giving it a delightful crunch. After baking, carefully remove the dish from the oven and set it aside to cool completely on a wire rack. Allowing the crust to cool fully is a vital step; adding the filling to a warm crust can lead to a softer, less defined base.
Step 2: Preparing the Creamy Coconut Base
While the graham cracker crust is diligently cooling, turn your attention to the luscious filling that will define these bars. In a separate, clean mixing bowl, combine the chilled coconut cream with the powdered sugar. It’s important to use full-fat coconut cream for the best texture and flavor; the lighter versions tend to be too watery and won’t yield the desired richness. Ensure your coconut cream is well-chilled, as this helps it whip up more easily and become delightfully thick.
Using an electric mixer, either a handheld one or a stand mixer fitted with a whisk attachment, beat the coconut cream and powdered sugar together. Start on a low speed to incorporate the sugar without creating a cloud of dust, then gradually increase the speed. Continue to beat until the mixture is smooth, creamy, and has a slightly fluffy consistency. You’re aiming for a well-combined blend that is free of sugar lumps and has a consistency similar to thick pudding. This stage is where the sweetness and foundational creaminess of your filling are established.
The duration of beating will depend on your mixer and the consistency of your coconut cream, but typically it takes a few minutes. Scrape down the sides of the bowl periodically to ensure all the ingredients are evenly incorporated. The resulting mixture should be pale, creamy, and fragrant with the subtle aroma of coconut. This forms the core of your delightful pie bar filling, setting the stage for the addition of other wonderful components.
Step 3: Achieving Airy Whipped Cream
Now, it’s time to introduce an element of airy lightness to your dessert. In yet another clean, dry mixing bowl, add the cold heavy whipping cream. It is crucial that this bowl and your whisk attachment are completely free of any grease or moisture, as this is essential for the cream to whip properly. The colder the cream and equipment, the better the results you will achieve. Some bakers even like to chill their mixing bowls and whisks in the freezer for about 15-20 minutes before starting this step for optimal performance.
Begin whipping the heavy cream on medium speed using your electric mixer. As the cream starts to thicken and turn opaque, gradually increase the speed to medium-high. You will notice it transform from a liquid to a foamy texture, and then eventually to soft peaks. Continue whipping until stiff peaks form; this means that when you lift the whisk out of the cream, the peaks stand up straight without curling over. Be careful not to overbeat, as this can result in the cream becoming grainy and turning into butter.
The goal here is to create a light, fluffy, and stable whipped cream that will perfectly complement the denser coconut cream mixture. This airy component will lighten the overall texture of the bars, making them feel decadent yet wonderfully delicate. Once the stiff peaks have formed, immediately remove the whisk attachment and set the bowl of whipped cream aside. This aerated cream is a key contributor to the overall delightful mouthfeel of the final product.
Step 4: Gently Uniting the Filling Components
The magic truly happens as you begin to combine the elements that will form your exquisite filling. Take the bowl containing your whipped heavy cream and gently spoon it into the bowl with the sweetened coconut cream mixture. The technique used here is crucial for maintaining the airiness of the whipped cream, which in turn ensures a light and fluffy filling for your bars. Avoid simply stirring vigorously, as this will deflate the whipped cream.
Employ a gentle folding motion using a spatula or a large rubber scraper. Carefully cut down through the center of the mixture, then bring the spatula up along the side, folding the denser coconut cream mixture over the lighter whipped cream. Rotate the bowl as you go, continuing this gentle folding process until the two mixtures are just combined. You want to see no streaks of white whipped cream remaining, but take care not to overmix, which will diminish the airy volume you worked so hard to achieve. The resulting mixture should be uniformly creamy and light.
This step requires a delicate touch and patience. The goal is to create a homogenous filling that is simultaneously rich from the coconut cream and airy from the whipped cream. The texture should be smooth, luscious, and inviting, promising a delightful taste experience. Once fully incorporated, the filling is ready for its final flavorful additions.
Step 5: Infusing Tropical Flavors
Now it’s time to introduce the star tropical ingredients that give these bars their name and signature taste. Take your well-drained crushed pineapple and gently fold it into the combined coconut and whipped cream mixture. Using the same gentle folding technique from the previous step is important to maintain the lightness of the filling. The pineapple chunks should be evenly distributed throughout the creamy base, promising delightful bursts of fruity flavor in every bite.
If you are using gelatin to help set the filling, this is also the stage where you would incorporate it. Ensure the gelatin has been bloomed and dissolved according to its package instructions, usually by mixing it with a small amount of warm liquid, such as the pineapple juice. Gently whisk the dissolved gelatin into the filling mixture. Make sure it is thoroughly distributed to ensure an even set throughout the bars. The pineapple juice itself can also be folded in at this stage, adding an extra layer of pineapple essence and contributing to the overall moisture of the filling.
Take care not to overwork the mixture once the pineapple and juice are added. You want to ensure everything is well combined without breaking down the pineapple too much or deflating the airy filling. The goal is a beautifully blended mixture that is creamy, studded with pineapple, and fragrant with tropical notes. This vibrant mixture is now ready to be poured over your prepared crust.
Step 6: Assembling and Chilling for Perfection
With your crust cooled and your luscious filling ready, the assembly of your Coconut Pineapple Cream Pie Bars is imminent. Carefully retrieve your cooled graham cracker crust from the counter. If you lined your baking dish with parchment paper, you can now gently lift the crust slightly to ensure it’s perfectly seated, or simply proceed to pour the filling directly into the pan over the crust.
Pour the entire prepared coconut-pineapple filling evenly over the cooled graham cracker crust. Use your spatula or the back of a spoon to gently spread the filling to all the corners and edges of the pan. Aim for a smooth, even surface for the best presentation and texture in every bar. A perfectly smooth top layer ensures that each slice will have an optimal ratio of crust to filling, making for a balanced and enjoyable dessert experience.
Once the filling has been spread evenly, it’s time for the most crucial step: chilling. Carefully cover the baking dish, either with plastic wrap or aluminum foil, ensuring that the covering does not touch the surface of the filling if possible. Place the dish in the refrigerator and allow the bars to chill for a minimum of 4 hours. For the best results and a firmly set filling, chilling overnight is highly recommended. This extended chilling period allows the flavors to meld beautifully and the filling to become perfectly firm and sliceable. Patience during this stage is rewarded with perfectly formed, delicious bars.
Step 7: The Grand Finale: Slicing and Serving
The moment of truth has arrived! After a patient chilling period, your Coconut Pineapple Cream Pie Bars are ready to be revealed. Carefully remove the baking dish from the refrigerator. If you used parchment paper with overhangs, now is the time to gently lift the entire block of bars out of the pan onto a cutting board. This makes slicing much cleaner and easier, preventing damage to the edges of your beautiful creation.
Using a sharp, thin knife, carefully cut the chilled bars into your desired serving size. For standard 8×8 or 9×9 inch pans, cutting into 9 or 12 squares is common. For a cleaner cut, it’s often helpful to wipe the knife clean with a damp cloth between each cut, especially if the filling is very soft. A hot knife can also make for very clean slices, but be mindful that it may slightly melt the top layer.
For an extra flourish and to enhance the tropical theme, sprinkle toasted coconut flakes over the top of each bar just before serving. This adds a delightful textural contrast and an extra layer of nutty coconut flavor that perfectly complements the bars. You can also garnish each bar with a small slice of fresh pineapple, a maraschino cherry, or a dollop of whipped cream for an even more festive presentation. Serve immediately and enjoy the delightful tropical flavors.
Pro Tips for Coconut Pineapple Cream Pie Bars
Chill Everything: For the fluffiest filling, ensure your heavy whipping cream, mixing bowl, and whisk attachment are thoroughly chilled. Cold ingredients whip up much better, resulting in a lighter texture for your bars. This is a simple step that significantly impacts the final mouthfeel.
Drain Pineapple Thoroughly: Excess moisture from the crushed pineapple can make your filling watery and prevent it from setting properly. Squeeze out as much liquid as possible using a fine-mesh sieve or by pressing it gently in paper towels before adding it to the filling mixture. This ensures a stable and delicious final product.
Gentle Folding is Key: When combining the whipped cream with the coconut mixture, use a gentle folding motion. This technique preserves the air incorporated into the whipped cream, ensuring a light and airy texture for your bars. Rushing this step can lead to a denser, less appealing filling.
Don’t Skip the Chill Time: While tempting to cut into them sooner, allowing the bars to chill for at least 4 hours, or preferably overnight, is crucial. This time allows the filling to set completely, making the bars firm enough to slice cleanly and for the flavors to meld together beautifully. Proper chilling is essential for structural integrity and taste development.
Toast Your Coconut: Toasted coconut flakes add an incredible depth of flavor and a delightful crunch that elevates these bars. Spread shredded coconut in a single layer on a baking sheet and toast in a 300°F (150°C) oven for a few minutes, watching carefully as it can burn quickly. This simple step transforms the topping into something truly special and aromatic.
Serving Suggestions for Coconut Pineapple Cream Pie Bars
Decoration
Elevate the visual appeal of your Coconut Pineapple Cream Pie Bars with simple yet effective decorations. A generous sprinkling of toasted coconut flakes over the top adds a beautiful golden-brown hue and a delightful textural contrast. For an even more tropical presentation, consider topping each bar with a small, perfectly cut piece of fresh pineapple or a bright maraschino cherry. A light dusting of powdered sugar can also add a touch of elegance, mimicking a dusting of fresh snow on a tropical island.
Side Dishes
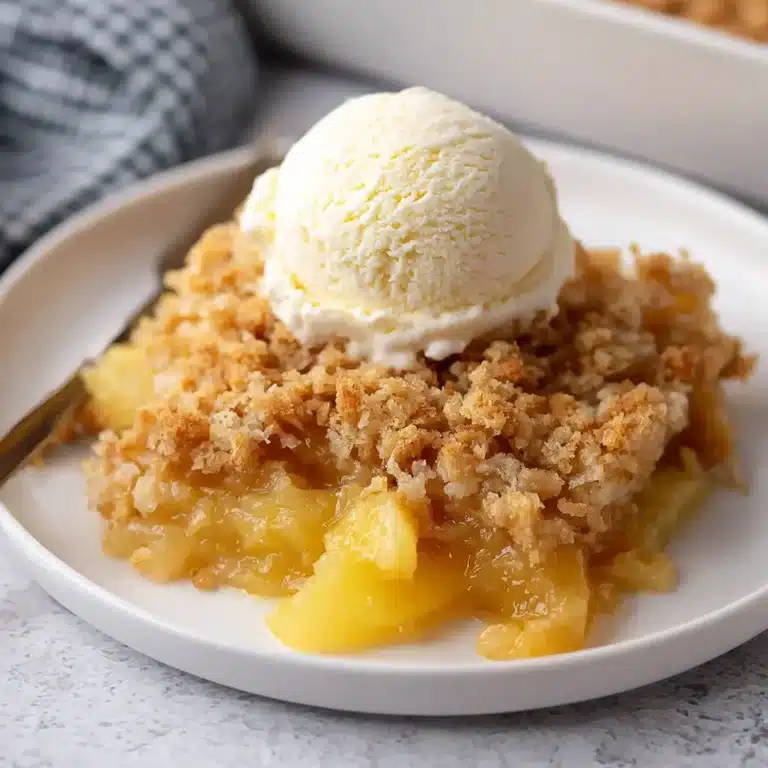
These bars are a delightful dessert on their own, but they pair wonderfully with certain accompaniments. A small scoop of creamy vanilla bean ice cream or a dollop of extra whipped cream can add another layer of indulgence. For a lighter touch, serving them alongside a fresh fruit salad featuring complementary tropical fruits like mango, papaya, or kiwi can enhance the overall tropical experience. The bright, fresh flavors of the fruit cut through the richness of the bars beautifully.
Creative Serving Ideas
Think beyond the standard square cut. You can use small cookie cutters to create fun shapes from the chilled bars, perfect for children’s parties or themed events. For a more sophisticated presentation, serve individual bars with a drizzle of caramel sauce or a swirl of raspberry coulis. Another idea is to present them as part of a dessert buffet, alongside other treats, where their unique tropical flavor can stand out. They also make for an excellent light dessert after a hearty meal, providing a sweet yet refreshing conclusion.
Preparation & Storage
Storing Leftovers
Should you be fortunate enough to have any leftover Coconut Pineapple Cream Pie Bars, storing them properly is key to maintaining their deliciousness. Place the bars in an airtight container, ensuring a tight seal to prevent them from drying out or absorbing odors from the refrigerator. You can also cover the baking dish tightly with plastic wrap or aluminum foil if you haven’t cut them all yet.
In the refrigerator, these bars will generally remain fresh and enjoyable for about 3 to 5 days. The chilling process helps to keep the filling firm and the crust crisp, though some slight softening of the crust is natural over time. Always check for any signs of spoilage before consuming leftovers, though their rich flavor profile usually ensures they’re enjoyed well within this timeframe.
Freezing
For longer-term storage, freezing is an excellent option for Coconut Pineapple Cream Pie Bars. It’s best to cut the bars into individual portions before freezing. This makes it much easier to thaw and serve just what you need without compromising the entire batch. Wrap each individual bar tightly in plastic wrap, ensuring no air can get to it, and then place them in a freezer-safe airtight container or a heavy-duty freezer bag.
Stored properly in the freezer, these bars can maintain their quality for up to two to three months. Freezing helps to preserve their flavor and texture, allowing you to enjoy a taste of the tropics whenever a craving strikes. It’s a great way to prepare ahead for parties or holidays, ensuring you always have a delightful dessert on hand.
Reheating
Reheating is generally not necessary for these chilled bars, as they are best served cold or slightly softened from refrigeration. However, if you are serving frozen bars, the best method of “reheating” is actually thawing. Simply transfer the frozen bars from the freezer to the refrigerator and allow them to thaw slowly overnight. This gradual thawing process helps them retain their texture and prevents the filling from becoming too soft or mushy.
Once thawed, you can serve them as is, or if you prefer a slightly softer crust, you can let them sit at room temperature for about 15-20 minutes before serving. Avoid microwaving them, as this will likely melt the filling and ruin the texture of the crust and filling. The focus is on gentle thawing to bring them back to their optimal serving consistency.
Frequently Asked Questions
-
Can I make Coconut Pineapple Cream Pie Bars in advance?
Absolutely! These bars are an excellent make-ahead dessert. You can prepare them a day or two in advance and store them covered in the refrigerator. This not only saves you time on the day of your event but also allows the flavors to meld together even further, enhancing the overall taste experience. Ensure they are kept well-covered to maintain freshness and prevent them from drying out.
-
How long do Coconut Pineapple Cream Pie Bars last?
When stored properly in an airtight container in the refrigerator, Coconut Pineapple Cream Pie Bars typically remain fresh and delicious for about 3 to 5 days. The combination of coconut cream and pineapple, along with the graham cracker crust, holds up well for this duration. For longer storage, freezing is recommended, as detailed in the storage section.
-
Can I substitute fresh pineapple instead of crushed?
Yes, you can use fresh pineapple, but it requires a bit more preparation. You’ll need to finely chop the fresh pineapple and ensure it is very well-drained, just like the crushed variety. Weighing the pineapple after chopping and draining can help ensure you have the correct amount. Raw pineapple contains enzymes that can affect the setting of dairy products, so using drained, fresh pineapple is crucial to avoid a runny filling.
-
What can I use instead of heavy whipping cream?
For a dairy-free version, you can substitute the heavy whipping cream with a high-quality vegan whipping cream alternative. Options include coconut-based whipping cream (ensure it’s the thick cream from the top of a chilled can) or other plant-based whipping creams available in most supermarkets. It’s important that the substitute whips up to stiff peaks to provide the necessary lightness and structure to the filling. Always check the packaging for whipping stability.
-
Is it necessary to use gelatin?
No, gelatin is optional and is primarily used to help ensure the filling sets firmly, especially if you are in a warmer climate or want a very stable bar that slices cleanly with minimal crumbling. If you prefer a softer, more pudding-like texture and are confident in your chilling time, you can omit the gelatin entirely. The bars will still hold together reasonably well due to the coconut cream and the chill time.