Coconut Mug Cake in Minutes
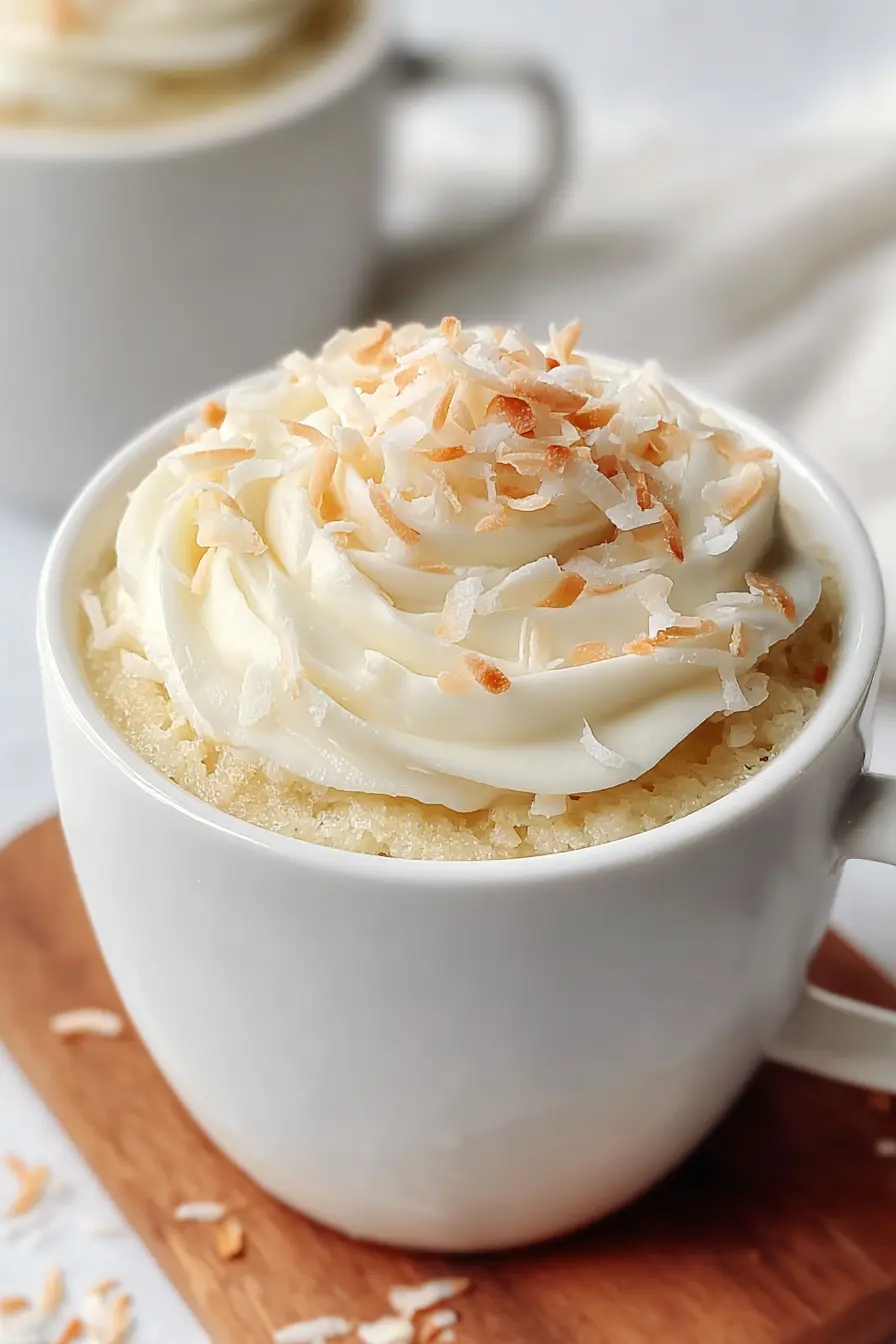
Quick, cozy, and beginner-friendly, Coconut Mug Cake gives you a soft, warm dessert with rich coconut flavor in just minutes. It is perfect for small cravings, fast weeknight treats, and those moments when you want something homemade without baking a full cake.
This is the kind of dessert that fits real life. You can mix it in one small bowl, cook it in the microwave, and have a tender little cake ready before your coffee has even cooled down. The flavor works because every ingredient has a clear job. The butter adds richness, the sour cream helps keep the crumb soft, and the flaked coconut gives the cake a little texture that makes it feel more complete than a plain mug dessert. It is also wonderfully practical. When you want something sweet without leftovers sitting on the counter, this single-serving treat feels just right for a quiet afternoon, late-night snack, or simple dessert after dinner.
Why You Will Love This Recipe
- Speedy Preparation: This delightful coconut mug cake comes together in a matter of minutes, making it the perfect solution for last-minute dessert emergencies or quick sweet cravings.
- Intense Coconut Flavor: Infused with both coconut extract and flaked coconut, this recipe delivers a robust and satisfying coconut taste that true fans will adore.
- Incredibly Moist Texture: The combination of ingredients, particularly the sour cream, ensures a wonderfully tender and moist crumb that avoids the dryness sometimes associated with microwave cakes.
- Single-Serving Perfection: Designed for individual enjoyment, this mug cake eliminates the need for baking a large dessert and dealing with leftovers, offering a perfectly portioned treat every time.
- Beginner-Friendly: With a straightforward mixing process and simple microwaving instructions, this recipe is accessible to cooks of all skill levels, guaranteeing success even for novice bakers.
Ingredients You Need
The quality of your ingredients plays a significant role in the final taste and texture of this coconut mug cake. Opting for fresh, good-quality staples ensures a delightful outcome that’s more than the sum of its parts. Ensure your flour is fresh, your butter is unsalted for better control over saltiness, and that your coconut extract is potent for maximum flavor impact.
Coconut Mug Cake

A warm, individual coconut cake prepared in minutes, this simple microwave dessert offers a soft texture and rich flavor in a convenient single-serving format.
- 2 tablespoons granulated sugar
- 1 tablespoon melted butter
- 3 tablespoons milk (preferably whole for a richer result)
- 1 tablespoon full-fat sour cream
- 1/4 teaspoon coconut extract
- 2 tablespoons flaked coconut (such as Baker’s shredded coconut)
- 1/2 teaspoon baking powder
- 1/4 cup all-purpose flour
- 1In a small bowl, place the melted butter, sugar, baking powder, coconut extract, milk, flaked coconut, sour cream, and flour. Stir well with a whisk or a small spatula until the mixture becomes smooth and evenly blended.
- 2Continue mixing until no lumps remain in the batter, as this will help the cake cook evenly.
- 3Pour the prepared batter into a microwave-safe mug and place it carefully in the microwave.
- 4Cook for 1 to 1 1/2 minutes, checking at the 1-minute mark to avoid overbaking. In many microwaves, about 1 minute 15 seconds produces the best texture, though the exact time may vary by appliance.
- 5Once cooked, let the mug cake rest briefly so it can cool slightly and settle.
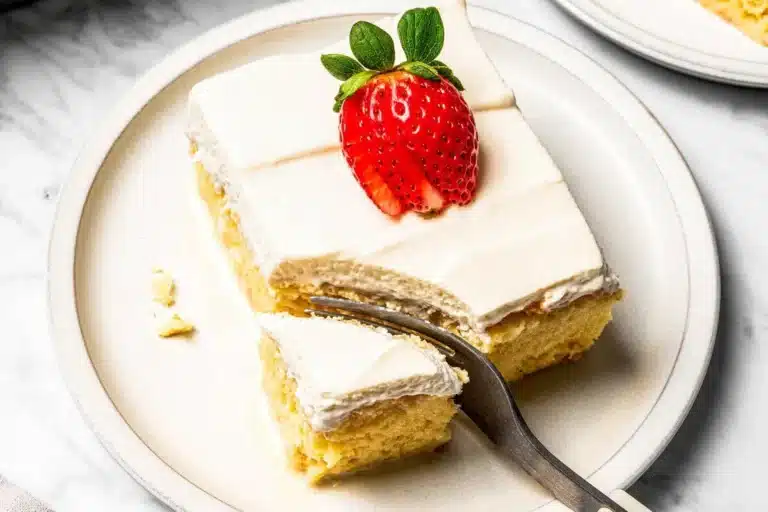
- 6Finish with any preferred topping, such as buttercream frosting, whipped cream, plain or toasted shredded coconut, or another garnish of choice. Serve directly from the mug.
Keywords: Coconut Mug Cake
- granulated sugar: adds just enough sweetness for a dessert that tastes comforting without becoming overly heavy.
- melted butter: brings richness and helps create a soft, cake-like texture that feels more satisfying than many quick microwave sweets.
- milk: loosens the batter and keeps it smooth; whole milk gives the mug cake a slightly fuller, creamier finish.
- full-fat sour cream: a small ingredient that makes a big difference, helping the crumb stay moist and tender instead of dry.
- coconut extract: gives the cake its clear coconut flavor, so the finished dessert tastes fragrant and distinct even with a short ingredient list.
- flaked coconut: adds texture and reinforces the coconut taste in every bite, giving the cake a more homemade feel.
- baking powder: provides lift, helping the batter puff gently as it cooks in the microwave.
- all-purpose flour: gives the mug cake structure and turns the wet mixture into a true cake instead of a pudding-like dessert.
The specific quantities for these delightful ingredients are detailed within the recipe card. For the most satisfying result, measuring accurately is key to achieving the perfect cake consistency and flavor balance.
Variations
The beauty of this coconut mug cake lies in its adaptability, allowing you to tailor it to various dietary preferences and flavor profiles. With just a few simple substitutions or additions, you can transform this basic recipe into something entirely new and exciting, catering to diverse tastes and needs.
For those seeking a vegan option, the transformation is remarkably simple. Replace the butter with a plant-based alternative like melted coconut oil or vegan butter. The milk can be swapped for any unsweetened plant-based milk, such as almond, soy, or oat milk, which will still provide the necessary liquid without altering the flavor too drastically. For the sour cream, a dollop of thick, unsweetened vegan yogurt, like soy or coconut yogurt, works beautifully to maintain that essential moisture and tender crumb. Ensure your flaked coconut is also vegan, as some brands may contain additives.
If you’re following a low-carb lifestyle, this mug cake can be adapted with a few clever ingredient swaps. Substitute the all-purpose flour with almond flour or a coconut flour blend; you might need to adjust the liquid slightly as these flours absorb moisture differently. For the sweetener, opt for a sugar substitute like erythritol, xylitol (ensure it’s safe for pets if you have any), or stevia, adjusting the amount to your preferred sweetness level. While this requires a bit more experimentation, the result can be a delicious, guilt-free treat that fits your dietary goals perfectly.
To elevate the flavor profile further, consider adding a hint of spice or a touch of citrus. A pinch of ground cinnamon or cardamom can add a warm, comforting dimension, especially appealing during cooler months. Alternatively, a teaspoon of lime or lemon zest folded into the batter before microwaving can introduce a bright, zesty note that complements the coconut beautifully. These small additions offer a sophisticated twist, turning a simple mug cake into a more complex and layered dessert experience.
How to Prepare Coconut Mug Cake
Step 1: Combine Dry Ingredients
Begin by gathering a small mixing bowl, one that’s conveniently sized for whisking and stirring. Into this bowl, precisely measure out your dry components. This foundational step is crucial for ensuring an even distribution of leavening agents and sweeteners throughout the batter.
Carefully add the granulated sugar, baking powder, and all-purpose flour into the bowl. The sugar not only sweetens but also contributes to the cake’s tender crumb by interfering with gluten development. Baking powder is the key to achieving that lovely rise and airy texture, so its presence is vital.
Using a small whisk or a fork, gently stir these dry ingredients together. The goal here is to create a uniform blend, breaking up any small clumps and ensuring the baking powder is evenly dispersed. This preliminary mixing prevents pockets of unincorporated ingredients and sets the stage for a perfectly baked mug cake.
Step 2: Incorporate Wet Ingredients and Coconut
Once the dry ingredients are harmoniously blended, it’s time to introduce the wet components that will bring the batter to life. Measure out your melted butter, milk, sour cream, and coconut extract. These ingredients are responsible for the richness, moisture, and distinct flavor of the cake.
Add the melted butter, which provides essential fat for a tender crumb and rich mouthfeel. Follow with the milk, preferably whole milk for an enhanced creamy texture, and the full-fat sour cream, a secret weapon for supreme moistness. Finally, pour in the coconut extract to infuse the batter with that signature tropical aroma and taste. Be generous with the extract if you desire a more pronounced coconut presence.
Gently stir these wet ingredients into the dry mixture. Continue mixing until the batter achieves a smooth and creamy consistency. It should look homogenous, with no streaks of dry flour or clumps of sour cream remaining. Once the batter is smooth, carefully fold in the flaked coconut. Distribute it evenly throughout the batter to ensure every bite offers that delightful texture and intensified coconut flavor. Avoid overmixing at this stage, as that can lead to a tougher cake.
Step 3: Achieve a Lump-Free Batter
The texture of your final mug cake is heavily influenced by the smoothness of the batter. Take a moment to thoroughly inspect the mixture for any remaining lumps, whether they are from flour, sugar, or sour cream. Persistence is key here to unlock the best possible outcome.
Continue to stir and gently fold the batter, ensuring all ingredients are fully incorporated. A smooth batter bakes more evenly, preventing dense spots or undercooked areas within the cake. The goal is a glossy, uniform consistency that looks inviting and promises a delightful eating experience.
This thorough mixing ensures that the leavening agent, baking powder, can react effectively and evenly, promoting a uniform rise. A well-blended batter is the foundation for a tender, soft, and perfectly cooked coconut mug cake, so don’t rush this vital step. It’s this attention to detail that distinguishes a good mug cake from a truly great one.
Step 4: Transfer Batter to Mug
Now, select your vessel for this miniature culinary creation. Choose a microwave-safe mug that offers ample room for the cake to expand and rise. A standard mug size, typically holding 10-12 ounces, is usually suitable. Ensure there is at least an inch or two of space above the batter once it’s in the mug.
Carefully spoon or pour the prepared batter into the chosen mug. Avoid filling the mug more than two-thirds full. Overfilling is a common mistake that leads to overflow during the microwaving process, creating a messy situation and potentially a less-than-perfect cake shape. This headspace is critical for allowing the cake to puff up without spilling over the rim.
The act of transferring the batter to the mug is the final preparation before the quick cooking stage. Ensure the batter is distributed relatively evenly within the mug. A level surface helps the cake cook uniformly, leading to a better final texture and appearance. This simple step prepares your mug cake for its rapid transformation.
Step 5: Microwave to Perfection
The magic of mug cakes lies in their incredibly fast cooking time, typically achieved in a microwave. Place the mug containing the batter into the center of your microwave oven. Ensure it is positioned so it can rotate freely if your microwave has a turntable.
Begin by microwaving on high power for approximately 60 seconds, or one full minute. Microwave wattages vary significantly, so this is a starting point. After the initial minute, carefully check the cake. The edges should appear set, but the very center might still look slightly wet or gooey. This is normal and indicates it’s on its way to being perfectly cooked.
Continue microwaving in very short bursts, 15 to 20 seconds at a time, checking after each interval. The cake is done when the top is set, springs back lightly when gently touched, and a toothpick inserted into the center comes out clean or with a few moist crumbs attached. Overcooking is the primary culprit for a dry or rubbery texture, so err on the side of caution and pull it out just before it looks completely done. The residual heat will continue to cook it slightly as it rests.
Step 6: Allow to Rest
Resisting the urge to dive in immediately is a crucial step for optimal texture. Once the mug cake has finished its microwave cooking cycle, carefully remove the hot mug from the microwave using oven mitts or a towel. Place it on a heat-resistant surface.
Allow the cake to stand and rest for one to two minutes. This brief resting period is essential for several reasons. Firstly, it allows the internal structure of the cake to finish setting, preventing it from being too soft or underdone in the center. Secondly, it lets the extreme heat dissipate slightly, making it more comfortable and safer to eat.
This short pause helps to create a more cohesive and pleasing texture. It prevents that steamy, slightly gummy feel that can occur if you eat a mug cake too soon after microwaving. The small amount of time spent resting yields a significantly better final eating experience, making the wait entirely worthwhile.
Step 7: Garnish and Enjoy
The final flourish transforms your simple mug cake into a delightful indulgence. While delicious on its own, a few thoughtful additions can elevate it to a more celebratory dessert. Consider your personal preferences and what you have readily available to enhance its appeal.
A dollop of whipped cream provides a cool, airy contrast to the warm, tender cake. For an extra punch of coconut flavor and a pleasant textural contrast, sprinkle a bit of toasted flaked coconut over the top. This adds a delightful crunch and intensifies the tropical notes of the cake.
Other fantastic options include a small spoonful of buttercream frosting, a dusting of powdered sugar, a drizzle of chocolate sauce, or even a few fresh berries. Serve your creation directly from the mug for ultimate convenience and enjoy the warm, comforting, and intensely coconutty goodness.
Pro Tips for Coconut Mug Cake
Don’t Overmix: Once the wet and dry ingredients are combined, mix only until the batter is smooth and lump-free. Overmixing develops the gluten in the flour, which can lead to a tougher, chewier cake instead of a tender one. Stirring just enough to incorporate everything is key.
Microwave Power Varies: Cooking times are approximate because microwaves differ significantly in wattage. Start checking your mug cake at the lower end of the suggested time (around 60 seconds) and add more time in short 15-second intervals. This prevents overcooking and results in a perfectly moist cake.
Room for Rise: Ensure your mug is not filled more than two-thirds full with batter. This provides ample space for the cake to rise as it cooks. Overflowing batter can create a mess and an unevenly cooked cake, so choosing a slightly larger or deeper mug is often beneficial.
The Power of Sour Cream: Full-fat sour cream is a game-changer for mug cake moisture. Its fat content and acidity contribute to a wonderfully tender crumb that resists drying out. If you absolutely cannot use sour cream, plain full-fat yogurt is the next best option.
Ingredient Quality Matters: While this is a quick recipe, using good quality ingredients will enhance the flavor. Fresh flour, real butter, and potent coconut extract make a noticeable difference in the final taste. For an even richer result, consider using whole milk instead of a lower-fat variety.
Serving Suggestions for Coconut Mug Cake
Decoration
The presentation of your coconut mug cake can elevate it from a simple treat to a special dessert. A light dusting of powdered sugar offers an elegant, classic finish that complements the coconut flavor without overpowering it. For a more decadent touch, a small swirl of homemade or store-bought buttercream or cream cheese frosting adds a luxurious element.
Toasted flaked coconut is an absolute must-try for an intensified coconut experience and a pleasing textural contrast. Toasting brings out a nutty aroma and a delightful crunch that beautifully complements the soft cake. A simple dollop of freshly whipped cream provides a cool, airy lightness that balances the warmth of the cake.
Consider adding a few fresh berries, like raspberries or blueberries, for a pop of color and a burst of tartness. A tiny sprig of mint can also add a touch of freshness and visual appeal. Even a drizzle of chocolate syrup or a scattering of finely chopped nuts can transform this simple mug cake into a visually appealing and delicious dessert.
Side Dishes
While this coconut mug cake is a delightful standalone treat, it can also be wonderfully paired with complementary flavors and textures. A small scoop of vanilla bean ice cream alongside the warm cake creates a classic dessert combination that is always a crowd-pleaser. The contrast between the warm cake and the cold ice cream is simply divine.
For a lighter accompaniment, consider serving it with a small side of fresh fruit salad. The bright, refreshing flavors of berries, melon, or tropical fruits can cut through the sweetness of the cake and offer a healthy balance. A few slices of kiwi or mango would pair exceptionally well with the coconut theme.
If you’re feeling adventurous, a small pitcher of warm caramel sauce for drizzling or a side of chocolate ganache can turn this simple dessert into something truly extraordinary. These additions allow for a more interactive and indulgent dessert experience, perfect for special occasions or when you simply want to treat yourself.
Creative Serving Ideas
Beyond traditional toppings, think outside the mug for truly unique presentations. For a fun, party-friendly option, unmold the cooked cake onto a small plate and serve it with a miniature skewer of fresh fruit. This makes it easier to handle and offers a more elegant presentation than eating directly from the mug.
Consider making two mug cakes and serving them as a pair, perhaps one plain and one with a hint of lime zest, alongside a small saucer of sweetened condensed milk for dipping. This offers guests a choice and an interactive dessert experience. The sweet, creamy milk is a classic pairing with coconut in many tropical cuisines.
For a whimsical touch, especially for children or themed parties, try piping small shapes or swirls of frosting onto the cake once it has cooled slightly. You could even use edible glitter or sprinkles to add some sparkle and festivity. Another idea is to bake the batter in silicone mini-muffin molds instead of a mug for perfectly portioned, bite-sized coconut cakes, ideal for a dessert buffet or a tea party.
Preparation & Storage
Storing Leftovers
Because this coconut mug cake is designed for single-serving enjoyment, it’s best when eaten fresh from the microwave. However, if you find yourself with a portion that wasn’t quite finished, proper storage is key to preserving its quality as much as possible. Do not leave it at room temperature for extended periods, as this can affect its texture and safety.
To store any remaining mug cake, first ensure it has cooled down completely. Then, you can either cover the mug tightly with plastic wrap or transfer the cake to a small airtight container. This prevents it from drying out and absorbing other odors from your refrigerator. It will remain good for up to one day, though the texture might become slightly firmer.
It’s important to note that microwaved desserts, in general, do not store and reheat as well as oven-baked goods. The texture can change, becoming denser or slightly chewier upon reheating. For the best experience, try to consume the mug cake shortly after it’s made.
Freezing
Freezing is generally not recommended for this particular coconut mug cake. Due to its delicate, moist texture achieved through quick microwaving, the freezing and thawing process can significantly alter its desirable consistency. Small, individual baked goods like mug cakes are particularly susceptible to textural changes.
When frozen and then thawed, the cake can become somewhat dry, crumbly, or even develop an unpleasantly gummy texture. The moisture that makes it so delightful can be compromised by ice crystals forming and then melting. This recipe is so quick to prepare that making a fresh one is usually a more satisfying option than trying to salvage a frozen portion.
If you absolutely must freeze it, wrap individual portions extremely well in multiple layers of plastic wrap and then foil to minimize freezer burn. However, manage your expectations; the quality upon thawing will likely be diminished compared to a freshly made cake. It’s best to focus on making just what you plan to eat.
Reheating
If you have a leftover mug cake that has been refrigerated, reheating it is a straightforward process. The goal is to warm it through gently without cooking it further, which could lead to a tough or rubbery consistency. Use the microwave for this task, as it’s the fastest and most efficient method.
Place the cooled mug cake back into a microwave-safe mug (if you transferred it to a container). Microwave on a medium power setting, or in very short intervals of 10-15 seconds at a time. Check the cake frequently after each short burst of heat. You are aiming to warm it up, not to cook it further until it’s piping hot.
The cake should feel warm to the touch and be soft. Avoid overheating, as this is the main cause of a rubbery texture. A minute or two of gentle reheating is usually sufficient. Once warmed, you can add fresh toppings like whipped cream or toasted coconut to enhance its appeal, making it feel almost as good as when it was first made.
Frequently Asked Questions
-
Why did my coconut mug cake turn out dry or rubbery?
The most common reason for a dry or rubbery mug cake is overcooking. Microwaves vary significantly in power, so a minute on one machine might be insufficient, while it could be too long on another. It is crucial to start checking the cake’s doneness early, around the 60-second mark, and continue microwaving in very short 15-second intervals. The cake is ready when the edges are set and the center springs back lightly to the touch. Allowing the cake to rest for a minute or two after microwaving also helps the texture to settle and become more tender, preventing that dreaded rubbery feel.
-
Can I substitute the sour cream in this recipe?
Yes, you can substitute the sour cream, although it might slightly alter the texture. The full-fat sour cream is instrumental in providing moisture and tenderness to the mug cake. A very good substitute is plain, full-fat yogurt, such as Greek yogurt or regular plain yogurt. Use an equal amount of yogurt as you would sour cream. Another option is to use a dairy-free yogurt if you are making a vegan version, like coconut yogurt or soy yogurt, ensuring it’s unsweetened. Avoid using low-fat or flavored yogurts, as they may not provide the necessary richness and can affect the cake’s consistency and taste.
-
What kind of mug is best for making a mug cake, and why does the size matter?
The best mug for making a mug cake is a standard-sized, microwave-safe ceramic mug. The ideal capacity is usually between 10 to 12 ounces. The size matters because the batter needs room to rise without overflowing. If the mug is too small or filled too high with batter, the cake will spill over during cooking, creating a mess and potentially resulting in an unevenly baked product. Aim to fill your chosen mug no more than two-thirds full with batter. This ensures that the cake has ample space to expand upwards, maintaining its shape and allowing for consistent cooking throughout. Always ensure the mug is clearly marked as microwave-safe.