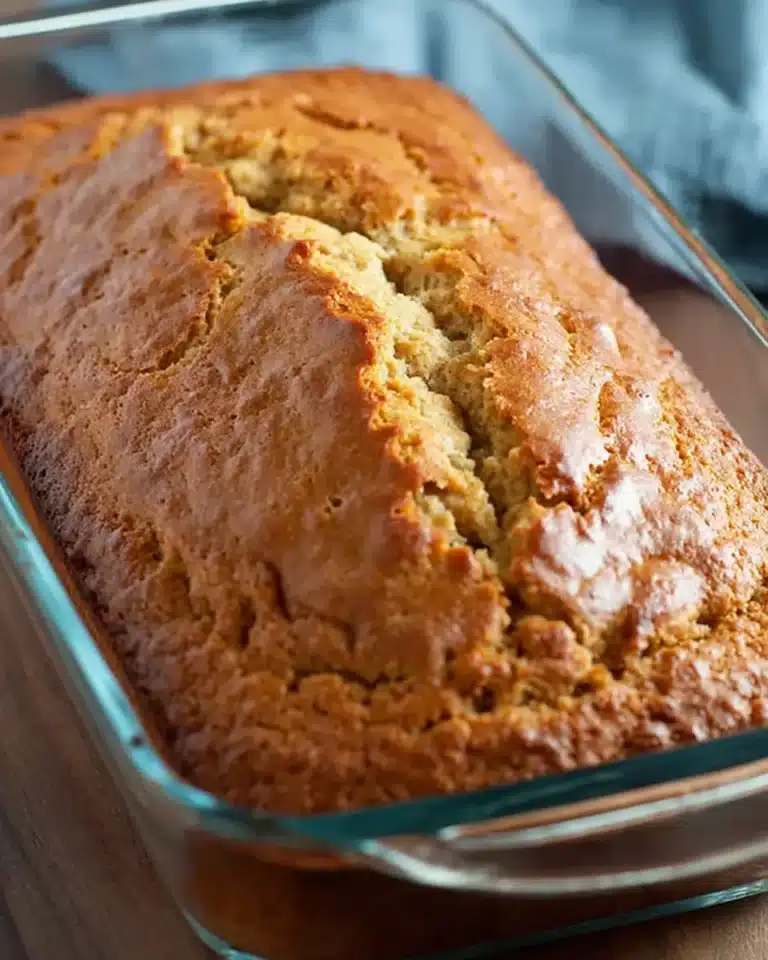
Coconut Cake with Lemon Curd

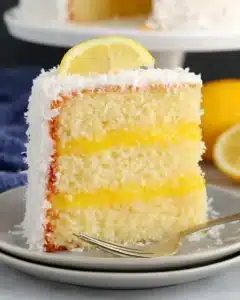
Creamy, elegant, and celebration-ready, Coconut Cake with Lemon Curd Filling brings together fluffy coconut cake, bright citrus layers, and a cloudlike frosting for a dessert that feels special without being fussy.
This is the kind of cake that works beautifully for birthdays, spring gatherings, holidays, or any time you want something that feels light yet still rich enough to satisfy the palate with its delightful combination of textures and flavors.
Why You Will Love This Recipe
- Delicate Texture: The cake layers are incredibly tender and moist, thanks to the use of cake flour and coconut milk, creating a melt-in-your-mouth experience with every bite that is truly unparalleled.
- Bright Citrus Zing: The homemade lemon curd filling provides a perfect counterpoint to the sweet coconut, offering a vibrant, tangy burst that cuts through the richness and awakens the taste buds beautifully.
- Light & Airy Frosting: The Chantilly-style frosting, made with cream cheese and heavy cream, is wonderfully smooth and fluffy, providing a decadent yet not overwhelmingly heavy topping that complements the cake and filling.
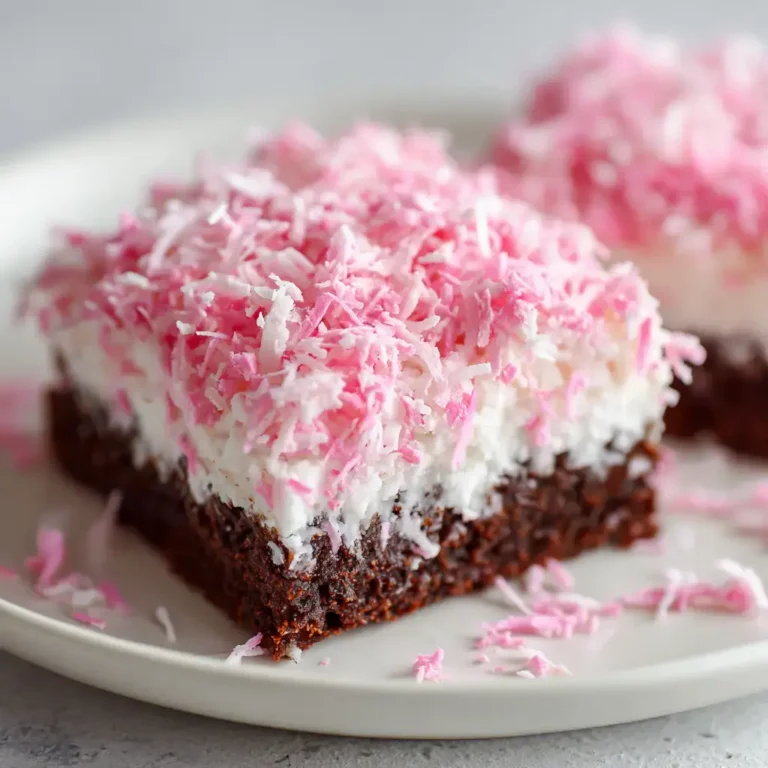
- Visually Stunning: With its classic shredded coconut coating, this cake looks like it came straight from a professional bakery, making it an impressive centerpiece for any occasion and a true showstopper.
- Make-Ahead Convenience: Many components can be prepared in advance, significantly reducing stress on the day of serving and allowing you to enjoy the process without feeling rushed or overwhelmed by last-minute preparations.
Ingredients You Need
Crafting this exquisite Coconut Cake with Lemon Curd Filling begins with selecting high-quality ingredients that promise exceptional flavor and texture. The careful selection of each component, from the dairy to the produce, plays a crucial role in achieving the perfect balance of sweetness, tanginess, and aroma that defines this delightful dessert.
Coconut Cake with Lemon Curd Filling
A refined layer cake featuring soft coconut-scented sponge, bright lemon curd between the layers, and a light Chantilly-style frosting. Finished with sweetened shredded coconut, this dessert offers a balanced combination of citrus freshness and rich coconut flavor.
- 1 cup plus 1/2 cup canned full-fat coconut milk (divided)
- 1 tablespoon coconut extract
- 5 large egg whites
- 1 cup softened unsalted butter
- 2 1/3 cups granulated sugar
- 3 cups sifted cake flour
- 4 1/2 teaspoons baking powder
- 1/2 teaspoon salt
- 10 large egg yolks
- 1 cup granulated sugar (divided)
- 1/2 cup unsalted butter
- 1 cup freshly squeezed lemon juice
- Finely grated zest of 3 lemons
- 8 ounces cream cheese (softened and cut into cubes)
- 1 cup confectioners’ sugar
- 1/4 teaspoon salt
- 1 teaspoon coconut extract or vanilla extract
- 2 1/2 cups cold heavy cream
- 1 1/2 cups sweetened shredded coconut
- 1Heat the oven to 350°F (175°C). Grease and flour three 8-inch or 9-inch cake pans, then line the bottoms with parchment paper.
- 2In a small bowl, lightly whisk the egg whites with 1/2 cup of the coconut milk and the coconut extract until the mixture is blended. Set it aside.
- 3In the bowl of a stand mixer fitted with the paddle attachment, combine the sifted cake flour, granulated sugar, baking powder, and salt. Add the softened butter along with the remaining 1 cup of coconut milk. Mix on low speed until the dry ingredients are moistened.
- 4Raise the mixer speed to medium and beat for about 2 minutes, or until the batter appears pale and aerated. Scrape down the bowl as needed so the mixture stays even.
- 5Add the egg white mixture in 3 additions, mixing only until incorporated after each addition. Divide the finished batter evenly among the prepared pans.
- 6Bake for 35 to 40 minutes, or until a toothpick inserted into the center emerges clean. Let the cake layers rest in the pans for 10 minutes, then turn them out onto wire racks and cool completely.
- 7Once cooled, wrap the cake layers well in plastic wrap and refrigerate them before assembly so they become easier to handle.
- 8For the lemon curd, place the butter, 1/2 cup of the sugar, lemon zest, and lemon juice in a saucepan. Bring the mixture to a gentle simmer, stirring from time to time.
- 9In a separate bowl, whisk the egg yolks with the remaining 1/2 cup sugar. Slowly stream the hot lemon mixture into the yolks while whisking continuously. Return the combined mixture to the saucepan.
- 10Cook over medium heat, stirring constantly, until the curd thickens. Remove it from the heat and pass it through a fine mesh strainer into a bowl to remove the zest and any cooked egg bits.
- 11Press plastic wrap directly onto the surface of the curd and refrigerate until thoroughly chilled, about 1 to 2 hours.
- 12For the frosting, place the cream cheese, confectioners’ sugar, extract of choice, and salt in the bowl of a stand mixer fitted with the whisk attachment. Beat on medium-high speed for 3 to 4 minutes until smooth and thick.
- 13Add the cold heavy cream in 3 portions, mixing on medium-low speed after each addition until incorporated. Scrape down the bowl, then beat on medium-high for about 1 minute more, or until the frosting holds medium peaks.
- 14To assemble, set one cake layer on a serving plate or cake stand. Pipe or spread a border of frosting around the outer edge to form a barrier. Spoon about 1/2 cup of lemon curd inside the border and spread it evenly.
- 15Add the second cake layer and repeat the same process with another ring of frosting and another portion of lemon curd. Place the final cake layer on top.
- 16Spread the Chantilly frosting over the top and sides of the cake, smoothing it with a spatula. Press the sweetened shredded coconut onto the sides and scatter more generously over the top.
- 17Refrigerate the finished cake for at least 1 hour before serving. It may be served cold, or allowed to stand briefly at room temperature before slicing.
Keywords: Coconut Cake, Lemon Curd, Layer Cake, Dessert, Baking, Celebration Cake, German Dessert
The specific quantities for each ingredient are detailed within the provided recipe card, ensuring you have all the necessary measurements for success.
Variations
To cater to diverse dietary preferences or simply to explore new flavor horizons, this versatile Coconut Cake with Lemon Curd Filling can be wonderfully adapted. Consider a vegan interpretation by substituting dairy ingredients with plant-based alternatives; coconut oil can often replace butter, and a good quality plant-based milk can stand in for dairy milk, while aquafaba or commercial egg replacers can work for the egg whites and yolks, though some adjustments to baking times may be necessary to achieve the perfect texture.
For those following a low-carb approach, the cake flour can be replaced with almond flour or a coconut flour blend, and the sugar can be substituted with a granular keto-friendly sweetener. The lemon curd can also be made using a sugar substitute, and the frosting can be adapted with a powdered sweetener to maintain its smooth consistency and sweetness without the carbs.
Another exciting avenue is to introduce different fruit elements into the filling or frosting. Imagine a raspberry-lemon curd for a burst of berry tartness, or a subtle hint of passionfruit in the filling to add an exotic twist. These creative additions can transform the cake into something uniquely your own, perfect for impressing guests or treating yourself to a gourmet experience.
How to Prepare Coconut Cake with Lemon Curd Filling
Step 1: Preparing the Cake Pans and Initial Batter Mix
The journey to this spectacular cake begins with meticulously preparing your baking pans to ensure the delicate layers release beautifully after baking. Generously grease and flour three 8-inch or 9-inch cake pans, paying close attention to getting into all the corners and edges; this is your first line of defense against sticking.
Lining the bottoms of these pans with parchment paper is an essential step, acting as a secondary insurance policy for effortless cake release. Cut circles of parchment paper to fit the exact dimensions of your pan bases, creating a smooth, non-stick surface that guarantees clean edges and prevents any precious cake crumb from being lost.
In a small, dedicated bowl, gently whisk together the egg whites with half a cup of canned full-fat coconut milk and a tablespoon of fragrant coconut extract; this mixture will contribute significantly to the cake’s moistness and its signature aroma, so ensure it’s thoroughly blended but avoid over-whisking at this stage.
Simultaneously, in the larger bowl of your stand mixer, combine the sifted cake flour, granulated sugar, baking powder, and salt, creating the dry foundation for your cake. Into this dry mixture, add the softened unsalted butter and the remaining cup of coconut milk, which will serve as the primary liquid component, binding everything together to form the initial batter.
Mix these ingredients on a low speed initially, just until the dry ingredients are visibly moistened by the butter and milk, ensuring no pockets of dry flour remain. This gentle start prevents excessive gluten development, contributing to a tender cake crumb.
Once the ingredients are minimally combined, increase the mixer speed to medium and continue to beat the batter for approximately two minutes. This extended beating process is crucial; it aerates the batter, making it lighter in color and noticeably fluffier in texture as the sugar and butter emulsify and incorporate air. Scrape down the sides of the bowl periodically with a spatula to ensure all ingredients are uniformly incorporated and to achieve the best possible texture.
The final incorporation of the egg white mixture is done in three separate additions. This gradual addition helps maintain the batter’s delicate structure and prevents it from becoming dense. Mix on a medium-low speed only until each addition is just incorporated into the batter before adding the next, ensuring the airy quality is preserved.
Once the batter is smooth and homogenous, divide it evenly among the three prepared cake pans. You can use a kitchen scale for the most accurate distribution, ensuring your cake layers bake evenly in thickness and thus, in time. Smooth the tops of the batter in each pan with a spatula.
Bake these layers in a preheated oven at 350°F (175°C) for about 35 to 40 minutes. The exact baking time can vary depending on your oven and the size of your pans. To check for doneness, insert a toothpick into the center of a cake layer; it should emerge clean without any wet batter clinging to it.
Allow the cake layers to rest in their pans for about 10 minutes after removing them from the oven. This brief cooling period helps them firm up slightly, making them easier to handle when you invert them. After this short rest, carefully turn the cakes out onto wire racks. It is absolutely vital to let these layers cool completely on the racks before proceeding to the next steps.
As the cake layers cool, prepare yourself to make the luscious lemon curd filling. In a medium saucepan, combine the unsalted butter, half a cup of granulated sugar, the finely grated zest of three lemons, and one cup of freshly squeezed lemon juice. Place this mixture over medium heat, stirring occasionally, until the butter has melted and the mixture is warm and just beginning to simmer gently around the edges.
While the lemon mixture is heating, in a separate, medium-sized bowl, whisk together ten large egg yolks with the remaining half cup of granulated sugar until the mixture is pale yellow and well combined. This step is crucial for creating a smooth, stable curd.
Once the lemon mixture is warm, slowly stream it into the egg yolk and sugar mixture, whisking continuously. This tempering process prevents the egg yolks from scrambling when exposed to the heat. Ensure a steady, gradual incorporation of the hot liquid into the yolks.
After thoroughly combining the tempered egg yolks and the lemon mixture, return the entire contents of the bowl back into the saucepan. Place the saucepan back over medium heat, and here is where constant vigilance is key.
Stir the lemon curd constantly with a whisk or a heatproof spatula, ensuring you scrape the bottom and sides of the pan to prevent any scorching or sticking. Continue to cook and stir until the curd has thickened enough to coat the back of a spoon. This typically takes about 8 to 10 minutes of gentle cooking.
As soon as the curd reaches the desired consistency, remove the saucepan from the heat immediately. For the silkiest, most refined texture, pass the hot lemon curd through a fine-mesh sieve placed over a clean bowl. This action removes any stray bits of cooked egg or lemon zest that might have remained, ensuring a smooth, glossy filling.
To prevent a skin from forming on the surface of the curd as it cools, press a piece of plastic wrap directly onto the surface of the curd. Ensure it makes full contact with the entire surface area of the curd. Refrigerate this curd until it is thoroughly chilled, which will typically take at least 1 to 2 hours, allowing it to set up properly.
With your cake layers cooled and your lemon curd chilling, it’s time to prepare the Chantilly frosting. In the clean bowl of your stand mixer, fitted with the whisk attachment, place the softened cream cheese. Add the confectioners’ sugar, a quarter teaspoon of salt, and one teaspoon of your chosen extract (coconut or vanilla), ensuring the cream cheese is at room temperature for optimal blending.
Beat these ingredients together on medium-high speed for about 3 to 4 minutes. The goal here is a smooth, thick, and creamy mixture, free from any lumps of cream cheese or streaks of sugar. Scrape down the sides of the bowl as needed to ensure everything is fully incorporated.
Once the cream cheese mixture is smooth, gradually add the 2 ½ cups of cold heavy cream. Do this in three separate additions, mixing on a medium-low speed after each addition just until the cream is incorporated. This slow incorporation helps the cream emulsify properly with the cream cheese base.
After all the cream has been added and incorporated, scrape down the bowl one final time. Then, increase the mixer speed to medium-high and beat for about 1 minute more, or until the frosting has reached medium peaks. Be careful not to over-whip, as this can turn the frosting grainy or soupy; medium peaks indicate it’s firm enough to hold its shape but still wonderfully light and spreadable.
Step 2: Baking and Cooling the Cake Layers
Preheat your oven to 350°F (175°C) well in advance of preparing your batter, ensuring it reaches the target temperature for optimal baking. Prepare three 8-inch or 9-inch cake pans by thoroughly greasing and flouring them. This thorough preparation is a crucial step in preventing the delicate cake layers from sticking and ensures they release cleanly onto the cooling racks.
Line the bottoms of each prepared pan with parchment paper rounds, cut to fit snugly. This double layer of protection, parchment paper over greased and floured surfaces, guarantees that even the most tender cake layers will come out of their pans without incident, preserving their perfect shape and integrity.
In a small bowl, lightly whisk together the 5 large egg whites with 1/2 cup of canned full-fat coconut milk and 1 tablespoon of coconut extract until the mixture is well blended. This liquid component will contribute moisture and a subtle coconut essence to the cake batter, ensuring a tender and flavorful crumb.
In the bowl of a stand mixer fitted with the paddle attachment, combine the 3 cups of sifted cake flour, 2 1/3 cups of granulated sugar, 4 1/2 teaspoons of baking powder, and 1/2 teaspoon of salt. Add the 1 cup of softened unsalted butter and the remaining 1 cup of canned coconut milk to this dry mixture.
Begin mixing on a low speed until the dry ingredients are just moistened by the butter and milk. This initial mix helps to prevent flour from flying everywhere and ensures a more uniform incorporation of ingredients. Once the initial dry streaks have disappeared, increase the mixer speed to medium and beat the batter for approximately 2 minutes.
This period of beating is important for aerating the batter, making it lighter and contributing to a finer crumb structure. The batter should appear paler and more voluminous after this stage, indicating that air has been successfully incorporated. Scrape down the sides of the bowl periodically during this process to ensure all ingredients are evenly mixed.
Gradually add the egg white mixture, which you prepared earlier, in three separate additions. Mix on a medium-low speed only until each addition is just incorporated into the batter. Overmixing at this stage can deflate the batter, so be mindful and stop mixing as soon as you see the last traces of the egg white mixture disappear.
Divide the finished batter evenly among the three prepared cake pans. Using a spatula, smooth the tops of the batter to create an even surface. This ensures that all layers bake to a similar thickness, resulting in a more stable and professional-looking cake assembly.
Bake the cake layers for 35 to 40 minutes, or until a toothpick inserted into the center of each cake emerges clean. Keep an eye on the cakes as they bake; ovens can vary, and you want them perfectly golden brown and fully cooked through without becoming dry. Allow the cake layers to rest in their pans for about 10 minutes after taking them out of the oven.
This brief resting period allows the cakes to firm up slightly, making them easier to handle when you invert them. Carefully turn the cakes out onto wire racks and allow them to cool completely. This is a critical step; warm cake layers are fragile and can break easily, so patience is essential.
Once the cake layers are fully cooled, wrap them well in plastic wrap and refrigerate them. Chilling the cake layers makes them firmer and much easier to handle when stacking and frosting. This simple step makes a significant difference in achieving a neat and professional finish, especially with a tender crumb like this coconut cake.
Step 3: Crafting the Luscious Lemon Curd Filling
While your cake layers are chilling and firming up, it’s the perfect time to prepare the vibrant and tangy lemon curd that will be the heart of this cake’s filling. In a medium saucepan, combine 1/2 cup of unsalted butter, 1/2 cup of granulated sugar, the finely grated zest of 3 lemons, and 1 cup of freshly squeezed lemon juice.
Place this mixture over medium heat. Stir occasionally as the butter melts and the ingredients warm through. You are aiming for a gentle simmer, not a rolling boil, as this will help the flavors meld beautifully and prepare the base for thickening. Ensure the lemon zest is evenly distributed throughout the liquid.
In a separate medium bowl, whisk together 10 large egg yolks with the remaining 1/2 cup of granulated sugar. Continue whisking until the mixture becomes pale yellow and slightly thickened. This process, known as tempering the yolks, is crucial for creating a smooth curd and preventing scrambled eggs.
Once the lemon juice mixture in the saucepan is warm and just beginning to simmer, slowly drizzle about half of the hot lemon mixture into the egg yolk and sugar mixture. Whisk continuously and vigorously as you pour. This gradual incorporation of heat slowly raises the temperature of the yolks without cooking them prematurely.
After you have tempered the egg yolks with about half of the hot lemon liquid, pour the tempered yolk mixture back into the saucepan with the remaining lemon mixture. Ensure you scrape every last bit from the bowl into the saucepan.
Return the saucepan to medium heat. Now, the key to a perfect curd is constant stirring. Use a whisk or a heatproof spatula to stir the mixture constantly, making sure to scrape the bottom and sides of the pan to prevent any scorching or lumps from forming. Continue this process until the curd thickens sufficiently to coat the back of a spoon, typically taking about 8 to 10 minutes.
When the curd has reached the desired consistency – it should be thick enough to leave a visible trail when you draw your finger through it on the back of a spoon – immediately remove the saucepan from the heat. This is important to prevent overcooking. For the smoothest possible texture, strain the warm lemon curd through a fine-mesh sieve set over a clean bowl. This step removes the lemon zest and any potential tiny bits of cooked egg, ensuring a silky-smooth filling.
To prevent a skin from forming on the surface of the lemon curd as it cools, press a piece of plastic wrap directly onto the surface of the curd. Ensure that the plastic wrap makes full contact with the entire surface area. Refrigerate the curd until it is thoroughly chilled, which will typically take at least 1 to 2 hours. This chilling period allows the curd to set and develop its final, luscious texture, making it ready for assembly.
Step 4: Whipping Up the Airy Chantilly Frosting
With the cake layers chilled and the lemon curd perfectly set, the next crucial step is to create the ethereal Chantilly-style frosting that will elegantly bind and enrobe your coconut cake. Begin by placing 8 ounces of softened cream cheese into the clean bowl of your stand mixer, which should be fitted with the whisk attachment for optimal aeration.
To the cream cheese, add 1 cup of confectioners’ sugar, 1/4 teaspoon of salt, and 1 teaspoon of your chosen extract – either coconut for an intensified tropical flavor or vanilla for a classic, subtle sweetness. Ensure the cream cheese is at room temperature; this is vital for achieving a smooth, lump-free frosting. The salt is essential for balancing the sweetness and enhancing the overall flavor profile of the frosting.
Beat these ingredients together on medium-high speed for approximately 3 to 4 minutes. The goal is a perfectly smooth and thick mixture, free from any grainy texture from the confectioners’ sugar or any lumps of cream cheese. Periodically scrape down the sides of the mixer bowl with a spatula to ensure all components are uniformly incorporated into the creamy base.
Once the cream cheese mixture is smooth and homogenous, it’s time to incorporate the heavy cream. Add the 2 1/2 cups of cold heavy cream in three separate additions. Mix on a medium-low speed after each addition, just until the cream is incorporated into the mixture. This gradual addition helps the cream emulsify properly with the cream cheese base, creating a stable yet light frosting.
After all the heavy cream has been added and mixed in, scrape down the bowl one last time to ensure everything is fully combined. Then, increase the mixer speed to medium-high and whip the frosting for about 1 minute more. You are looking for the frosting to reach medium peaks – it should be thick enough to hold its shape when the whisk is lifted, but still wonderfully light and spreadable.
Be careful not to over-whip; overbeating can cause the frosting to become grainy or even curdle, compromising its smooth texture and luxurious mouthfeel. The medium peak stage is ideal for frosting a cake, as it provides structure without being too stiff or too soft, allowing for easy spreading and a beautiful finish.
Step 5: Assembling the Masterpiece
The moment of assembly has arrived, where all the beautifully prepared components come together to form the stunning Coconut Cake with Lemon Curd Filling. Begin by placing one of your thoroughly chilled cake layers onto your chosen serving plate or cake stand. Ensuring the layer is stable is the first step to a well-assembled cake.
Next, create a barrier using the Chantilly frosting. You can do this either by piping a thick ring of frosting around the outer edge of the cake layer using a piping bag and a large round tip, or by carefully spreading a thick border with a spatula. This frosting dam is crucial for containing the luscious lemon curd and preventing it from oozing out the sides of the cake once it’s assembled.
Once your frosting dam is in place, spoon approximately 1/2 cup of the chilled lemon curd into the center of the cake layer, within the frosting border. Spread the curd evenly and smoothly to the edges of the dam, ensuring an even layer of bright, tangy filling across the entire surface of the cake layer.
Carefully place the second chilled cake layer on top of the first layer with the lemon curd. Gently press down to ensure it sits evenly. Repeat the process of creating a frosting dam around the edge of this second layer, and then fill the center with another portion of lemon curd, spreading it smoothly within the dam.
Finally, place the third and final chilled cake layer on top, ensuring it is centered and level. Now, it’s time to frost the entire cake. Using an offset spatula, generously apply the Chantilly frosting over the top and sides of the assembled cake. Smooth the frosting as best as you can, aiming for an even coating all around, creating a pristine canvas for the final decoration.
Immediately after frosting the cake, it’s time to apply the shredded coconut. Generously press the sweetened shredded coconut onto the sides of the cake, working from the bottom up, ensuring good coverage. Scatter more of the shredded coconut over the top of the cake, creating a classic and inviting bakery-style finish.
For the best texture and to allow the flavors to meld beautifully, refrigerate the finished cake for at least 1 hour before serving. This chilling period allows the frosting to firm up slightly and the curd to set further, ensuring cleaner slices and a more cohesive dessert experience.
Step 6: Final Touches and Resting
After the cake has been meticulously assembled with its layers of tender coconut sponge, bright lemon curd, and fluffy frosting, and then adorned with a generous coating of shredded coconut, it requires a period of rest. This resting stage is not merely for decoration but is a vital step in allowing the cake’s components to settle and its flavors to harmonize.
Place the assembled cake into the refrigerator for a minimum of one hour. This time allows the frosting to firm up, making it easier to slice cleanly, and it also helps the lemon curd to achieve its perfect, slightly set consistency. Think of it as letting the cake mature, allowing the moisture from the curd to slightly permeate the cake layers, enhancing their tenderness.
During this chilling period, the flavors within the cake will also begin to meld together. The sweetness of the coconut cake, the bright tartness of the lemon curd, and the creamy richness of the Chantilly frosting will start to become more integrated, creating a more complex and satisfying taste experience with every bite.
This resting period ensures that when you slice into the cake, you will achieve clean, distinct layers, showcasing the beautiful construction. It prevents the frosting from smearing and the curd from oozing out, contributing to a polished presentation that is as pleasing to the eye as it is to the palate. The patience exercised during this final step significantly elevates the overall enjoyment of the finished dessert.
Pro Tips for Coconut Cake with Lemon Curd Filling
Use Cold Cake Layers: Always ensure your cake layers are thoroughly chilled before you begin assembling the cake. Cold layers are firmer and less prone to crumbling or breaking when you stack and frost them, which is especially important for a tender cake like this one.
Make the Curd Ahead: Prepare the lemon curd a day in advance. This allows it ample time to chill and set properly, ensuring it has the ideal consistency for spreading between the cake layers without becoming too runny.
Don’t Overmix the Frosting: When whipping the Chantilly frosting, stop as soon as it reaches medium peaks. Overbeating can lead to a grainy or unstable texture, so watch it closely to achieve that perfect light and airy consistency.
Apply Coconut Promptly: Press the sweetened shredded coconut onto the frosted cake immediately after you’ve finished frosting. The frosting acts as the adhesive, and applying the coconut while the frosting is still fresh ensures it sticks well and creates an even coating.
Chill Before Slicing: After the cake is fully assembled and frosted, refrigerate it for at least an hour before slicing. This resting period is crucial for the frosting to set and the curd to firm up, allowing for cleaner, more attractive slices.
Serving Suggestions for Coconut Cake with Lemon Curd Filling
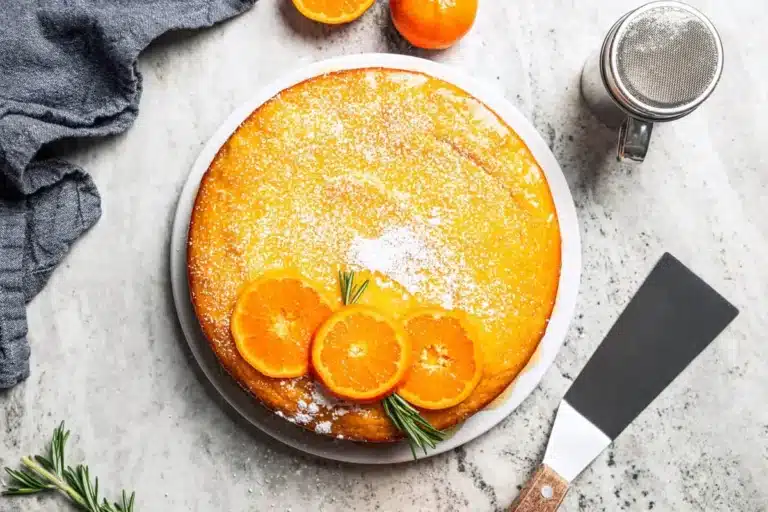
Decoration
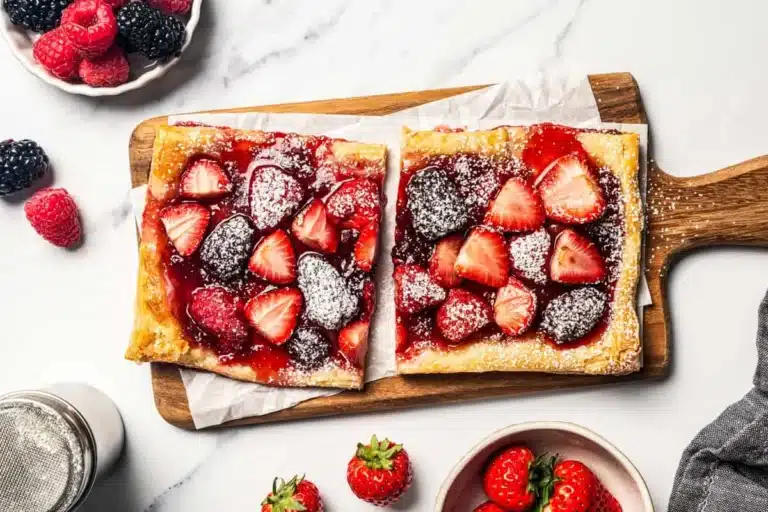
For an elegant touch, consider garnishing the top of the cake with fresh raspberries or thin slices of candied lemon peel. A delicate dusting of powdered sugar can also add a touch of sophistication, or pipe small rosettes of the Chantilly frosting around the edge for a classic bakery look. Ensure the shredded coconut is evenly applied to the sides and top for that signature coconut cake appearance.
Side Dishes
This cake pairs beautifully with a simple side of fresh berries, such as blueberries or strawberries, whose natural tartness complements the sweet and tangy flavors of the cake. A light fruit salad featuring melon, kiwi, or grapes can also provide a refreshing contrast without competing with the cake’s intricate flavors.
Creative Serving Ideas
For a special occasion, consider serving individual slices of cake with a small dollop of extra lemon curd and a quenelle of lightly sweetened whipped cream on the side. Another idea is to present a slice of cake alongside a scoop of coconut sorbet or a delicate white chocolate mousse for an extra layer of dessert indulgence. You could even present it with a small glass of iced tea or a crisp white wine for a sophisticated pairing.
Preparation & Storage
Storing Leftovers
Due to the presence of fresh lemon curd and the whipped Chantilly frosting, this Coconut Cake with Lemon Curd Filling must be stored in the refrigerator. Cover the cake tightly with plastic wrap or place it in an airtight cake container to prevent it from drying out.
When properly stored, leftovers will maintain their optimal quality and flavor for approximately 3 to 4 days. Ensure the refrigerator temperature is consistently cold to maintain the integrity of the frosting and curd.
Always aim to keep the cake well-covered to protect it from absorbing any unwanted odors from other foods in the refrigerator. A well-sealed container is your best defense against staleness.
Freezing
For longer-term storage, unfrosted cake layers or individual slices of the fully assembled cake can be frozen. Wrap each layer or slice tightly in several layers of plastic wrap, followed by a layer of aluminum foil or a freezer-safe bag to prevent freezer burn.
When stored correctly in the freezer, the cake can last for up to 2 months. Ensure that the wrapping is airtight to preserve the moisture and flavor of the cake and frosting.
Thaw frozen portions overnight in the refrigerator for the best results. This slow thawing process allows the cake to gradually reach a desirable serving temperature and texture without compromising its delicate structure.
Reheating
This cake is best enjoyed at refrigerator temperature or slightly softened. You do not need to reheat the cake in the traditional sense, as warming it could melt the frosting and alter the texture of the curd. Instead, allow refrigerated slices to sit at room temperature for about 10 to 15 minutes before serving.
This brief resting period allows the frosting to soften just slightly, becoming more pliable and easier to slice, while also enabling the coconut and lemon flavors to come through more fully. It brings the cake to an ideal eating temperature where all the components are at their best.
If the cake is very cold from the refrigerator, a slightly longer resting time might be beneficial. The goal is to achieve a pleasant temperature that enhances the creamy texture of the frosting and the vibrant notes of the lemon, without making it too warm.
Frequently Asked Questions
-
Can I make this cake ahead of time, and what components are best prepared in advance?
Yes, this Coconut Cake with Lemon Curd Filling is an excellent candidate for make-ahead preparation, which significantly eases the baking process. The cake layers themselves can be baked a day or two in advance, cooled completely, wrapped tightly in plastic wrap, and refrigerated. The lemon curd filling can also be made a day or two ahead of time; once chilled and set, it should also be stored in an airtight container in the refrigerator. The frosting is best made closer to the assembly time to ensure its ideal light and fluffy texture, though the cream cheese base can be mixed a few hours prior if kept chilled. Assembling the cake a few hours before serving, or even the day before if it will be served cold, allows the flavors to meld beautifully and the structure to set properly.
-
Why is it important to chill the cake layers before assembling and frosting, and what happens if I skip this step?
Chilling the cake layers before assembly is a critical step for achieving a neat and professional-looking cake, especially with a tender crumb like this coconut cake. Cold cake layers are firmer and less fragile, making them much easier to handle, stack, and frost without them breaking or crumbling. If you skip this step and try to assemble warm or room-temperature layers, they are much more likely to tear, slide around, or develop uneven surfaces when frosting, leading to a less polished final product. The firmness from chilling also helps the cake layers absorb the moisture from the lemon curd and frosting more evenly without becoming soggy, contributing to a better overall texture and stability.
-
Can I substitute the coconut milk and coconut extract in the cake recipe with other ingredients, and if so, how would it affect the flavor and texture?
You can certainly make substitutions, but it will alter the distinctive coconut character of the cake. If you omit the coconut milk, you can replace it with regular whole milk or even almond milk. This substitution will result in a less pronounced coconut flavor and a slightly different moisture profile, as coconut milk has a higher fat content than typical dairy milk. For the coconut extract, if you cannot find it or prefer not to use it, you can substitute it with an equal amount of vanilla extract. This will give the cake a more classic vanilla flavor, moving away from the tropical notes. While vanilla is a universally loved flavor and will still result in a delicious cake, it won’t have the same signature coconut essence that defines this particular recipe.