Coconut Cake with Cream Cheese Frosting
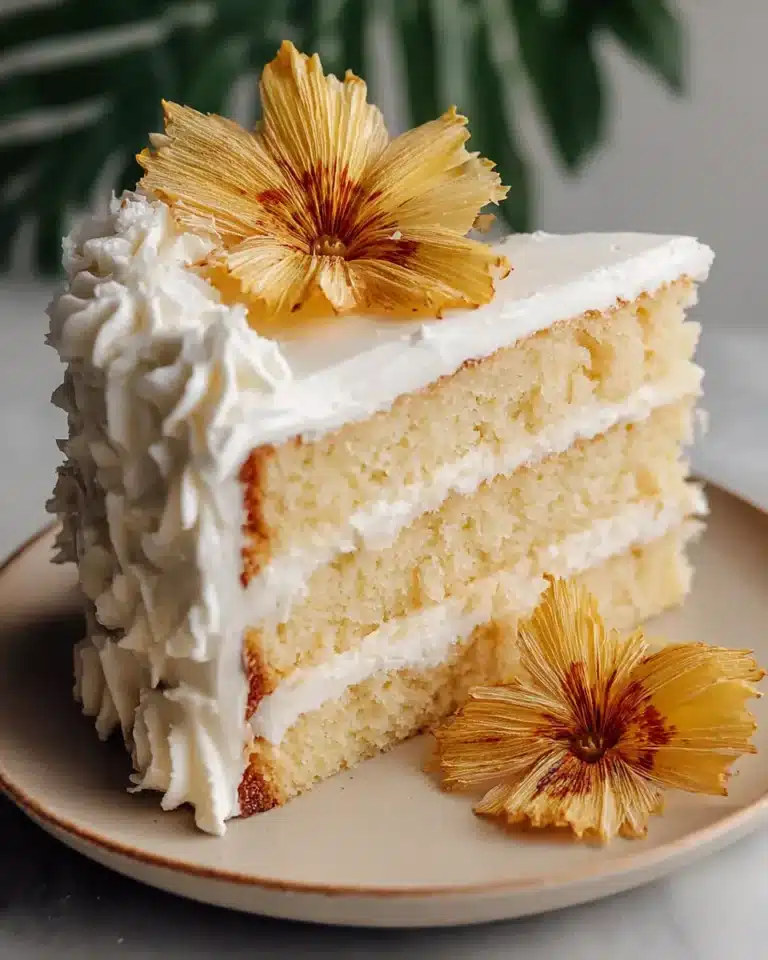
There’s something truly magical about a perfectly baked coconut cake, especially when it’s crowned with a luscious cream cheese frosting. This particular recipe promises a moist, tender crumb infused with the delightful essence of coconut, complemented by the slightly tangy richness of cream cheese. It’s a celebration in every slice, perfect for any occasion that calls for a touch of sweetness and elegance.
Imagine a cake that not only tastes divine but also looks stunning without requiring professional decorating skills. This coconut cake with cream cheese frosting offers exactly that, making it an ideal choice for both seasoned bakers and enthusiastic beginners. Get ready to impress your guests and satisfy your sweet cravings with this absolute gem of a dessert.
Why You Will Love This Recipe
- Irresistible Coconut Flavor: From the infused batter to the topping, every bite bursts with authentic coconut goodness.
- Delightfully Moist Texture: The combination of buttermilk, butter, and coconut oil ensures a tender, melt-in-your-mouth crumb.
- Perfectly Balanced Frosting: The creamy, slightly tangy cream cheese frosting cuts through the sweetness, creating a harmonious flavor profile.
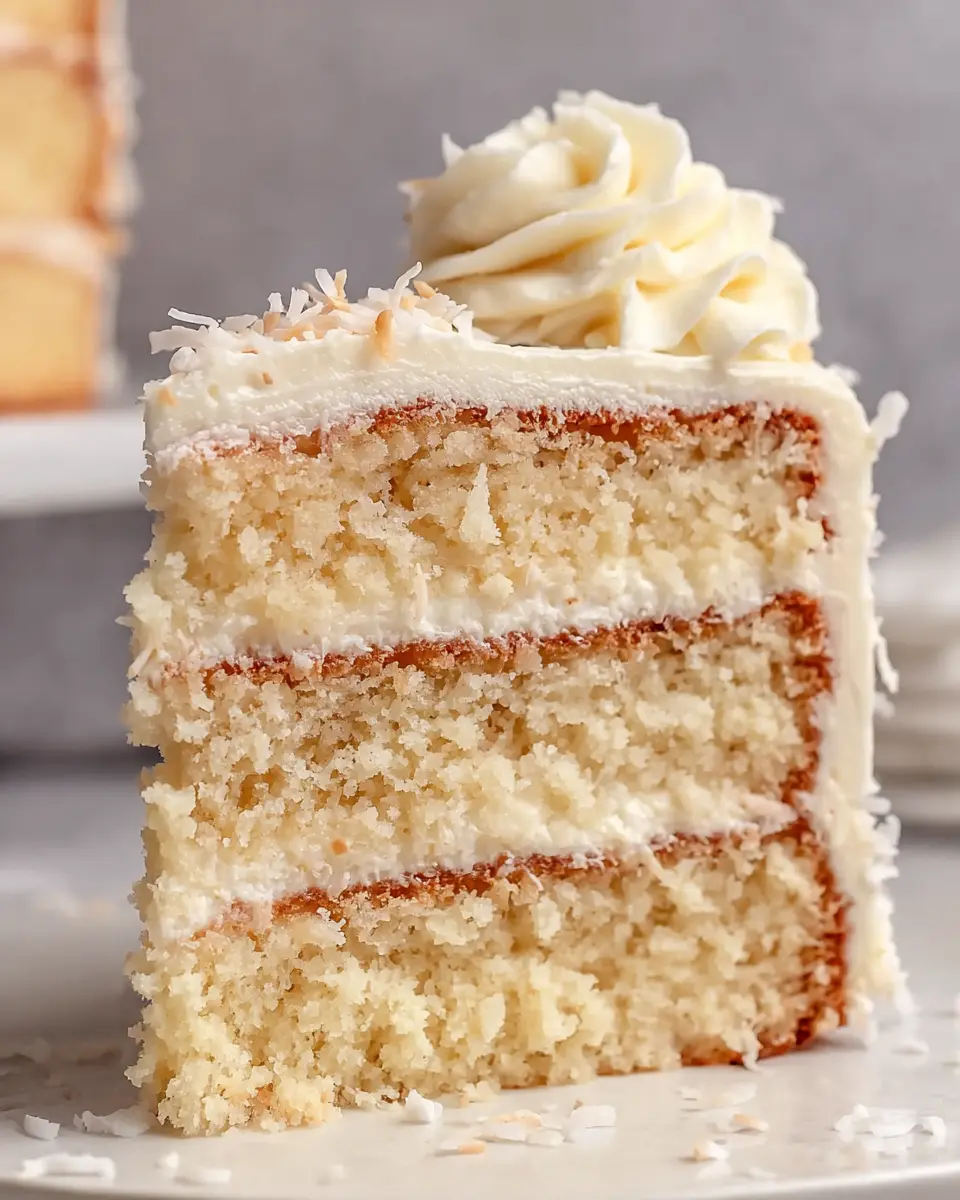
- Elegant Yet Easy Presentation: This cake looks sophisticated with minimal effort, especially when adorned with toasted coconut.
- Make-Ahead Friendly: Bake the layers in advance, making assembly on the day of your event a breeze.
Ingredients You Need
The quality of your ingredients significantly impacts the final outcome of this coconut cake. Opt for fresh, high-quality components to ensure the best possible flavor and texture. Using good butter and fresh cream cheese is paramount for that signature creamy frosting.
Coconut Cake with Cream Cheese Frosting
A tender, bakery-style coconut layer cake with a soft crumb, rich coconut flavor, and a smooth, tangy cream cheese frosting. This make-ahead dessert is perfect for birthdays, holidays, or any gathering where you want an impressive slice without fussy decorating.
- For the cake layers: 11 ounces all-purpose flour, 1/2 teaspoon fine salt, 2 teaspoons coconut flavoring, 4 ounces unsalted butter (softened), 4 large egg yolks, 1 teaspoon baking powder, 8 fluid ounces buttermilk (at room temperature), 1/2 teaspoon baking soda, 2 cups granulated sugar, 4 large egg whites (at room temperature), 4 ounces coconut oil (melted and cooled), 1/4 teaspoon cream of tartar, 1 teaspoon vanilla extract
- For the coconut filling and topping: 1 ounce sweetened shredded coconut, 6 ounces sweetened shredded coconut (lightly toasted)
- For the cream cheese frosting: 36 ounces powdered sugar (sifted), 1/2 teaspoon salt, 16 ounces cream cheese (softened), 8 ounces unsalted butter (softened), 1 teaspoon coconut flavoring
- 1Preheat oven to 350°F (176°C). Prepare three 6-inch round cake pans with pan release. Scatter 6 ounces shredded coconut on a baking sheet and broil until lightly golden, watching closely to prevent burning. Let cool completely.
- 2In a medium bowl, whisk together flour, baking powder, baking soda, and salt. In a separate container, stir coconut flavoring and vanilla extract into buttermilk.
- 3In a stand mixer with the paddle attachment, beat softened butter and softened coconut oil until smooth. Gradually add granulated sugar and mix until pale and fluffy (3-5 minutes). Add egg yolks one at a time, mixing well after each.
- 4Reduce mixer speed to low. Add dry ingredients and buttermilk mixture in alternating additions, beginning and ending with dry ingredients, mixing until just combined. Fold in cooled toasted coconut.
- 5In a clean bowl with the whip attachment, beat egg whites until foamy. Add cream of tartar and whip to semi-stiff peaks. Gently fold whipped egg whites into the batter in stages.
- 6Divide batter evenly among prepared pans. Bake for 30-35 minutes, or until a skewer comes out clean. Let cakes rest in pans for 10 minutes, then turn out onto a wire rack to cool completely. Chill layers for 30 minutes before assembly or freeze overnight for later use.
- 7For frosting, ensure butter and cream cheese are at room temperature. In a stand mixer with the whisk attachment, beat butter until smooth. Add cream cheese in small pieces and mix until fully blended. Gradually add sifted powdered sugar, mixing until incorporated. Add coconut flavoring and salt, and mix until smooth. Cover and refrigerate until needed.
- 8Level cake layers. Stack layers with frosting between each. Apply a thin crumb coat over the entire cake and refrigerate for 15 minutes. Cover with a final thicker layer of frosting.
- 9Press remaining shredded coconut onto the sides of the cake and pipe swirls on top if desired.
Keywords: Coconut Cake, Cream Cheese Frosting, Layer Cake, Bakery Style, Make Ahead Dessert, Coconut Flavor, Tangy Frosting, German Cuisine
Please refer to the recipe card for the precise quantities of each ingredient needed to create this exquisite coconut cake.
Variations
While this classic coconut cake with cream cheese frosting is already a showstopper, feel free to explore creative variations to suit different dietary needs or flavor preferences. These adaptations can add an exciting new dimension to your baking adventures, ensuring everyone can enjoy a slice of this delightful treat.
For a Vegan Coconut Cake, you can easily adapt this recipe. Replace the butter and coconut oil with vegan butter sticks or a neutral-flavored vegetable oil. For the egg yolks and whites, consider using a flax egg (1 tablespoon ground flaxseed mixed with 3 tablespoons water, let sit for 5 minutes) for the yolks, and a commercial egg replacer or aquafaba (the liquid from a can of chickpeas) whipped to stiff peaks for the whites to achieve a similar lightness. The buttermilk can be substituted with a plant-based milk like almond or soy milk with a teaspoon of apple cider vinegar or lemon juice added, let sit for five minutes to curdle. For the cream cheese frosting, opt for a good quality vegan cream cheese and vegan butter spread, adjusting the powdered sugar to achieve your desired consistency.
If you’re following a Low-Carb or Keto lifestyle, this cake can be modified with significant ingredient swaps. Replace the all-purpose flour with a blend of almond flour and coconut flour, adjusting ratios as needed for texture. For the granulated sugar, use a keto-friendly sweetener like erythritol, xylitol (caution: toxic to pets), or a monk fruit blend, ensuring it’s granulated or powdered to mimic sugar. The powdered sugar in the frosting can be replaced with a keto powdered sweetener. You might need to adjust the amount of liquid or fat slightly to achieve the perfect batter and frosting consistency, as low-carb flours behave differently. This version will yield a wonderfully rich and satisfying treat without the carb load.
Adding Tropical Fruit Infusions is another fantastic way to elevate this cake. Consider folding in finely diced fresh pineapple or mango into the batter for bursts of juicy sweetness. You could also create a vibrant passion fruit curd to swirl into the cream cheese frosting or use as a tangy filling layer between the cake sponges. A light glaze made from coconut milk and lime juice drizzled over the top, before the final frosting or alongside it, adds an extra layer of tropical brightness that complements the coconut beautifully.
How to Prepare coconut cake with cream cheese frosting
Step 1: Prepare the Pans and Toast the Coconut
Begin by preheating your oven to the specified temperature, typically around 350°F (175°C), ensuring it’s evenly heated for consistent baking. Next, meticulously prepare your cake pans by greasing and flouring them thoroughly, or by using cake goop and parchment paper rounds for easy release. This crucial step prevents your beautifully baked layers from sticking, ensuring they slide out cleanly once baked.
Simultaneously, you’ll want to toast the sweetened shredded coconut that will be used for both filling and garnish. Spread a generous amount of the coconut evenly across a baking sheet. Place this under a broiler for a few minutes, watching it with hawk-like vigilance, as coconut can transition from golden to burnt in mere seconds. Stirring it periodically helps to achieve an even, beautiful golden-brown hue. Once toasted to perfection, remove it from the oven and allow it to cool completely on the baking sheet before incorporating it into your cake or frosting.
This initial step is all about setting the stage for a successful bake. Properly prepared pans mean less stress during the crucial demolding phase, and perfectly toasted coconut provides that irresistible nutty aroma and visual appeal that defines a classic coconut cake. The cooling process is essential to prevent the toasted coconut from becoming soggy or clumping when added to moist ingredients later on.
Step 2: Combine Dry and Wet Ingredients Separately
In a medium-sized bowl, diligently whisk together your dry ingredients: the all-purpose flour, baking powder, baking soda, and fine salt. Whisking them together ensures that the leavening agents and salt are evenly distributed throughout the flour, which is vital for a uniform rise and flavor profile in your cake layers. Set this bowl aside, ready to be incorporated into the wet ingredients.
In a separate, smaller container, combine the buttermilk with the coconut flavoring and vanilla extract. Stir these liquids together until they are well blended. This pre-mixing of the buttermilk mixture helps to ensure that the coconut and vanilla flavors are dispersed evenly throughout the cake batter as it bakes, rather than being concentrated in certain areas. This also makes the addition of the liquid to the batter a smoother process, minimizing overmixing.
The meticulous separation and combined preparation of these ingredient groups are fundamental to achieving the cake’s delicate texture and consistent flavor. Even distribution of leavening agents prevents dense spots or excessive rising in one area, while pre-combining the flavorings in the liquid ensures their full impact throughout the crumb. This thoughtful preparation lays the groundwork for the cake’s signature moistness and aromatic depth.
Step 3: Cream Butter, Coconut Oil, and Sugar, Then Add Yolks
In the bowl of a stand mixer fitted with the paddle attachment, combine the softened butter and softened coconut oil. Beat these together on a medium-high speed for approximately 30 seconds until they achieve a smooth and glossy consistency. This initial creaming ensures that the fats are fully incorporated and ready to aerate properly.
Gradually add the granulated sugar to the butter and coconut oil mixture. Continue to beat on medium-high speed for about 3 to 5 minutes, or until the mixture becomes noticeably pale and fluffy. This process, known as creaming, incorporates air into the batter, which is essential for creating a light and tender cake crumb. The pale color indicates that significant air has been incorporated and the sugar has largely dissolved.
Once the sugar is fully incorporated and the mixture is light and fluffy, add the egg yolks one at a time. Make sure to mix well after each addition, allowing each yolk to be fully incorporated before adding the next. The egg yolks contribute richness, moisture, and color to the cake batter, further enhancing its tender texture and creating a beautiful golden hue.
This step is absolutely critical for developing the cake’s structure and achieving that sought-after tender crumb. The aeration achieved during the creaming of fats and sugar provides the scaffolding for the cake’s rise. The subsequent addition of egg yolks enriches the batter, adding essential fats and emulsifiers that bind the ingredients together and contribute to a smooth, velvety texture. Properly creamed ingredients are the foundation of a superior cake, preventing a dense or greasy final product and ensuring a delicate mouthfeel.
Step 4: Incorporate Dry and Wet Ingredients, Then Fold in Coconut
With the mixer speed reduced to low, begin adding the dry ingredients and the buttermilk mixture to the creamed fat and sugar mixture. It is important to add these in alternating additions, starting with the dry ingredients and ending with the dry ingredients. This method helps to prevent the gluten in the flour from developing too much, which can lead to a tough cake.
Mix only until the ingredients are just combined. Overmixing at this stage can toughen the cake, so it’s crucial to stop as soon as you no longer see streaks of flour or wet ingredients. A few small lumps are perfectly acceptable and often preferable to overmixing. The goal is a tender cake, and gentle incorporation of the flour is key to achieving this.
Once the batter is just combined, gently fold in the cooled toasted coconut. This is done by hand using a spatula, scooping from the bottom of the bowl and bringing it up and over the batter, turning the bowl as you go. Folding ensures that the delicate toasted coconut pieces are distributed throughout the batter without being broken down or overworked, providing delightful texture and a deeper coconut taste in every bite.
The alternating addition of dry and wet ingredients is a baker’s trick to achieve a delicate crumb by minimizing gluten development. This technique ensures that the flour is hydrated evenly without excessive mixing, which would toughen the cake. Folding in the toasted coconut at the end preserves its texture and flavor, adding subtle crunch and a more pronounced nutty note to the finished cake, making each slice a textural and flavorful delight.
Step 5: Whip Egg Whites and Fold into Batter
In a separate, impeccably clean mixing bowl, preferably one that is grease-free, fit a stand mixer with the whisk attachment. Add the room-temperature egg whites to the bowl. Begin whipping the egg whites on a medium-high speed until they become foamy and opaque.
Once the egg whites are foamy, add the cream of tartar. This acidic ingredient acts as a stabilizer, helping the egg whites to hold their structure and achieve stiffer peaks. Continue whipping the egg whites until they reach semi-stiff peaks; this means that when you lift the whisk, the peaks will stand up but their tips will curl over slightly. Avoid whipping them to stiff or dry peaks, as this can make them difficult to fold into the batter and result in a dry cake.
Now, gently fold the whipped egg whites into the cake batter in stages. Use a large spatula and a light hand, scooping from the bottom of the batter bowl up and over the egg whites, turning the bowl as you go. The aim is to incorporate the air from the egg whites without deflating them. Continue folding until the batter looks evenly blended and no streaks of egg white remain, but do not overmix. This step is crucial for achieving the cake’s airy and delicate crumb.
The separate whipping of egg whites is a fundamental technique for creating a light and airy cake. By incorporating air into the egg whites, you introduce a significant amount of lift and volume into the batter. This results in a cake that is not dense or heavy, but rather delightfully delicate and tender. The gentle folding process ensures that this incorporated air is preserved, contributing to the cake’s characteristic ethereal texture that melts in your mouth.
Step 6: Bake and Cool the Cake Layers
Divide the prepared cake batter evenly among the three prepared 6-inch round cake pans. Ensure that the batter is distributed as equally as possible to promote even baking across all layers. Smooth the tops of the batter in each pan gently with a spatula.
Place the filled pans into the preheated oven on the center rack. Bake for approximately 30 to 35 minutes, or until a wooden skewer or toothpick inserted into the center of the cakes comes out clean. This indicates that the cakes are fully baked and cooked through. Avoid opening the oven door too frequently during the baking process, as this can cause the cakes to sink.
Once baked, let the cakes rest in their pans on a wire rack for about 10 minutes. This brief resting period allows the cakes to firm up slightly, making them easier to handle. After 10 minutes, carefully invert the pans onto the wire rack to turn out the cake layers. Allow them to cool completely on the wire rack before proceeding to frost them. Chilling the cooled cake layers for at least 30 minutes in the freezer or for a few hours in the refrigerator before assembly will make them firmer and much easier to frost neatly, resulting in cleaner edges.
Proper baking and cooling are paramount to the success of any cake, and this coconut cake is no exception. Baking until a skewer comes out clean ensures that the interior is fully cooked and the leavening agents have done their job. The resting period in the pans allows for structural integrity, preventing immediate breakage upon inversion. Complete cooling before frosting is essential; warm cakes will melt the frosting and create a mess, while chilled layers offer a stable surface for smooth frosting application and precise decorating.
Step 7: Prepare the Cream Cheese Frosting and Assemble
To prepare the cream cheese frosting, ensure that both the butter and cream cheese are at room temperature. This is crucial for a smooth, lump-free frosting. In the bowl of a stand mixer fitted with the whisk attachment, beat the softened butter on low speed until it becomes smooth and creamy. This initial creaming helps to create a lighter, more stable frosting base.
Add the softened cream cheese to the butter in small pieces. Continue mixing on low speed until the cream cheese is fully blended and the mixture is smooth. Scrape down the sides and bottom of the bowl as needed to ensure everything is incorporated. Be careful not to overmix at this stage, as it can sometimes make cream cheese frosting too soft.
Gradually add the sifted powdered sugar, about 1 cup at a time, mixing on low speed until each addition is incorporated. Once all the powdered sugar is added and the frosting is smooth, stir in the coconut flavoring and salt. Mix until everything is evenly combined and the frosting has reached your desired consistency. Cover the frosting with plastic wrap, pressing it directly onto the surface to prevent a skin from forming, and refrigerate until ready to use.
Once the cake layers are completely cooled and chilled, you can begin assembly. Trim the domes off the top of each cake layer using a serrated knife to create flat surfaces, ensuring your cake will stack evenly. Place the first cake layer on your cake board or serving platter. Spread an even and generous coating of the chilled cream cheese frosting over the surface of this layer, using an offset spatula. Carefully place the second cake layer on top of the frosting, followed by another layer of frosting. Finally, place the third cake layer on top. Apply a thin, even layer of frosting all over the cake, known as a crumb coat. Refrigerate the cake for about 15-20 minutes to allow the crumb coat to set. This step traps any loose crumbs, ensuring a clean and professional-looking final frosting layer. Once chilled, apply a thicker, final layer of cream cheese frosting over the entire cake, smoothing it with your offset spatula. For added texture and visual appeal, gently press the remaining toasted shredded coconut onto the sides of the cake. If desired, you can pipe decorative swirls or borders around the top edge using a star tip and a portion of the remaining frosting.
Pro Tips for coconut cake with cream cheese frosting
Room Temperature is Key: For both the cake batter and the cream cheese frosting, ensuring your dairy ingredients (butter, cream cheese, buttermilk) and eggs are at room temperature is non-negotiable. This allows them to emulsify properly, leading to a smoother batter, a more stable frosting, and ultimately, a more tender cake with a flawless crumb structure.
Don’t Overmix the Batter: Once the flour is added to the wet ingredients, mix only until just combined. Overmixing develops the gluten in the flour, which can result in a tough, dense cake. A few small lumps are perfectly fine and will bake out; the goal is a tender crumb.
Chill Your Cake Layers: Before you attempt to frost your cake, make sure the layers are thoroughly cooled and then chilled. Chilling them in the refrigerator or freezer for at least 30 minutes makes them firm and much easier to handle, level, and frost cleanly. This step is crucial for achieving those sharp, professional-looking edges.
Master the Crumb Coat: Apply a thin, even layer of frosting all over the cake first – this is your crumb coat. It seals in any loose crumbs and creates a smooth surface for your final frosting layer. Chill the cake for about 15-20 minutes after applying the crumb coat to allow it to set firmly before applying the thicker, final layer of frosting.
Taste and Adjust Frosting: Always taste your cream cheese frosting before you begin frosting the cake. Adjust the sweetness by adding more sifted powdered sugar if needed, or a tiny pinch more salt to enhance the flavors. If the frosting is too stiff, you can add a tablespoon or two of milk or cream; if too soft, add more sifted powdered sugar.
Serving Suggestions for coconut cake with cream cheese frosting
Decoration
The visual appeal of your coconut cake with cream cheese frosting can be enhanced with a few thoughtful decorative touches. The most classic and arguably the most effective is pressing additional toasted shredded coconut onto the sides of the cake after the final frosting layer has been applied. This not only looks beautiful, creating a textured, golden exterior, but it also reinforces the cake’s dominant flavor. For a more elegant finish, consider using a piping bag fitted with a star tip to create decorative borders around the top edge of the cake or to pipe small rosettes. If you’ve opted for a fruit element, a few fresh berries or small edible flowers placed strategically on top can add a pop of color and freshness.
Side Dishes
While this cake is often a star on its own, certain accompaniments can elevate the dessert experience. Fresh berries, such as raspberries, blueberries, or sliced strawberries, provide a bright, slightly tart contrast to the cake’s sweetness and richness. A simple fruit salad featuring tropical fruits like pineapple, mango, and kiwi would also be a delightful pairing, echoing the cake’s coconut theme. For a more refined presentation, a small dollop of unsweetened whipped cream or a light coconut crème anglaise can add another layer of texture and complementary flavor without overpowering the cake itself.
Creative Serving Ideas
Move beyond the standard slice with some imaginative serving ideas that highlight the cake’s best qualities. Consider transforming individual slices into elegant dessert parfaits by layering crumbled cake with extra cream cheese frosting and a drizzle of coconut caramel sauce in clear glasses. You could also serve mini versions of the cake, perhaps baked in muffin tins and topped with a swirl of frosting, perfect for parties or as charming individual treats. For a brunch setting, serve smaller portions alongside a light fruit salad and a cup of gourmet coffee or a refreshing tropical smoothie to create a cohesive and delightful menu that celebrates the coconut flavor.
Preparation & Storage
Storing Leftovers
Because this luscious coconut cake features a cream cheese frosting, it is essential to store any leftovers properly to maintain both safety and quality. Always cover the cake tightly once it has cooled down to room temperature, or transfer it to an airtight container. This prevents the frosting from drying out and protects the cake from absorbing any unwanted odors from other foods in the refrigerator. Properly stored, leftover cake slices or whole cakes will retain their deliciousness and texture for approximately 4 days when kept in the refrigerator.
Freezing
For longer-term storage, this coconut cake is an excellent candidate for freezing. You can freeze individual slices or even the entire assembled cake once it has been fully frosted and chilled until firm. The key to successful freezing is to wrap the cake pieces extremely well to prevent freezer burn. Use a layer of plastic wrap followed by a layer of aluminum foil, or place them in a freezer-safe airtight container. Frozen cake layers or the assembled cake can be enjoyed for up to 1 month for optimal texture and flavor. Unfrosted cake layers can often be stored in the freezer for a bit longer, up to about 2 months, provided they are very tightly wrapped to maintain their moisture.
Reheating
This particular cake is not designed to be reheated, as warming cream cheese frosting can alter its texture and flavor significantly. Instead, the best way to enjoy refrigerated leftovers is to allow them to come to room temperature before serving. Let refrigerated slices sit out on the counter for about 20 to 30 minutes. This brief resting period allows the frosting to soften slightly, making it wonderfully creamy again, and the cake itself will regain its tender texture and full flavor. The cream cheese frosting can safely remain at room temperature for a few hours during serving time, making it convenient for parties and gatherings.
Frequently Asked Questions
-
Can I make this cake ahead of time?
Absolutely, this cake is an ideal make-ahead dessert, which simplifies entertaining. You can bake the cake layers one day in advance, ensuring they are completely cooled before wrapping them tightly in plastic wrap. These layers can then be chilled in the refrigerator or frozen for longer storage. Baking ahead and chilling the layers makes them firmer and easier to handle, which is particularly beneficial when it comes to leveling, stacking, and applying the crumb coat for a perfectly smooth frosting finish.
-
Why are the egg whites whipped separately for this coconut cake?
Whipping the egg whites separately before folding them into the cake batter is a critical step that introduces a significant amount of air. This incorporated air is what helps the cake achieve its signature light, airy, and soft texture. Without this process, the cake layers would still be delicious but would likely be denser and less delicate, not quite embodying the ethereal quality that makes this style of coconut cake so desirable. It’s this careful aeration that transforms a good cake into an exceptional one.
-
Does coconut cake with cream cheese frosting need to stay chilled?
Yes, due to the presence of cream cheese in the frosting, it is imperative that this cake is refrigerated when it is not actively being served. Cream cheese is a dairy product that requires cool temperatures to prevent spoilage and maintain its texture. While it’s recommended to take refrigerated slices out a little before serving to allow them to soften slightly, any leftovers should promptly be returned to the refrigerator to ensure food safety and preserve the frosting’s integrity.