Creamy Chilled Coconut Cake

Coconut cake is a wonderfully comforting dessert that brings a taste of the tropics right into your kitchen. Its appeal lies in its incredible simplicity, creating a moist, flavorful cake with minimal fuss. This treat is perfect for any occasion, from casual family gatherings to more elaborate celebrations, promising a delightful experience with every bite.
What truly sets this coconut cake apart is its luscious, creamy texture and deeply satisfying coconut flavor. It’s the kind of cake that gets even better as it sits, allowing the flavors to meld and the moistness to deepen, making it an ideal make-ahead dessert.
Why You Will Love This Recipe
- Effortless Preparation: Utilizing a cake mix as a base simplifies the baking process significantly, making it accessible even for novice bakers. The steps are straightforward, ensuring success without complex techniques.
- Intense Coconut Flavor: Through the strategic use of coconut milk and a rich cream of coconut soak, every bite is infused with authentic, delicious coconut essence. This depth of flavor makes it a standout among simple cakes.
- Incredibly Moist Texture: The signature soak, poured over a warm cake and allowed to meld during chilling, creates an unbelievably tender and moist crumb. This makes the cake practically melt in your mouth.
- Make-Ahead Convenience: This cake is designed to be prepared in advance, with its flavor and texture improving overnight in the refrigerator. This makes it a stress-free option for busy hosts.
- Crowd-Pleasing Appeal: The combination of familiar cake texture with decadent coconut notes is universally loved. It’s a dessert that appeals to a wide range of palates, ensuring everyone at your gathering will enjoy it.
Ingredients You Need
The beauty of this coconut cake lies in its use of readily available ingredients, enhanced by a few key components that deliver its signature flavor and texture. Opting for good quality ingredients, especially for the coconut elements, will significantly elevate the final result. The cake mix provides a reliable foundation, while the coconut milk and cream of coconut work in harmony to create a deeply flavorful and exceptionally moist cake.
Creamy Coconut Cake
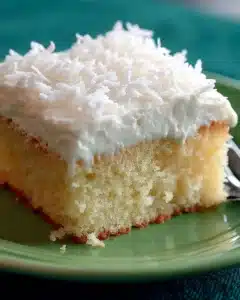
This coconut cake is prepared with a white cake mix enriched with coconut milk, then saturated with warm cream of coconut for a tender, moist crumb. It is finished with a smooth layer of whipped topping and a generous scattering of sweetened shredded coconut.
- 1 cup sweetened shredded coconut (for the finishing layer)
- 1 box white cake mix
- 8 ounces whipped topping
- 1 1/4 cups coconut milk (to replace the water listed on the cake mix package)
- 1 15-ounce can cream of coconut, for soaking
- 1Prepare the white cake mix according to the package instructions, using 1 1/4 cups of coconut milk in place of the water specified. Mix thoroughly, preferably with a stand mixer, until the batter is smooth and well aerated.
- 2Transfer the batter to a 9 x 13-inch baking dish and bake as directed on the package. Begin checking for doneness about 5 minutes before the suggested baking time, as a slightly less baked surface will better absorb the soaking liquid without becoming dry.
- 3Remove the cake from the oven and, while it is still warm, pierce the top all over with a skewer, toothpick, chopstick, or fork.
- 4Place the cream of coconut in the microwave and heat on HIGH for 1 1/2 minutes. Pour the warmed cream of coconut evenly over the cake, allowing it to flow into the holes and soak into the crumb.
- 5Refrigerate the cake for several hours, or ideally overnight, so the coconut flavor can fully develop and the cake can set properly.
- 6Once chilled, spread the whipped topping evenly across the surface of the cake.
- 7Scatter the shredded coconut evenly over the whipped topping. Keep the cake refrigerated until serving.
The precise quantities for each ingredient are detailed in the recipe card, ensuring you have everything needed for a perfect bake. You’ll find the specific measurements there to guide you through the process seamlessly.
Variations
One fantastic way to adapt this recipe is by transforming it into a delightful vegan treat. Simply use a vegan-friendly white cake mix and ensure your coconut milk and cream of coconut are dairy-free. For the topping, a rich vegan whipped cream or a coconut cream frosting can be substituted for the traditional whipped topping, creating a decadent plant-based dessert that doesn’t compromise on flavor or texture.
For those following a low-carb lifestyle, this cake can be cleverly modified. Seek out a sugar-free white cake mix and replace the water with unsweetened almond milk or a similar low-carb liquid. The cream of coconut soak can be recreated using a sugar-free coconut cream mixture, perhaps with a touch of stevia or erythritol for sweetness, and then topped with sugar-free whipped cream and unsweetened shredded coconut for a guilt-free indulgence.
Adding extra textural and flavor elements can also be a wonderful variation. Consider folding in some toasted slivered almonds or chopped macadamia nuts into the cake batter before baking for a delightful crunch and nutty undertone. Alternatively, a layer of pineapple preserves or mango coulis could be spread over the warm, soaked cake before the whipped topping is added, introducing a fruity, tropical twist that complements the coconut beautifully.
How to Prepare Coconut Cake
Step 1: Baking the Coconut Cake Base
Begin by preparing your cake batter according to the instructions on your chosen white cake mix box. The crucial modification here is to substitute the water called for on the package with 1 and 1/4 cups of rich coconut milk. This simple switch instantly infuses the cake with a deeper, more authentic coconut flavor and contributes significantly to its eventual moistness. Ensure you mix the batter thoroughly, aiming for a smooth and airy consistency. Overmixing can develop the gluten too much, leading to a tougher cake, so mix just until everything is well combined and no dry streaks remain.
Pour this specially prepared coconut-infused batter into a greased and floured 9 x 13-inch baking dish. Spread the batter evenly to ensure it bakes up flat and uniform. Place the dish into a preheated oven, following the package’s recommended baking time. However, it’s wise to start checking for doneness a few minutes before the suggested time. You are looking for a cake that is baked through but not overly dry; a slightly underbaked top surface will be more receptive to the soaking liquid.
The aroma of baking cake will fill your kitchen, signaling that it’s almost ready. As soon as the cake comes out of the oven, it’s time to move on to the next critical step. The warmth of the cake is essential for absorbing the delicious soaking mixture. This initial baking phase is fundamental to the cake’s tender crumb and its ability to hold the luscious coconut soak, setting the stage for the delightful texture that follows.
Step 2: Creating the Infusion Holes
Once the cake has finished its time in the oven, do not let it cool completely. The magic of this recipe relies on the cake’s residual heat to draw in the coconut soak. Immediately after removing it from the oven, grab a skewer, a thick toothpick, a chopstick, or even the tines of a fork. You want a tool that can create substantial holes, penetrating deep into the cake’s crumb without excessively crumbling the top.
Systematically poke holes all over the surface of the warm cake. Aim for a dense pattern of holes, ensuring they are spread evenly from edge to edge. The goal is to create numerous pathways for the cream of coconut to seep into the cake’s interior. Think of it like creating a network of tiny channels designed to deliver maximum moisture and flavor to every single bite. This step is absolutely vital; if the holes are too sparse or shallow, the soak will pool on the surface, leading to a less integrated flavor and texture.
This process of poking holes might seem simple, but it’s one of the most impactful techniques in achieving that signature moist, melt-in-your-mouth texture that coconut cake lovers adore. It ensures that the rich, sweet coconut mixture doesn’t just sit on top but becomes an integral part of the cake’s structure and flavor profile. It’s this attention to detail that transforms a standard cake into an exceptional dessert.
Step 3: Warming and Applying the Coconut Soak
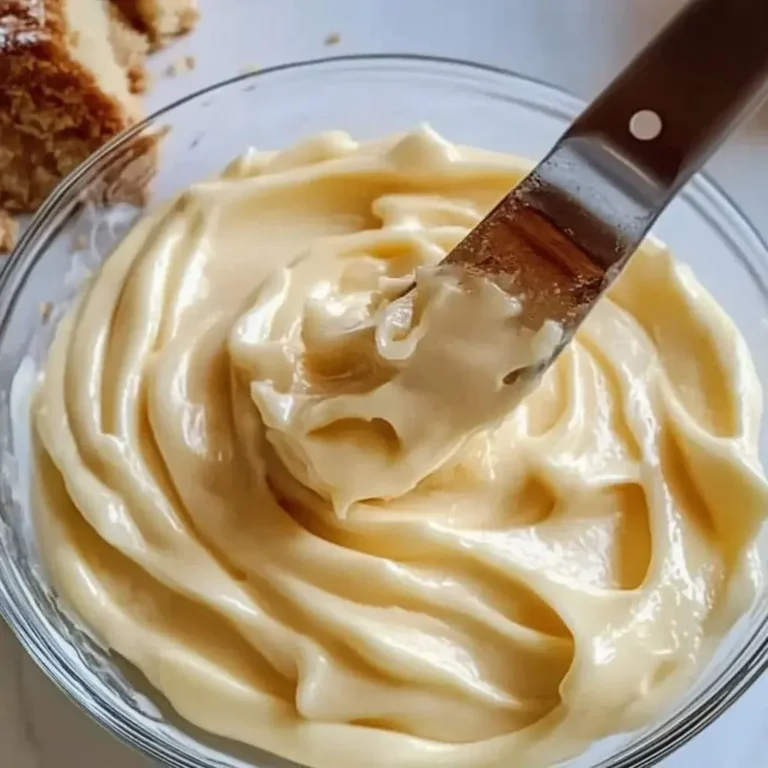
While your cake is still warm and covered in its network of freshly made holes, it’s time to prepare the luxurious coconut soak. You will need one 15-ounce can of cream of coconut for this step. To ensure it pours smoothly and distributes evenly, briefly warm the cream of coconut. A quick stint in the microwave, perhaps for 30 to 60 seconds, should be sufficient to achieve a pourable consistency. Be careful not to overheat it; you want it warm, not hot, to prevent it from cooking the cake further or creating an unpleasant texture.
Once warmed, slowly and methodically spoon or pour the cream of coconut over the entire surface of the warm cake. Take your time with this process, allowing the liquid to naturally flow into the holes you created. As you pour, you should observe the cream of coconut being absorbed almost immediately, disappearing into the cake. Ensure you cover the entire cake evenly, paying attention to the edges and corners to guarantee consistent flavor and moisture throughout. The warmth of the cake acts like a sponge, eagerly soaking up this rich, sweet liquid.
This soak is the secret ingredient that elevates this cake from good to extraordinary, imparting a deep coconut richness and an incredibly tender, almost pudding-like texture. The process should be gentle and unhurried, allowing the cream of coconut to work its magic. By patiently applying the soak, you are investing in the cake’s final texture and flavor, setting the stage for the delightful chill that follows, which will further meld these glorious components.
Step 4: The Crucial Chilling Period
Once the warm cake has been thoroughly drenched in the cream of coconut soak, the next step is patience. This cake absolutely requires a significant chilling period to allow the flavors to meld and the texture to set properly. It is highly recommended to cover the baking dish tightly with plastic wrap or a lid and refrigerate it for at least several hours. For the absolute best results and the most impressive texture, aim to chill it overnight.
During this extended chilling time, the cream of coconut penetrates deeper into the cake’s crumb, transforming its texture into something incredibly soft, moist, and melt-in-your-mouth. The coconut flavor also has ample time to fully develop and permeate every part of the cake, creating a rich, cohesive taste experience. Rushing this process will result in a cake that is less flavorful and not as pleasingly tender. The cold also helps the cake firm up, making it much easier to slice neatly later on.
This resting period is not merely a waiting game; it is an integral part of the cake’s preparation, where the true magic happens. The transformation from a warm, soaked cake to a perfectly chilled, deeply flavorful dessert is a testament to the power of time and temperature in baking. Embracing this chilling phase is key to unlocking the full potential of this delightful coconut cake recipe.
Step 5: Adding the Whipped Topping
After the cake has undergone its essential chilling period, and the flavors have had ample time to marry and the texture has achieved its perfect state of moist tenderness, it’s time for the finishing touches. Carefully remove the plastic wrap or lid from the chilled cake. You will notice that the surface is now firm and beautifully ready for its crowning glory. Ensure your whipped topping is ready and chilled; this helps it spread smoothly and maintain its airy structure.
Using an offset spatula or a butter knife, spread the whipped topping evenly across the entire surface of the cold, soaked cake. Aim for a smooth, uniform layer that covers the cake completely, from edge to edge. The contrast between the cool, fluffy whipped topping and the dense, moist cake beneath is a highlight of this dessert. Take your time to ensure an even application, as this will not only look appealing but also provide a consistent topping experience with every slice.
The whipped topping adds a delightful lightness and a creamy, refreshing counterpoint to the rich coconut flavor of the cake and soak. It acts as a beautiful canvas for the final flourish of coconut, enhancing the overall visual appeal and taste sensation. This step brings the cake closer to its final, irresistible form, ready for its decorative finale.
Step 6: The Final Coconut Garnish
The final element that truly makes this cake a showstopper is the generous scattering of sweetened shredded coconut over the whipped topping. This step not only adds a beautiful visual appeal, reminiscent of fresh snowfall, but also provides a delightful textural contrast to the smooth topping and soft cake. It is the signature look of a classic coconut cake, signaling the delicious tropical flavors within.
Take your sweetened shredded coconut and sprinkle it evenly and liberally over the entire surface of the whipped topping. Don’t be shy; a good amount of coconut enhances both the appearance and the taste of the cake. Ensure an even distribution so that each slice gets a delightful crunch and coconut flavor. This is the final decorative touch that completes the cake’s presentation, making it look as inviting as it tastes.
Once the cake is beautifully adorned with its blanket of shredded coconut, return it to the refrigerator. It needs to stay chilled until you are ready to serve it. This final chill helps the whipped topping set slightly and ensures the cake remains at its optimal serving temperature, ready to impress your guests with its delightful appearance and exquisite flavor profile. This final step seals the deal for a perfect coconut cake.
Pro Tips for Coconut Cake
Maximizing Soak Absorption: For the cream of coconut to truly penetrate the cake, it’s essential to poke the holes while the cake is still warm. This initial warmth allows the porous crumb to readily accept the liquid. Use a tool that creates holes of sufficient size and depth to ensure the soak reaches throughout, not just on the surface.
The Importance of Patience: Do not underestimate the power of the chilling time. This period is crucial for the texture and flavor development of the cake. Rushing the chilling will result in a cake that is less cohesive, less flavorful, and harder to slice cleanly. Overnight is truly ideal for this recipe.
Preventing a Dry Top: To ensure the cake’s surface remains receptive to the soak, start checking for doneness about five minutes before the time indicated on the cake mix box. A slightly softer top is more desirable here than a perfectly golden, firm crust, as it absorbs the liquid more effectively without becoming gummy.
Elevate with Extracts: While the cake mix and coconut milk provide a good base, a touch of pure coconut extract can further amplify the coconut flavor. Add about half a teaspoon to the cake batter for an even more intense tropical essence. Be cautious not to add too much, as extracts can be potent and may overpower other flavors if used excessively.
Toasted Coconut Finish: For an added layer of flavor and a more sophisticated presentation, consider lightly toasting the shredded coconut before sprinkling it on top. Spread the coconut on a baking sheet and toast in a 300°F (150°C) oven for 5-8 minutes, watching carefully to prevent burning. This brings out a nutty aroma and a richer coconut taste.
Serving Suggestions for Coconut Cake
Decoration
The classic decoration for this coconut cake is a generous blanket of sweetened shredded coconut spread evenly over the whipped topping. For a touch of elegance, you could also garnish the top with a few toasted coconut flakes, which add a lovely golden hue and a subtle crunch. Edible flowers, such as violets or pansies, can add a beautiful pop of color and a delicate floral note. Alternatively, a sprinkle of edible glitter or edible pearls can give the cake a more festive and celebratory appearance, perfect for special occasions.
Side Dishes
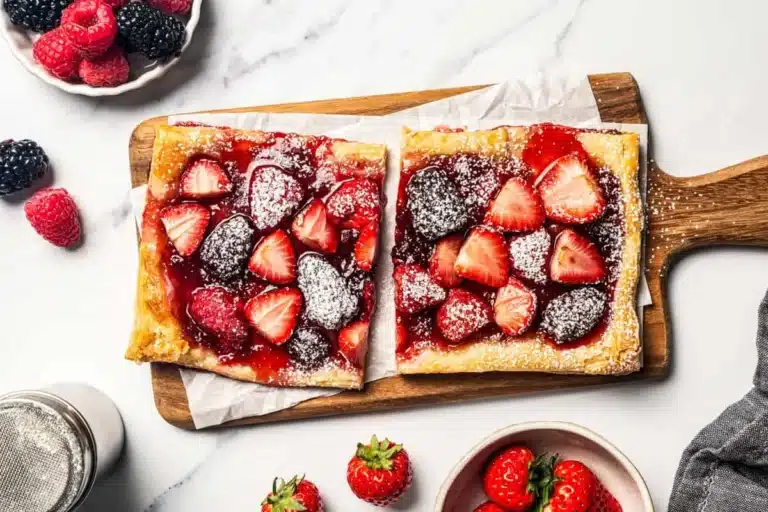
Fresh fruit is a natural and refreshing accompaniment to this rich coconut cake. Sliced fresh strawberries, raspberries, or blueberries offer a delightful tartness that beautifully balances the cake’s sweetness. A simple fruit salad featuring tropical fruits like pineapple, mango, and kiwi would further enhance the cake’s theme and provide a vibrant, juicy contrast. A light, citrusy glaze drizzled over fresh fruit could also add another dimension of flavor and appeal.
Creative Serving Ideas
For an individual dessert presentation, consider cutting the cake into smaller portions and serving each piece with a dollop of fresh whipped cream or a scoop of coconut ice cream. A warm beverage, such as a rich dark roast coffee or a fragrant cup of herbal tea, pairs wonderfully with the cool, creamy cake, creating a delightful contrast. You could also present small slices as part of a dessert buffet, allowing guests to sample its delicious flavor alongside other sweet treats.
Preparation & Storage
Storing Leftovers
To keep your delicious coconut cake fresh and moist after serving, it’s essential to store it properly. Always keep the cake covered tightly with plastic wrap or in an airtight container. Because it is topped with whipped topping and is designed to be served chilled, it must be stored in the refrigerator. Properly stored, the cake will maintain its best quality for up to 3 to 4 days. Refrigeration helps prevent the whipped topping from wilting and keeps the cake’s texture pleasantly firm yet moist.
Freezing
This coconut cake can indeed be frozen, although the texture of the whipped topping might change slightly upon thawing. For the best results, it is recommended to freeze individual portions. Wrap each slice securely in plastic wrap, then place them in a freezer-safe bag or container. This method helps protect the cake from freezer burn. Frozen cake should be consumed within 1 to 2 months for optimal quality. Ensure it is well-wrapped to preserve its moisture and flavor during the freezing process.
Reheating
The reheating process for this coconut cake is straightforward and focuses on bringing it back to its ideal serving temperature and texture. If reheating from frozen, the best approach is to thaw the cake overnight in the refrigerator. This allows the moisture to redistribute gradually and gently, preventing any drastic changes in texture. Once thawed, allow the cake to sit at room temperature for about 15-20 minutes before serving, just to take the extreme chill off. Avoid reheating the entire cake in an oven or microwave, as this can compromise the delicate structure of the whipped topping and the moist crumb.
Frequently Asked Questions
-
Can I make this coconut cake using a different type of cake mix, such as yellow or spice?
While a white cake mix is ideal for its neutral base, allowing the coconut flavor to shine through, you can experiment with other cake mixes. A yellow cake mix will also work quite well, offering a slightly richer flavor profile. For a spice cake mix, the added spices might complement the coconut, creating a unique, warm flavor profile, though it will deviate from the classic taste. Always ensure to follow the liquid substitution rule using coconut milk, and adjust baking times as needed, as different mixes can bake slightly differently.
-
What is the difference between cream of coconut and coconut cream, and which should I use?
It’s crucial to use cream of coconut for the soak, not just regular coconut cream. Cream of coconut, such as the brand Coco Lopez, is a sweetened product made from coconut milk and sugar, often with added flavoring. It has a thick, syrupy consistency and is specifically designed for sweet applications and cocktails. Regular coconut cream, on the other hand, is the thick, unsweetened solid that forms at the top of a can of chilled coconut milk. Using regular coconut cream would require adding significant amounts of sugar and might not yield the same rich, smooth texture and sweetness for the soak. Always check your ingredients to ensure you have the sweetened cream of coconut for this recipe.
-
My cake turned out a bit dry; what could have gone wrong, and how can I prevent it next time?
If your cake turned out dry, there are a few common culprits. First, ensure you did not overbake it; start checking for doneness a few minutes earlier than the package suggests. The surface should be slightly soft when you poke holes. Second, the amount of liquid used for the soak is critical; ensure you used the full can of cream of coconut and that it was warmed properly to pour easily. If the cake was baked for too long or the soak didn’t penetrate enough, it can result in dryness. Make sure to poke ample holes and allow sufficient chilling time for the soak to fully integrate and hydrate the crumb.