Choux au Craquelin: Irresistibly Crispy Cream-Filled Delights
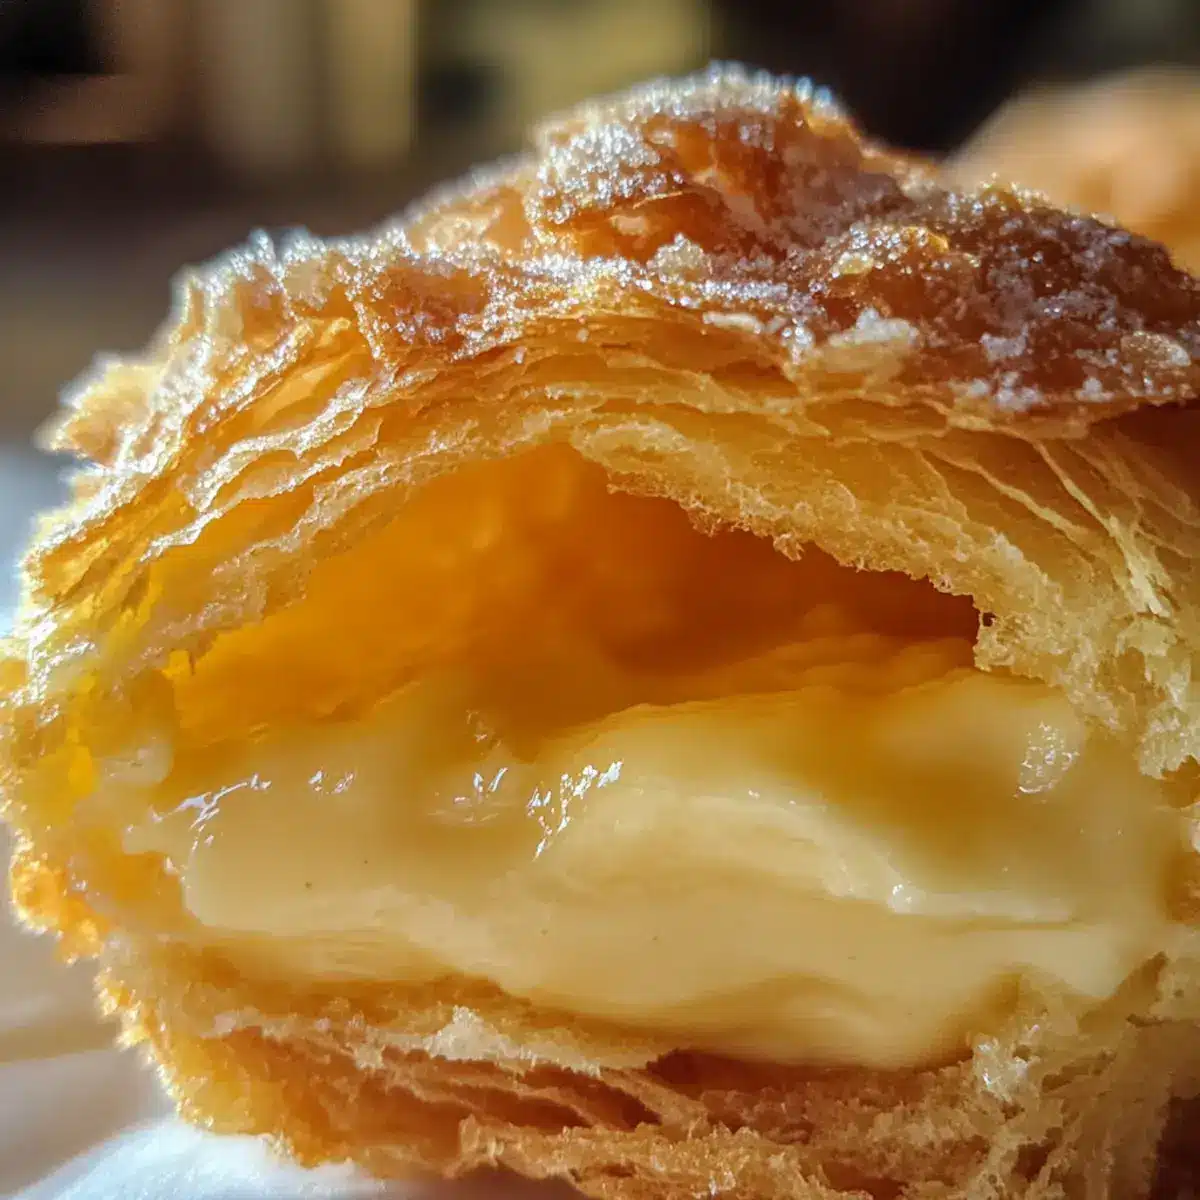
As I stood in my kitchen, the rich aroma of baked pastries wafted through the air, taking me back to quaint French cafés where elegance meets comfort. Today, I’m excited to share my recipe for Choux au Craquelin, a delightful French dessert that features airy choux pastry topped with a crispy cookie layer.
With only a handful of ingredients, this recipe is perfect for anyone seeking a fast yet impressive treat. The combination of a crunchy craquelin and a luscious cream filling creates a magical texture that will surely wow your family and friends. Plus, with variations that let you customize the filling, Choux au Craquelin is not only a showstopper but also a canvas for your creativity. Are you ready to indulge in this culinary adventure? Let’s dive in!
Why You Will Love This Recipe
- Decadent Delight: These crispy cream-filled pastries offer a flavor experience that seems gourmet yet is achievable in your home kitchen.
- Versatile Filling Options: Experiment with creativity by swapping out the classic vanilla pastry cream for rich chocolate or zesty citrus variations that will keep your taste buds dancing.
- Quick and Simple: With only a handful of ingredients, you’ll have a stunning dessert that can impress guests without spending hours in the kitchen.
- Texture Triumph: The combination of a crunchy exterior with a creamy interior is not just delicious, it’s a textural thrill that makes each bite an adventure.
- Perfect for Any Occasion: Whether it’s a celebration or a casual treat, these pastries fit seamlessly into any gathering, ensuring your culinary skills are celebrated.
Ingredients You Need
Crafting these Choux au Craquelin requires attention to the quality of your ingredients, as each plays a vital role in achieving the perfect balance of crispness and creaminess. Utilizing fresh, high-quality components will undoubtedly elevate the final taste and texture of your pastries.
Choux au Craquelin Recipe

Experience the magic of Choux au Craquelin, a delightful French dessert with a crispy cookie layer and airy cream-filled pastry. These pastries offer a flavor experience that seems gourmet yet is achievable in your home kitchen. They are quick and simple, with only a handful of ingredients, you’ll have a stunning dessert that can impress guests without spending hours in the kitchen. The combination of a crunchy exterior with a creamy interior is not just delicious, it’s a textural thrill that makes each bite an adventure. Perfect for any occasion, whether it’s a celebration or a casual treat, these pastries fit seamlessly into any gathering, ensuring your culinary skills are celebrated.
- For the Craquelin: 50g Flour, 50g Brown Sugar, 1 pinch Salt, 50g Butter
- For the Choux Pastry: 100g Butter, 3 large Eggs, 125g Flour, 1 pinch Salt
- For the Pastry Cream Filling: 100g Granulated Sugar, 30g Cornstarch, 500ml Whole Milk, 3 sheets Gelatin Sheets
- 1Make the Craquelin: Whisk together flour, brown sugar, and a pinch of salt. Incorporate softened butter, mix until smooth. Roll between parchment to 4 mm thick, freeze for 30 minutes, then cut into rounds.
- 2Prepare the Choux Pastry: Preheat oven to 355°F (180°C). Combine water, butter, and salt in a saucepan, bring to boil. Add all-purpose flour, stir until the dough pulls away from the pan.
- 3Incorporate Eggs: Let the dough cool 5 minutes. Gradually add beaten eggs, mixing until glossy and smooth.
- 4Pipe Choux Buns: Transfer dough to piping bag, pipe dollops on trays, top with frozen craquelin rounds.
- 5Bake: Place trays in oven and bake for 35-40 minutes until puffed and golden brown.
- 6Make Pastry Cream: Combine sugar, cornstarch, and milk in a saucepan, cook until thick. Incorporate gelatin.
- 7Assemble Choux au Craquelin: Fill cooled choux with pastry cream using piping bag or slice and spoon in cream.
Keywords: Choux au Craquelin, French pastry, cream puffs, crispy topping, dessert recipe, baking, homemade
- flour: provides structure to the pastry; use all-purpose flour for best results.
- brown sugar: adds sweetness and a subtle caramel flavor; substitute with white sugar if needed.
- salt: enhances flavor and balances sweetness; it’s essential for a perfect craquelin.
- butter: softened butter creates a rich, moist texture; ensure it’s room temperature for easier mixing.
- butter: important for creating a rich pastry; use unsalted for better control of flavor.
- eggs: essential for rise and structure; use large eggs for optimal results.
- flour: integral for the structure of the choux; stick to all-purpose for the best consistency.
- salt: a small but crucial ingredient; it helps bring out the sweetness of the pastry.
- granulated sugar: sweetens the pastry cream; can be replaced with a sugar alternative for less sweetness.
- cornstarch: thickens the cream for a silky texture; no substitutions recommended for this key ingredient.
- whole milk: provides creaminess; can be replaced with a dairy-free alternative for a vegan option.
- gelatin sheets: stabilizes the pastry cream; omit for a softer texture or use a vegan gelatin alternative for plant-based needs.
The precise quantities for each ingredient are detailed within the accompanying recipe card.
Variations
The beauty of Choux au Craquelin lies not only in its classic form but also in its adaptability. You can transform these delightful pastries into entirely new experiences with simple ingredient swaps and additions, catering to diverse palates and dietary needs.
For a truly decadent experience, consider a chocolate lover’s dream variation. Instead of the standard vanilla pastry cream, whip up a rich, dark chocolate ganache or a velvety chocolate mousse. You can even infuse the craquelin dough with a tablespoon of unsweetened cocoa powder for an extra layer of chocolatey goodness that complements the filling beautifully. This twist transforms your Choux au Craquelin into an indulgent treat perfect for any celebration.
Embracing a low-carb dessert approach is also entirely achievable. For the filling, experiment with a sugar-free cream cheese frosting or a luscious avocado-based chocolate cream, which offers healthy fats and a surprisingly rich texture. You can omit the sugar entirely in the craquelin and use a sugar substitute, ensuring a delightful crunch without the carbs. This mindful modification allows you to enjoy the Choux au Craquelin experience with dietary considerations in mind.
Introducing vibrant, fresh flavors can also redefine your Choux au Craquelin. Try infusing the pastry cream with citrus zest, such as lemon or lime, for a bright, zesty contrast to the sweet choux and crunchy topping. Another exciting option is to incorporate fresh fruit purees directly into the filling, creating a vibrant berry or passion fruit cream. These fruit-forward variations add a refreshing element, making them perfect for warmer weather or as a lighter dessert option.
How to Prepare Choux au Craquelin
Step 1: Crafting the Craquelin Crumbly Crown
The foundation of a perfect Choux au Craquelin begins with its signature crunchy topping, the craquelin. This delicate cookie layer provides a delightful textural contrast to the soft, airy choux pastry beneath. It’s a simple mixture, but its preparation requires precision to achieve that characteristic crispness.
In a medium mixing bowl, begin by whisking together the measured all-purpose flour, the light brown sugar, and a small pinch of salt. These dry ingredients form the base of our flavorful cookie dough, ensuring an even distribution of sweetness and structure. Combining them thoroughly at this stage prevents any lumps and prepares them for the richness that’s about to be added.
Next, incorporate the softened unsalted butter into the dry mixture. Use your fingertips or a pastry blender to work the butter into the flour and sugar until the mixture resembles coarse breadcrumbs. The butter coats the flour particles, which is crucial for creating a tender, crumbly texture in the final craquelin. Ensure the butter is at room temperature; this is key for achieving a smooth, cohesive dough without overworking it, which can lead to a tough craquelin.
Once the dough has come together, transfer it between two sheets of parchment paper. Using a rolling pin, gently roll the dough to an even thickness of approximately 4 millimeters. This uniform thickness is vital for consistent baking and ensuring that each choux bun receives an adequately sized craquelin disc. Place the rolled dough, still between the parchment paper, into the freezer for at least 30 minutes. This chilling process firms up the dough, making it easier to cut and handle without deforming, and ensures it maintains its shape during baking.
After the craquelin dough is sufficiently chilled and firm, remove it from the freezer. Using a round cookie cutter that is slightly larger than your intended choux bun size, cut out as many discs as possible. Carefully place these frozen craquelin rounds onto a parchment-lined baking sheet and return them to the freezer. Keeping them frozen until the moment they are placed atop the choux pastry is essential for their structural integrity and ensuring they bake to a perfect crisp, contributing to the overall appeal of your Choux au Craquelin.
Step 2: Building the Airy Choux Pastry Base
With the craquelin ready, it’s time to construct the light and airy choux pastry that forms the heart of these exquisite buns. This delicate pastry dough is known for its ability to puff dramatically in the oven, creating hollow interiors perfect for filling. Its creation involves a precise cooking and mixing technique that transforms simple ingredients into a culinary marvel.
Begin by preheating your oven to 355°F (180°C) and meticulously lining your baking trays with parchment paper. This preparation ensures that the choux buns will not stick and will bake evenly, allowing them to rise to their full potential. The parchment paper also provides a non-stick surface, facilitating easy removal of the delicate pastries once they are baked to golden perfection.
In a medium saucepan, combine the specified amount of water, the unsalted butter, and a pinch of salt. Place the saucepan over medium heat and bring the mixture to a rolling boil. The butter should be fully melted, and the water steaming, indicating it’s ready for the next crucial step in creating the choux pastry for your Choux au Craquelin.
As soon as the mixture reaches a rolling boil, immediately remove the saucepan from the heat. Quickly and decisively add the all-purpose flour all at once. Using a sturdy wooden spoon or a heat-resistant spatula, vigorously stir the mixture for about one to two minutes. The goal is to incorporate the flour into the liquid, creating a cohesive dough that pulls away cleanly from the sides of the pan and forms a smooth ball. This cooking process gelatinizes the starches in the flour, which is essential for the pastry’s structure and its remarkable ability to puff.
Continue to stir the dough in the saucepan over low heat for another minute or two. This step, often referred to as “drying out” the dough, is critical for evaporating excess moisture. A well-dried dough will result in lighter, crispier choux buns that are less likely to collapse. You’ll notice the dough forming a slight film on the bottom of the pan, and it will become even more pliable and smooth as you continue to stir, signifying it’s ready for the eggs.
Step 3: The Crucial Egg Incorporation
The addition of eggs to the cooked choux paste is perhaps the most delicate yet transformative step in achieving the perfect Choux au Craquelin. This process requires patience and a gradual approach to ensure the eggs are fully incorporated without cooking, which is vital for the pastry’s light, airy texture and impressive rise.
Once the dough has been removed from the heat and stirred vigorously, allow it to cool in the saucepan for approximately 5 minutes. This brief cooling period is essential. If the dough is too hot when the eggs are added, the heat will begin to cook the eggs prematurely, resulting in a scrambled egg texture within the pastry and hindering its ability to achieve a smooth, glossy consistency. The slightly cooled dough creates a more stable base for emulsifying the eggs.
In a separate small bowl, lightly beat the large eggs until they are well combined and the yolks and whites are fully integrated. It’s important to beat them thoroughly to ensure a uniform mixture before adding them to the choux paste. This prepares them for gradual incorporation into the warm dough.
Now, begin adding the beaten eggs to the choux paste gradually. Add about one-third of the beaten eggs first and mix them into the dough using your wooden spoon or spatula. Work the eggs into the paste until they are completely absorbed and the mixture starts to become smooth and glossy. The dough will likely look broken or separated at first, but keep mixing; it will eventually come together.
Continue adding the remaining beaten eggs in two more additions, mixing thoroughly after each addition. The key is to add only enough egg that can be fully incorporated before adding the next portion. The final dough should be thick, smooth, and glossy, with a consistency that is pipeable but also holds its shape. When you lift the spatula or spoon, the dough should fall off in a thick, ribbon-like stream, forming a ‘V’ shape. This perfect consistency is what promises those beautifully puffed Choux au Craquelin buns.
Step 4: Piping and Topping the Choux Buns
With the choux paste perfectly prepared and the craquelin discs ready to go, the next step is to shape the buns and adorn them with their signature crunchy layer. This stage is where the magic truly begins to take shape, as the raw ingredients transform into visually appealing pastry shells.
Transfer the glossy choux pastry dough into a piping bag fitted with a large, plain round nozzle. A round nozzle is ideal for creating uniform dollops of dough that will puff up evenly in the oven. Ensure the nozzle is securely attached to the bag and that there are no air pockets trapped within the dough, as these can cause uneven baking or collapse.
On the prepared baking trays, which are lined with parchment paper, begin piping the choux pastry. Aim for uniform dollops, about the size of a large golf ball or roughly 1.5 to 2 inches in diameter. It’s crucial to space the piped buns about 2 inches apart on the baking tray. This spacing allows ample room for them to expand and rise significantly during baking without touching each other, which would prevent them from puffing correctly and lead to misshapen pastries.
Once you have piped all the choux buns, it’s time to add the star of the show – the craquelin topping. Carefully retrieve the frozen craquelin rounds from the freezer. Gently place one frozen craquelin disc on top of each piped choux bun. Ensure the craquelin is centered on the peak of the choux dough. The cold craquelin will immediately begin to adhere to the slightly sticky choux paste.
Press down very gently on the craquelin disc with your fingertip to secure it to the choux bun and to slightly flatten the peak of the choux. This simple action helps the craquelin stay in place during baking and encourages even spreading. The contrast of the cold craquelin against the room-temperature choux paste will start to melt slightly, ensuring a beautiful adherence as they bake, creating the iconic look and taste of your Choux au Craquelin.
Step 5: The Art of Baking to Golden Perfection
The baking phase is where the true transformation of Choux au Craquelin occurs, as heat works its magic to puff the dough and crisp the craquelin. This is a critical step that demands attention to temperature and timing to achieve the ideal airy structure and golden-brown finish.
Carefully place the prepared baking trays, now adorned with the piped choux buns topped with craquelin, into the preheated oven set at 355°F (180°C). It is essential that the oven has reached the correct temperature before the trays are introduced, ensuring an even and immediate rise for the pastries. Avoid overcrowding the oven; bake only one or two trays at a time to allow for proper air circulation around each bun.
Bake the Choux au Craquelin for a total of 35 to 40 minutes. During the first 20-25 minutes of baking, resist the urge to open the oven door at all costs. Opening the door prematurely will cause a sudden drop in temperature, which can make the already puffed choux buns collapse and fail to achieve their characteristic hollow interior. The high initial heat creates steam within the dough, which is what causes them to puff up dramatically.
After the initial baking period, if the choux seem to be browning too quickly, you can reduce the oven temperature slightly to 325°F (160°C) for the remaining time. This helps to ensure they cook through completely without burning the outside. The goal is for the choux to be deeply golden brown and feel firm and light to the touch, indicating that the interior moisture has evaporated sufficiently.
Once baked, carefully remove the trays from the oven. To prevent the delicate pastries from becoming soggy from trapped steam, it’s recommended to immediately use a toothpick or the tip of a sharp knife to poke a small hole in the side or bottom of each choux puff. This allows any residual steam to escape freely. Let the baked Choux au Craquelin cool completely on a wire rack before proceeding to the filling stage, ensuring they retain their crispness.
Step 6: Preparing the Silky Pastry Cream Filling
While your Choux au Craquelin are baking and cooling, the perfect accompaniment is a smooth, luscious pastry cream. This rich custard filling is the quintessential partner to the crispy choux and craquelin, providing a creamy, delightful contrast that makes each bite a symphony of textures and flavors.
Begin by gathering your ingredients for the pastry cream, ensuring you have high-quality components for the best flavor. In a medium saucepan, combine the granulated sugar and cornstarch. Whisk these dry ingredients together thoroughly to break up any clumps of cornstarch and to ensure they are well-blended before any liquid is added. This step prevents lumps from forming later in the cooking process.
Gradually pour in the whole milk while whisking continuously. It is important to add the milk slowly at first to create a smooth slurry. This ensures the cornstarch is evenly dispersed, which is crucial for achieving a silky-smooth, lump-free cream. Once a smooth mixture is achieved, place the saucepan over medium heat.
Cook the milk mixture, stirring constantly with a whisk, until it reaches a gentle boil and begins to thicken. Be patient during this stage; constant stirring is essential to prevent the mixture from scorching on the bottom of the pan and to ensure even cooking. As it heats, the cornstarch will begin to activate, thickening the liquid into a rich custard.
Once the pastry cream has thickened considerably and coats the back of your spoon, remove the saucepan from the heat. If you are using gelatin sheets to stabilize the cream, soak them in cold water for a few minutes until softened, then squeeze out the excess water and whisk them into the hot pastry cream until fully dissolved. The gelatin helps the cream hold its shape when filled, preventing it from becoming too runny, especially if you plan to serve the Choux au Craquelin later.
Pour the finished pastry cream into a clean bowl. To prevent a skin from forming on the surface as it cools, press a piece of plastic wrap directly onto the surface of the cream. Allow the pastry cream to cool completely, first at room temperature and then in the refrigerator. Chilled pastry cream is easier to handle and pipe, resulting in beautifully filled Choux au Craquelin that are ready to be enjoyed.
Step 7: Assembling Your Masterpiece
The final, most exciting step in creating your Choux au Craquelin is the assembly, where the crispy shells are filled with luscious pastry cream to create the complete, delightful pastry. This is where your culinary creation comes to life, ready to be savored.
Once the baked choux puffs have cooled completely, it’s time to fill them. Ensure the pastry cream is also thoroughly chilled and has a firm, pipeable consistency. If the cream has become too firm, you can gently whisk it to loosen it slightly before transferring it to a piping bag.
Prepare a piping bag fitted with a small, plain round nozzle. Insert the nozzle into the small steam hole you created in the side or bottom of each cooled choux puff. Gently squeeze the piping bag to fill the interior of the choux shell with the chilled pastry cream. Fill until you feel a slight resistance or see a bit of cream begin to ooze out, indicating it’s sufficiently filled without bursting the pastry. This method ensures a neat and professional finish.
Alternatively, for a more rustic presentation or if you don’t have a piping bag, you can carefully slice each choux puff in half horizontally using a serrated knife. Then, use a spoon to generously dollop the chilled pastry cream onto the bottom half of the choux. Place the top half of the choux puff back on, gently pressing it down to secure the cream.
Arrange the assembled Choux au Craquelin on a serving platter. You can serve them immediately to enjoy the perfect contrast between the crisp pastry and the cool, creamy filling. If you need to prepare them slightly in advance, store them in an airtight container in the refrigerator for a few hours, but be aware that the pastry may soften over time. Enjoy the delightful fruits of your labor!
Pro Tips for Choux au Craquelin
Achieving Choux au Craquelin perfection involves a few key techniques that can make all the difference. These expert tips are designed to guide you through the process, ensuring your pastries are consistently delightful.
Temperature is Key: Always ensure your butter is at the correct temperature, whether it’s softened for the craquelin or unsalted for the choux paste. Room temperature butter is crucial for smooth mixing and achieving the right texture. Cold butter can lead to uneven distribution, resulting in a less desirable texture in your final Choux au Craquelin.
Baking Watchfulness: Keep a close eye on your Choux au Craquelin during the baking process. Over-baking can result in dry, dense pastries, while under-baking will leave them pale and potentially collapsed. They should feel airy and light when done, with a beautiful golden-brown hue.
Steam Release Strategy: After baking, immediately poke a small hole in each choux puff using a toothpick or the tip of a sharp knife. This is a critical step to release the internal steam, which prevents sogginess and maintains the delightful crispness of your Choux au Craquelin. Don’t skip this part!
Piping Precision: When piping the choux buns, use a round nozzle for consistent shapes and sizes. Avoid squeezing the piping bag too forcefully or inconsistently, as this can lead to uneven buns. Aim for gentle, steady pressure to create uniform dollops that will bake evenly.
Craquelin Consistency Management: If your craquelin dough becomes too soft to handle while cutting the discs, simply return it to the freezer for a few minutes to firm up. This ensures you can cut clean, precise rounds that will top your Choux au Craquelin beautifully, guaranteeing that signature crisp finish.
Serving Suggestions for Choux au Craquelin
Decoration
The visual appeal of Choux au Craquelin can be enhanced with simple yet elegant decorative touches. A light dusting of powdered sugar offers a classic finish, providing a subtle sweetness and a snowy appearance that highlights the golden craquelin. For a more indulgent look, a delicate drizzle of melted dark or white chocolate across the tops of the filled buns adds a touch of sophistication and a hint of extra flavor. Edible gold leaf or small edible flowers can also be strategically placed for a truly gourmet presentation, transforming your Choux au Craquelin into miniature works of art.
Side Dishes
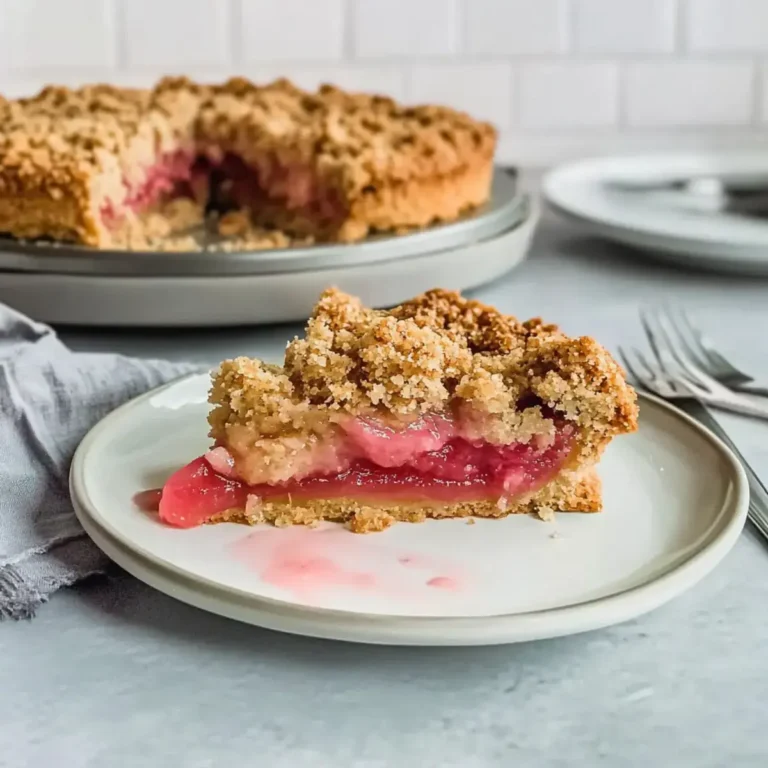
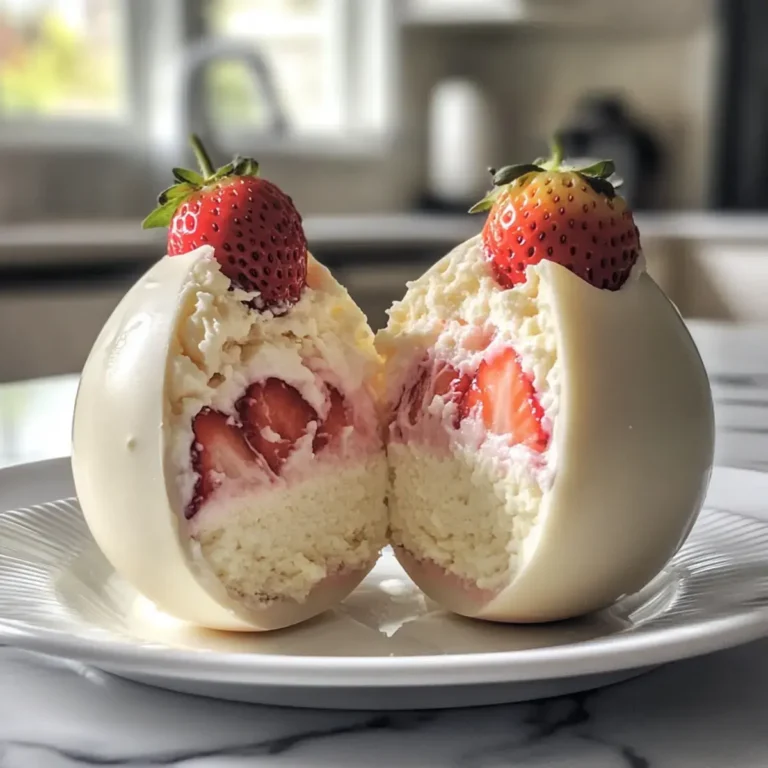
While Choux au Craquelin are often enjoyed as a standalone dessert, they pair wonderfully with certain accompaniments that complement their flavors and textures. A small bowl of fresh, mixed berries, such as raspberries, blueberries, and sliced strawberries, provides a vibrant, tangy counterpoint to the sweet cream filling and crunchy pastry. Consider serving them alongside a dollop of freshly whipped cream or a scoop of high-quality vanilla bean ice cream for an extra layer of creamy indulgence. A light fruit coulis, like a raspberry or mango purée, can add a burst of fresh fruit flavor and a beautiful splash of color to the dessert plate, enhancing the overall dining experience.
Creative Serving Ideas
Elevate your Choux au Craquelin presentation beyond the traditional by exploring creative serving ideas that will impress your guests. Arrange them artfully on a tiered dessert stand, allowing their varying heights and textures to create visual interest. For a festive occasion, create a “Choux au Craquelin Tower” by stacking them with a bit of cream or chocolate to hold them together, akin to a croquembouche, but on a smaller scale. Another delightful approach is to serve them alongside a small pot of rich hot chocolate or a steaming cup of espresso, making for a perfect afternoon tea or coffee break indulgence. These thoughtful presentations can turn a simple dessert into a memorable culinary event.
Preparation & Storage
Storing Leftovers
To keep your delicious Choux au Craquelin at their best, proper storage is essential. Store any leftover filled pastries in an airtight container in the refrigerator. This prevents them from drying out and protects them from absorbing other odors in the fridge. It’s important to note that the pastry will begin to soften after a few hours due to the moisture from the cream filling, so they are best enjoyed within 24 hours of assembly for optimal texture.
Freezing
Freezing is an excellent option for preparing Choux au Craquelin ahead of time, but it’s best to freeze the components separately. Unfilled, baked choux puffs can be frozen for up to 3 months. Ensure they are completely cool before placing them in an airtight container or a heavy-duty freezer bag, with parchment paper between layers to prevent sticking. The craquelin discs can also be prepared and frozen in a similar manner. Avoid freezing filled pastries, as the texture of the cream and the crispness of the choux will be compromised upon thawing.
Reheating
If you have frozen unfilled choux puffs and are ready to enjoy them, the best way to restore their crispness is through reheating. Allow the frozen choux puffs to thaw slightly in the refrigerator for about an hour. Then, preheat your oven to 350°F (175°C) and spread the thawed puffs on a baking sheet. Bake for about 8-10 minutes, or until they are warmed through and their crispness is restored. Once reheated and cooled slightly, you can then fill them with your prepared pastry cream.
Frequently Asked Questions
-
What kind of flour is best for Choux au Craquelin, and why?
For Choux au Craquelin, all-purpose flour is highly recommended for both the choux pastry and the craquelin. All-purpose flour has a moderate protein content that provides the ideal balance of structure and tenderness. In the choux pastry, this protein content helps create the gluten network necessary for the dramatic rise and airy interior. For the craquelin, it contributes to a pleasant crispness without making the topping too hard. Using a flour with too high a protein content, like bread flour, could result in a chewier texture, while a lower protein flour, like cake flour, might not provide enough structure, leading to a flatter pastry. Therefore, all-purpose flour is the most reliable choice for achieving that perfect Choux au Craquelin consistency.
-
How can I ensure my Choux au Craquelin remain crispy after filling, and for how long can I store them?
To maintain the crispness of your Choux au Craquelin after filling, it is crucial to ensure both the choux shells and the pastry cream are thoroughly cooled before assembly. Using a piping bag to fill the choux from a small hole at the base helps minimize contact with the interior surface, preserving some crispness. Additionally, when filling, try not to overfill, as excess cream can soften the pastry more quickly. Store filled Choux au Craquelin in an airtight container in the refrigerator. They are best consumed within 24 hours of assembly, as the moisture from the filling will inevitably begin to soften the crisp exterior over time. For longer storage, it is always recommended to freeze unfilled choux shells and fill them just before serving.
-
What are common pitfalls when making Choux au Craquelin, and how can I avoid them?
Several common pitfalls can arise during Choux au Craquelin preparation. One is not drying the choux paste sufficiently after cooking, which leads to dense, heavy pastries. Ensure you stir the dough in the hot pan for at least a minute or two after adding the flour to evaporate excess moisture. Another pitfall is opening the oven door too early during baking, causing the pastries to collapse; resist the temptation until the last 10-15 minutes of baking. For the craquelin, rolling it too thick or too thin can affect its crispness and how well it bakes. Aim for a consistent 4mm thickness. Finally, not cooling the choux shells completely before filling can result in the pastry cream becoming too runny and further softening the shells. Always allow ample cooling time for both components.