Chicken Kiev – Easy and Classic Stuffed Chicken Recipe!
Embark on a culinary adventure that will transport your taste buds to new heights with this exquisite Chicken Kiev recipe. This dish, a symphony of textures and flavors, promises a delightful dining experience that is both comforting and sophisticated. Get ready to impress your family and friends with a dish that is as beautiful to behold as it is delicious to savor.
Prepare yourself for a cooking journey that combines classic techniques with simple ingredients to create a truly memorable meal. We’ll guide you through each step, ensuring that even novice cooks can achieve restaurant-quality results. The aroma alone will fill your kitchen with warmth and anticipation, hinting at the delightful feast to come.
Why You Will Love This Recipe
- Crispy Perfection: Experience the satisfying crunch of a golden-brown exterior that gives way to incredibly moist and tender chicken.
- Explosion of Flavor: Each bite is infused with a rich, lemony garlic and herb butter that melts into the chicken, creating a burst of deliciousness.
- Impressive Presentation: This dish looks elegant and sophisticated, making it perfect for special occasions or when you want to elevate a weeknight meal.
- Simple Yet Rewarding: While it seems impressive, the preparation is straightforward, offering a rewarding cooking experience with spectacular results.
- Versatile Delight: Enjoy it as a standalone main course or pair it with a variety of side dishes for a complete and customizable meal.
Ingredients You Need
The secret to an exceptional Chicken Kiev lies in the quality of its ingredients. Opting for fresh, vibrant components will elevate the final dish, ensuring a burst of authentic flavor in every single bite. We’ve carefully selected each element to complement the rich butter and succulent chicken, creating a harmonious culinary masterpiece that is sure to delight.
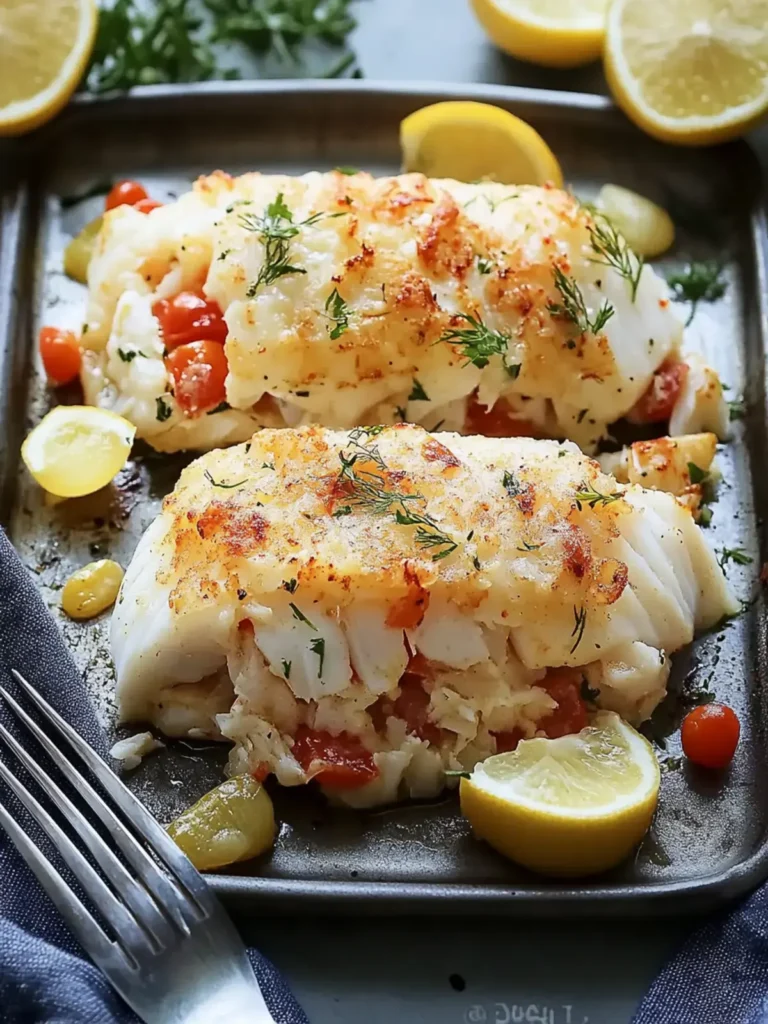
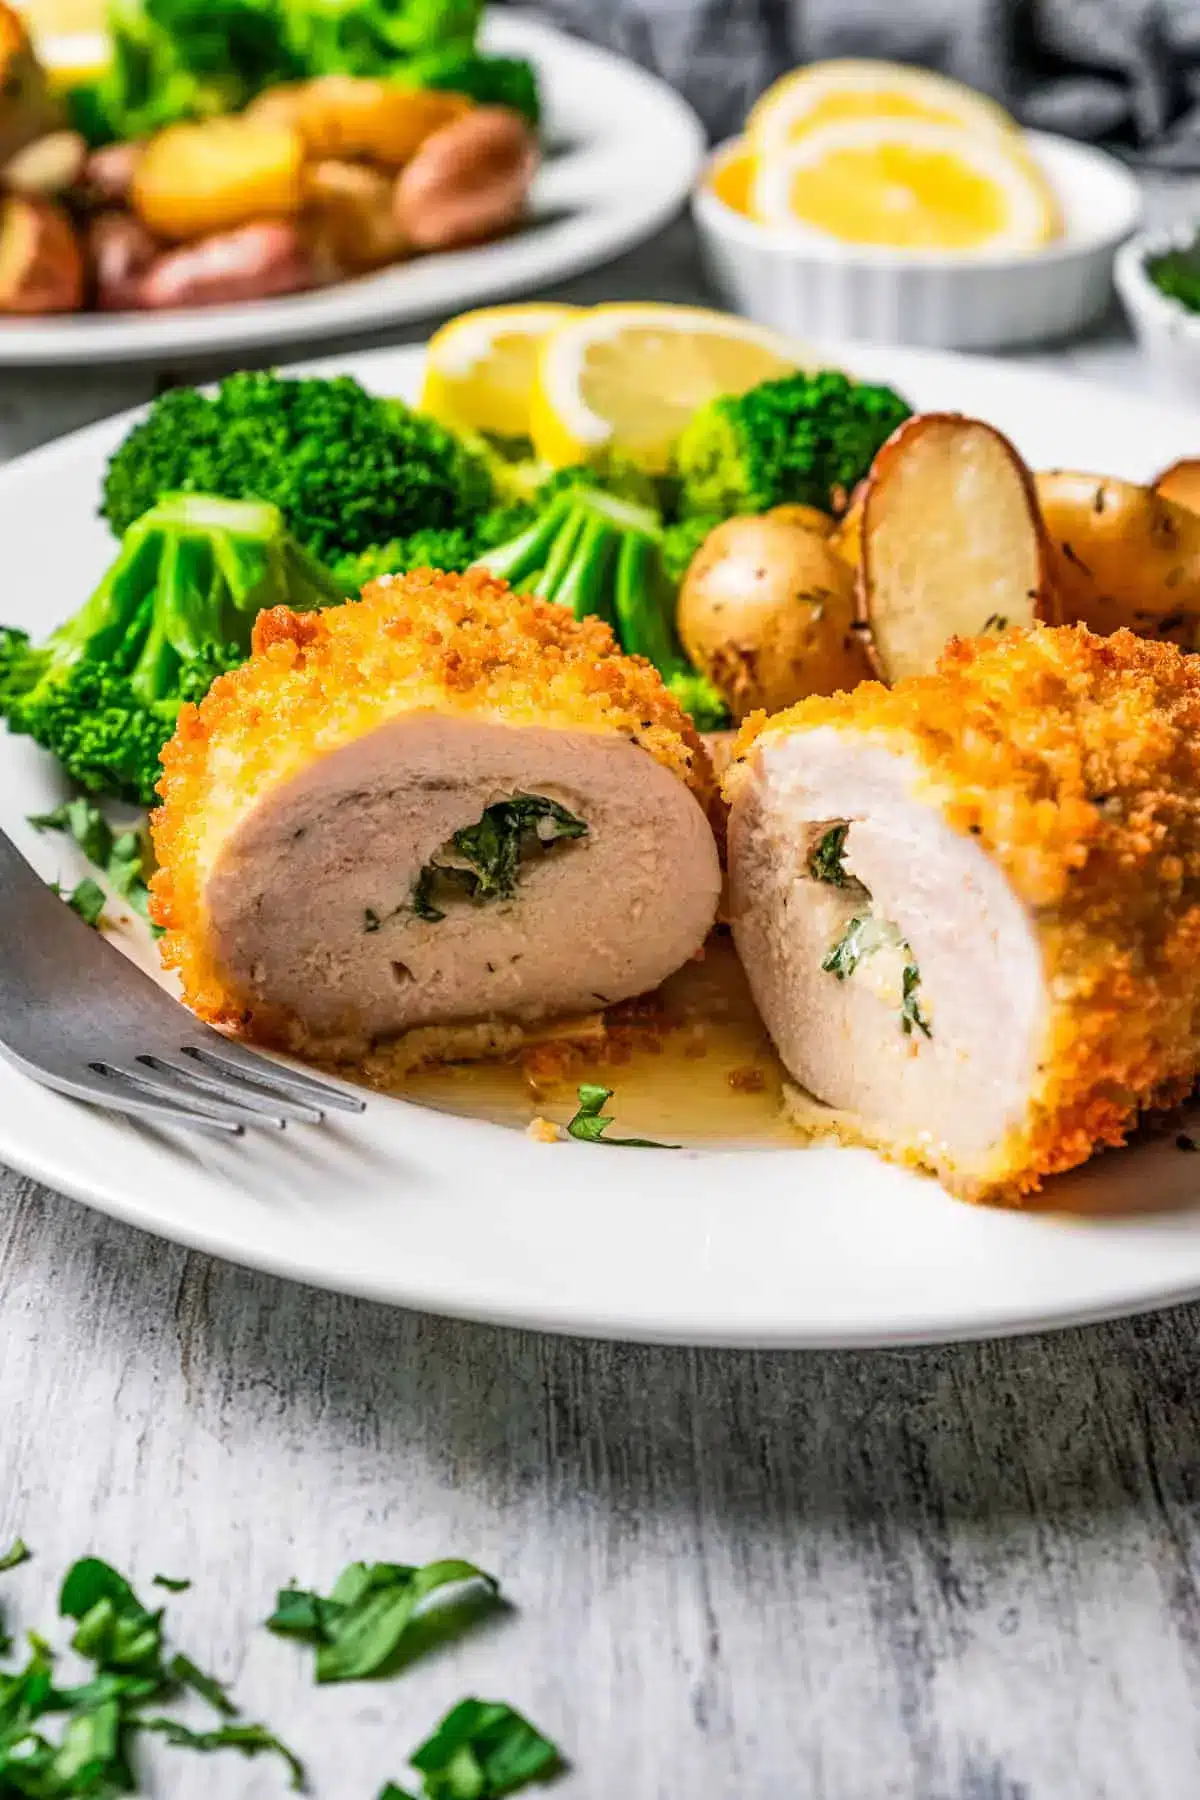
Chicken Kiev

Chicken Kiev is crispy crumbed chicken stuffed with lemony garlic and herb butter. It's crunchy outside, juicy inside, and so delicious!
- For the Butter: 6 tablespoons unsalted butter, softened
- 2 cloves garlic, minced
- 2 tablespoons chopped fresh parsley
- For the Chicken: 4 chicken breast fillets, about 6 ounces each
- 1 cup all purpose flour
- salt and freshly ground black pepper, to taste
- 2 large eggs, beaten
- 2 cups panko breadcrumbs
- 1Combine the butter ingredients: Add softened butter, garlic, and parsley in a bowl. Stir well until combined. If you are using lemon zest, now is the time to add it.
- 2Chill: Place the butter on a piece of plastic wrap. Roll it into a log shape and twist the ends of the plastic wrap. Refrigerate the butter until firm.
- 3Pound the chicken: Place chicken breasts between two pieces of plastic wrap (one at a time) and pound with a meat mallet to ¼-inch thickness. Season the chicken to taste with salt and pepper.
- 4Roll the chicken: Cut the butter into four equal pieces. Place one piece of butter in the center of the pounded chicken. Fold the sides of the chicken breasts over the butter and roll from the narrower side until you have a log shape. Repeat with the remaining butter and chicken breasts.
- 5Wrap the prepared chicken with plastic wrap and freeze for 30 minutes.
- 6In the meantime, prepare the breading station: Add flour in a shallow wide bowl, with a pinch of salt and pepper. Stir to combine. Whisk the eggs with a pinch of salt and pepper in a separate bowl and add the panko breadcrumbs into the third bowl.
- 7Coat the chicken: Carefully remove plastic wrap from the chicken. Coat the chicken with flour, then eggs, shaking off the excess eggs. Finally, coat the chicken with panko breadcrumbs.
- 8Fry the chicken: Heat oil in a deep fryer to 375°F. Meanwhile, preheat the oven to 350°F. Fry the chicken for 1-2 minutes per side or until golden.
- 9Bake the chicken: Place a wire rack on top of the baking sheet. Add the fried chicken breasts to the wire rack and bake for 15 to 20 minutes or until the inner temperature reaches 165°F.
- 10Allow the chicken to rest for 5 minutes before serving and cutting.
Keywords: Chicken Kiev, stuffed chicken, garlic butter, herb butter, crispy chicken, pan-fried chicken, baked chicken, Eastern European cuisine
- unsalted butter, softened: This forms the luscious heart of our Kiev, providing a creamy richness.
- garlic, minced: Pungent and aromatic, minced garlic adds a delightful depth of flavor to the butter.
- fresh parsley, chopped: Bright and herbaceous, parsley brings a refreshing counterpoint to the richness.
- lemon zest, optional: A touch of citrus zest awakens the palate and brightens the overall flavor profile.
- chicken breast fillets: Opt for boneless, skinless breasts for ease of preparation and a tender outcome.
- all purpose flour: This provides the initial light coating, crucial for the subsequent breading layers.
- salt and freshly ground black pepper: Essential seasonings to enhance and balance all the flavors.
- large eggs, beaten: The binder that helps the breadcrumbs adhere beautifully to the chicken.
- panko breadcrumbs: These Japanese-style breadcrumbs offer superior crispiness and a delightful crunch.
You’ll find the precise quantities for each ingredient within the comprehensive recipe card above, ensuring you have everything you need for a perfect Chicken Kiev.
Variations
For those with dietary preferences or a desire for culinary exploration, Chicken Kiev offers a fantastic canvas for creativity. Whether you’re seeking a plant-based alternative or aiming for a lighter, more nutrient-dense option, there are delightful avenues to explore without compromising on flavor.
Consider a Vegan Chicken Kiev by substituting the chicken with thick slices of king oyster mushrooms or firm tofu. The mushrooms, when scored and rolled, can mimic the texture surprisingly well, while tofu offers a more substantial bite. For the butter, a high-quality vegan butter, mixed with nutritional yeast, garlic, herbs, and lemon zest, can create a rich and savory filling. The breading process remains similar, using plant-based milk or aquafaba as the egg wash alternative.
A Low-Carb Chicken Kiev is another exciting possibility. Instead of traditional flour and breadcrumbs, you can create a gluten-free, low-carbohydrate coating. Almond flour or a blend of almond and coconut flour can be used for the initial dredge, and finely crushed pork rinds or a mix of almond flour and Parmesan cheese can create a wonderfully crisp crust. This variation maintains the decadent butter filling while aligning with lower carbohydrate dietary goals.
You could also experiment with different herb and spice combinations within the butter. Imagine a Spicy Herb Butter Kiev by adding a pinch of cayenne pepper or red pepper flakes to the traditional garlic and parsley mix. Another idea is an “Italian-Inspired” Kiev, incorporating finely chopped sun-dried tomatoes, basil, and a touch of Parmesan cheese into the compound butter for a Mediterranean twist. These variations prove that the classic Chicken Kiev can be adapted to suit a multitude of tastes and dietary needs.
How to Prepare chicken kiev recipe
Step 1: Crafting the Flavorful Compound Butter
The soul of Chicken Kiev lies in its aromatic compound butter, and this step is where the magic begins. In a medium bowl, combine the softened unsalted butter, finely minced garlic cloves, and freshly chopped parsley. If you’re opting for that subtle brightness, now is the perfect time to add the lemon zest; it adds a wonderful, zesty dimension that cuts through the richness beautifully.
Using a spatula or a sturdy spoon, thoroughly mix these ingredients together until they are uniformly incorporated. You want a cohesive blend where the garlic and parsley are evenly distributed throughout the butter, ensuring a consistent flavor in every bite of your finished Kiev. Some chefs even prefer using a mortar and pestle for this stage, which can help to release more of the garlic’s essential oils and finely mince the herbs, creating an even more intense flavor.
Once your butter mixture is perfectly blended, transfer it onto a piece of plastic wrap or parchment paper. Shape the mixture into a neat log, approximately 1 to 1.5 inches in diameter. Twist the ends of the plastic wrap tightly, much like you would seal a candy wrapper, to create a firm, cylindrical shape. This professional presentation will make it easier to slice the butter into even portions later on. Place this butter log into the refrigerator and allow it to chill until it is completely firm. This chilling process is crucial, as it prevents the butter from melting too quickly when it’s enclosed within the chicken, minimizing the risk of leakage during cooking.
Step 2: Preparing the Chicken for Stuffing
The foundation of a successful Chicken Kiev is tenderized chicken breasts, ready to embrace the flavorful butter filling. Take your chicken breast fillets, and if they are particularly thick, you might want to trim any excess fat or sinew. Place one chicken breast at a time between two pieces of plastic wrap or inside a heavy-duty zip-top bag. This protective layer prevents the chicken from tearing and keeps your kitchen tidy during the pounding process.
Using a meat mallet, the flat side of a tenderizing tool, or even a sturdy rolling pin, begin to gently but firmly pound the chicken. Start from the center and work your way outwards, aiming for an even thickness of about ¼ inch across the entire fillet. This process not only tenderizes the meat, making it more succulent, but also increases the surface area, making it easier to roll and enclose the butter filling. Be careful not to pound too vigorously, as you don’t want to create holes in the chicken.
Once each chicken breast has been pounded to the desired thinness, season both sides generously with salt and freshly ground black pepper. This seasoning is essential for enhancing the natural flavor of the chicken and providing a well-rounded taste profile. Ensure the seasoning is applied evenly, as it will become an integral part of the final dish. Set the seasoned, pounded chicken breasts aside while you prepare the other components.
Step 3: Filling and Rolling the Chicken
Now comes the exciting part: encasing the flavorful butter within the tender chicken breasts. Retrieve your chilled, firm compound butter from the refrigerator. Carefully unwrap the butter log and slice it into four equal portions. Each portion should be roughly the same length as the width of your pounded chicken breasts.
Take one of your seasoned, pounded chicken fillets and place one of the butter portions in the center of the fillet. Now, it’s time to strategically fold the chicken around the butter. Start by folding in the two narrower sides of the chicken breast over the butter, tucking them in snugly. Then, begin to roll the chicken tightly from the narrower end towards the wider end, ensuring that the butter is completely enclosed. You are essentially creating a sealed log shape, aiming to prevent any butter from escaping.
Repeat this process with the remaining butter portions and chicken breasts. You should end up with four perfectly formed chicken rolls, each containing a generous core of herby, garlicky butter. This meticulous rolling technique is vital for the success of your Chicken Kiev, as it ensures that the delicious butter remains inside during the cooking process, creating that signature juicy interior. Take your time and ensure each roll is as tightly sealed as possible.
Step 4: Freezing and Preparing the Breading Station
Before we move on to breading and cooking, an important intermediate step involves a brief stint in the freezer. This chilling phase is critical for firming up the rolled chicken and ensuring that the butter remains securely inside. Once you have completed rolling all four chicken breasts, wrap each one individually and tightly with plastic wrap. If you want extra security against leakage, you can place the individually wrapped rolls into a larger freezer-safe bag or container.
Place the wrapped chicken rolls into the freezer for approximately 30 minutes. This short freezing period will firm up the chicken and any residual butter just enough to make the breading process much smoother and more effective. It significantly reduces the chances of the butter leaking out during the frying and baking stages, resulting in a more satisfying and less messy final product. While the chicken is chilling, you can prepare your breading station, which is a classic three-step process.
Set up three shallow, wide bowls or plates. In the first bowl, place the all-purpose flour. Season the flour lightly with a pinch of salt and freshly ground black pepper, and stir to combine. In the second bowl, whisk the two large eggs with another pinch of salt and pepper until they are well beaten; this is your egg wash. In the third and final bowl, place the panko breadcrumbs, ensuring they are spread out evenly for easy coating. Having your breading station ready before the chicken comes out of the freezer ensures a seamless transition into the next stage of preparation.
Step 5: Breading the Chicken
With your chicken suitably chilled and your breading station meticulously prepared, it’s time to give your Chicken Kiev its signature crispy coating. Carefully remove the chicken rolls from the freezer and unwrap them from their plastic coating. Gently place one chicken roll into the bowl of seasoned flour and turn it to coat evenly on all sides. Tap off any excess flour, as too much can create a gummy texture.
Next, carefully transfer the floured chicken roll into the bowl of beaten eggs. Ensure it is fully submerged in the egg wash, allowing the liquid to coat all surfaces. Let any excess egg drip off for a moment before moving to the final breading stage. This sticky egg layer is what will help the breadcrumbs adhere firmly to the chicken.
Finally, place the egg-coated chicken roll into the bowl of panko breadcrumbs. Press the breadcrumbs gently onto the chicken, ensuring a thick and even coating on all sides. You want to create a robust crust that will become wonderfully golden and crunchy during cooking. Repeat this entire three-step breading process for all four chicken rolls, ensuring each one is thoroughly coated and ready for its next culinary adventure. This diligent breading ensures that delightful crunch we all love in Chicken Kiev.
Step 6: Frying and Baking to Golden Perfection
The final culinary transformation for your Chicken Kiev involves a combination of frying and baking, designed to achieve both a perfectly crispy exterior and a thoroughly cooked, juicy interior. Begin by heating a generous amount of oil in a deep fryer or a large, heavy-bottomed pot (like a Dutch oven) to 375°F (190°C). It’s important to maintain this temperature to ensure the chicken fries properly without becoming greasy.
While the oil is heating, preheat your oven to 350°F (175°C). Once the oil reaches the correct temperature, carefully add the breaded chicken rolls to the hot oil. Fry them for about 1 to 2 minutes per side, just until they achieve a beautiful golden-brown color. This initial frying step is not about cooking them through but rather about setting the breading and imparting that initial crispiness. Do not overcrowd the pot; fry in batches if necessary to maintain the oil temperature.
Using a slotted spoon or tongs, carefully remove the partially fried chicken from the oil and place them on a wire rack set over a baking sheet. This allows excess oil to drain off. Transfer the baking sheet with the chicken to the preheated oven. Bake for 15 to 20 minutes, or until an instant-read thermometer inserted into the thickest part of the chicken registers an internal temperature of 165°F (74°C). This ensures the chicken is safely cooked through while the butter inside remains delightfully molten. Finally, allow the chicken to rest for at least 5 minutes before serving to allow the juices to redistribute, resulting in an even more tender and flavorful experience.
Pro Tips for chicken kiev recipe
- Chill is Key: Don’t skimp on the chilling steps for both the butter and the rolled chicken. A firm butter prevents leakage, and chilled chicken breading adheres better.
- Pound with Purpose: Ensure your chicken is pounded to an even ¼-inch thickness. This not only tenderizes but also makes rolling easier and ensures even cooking.
- Seal the Deal: When rolling the chicken, fold the sides in first to create a pocket for the butter before rolling tightly. This double-fold technique significantly reduces the chance of butter escaping.
- Double Breading (Optional): For an extra-crispy crust, you can dip the chicken in the egg wash and breadcrumbs a second time after the initial coating.
- Use a Thermometer: An instant-read thermometer is your best friend for ensuring the chicken is cooked to the safe internal temperature of 165°F (74°C) without overcooking.
Serving Suggestions for chicken kiev recipe
Decoration
A sprinkle of fresh, finely chopped parsley over the top of the finished Chicken Kiev adds a vibrant splash of green and a hint of freshness. You can also add a small sprig of fresh dill or a thin slice of lemon to each plate for an elegant garnish.
Side Dishes
This rich dish pairs beautifully with lighter sides. Consider steamed asparagus, a crisp green salad with a vinaigrette, or a simple side of roasted root vegetables like carrots and parsnips. Creamy mashed potatoes or fluffy rice are also excellent choices for soaking up any delicious butter that might escape.
Creative Serving Ideas
For a truly special presentation, consider serving the Chicken Kiev on a bed of creamy polenta or a delicate cauliflower puree. A drizzle of a light lemon-butter sauce around the plate can also enhance the dish’s flavors and visual appeal. For an adventurous twist, serve it alongside a vibrant salsa verde for a delightful contrast.
Preparation & Storage
Storing Leftovers
To store any leftover Chicken Kiev, allow it to cool completely at room temperature before transferring it to an airtight container. Properly stored in the refrigerator, leftovers will maintain their quality for up to 3 days. While the breading might lose some of its initial crispiness upon refrigeration, the chicken inside will remain moist and flavorful.
Freezing
While Chicken Kiev is best enjoyed fresh, it can be frozen. It’s recommended to freeze the cooked and cooled chicken. Wrap each piece tightly in plastic wrap, then in aluminum foil, or place in a freezer-safe container. Frozen Chicken Kiev can be stored for up to 2 months. It is best to reheat from frozen to maintain the best texture.
Reheating
The best way to reheat Chicken Kiev is in the oven to help restore some of its crispiness. Place the cooled leftovers on a wire rack set over a baking sheet and bake in a preheated oven at 375°F (190°C) for about 15-20 minutes, or until heated through. For frozen chicken, reheat at 400°F (200°C) for a slightly longer period until fully heated.
Frequently Asked Questions
- How can I ensure the butter doesn’t leak out of the Chicken Kiev during cooking?
Preventing butter leakage is a common concern with Chicken Kiev, but several techniques can help. The most crucial step is to ensure the compound butter is thoroughly chilled and firm before stuffing it into the pounded chicken breast. After stuffing and rolling, freezing the assembled chicken rolls for at least 30 minutes before breading is highly effective. This firming period helps the chicken and butter to solidify, making it less likely to ooze out during the cooking process. Additionally, ensure the chicken is rolled tightly and that the seams are well-tucked. If you notice any small openings after rolling, you can gently press them shut. Some chefs even suggest double-coating the chicken with breadcrumbs for an extra barrier.
- What is the best way to pound the chicken breasts for Chicken Kiev?
Pounding chicken breasts thinly and evenly is essential for creating a tender texture and a good surface area for rolling. Start by placing the chicken breast between two sheets of plastic wrap or inside a sturdy plastic bag. This prevents the meat from tearing and keeps your workspace clean. Use the flat side of a meat mallet, a rolling pin, or even a heavy saucepan. Begin pounding from the center of the breast and work your way outwards, applying firm, even pressure. Aim for a consistent thickness of about ¼ inch throughout the entire fillet. Avoid pounding too aggressively, as this can create holes or shred the meat, compromising its ability to hold the filling.
- Can I make Chicken Kiev ahead of time, and if so, how should I store it?
Yes, Chicken Kiev can be prepared ahead of time, which can be a great way to save time on the day of serving. You can prepare the chicken rolls up to the breading stage and store them uncooked in the refrigerator for up to 24 hours, ensuring they are well-wrapped. Alternatively, you can freeze the breaded, uncooked chicken Kiev for up to 2-3 months; when ready to cook, bake it from frozen at a slightly higher temperature for an extended period. If you have cooked leftovers, they should be cooled completely and stored in an airtight container in the refrigerator for up to 3 days. Reheat them in the oven to regain some crispiness.