Chicken Kiev – Easy and Classic Stuffed Chicken Recipe!
Chicken Kiev stands as a testament to culinary elegance, a dish that marries a crispy, golden exterior with a succulent, flavor-infused interior. This classic is not just a meal; it’s an experience, featuring tender chicken breast encasing a luscious, herb-and-garlic compound butter that melts into the meat as it cooks.
Prepare to be enchanted by a dish that brings together the comforting crunch of fried chicken with the sophisticated burst of aromatic butter. It’s a dish that has captivated palates for generations, offering a delightful contrast in textures and a symphony of flavors that will leave you wanting more. Let’s embark on a journey to create this iconic and utterly delicious Chicken Kiev.
Why You Will Love This Recipe
- Exceptional Flavor Fusion: Experience the delightful interplay between the savory, pan-fried chicken and the zesty, garlicky, herb-infused butter that spills out with every bite, creating an unforgettable taste sensation.
- Satisfying Textural Contrast: Revel in the perfect combination of a super-crispy, golden-brown panko breadcrumb coating that gives way to incredibly moist and tender chicken, offering a truly gratifying eating experience.
- Impressive Presentation: This dish is as beautiful to look at as it is delicious to eat, making it a perfect centerpiece for any dinner party or special occasion, guaranteed to impress your guests.
- Customizable Comfort: While a classic, this recipe offers room for personalization, allowing you to adjust the herbs and spices in the butter to suit your personal preferences, making it uniquely yours.
- Rewarding Culinary Adventure: Mastering Chicken Kiev provides a significant sense of accomplishment, transforming a seemingly complex dish into an achievable and deeply satisfying home-cooked meal.
Ingredients You Need
The success of Chicken Kiev hinges on the quality of its simple yet impactful ingredients. Opting for fresh, high-quality components will elevate this dish from good to absolutely extraordinary, ensuring that each bite is packed with vibrant flavor and delightful texture.
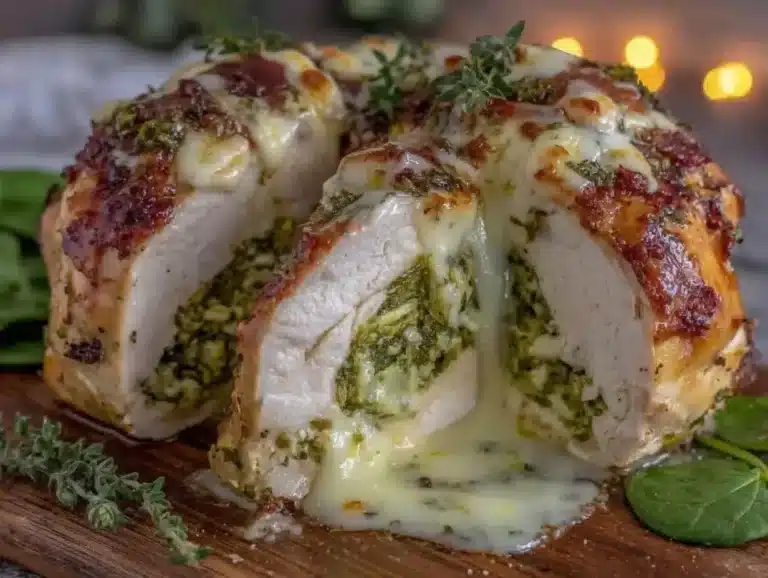
Chicken Kiev

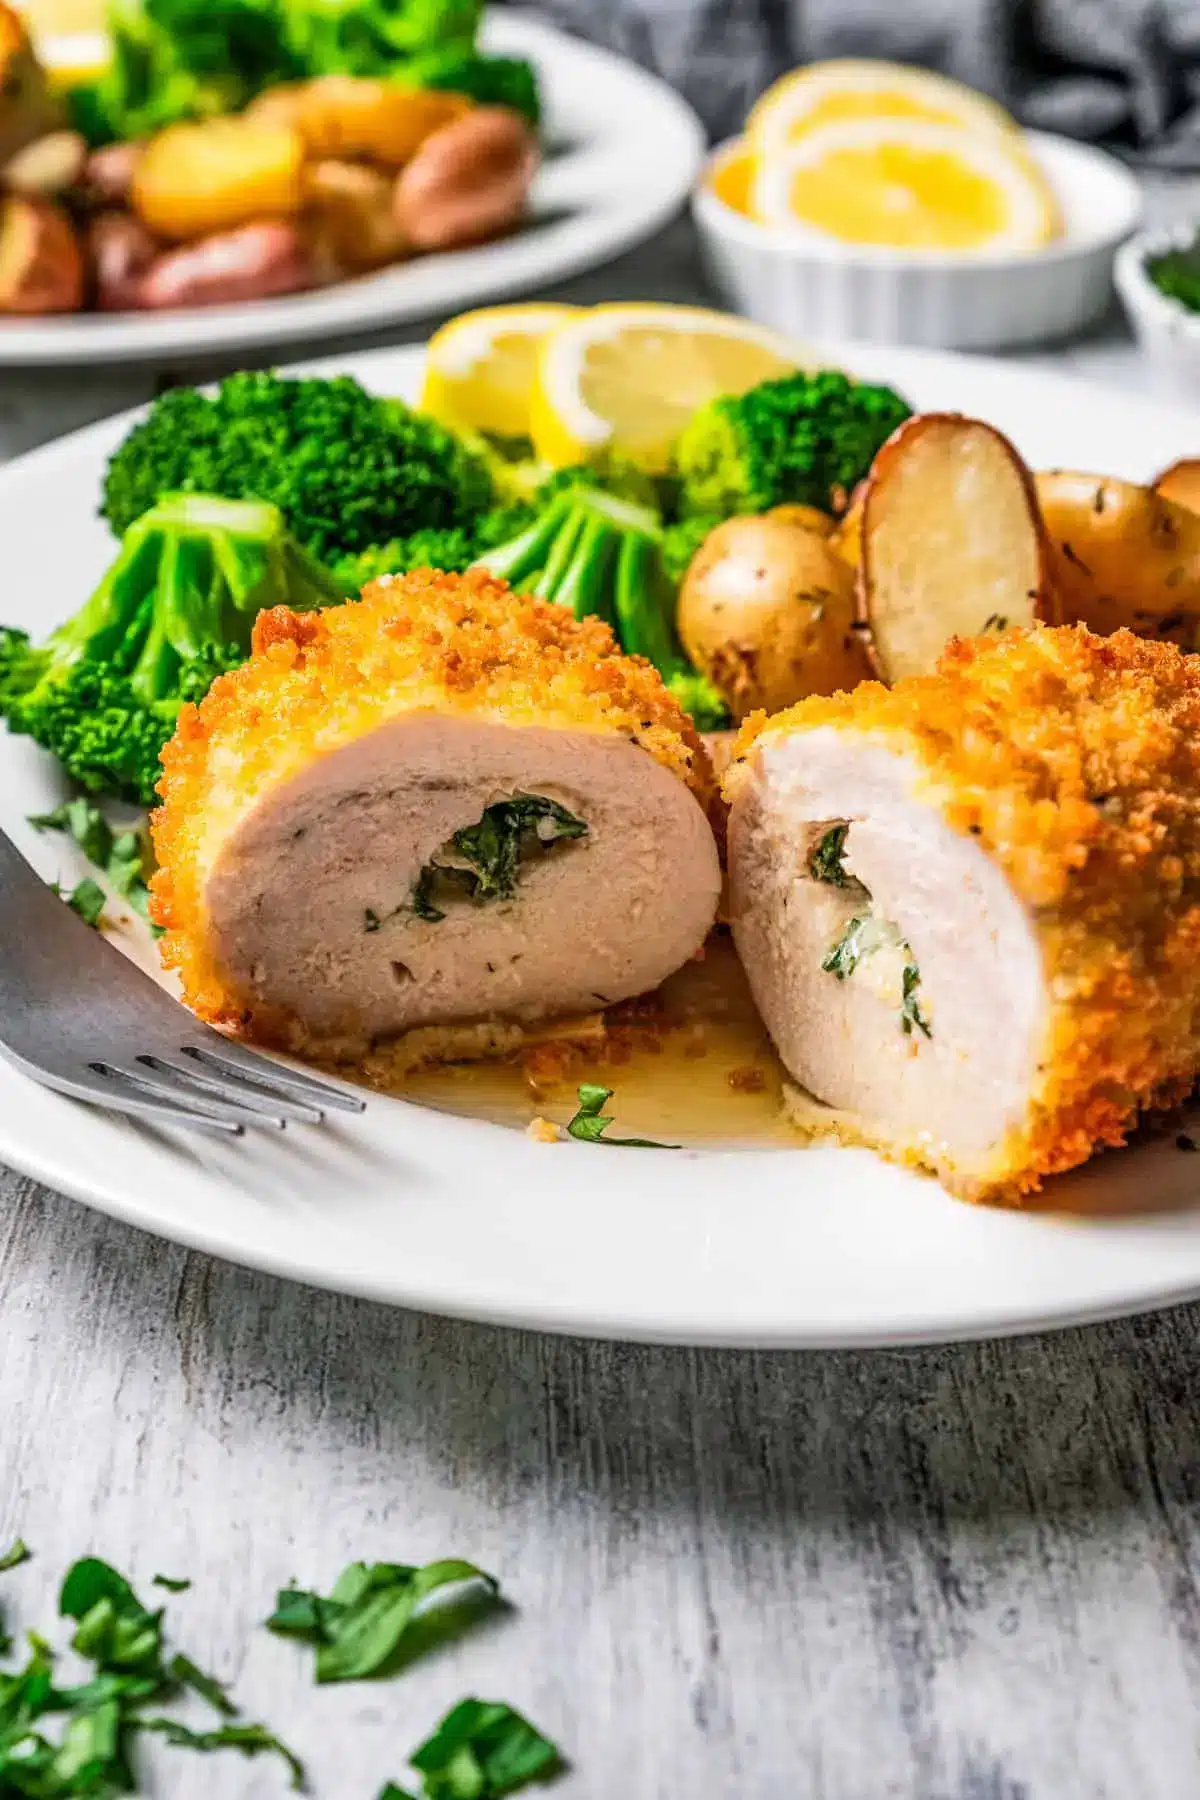
Chicken Kiev is crispy, golden-fried chicken stuffed with lemony garlic herb butter. It’s crunchy on the outside, juicy on the inside, and totally delicious!
- For the Butter: 6 tablespoons unsalted butter, softened
- 2 cloves garlic, minced
- 2 tablespoons chopped fresh parsley
- ¼ teaspoon lemon zest, optional
- For the Chicken: 4 chicken breast fillets, about 6 ounces each
- 1 cup all purpose flour
- salt and freshly ground black pepper, to taste
- 2 large eggs, beaten
- 2 cups panko breadcrumbs
- 1Combine the butter ingredients. Add softened butter, garlic, and parsley in a bowl. Stir well until combined. If you are using lemon zest, now is the time to add it.
- 2Chill. Place the butter on a piece of plastic wrap. Roll it into a log shape and twist the ends of the plastic wrap. Refrigerate the butter until firm.
- 3Pound the chicken. Place chicken breasts between two pieces of plastic wrap (one at a time) and pound with a meat mallet to ¼-inch thickness. Season the chicken to taste with salt and pepper.
- 4Roll the chicken. Cut the butter into four equal pieces. Place one piece of butter in the center of the pounded chicken. Fold the sides of the chicken breasts over the butter and roll from the narrower side until you have a log shape. Repeat with the remaining butter and chicken breasts.
- 5Wrap the prepared chicken with plastic wrap and freeze for 30 minutes.
- 6In the meantime, prepare the breading station. Add flour in a shallow wide bowl, with a pinch of salt and pepper. Stir to combine. Whisk the eggs with a pinch of salt and pepper in a separate bowl and add the panko breadcrumbs into the third bowl.
- 7Coat the chicken. Carefully remove plastic wrap from the chicken. Coat the chicken with flour, then eggs, shaking off the excess eggs. Finally, coat the chicken with panko breadcrumbs.
- 8Fry the chicken. Heat oil in a deep fryer to 375ºF. Meanwhile, preheat the oven to 350ºF. Fry the chicken for 1-2 minutes per side or until golden.
- 9Bake the chicken. Place a wire rack on top of the baking sheet. Add the fried chicken breasts to the wire rack and bake for 15 to 20 minutes or until the inner temperature reaches 165ºF.
- 10Allow the chicken to rest for 5 minutes before serving and cutting.
Keywords: Chicken Kiev, Stuffed Chicken, Garlic Butter, Herb Butter, Crispy Chicken, German Cuisine, Dinner
The precise quantities for each ingredient are detailed within the accompanying recipe card, guiding you to the perfect balance for this classic dish.
Variations
While the classic Chicken Kiev is undeniably delightful, the beauty of this dish lies in its adaptability. Exploring variations can introduce exciting new flavor profiles and cater to different dietary preferences, ensuring everyone can enjoy this culinary masterpiece.
Vegan Chicken Kiev: For a plant-based rendition, substitute chicken with thick slices of king oyster mushrooms or firm tofu. The mushrooms can be scored to help absorb marinades, while tofu should be pressed thoroughly. The compound butter can be recreated using vegan butter, nutritional yeast for a cheesy undertone, and a blend of finely minced garlic, fresh herbs like parsley and chives, and a touch of lemon zest. The breading process remains similar, utilizing plant-based milk or aquafaba for the egg wash and panko breadcrumbs. This vegan version offers a surprisingly rich and satisfying experience, proving that deliciousness knows no bounds.
Low-Carb Chicken Kiev: To make this dish suitable for a low-carbohydrate diet, the traditional flour and breadcrumb coating can be replaced. Almond flour or finely ground pork rinds can be used as a substitute for breadcrumbs, offering a crispy texture with significantly fewer carbohydrates. Ensure the compound butter remains carb-free by sticking to butter, garlic, herbs, and lemon zest. Baking or pan-frying these low-carb versions will yield a delightful and guilt-free take on the classic, perfect for those managing their carb intake while still craving comfort food.
Spicy Chicken Kiev: Introduce a kick of heat by incorporating finely chopped jalapeños or a pinch of cayenne pepper into the compound butter. For an even more pronounced fiery flavor, a dash of hot sauce can be added to the egg wash before breading. This variation transforms the mellow, herbaceous butter into an exhilarating blend of spice and zest, creating a thrilling contrast with the crispy chicken. Serve with a cooling side, such as a dollop of sour cream or a fresh, crisp salad, to balance the heat.
How to Prepare chicken kiev recipe
Step 1: Crafting the Aromatic Compound Butter
Begin by preparing the heart of the Chicken Kiev: the compound butter. Ensure your unsalted butter has softened to room temperature, making it pliable and easy to mix. In a medium bowl, combine the softened butter with freshly minced garlic and finely chopped fresh parsley.
If you desire a brighter, more zesty note, incorporate the optional lemon zest at this stage. Mix these ingredients thoroughly until they are well incorporated, creating a fragrant paste. A spatula is perfectly adequate for this task, though a mortar and pestle can also be used to thoroughly blend the components, releasing even more of the garlic and herb aromas.
The Key to Success: Once the butter mixture is homogenous, transfer it onto a piece of plastic wrap or parchment paper. Shape it into a log, approximately 1.5 to 2 inches in diameter, by rolling and twisting the ends of the wrap tightly. This log shape will make it easier to portion and stuff into the chicken later. Place this butter log in the refrigerator for at least 30 minutes, or until it is completely firm and solid.
Step 2: Tenderizing and Preparing the Chicken
Next, focus on the chicken breasts, which will form the outer casing for our luscious butter. Select four boneless, skinless chicken breast fillets, aiming for those that are roughly 6 ounces each for optimal results. It is crucial to pound these breasts to an even, thin thickness, typically around ¼ inch. This is best achieved by placing each chicken breast between two sheets of plastic wrap or inside a large zip-top bag.
Using a meat mallet or a rolling pin, gently but firmly pound the chicken from the center outwards. This process not only tenderizes the meat but also creates a larger surface area, making it easier to wrap around the butter filling. Be careful not to pound too aggressively, as you do not want to tear the chicken.
Seasoning is Essential: Once each chicken breast has been pounded to the desired thickness, season both sides generously with salt and freshly ground black pepper. This initial seasoning is vital for infusing the chicken itself with flavor, ensuring that every component of the dish is well-seasoned and delicious. Proper seasoning at this stage lays the groundwork for the overall taste profile of the final Chicken Kiev.
Step 3: Stuffing and Rolling the Chicken
Now comes the delicate but rewarding process of encasing the compound butter within the pounded chicken. Retrieve the chilled, firm butter log from the refrigerator. Carefully cut the butter log into four equal portions, ensuring each piece is roughly the same size. These portions are the flavorful cores of your Chicken Kiev.
Take one flattened and seasoned chicken breast fillet. Place one portion of the chilled compound butter in the center of the chicken. Begin to carefully fold the sides of the chicken breast inwards, over the butter. Once the sides are tucked in, start rolling the chicken from the narrower end, similar to how you would roll up a log or a burrito, to completely enclose the butter.
Securing the Filling: The goal is to create a compact, sealed parcel of chicken. Ensure there are no gaps or openings through which the butter might leak during cooking. Once rolled, wrap each stuffed chicken breast tightly in plastic wrap. This wrapping is crucial for maintaining the shape and preventing any butter leakage during the initial chilling phase. Place these wrapped chicken rolls into the freezer for approximately 30 minutes.
Step 4: Preparing for Breading and Initial Chilling
While the chicken rolls are firming up in the freezer, it’s the perfect time to set up your breading station. This systematic approach ensures a smooth and efficient coating process, leading to the perfect crispy exterior. You will need three shallow bowls or plates for this step.
In the first bowl, place the all-purpose flour. Season it lightly with a pinch of salt and freshly ground black pepper, and stir to combine. This seasoned flour will provide the initial base layer for the breading, helping the subsequent coatings adhere better. In the second bowl, whisk the two large eggs with a pinch of salt and pepper until they are well combined; this forms your egg wash.
The Crispy Element: In the third bowl, place the panko breadcrumbs. Panko breadcrumbs are highly recommended for their superior crunchiness and lightness, creating an exceptionally crispy coating. If panko is unavailable, regular breadcrumbs can be used, but the texture will be slightly different. Ensure your breading station is fully prepared and within easy reach before you remove the chicken from the freezer.
Step 5: The Breading Process
Once the chicken rolls have firmed up in the freezer for about 30 minutes, they are ready for their flavorful coating. Carefully remove the plastic wrap from each chicken roll. Handle them gently to maintain their shape and ensure the butter remains enclosed.
Begin the breading process by first dredging each chicken roll in the seasoned flour. Ensure it is evenly coated on all sides, shaking off any excess flour. This flour layer acts as a primer, helping the egg wash to stick more effectively. After the flour coat, dip the chicken into the beaten egg wash, making sure it is fully submerged and coated.
Achieving the Golden Crust: Allow any excess egg wash to drip off before transferring the chicken to the bowl of panko breadcrumbs. Press the breadcrumbs gently onto the chicken to ensure they adhere well, creating a thick and even coating all around. Repeat this flour-egg-breadcrumb process if you desire an extra-thick, super-crispy crust, though a single coating is typically sufficient for excellent results. Place the breaded chicken Kiev onto a plate or tray while you proceed to the next cooking steps.
Step 6: Frying and Baking to Perfection
The final stage involves cooking the breaded chicken Kiev to achieve that coveted golden-brown crispiness and ensure it’s cooked through. Heat a sufficient amount of neutral oil in a deep fryer or a large, heavy-bottomed pot (like a Dutch oven) to 375°F (190°C). The oil should be deep enough to partially submerge the chicken for even frying.
Carefully place the breaded chicken Kiev into the hot oil, frying for 1-2 minutes per side, or just until the exterior is golden and crispy. This brief frying step is primarily to set the breading and enhance the crispiness; the chicken will finish cooking in the oven. Do not overcrowd the pot; fry in batches if necessary to maintain the oil temperature.
The Finishing Touch: While the chicken fries, preheat your oven to 350°F (175°C). Once fried, transfer the golden chicken Kiev to a wire rack set over a baking sheet. This rack allows air to circulate, ensuring the bottom of the chicken doesn’t become soggy. Bake for 15 to 20 minutes, or until an instant-read thermometer inserted into the thickest part of the chicken registers an internal temperature of 165°F (74°C). This ensures the chicken is fully cooked and the butter inside is melted and hot.
Pro Tips for chicken kiev recipe
Chill is Key: Always ensure your compound butter is thoroughly chilled and firm before stuffing it into the chicken. This prevents it from melting too early and leaking out during the rolling and breading process. A well-chilled butter core is essential for a successful Chicken Kiev.
Don’t Skip the Freeze: Freezing the rolled and breaded chicken for at least 30 minutes before frying is a critical step. This firms up the chicken and the butter inside, making the breading adhere better and further minimizing the risk of butter leakage during cooking. It ensures a more uniform cooking process.
Use a Thermometer: Relying on an instant-read thermometer is the most accurate way to determine if your chicken Kiev is cooked through. Aim for an internal temperature of 165°F (74°C) in the thickest part of the chicken. This guarantees food safety and prevents over or undercooking.
Rest is Best: Just like with a prime steak, allowing your cooked Chicken Kiev to rest for about 5-10 minutes before cutting into it is highly recommended. This resting period allows the juices within the chicken to redistribute, resulting in a more tender and moist final product. It ensures the succulent flavors are locked in.
Manage the Oil Temperature: Maintaining the correct oil temperature during the frying stage is crucial for achieving that perfect golden crust without burning the breadcrumbs. If the oil is too cool, the chicken will absorb too much grease; if it’s too hot, the outside will brown too quickly before the inside is cooked. Use a thermometer to monitor and adjust as needed.
Serving Suggestions for chicken kiev recipe
Decoration
Elevate the visual appeal of your Chicken Kiev with simple yet elegant garnishes. A sprig of fresh parsley or chives placed artfully on top of each piece adds a pop of color and freshness, hinting at the flavors within. A light dusting of paprika can also provide a warm, inviting hue.
For a more refined touch, a drizzle of a light sauce, such as a lemon-herb aioli or a simple pan sauce made from deglazing the frying pan, can enhance both the look and taste. A scattering of toasted sesame seeds on the plate can add a subtle textural contrast and visual interest.
Side Dishes
Chicken Kiev pairs wonderfully with a variety of classic sides that complement its rich flavor. Creamy mashed potatoes are a perfect companion, soaking up any errant herb butter. Roasted vegetables, such as asparagus, broccoli, or Brussels sprouts, offer a healthy contrast to the richness of the dish.
Crispy potato wedges or a classic potato salad also make excellent choices, providing a starchy balance. For a lighter option, consider a vibrant green salad with a zesty vinaigrette, or a simple side of steamed green beans or peas, which echo the fresh herb notes in the butter.
Creative Serving Ideas
Move beyond the traditional by serving Chicken Kiev in slightly unexpected ways. Consider deconstructing the dish by serving the crispy chicken breast alongside a dollop of the melted herb butter in a small ramekin for dipping. This allows diners to control the amount of butter they enjoy with each bite.
Another creative idea is to serve mini Chicken Kiev portions as elegant appetizers at a cocktail party. These smaller versions are easier to handle and make for a sophisticated start to any gathering. You could also present the Chicken Kiev over a bed of fluffy rice pilaf or creamy polenta, adding another layer of flavor and texture to the meal.
Preparation & Storage
Storing Leftovers
To store leftover Chicken Kiev, allow the cooked portions to cool completely at room temperature. Once cooled, place them in an airtight container or wrap them tightly in plastic wrap or aluminum foil. Stored properly in the refrigerator, leftovers can be kept for up to 3 days.
Maintaining Texture: While the breading may lose some of its initial crispness upon refrigeration, the chicken will remain moist and flavorful. It’s best to store the chicken whole to prevent the filling from drying out. Ensure the container is sealed to prevent the absorption of other odors from the refrigerator.
Freezing
Chicken Kiev can also be frozen for longer storage, either before or after cooking. For uncooked, breaded chicken Kiev, freeze the individual portions on a baking sheet until solid, then transfer them to a freezer-safe bag or container. They can be stored in the freezer for up to 1-2 months. Cooked Chicken Kiev can be frozen similarly and will last for 1-2 months.
Best Practices for Freezing: When freezing uncooked chicken Kiev, ensure it is well-wrapped to prevent freezer burn. For cooked chicken, allow it to cool completely before freezing. Freezing individual portions makes it convenient to reheat only what you need.
Reheating
The best way to reheat Chicken Kiev and recapture some of its original crispiness is in the oven. Preheat your oven to 400°F (200°C). Place the leftover chicken Kiev on a wire rack set over a baking sheet, allowing for air circulation. Reheat for about 10-15 minutes, or until heated through and the exterior is re-crisped.
Alternative Reheating Methods: An air fryer can also be an excellent tool for reheating, providing a similar crispy result. Place the chicken in the air fryer basket and heat at around 375°F (190°C) for 5-8 minutes, checking for doneness. Microwaving is generally not recommended as it can make the chicken mushy and the breading soggy, though it is the fastest method if crispiness is not a priority.
Frequently Asked Questions
-
How do I ensure the butter doesn’t leak out during cooking?
Preventing butter leakage is a common concern with Chicken Kiev, but several techniques can significantly minimize this risk. First, ensure the compound butter is thoroughly chilled and firm before stuffing it into the chicken. Second, pound the chicken breast to an even, thin consistency, creating a good surface area for wrapping. When rolling, fold the sides of the chicken inwards before rolling from the narrow end to create a secure pocket. Finally, the crucial step of freezing the rolled and breaded chicken for at least 30 minutes before frying helps to firm everything up, making the butter and chicken less likely to separate during the cooking process. If a slight leak does occur, it’s often manageable, and the delicious melted butter will still enhance the dish.
-
Can I prepare the Chicken Kiev in advance and cook it later?
Yes, Chicken Kiev is an excellent candidate for make-ahead preparation. You can prepare the chicken rolls, stuff them with the compound butter, and bread them completely. Once breaded, arrange the uncooked chicken Kiev on a baking sheet and freeze until firm, then transfer them to a freezer-safe container or bag. When you’re ready to cook, you can either bake them directly from frozen (adding a few extra minutes to the cooking time) or allow them to thaw slightly in the refrigerator for a shorter cooking period. Ensure the internal temperature reaches 165°F (74°C) regardless of whether you cook from frozen or thawed.
-
What is the best way to achieve a perfectly crispy crust without overcooking the chicken?
Achieving the perfect balance between a crispy crust and a succulent, fully cooked interior is key to excellent Chicken Kiev. The method outlined, which involves a brief fry followed by baking, is highly effective. The initial fry at 375°F (190°C) for 1-2 minutes per side quickly crisps the breading and sets it. The subsequent baking at 350°F (175°C) for 15-20 minutes allows the chicken to cook through gently without burning the crust. Using a wire rack during baking is also vital, as it promotes air circulation around the chicken, preventing the bottom from becoming soggy and ensuring even crisping. Always rely on an instant-read thermometer to confirm the chicken has reached an internal temperature of 165°F (74°C).