Challah French Toast Recipe – Fluffy & Flavorful!
Imagine waking up on a lazy weekend morning, the aroma of something truly delightful wafting from the kitchen. This is the promise of a perfect breakfast, a moment of pure culinary bliss that sets the tone for the entire day. We’re diving into a recipe that transforms humble bread into an extraordinary treat, a dish that’s both comforting and elegantly simple.
This particular creation elevates the classic French toast to new heights, utilizing a bread that’s naturally suited for its eggy embrace. Get ready to experience a breakfast that’s a step above the ordinary, a guaranteed crowd-pleaser that will have everyone asking for seconds.
Why You Will Love This Recipe
- Exceptional Texture: The use of day-old challah bread ensures an ideal balance between a crisp exterior and a soft, custardy interior that is never soggy.
- Rich & Creamy Custard: A harmonious blend of eggs, half-and-half, honey, and warm spices creates a luxuriously smooth soaking liquid that infuses every bite.
- Aromatic Flavors: Notes of real vanilla and freshly grated nutmeg, complemented by a hint of cinnamon, contribute a depth of flavor that is truly irresistible.
- Effortless Preparation: Despite its gourmet taste and texture, this French toast is surprisingly easy to make, making it perfect for busy mornings or relaxed brunches.
- Versatile Serving Options: Whether dressed up with elaborate toppings or kept simple, this challah French toast is a delightful canvas for your favorite accompaniments.
Ingredients You Need
The secret to truly outstanding challah French toast lies in the quality of your ingredients and the magic of a slightly stale loaf. By selecting fresh, high-quality components, you lay the foundation for a dish that sings with flavor and boasts an unparalleled texture. Even the simplest ingredients, when brought together with care, can create something truly spectacular for your breakfast table.
Challah French Toast

Make thick, fluffy challah bread French toast soaked in an eggy custard with cinnamon, vanilla, and grated nutmeg. Using challah is an easy way to level up homemade French toast!
- 1 loaf of challah bread, stale
- 6 large eggs
- 2 cups half and half (milk or heavy cream are also okay to use)
- ¼ cup honey (poured into a microwave-safe bowl and heated in the microwave for 30 seconds)
- ½ teaspoon kosher salt
- 2 teaspoons pure vanilla extract
- pinch of grated nutmeg
- pinch of ground cinnamon
- 3-4 tablespoons unsalted butter, for cooking
- French toast toppings of choice (such a maple syrup, whipped cream, fresh fruit, or confectioners' sugar)
- 1Slice the bread and leave out overnight. If your challah is fresh, cut it into thick slices and lay them out on a cooling rack to dry overnight.
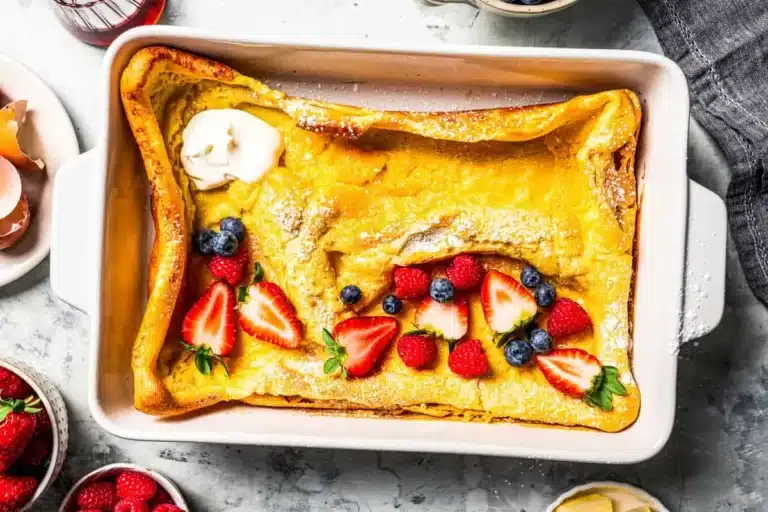
- 2Make the French Toast Prep your tools. Position a drying rack over a cookie sheet lined with parchment paper. Preheat your oven to 190ºF and place a separate oven-safe drying rack over a cookie sheet lined with parchment paper in the oven. (So you will need two sets of drying racks set over lined baking sheets.)
- 3Make the custard. In a medium bowl, whisk the eggs, half & half, warm honey, salt, vanilla, nutmeg, and cinnamon until thoroughly combined, then pour into a 9×9 baking dish.
- 4Add the bread. Soak the dried bread slices in the custard, 2 slices at a time, for about 2 minutes per side. Then set the soaked bread on the wire rack (the one outside the oven) so any extra custard can drip off before cooking. Sprinkle each slice with a pinch or two of cinnamon to taste.
- 5Cook. After soaking for about 3 to 4 minutes, cook the soaked bread on a greased griddle or pan, buttered with 1 tablespoon of butter, over medium heat. Don’t overcrowd the pan/griddle (I cook two slices at a time). Cook the bread slices on each side for about 2 minutes. Check for doneness judging by color. Each side should be golden brown. Make sure the slices cook through and evenly (rotate them around if your pan or griddle has hot spots). Add 1/2 tablespoon of butter to the griddle after each batch of French toast has cooked, and let it foam and subside before adding the next batch.
- 6Keep warm in the oven. This is optional, but a great way to serve your toast warm. Once they are cooked, place them on the rack that's inside the oven, batch by batch, to keep warm.
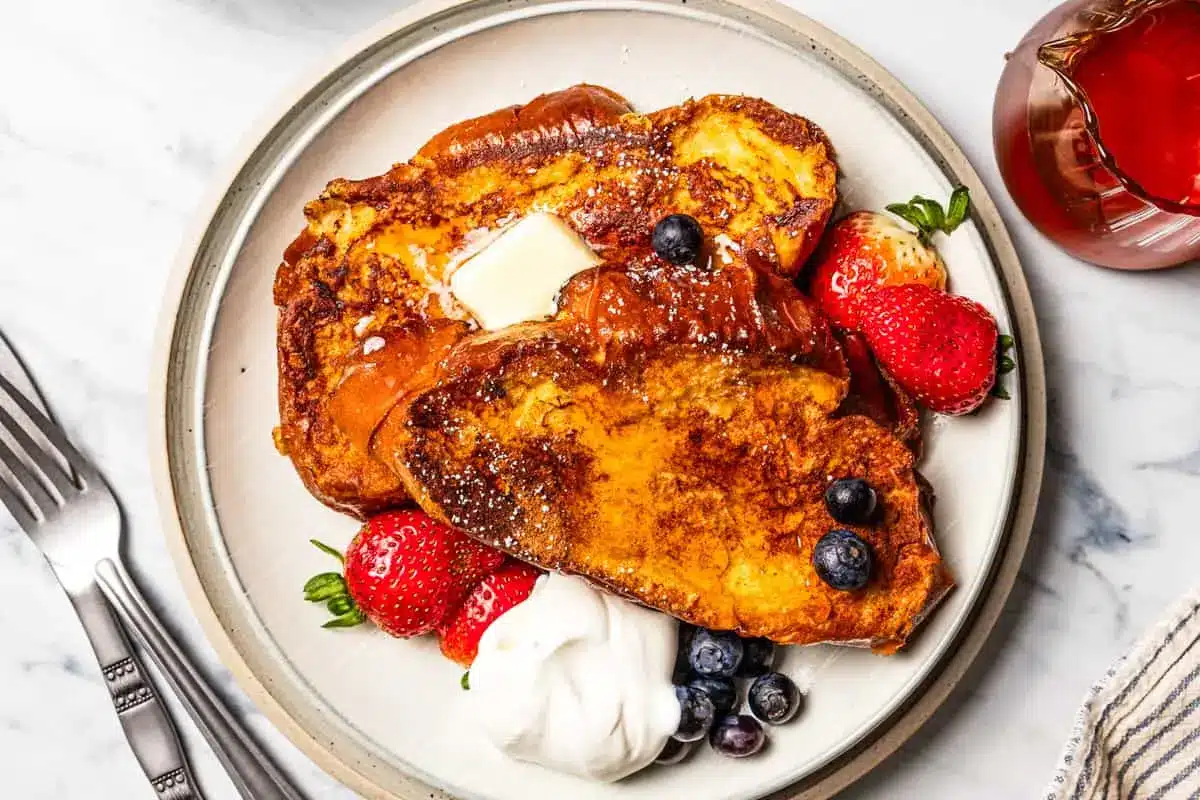
- 7Serve. I like to serve French toast with homemade whipped cream, maple syrup, and blueberries.
Keywords: challah, french toast, breakfast, brunch, sweet bread, custard, cinnamon, nutmeg, vanilla
The precise quantities for each ingredient can be found within the detailed recipe card, ensuring you have everything you need for perfect results every time.
Variations
While this challah French toast recipe is a classic for a reason, it’s also a wonderful base for creative exploration. Don’t be afraid to experiment with different flavor profiles to suit your personal preferences or the occasion.
For a delightful vegan twist, you can forgo the eggs and dairy entirely. A common approach involves creating a custard base with plant-based milk, such as almond or soy, thickened with cornstarch or silken tofu. Flax eggs or a commercial egg replacer can also work wonders in binding the mixture. Infuse this vegan custard with your favorite spices, like cardamom or ginger, and consider adding a touch of turmeric for a golden hue. The key remains using slightly dried-out bread, though vegan challah loaves are increasingly available, or you can adapt a vegan brioche recipe. Serve with a drizzle of agave nectar and fresh berries for a vibrant, ethical treat.
If you’re watching your carbohydrate intake, a low-carb adaptation can be surprisingly satisfying. While traditional challah is high in carbs, you can substitute it with a low-carb bread made from almond flour or coconut flour. These breads can be a bit denser, so ensure they are well-dried. The custard can be made using heavy cream or a blend of cream and unsweetened almond milk, sweetened with a low-carb sweetener like erythritol or stevia. A touch of vanilla and cinnamon will still provide that comforting flavor profile. This variation, when served with a side of sugar-free whipped cream and a handful of raspberries, offers a guilt-free indulgence.
Consider infusing the custard with global flavors for an adventurous twist. Perhaps add a touch of matcha powder for an earthy, vibrant green hue and a subtly bitter note, or introduce the warming essence of chai spices like cinnamon, cardamom, and cloves. A drizzle of a passionfruit syrup or a sprinkle of toasted coconut flakes can transport your taste buds to tropical shores. These subtle additions can transform the familiar into something exotic and exciting, perfect for a special brunch or a themed breakfast gathering.
How to Prepare challah french toast recipe
Step 1: Prepare Your Bread and Custard Station
The foundation of exceptional French toast begins with the bread. For this recipe, it is absolutely crucial to use challah bread that is at least a day old. Fresh challah is far too soft and will become overly saturated, leading to a mushy, unappealing texture. To achieve the perfect dryness, slice your challah loaf into thick, approximately 1-inch slices. Lay these slices out in a single layer on a wire cooling rack, which allows for even air circulation around each piece.
Ideally, allow the bread to air dry overnight at room temperature. This gradual drying process is key to creating those delightful crisp edges and a tender, absorbent crumb. If time is a constraint and you’ve forgotten to dry the bread in advance, you can expedite this process by placing the sliced challah on a baking sheet and drying it in a preheated oven at 300°F (150°C) for about 10 to 15 minutes. Be sure to flip the slices halfway through this warming period. The goal is to achieve a texture that feels dry to the touch, not toasted or browned, but simply devoid of its initial moisture.
Simultaneously, prepare your custard mixture, which is the heart of the French toast. In a medium-sized mixing bowl, gently whisk together the eggs until they are well-beaten and beginning to look frothy. This initial whisking helps to incorporate air, contributing to a lighter final product. Avoid over-whipping at this stage, as excessive aeration can sometimes lead to a slightly rubbery texture in the cooked French toast. The aim is simply to break down the egg whites and yolks and combine them into a uniform liquid. Ensure your bowl is large enough to comfortably accommodate all the custard ingredients without spillage.
Step 2: Craft the Perfect Custard
Once the eggs are whisked, it’s time to introduce the remaining liquid ingredients and flavorings that will transform them into a rich, delectable custard. Pour in the half-and-half, which provides a luxurious creaminess. If half-and-half is unavailable or you prefer a lighter version, whole milk or even a blend of milk and cream can be used with satisfactory results. For those seeking an even richer experience, heavy cream can be incorporated, though this will increase the fat content of the dish.
Next, add the honey. It’s recommended to gently warm the honey in a microwave-safe bowl for about 30 seconds. This makes it more fluid and easier to incorporate smoothly into the custard. You can substitute maple syrup or agave nectar for the honey if that’s what you have on hand, though each will impart a slightly different flavor profile. A pinch of kosher salt is also added to balance the sweetness and enhance the overall flavors. This might seem counterintuitive in a sweet dish, but salt plays a vital role in bringing out the nuances of the other ingredients.
Introduce the pure vanilla extract, which lends a warm, aromatic sweetness that is quintessential to French toast. Using good quality vanilla extract will significantly impact the final taste. Finally, add the spices: a pinch of freshly grated nutmeg and a pinch of ground cinnamon. Freshly grated nutmeg offers a more vibrant and complex flavor than pre-ground varieties, so if possible, opt for whole nutmeg. Whisk all these ingredients together thoroughly until the mixture is completely smooth and uniform in color. Ensure there are no streaks of egg white remaining. This careful blending ensures that every slice of bread will absorb the same exquisite flavor profile.
Step 3: The Art of Soaking the Bread
With your perfectly dried challah slices and the lusciously infused custard ready, the next critical step is the soaking process. This is where the bread absorbs the flavorful custard, becoming tender and ready to transform into golden French toast. It’s important to work in batches to avoid overcrowding the custard dish, which can lead to uneven soaking and potential breakage of the bread slices. Carefully place two slices of the dried challah into the custard mixture at a time.
Allow each side of the bread to soak for approximately 2 minutes. The exact timing can vary slightly depending on how dry your bread is; you want it to absorb a good amount of the custard without becoming saturated to the point of falling apart. Gently press down on the bread with a spatula or fork to ensure it is fully submerged and absorbing the liquid evenly. As you turn the slices, observe how they plump up and become heavier, indicating they are soaking up the delicious custard. Avoid the temptation to soak them for too long, as this is a common pitfall that can lead to soggy French toast.
Once the soaking time is complete for a batch, carefully remove the bread slices from the custard. It is highly beneficial to place the soaked slices onto a wire cooling rack set over a baking sheet. This allows any excess custard to drip away, preventing a watery exterior and ensuring a crispier finish during cooking. This draining period, even just a minute or two, makes a noticeable difference in the final texture of your French toast. While these slices are draining, you can proceed with soaking the next batch of bread, maintaining a steady rhythm for your preparation.
Step 4: Achieve Golden-Brown Perfection on the Griddle
Now, it’s time to bring your challah French toast to life through the magic of cooking. Heat a large skillet or a griddle over medium heat. A well-seasoned cast-iron skillet or a non-stick griddle works best for achieving an even golden-brown crust. Add about 1 tablespoon of unsalted butter to the heated pan. Allow the butter to melt and foam, but be careful not to let it burn. The butter not only prevents sticking but also contributes a wonderful flavor and helps to create that beautiful golden hue.
Carefully place the soaked and drained challah slices onto the hot, buttered skillet. It is advisable to cook only two slices at a time, or as many as your pan can comfortably accommodate without them touching. Overcrowding the pan will lower the temperature of the skillet, resulting in steamed, rather than fried, French toast. Cook each side for approximately 2 to 3 minutes, or until a rich, golden-brown color develops. The exact cooking time will depend on the heat of your pan and the thickness of your bread slices.
Keep a close eye on the toast as it cooks, as French toast can go from perfectly golden to burnt very quickly. Resist the urge to move the slices around too much during the initial cooking phase; allowing them to sit undisturbed helps in developing a good crust. Once one side is beautifully browned, carefully flip the slices using a spatula and cook the other side until it achieves the same level of golden perfection. You’ll want to ensure that the inside is cooked through and no longer eggy. If your pan seems to be drying out, add another half tablespoon of butter for each subsequent batch, allowing it to foam and subside before adding more bread.
Step 5: Maintain Warmth and Presentation
As each batch of your delectable challah French toast is cooked to golden perfection, the question arises of how to keep it warm while you finish the remaining slices. This is where your pre-prepared second oven rack setup comes into play. Once you remove a batch of cooked French toast from the skillet, immediately transfer these golden slices to the second wire rack, which should be positioned over a parchment-lined baking sheet inside a slightly warmed oven, ideally set to around 190°F (88°C). This gentle warming environment prevents the French toast from becoming soggy as it waits for its turn to be served.
This step is entirely optional but highly recommended, especially if you are cooking for a larger group. It ensures that everyone can enjoy their French toast hot and at its best. The low oven temperature is crucial; it’s warm enough to keep the toast from cooling down significantly but not so hot that it continues to cook or dries out the bread further. If you do not have an oven-safe rack, a regular baking sheet lined with parchment paper can also serve this purpose, though the air circulation might be slightly less efficient. The key is to keep the cooked French toast elevated and gently warmed.
As you complete the final batch of cooking, you’ll have a beautiful stack of warm, perfectly cooked challah French toast ready for plating. The aroma filling your kitchen at this point is truly intoxicating, a testament to the simple yet profound pleasure of a well-made breakfast. The contrast between the slightly crisp exterior and the soft, custard-infused interior is what makes this dish so irresistible. Each slice is a delightful bite of sweetness and warmth, a perfect start to any day.
Step 6: Serve and Savor
The culmination of your efforts is now at hand: serving your magnificent challah French toast. While the plain, perfectly cooked slices are delicious on their own, they are truly a canvas for creativity and personal preference. Consider a generous dusting of confectioners’ sugar for a classic and elegant finish. This adds a touch of sweetness and a beautiful visual appeal, evoking a sense of indulgence.
A staple accompaniment for most French toast is a warm drizzle of pure maple syrup. The amber liquid cascades over the toast, its sweetness complementing the spices and eggy custard beautifully. For an added layer of richness, a dollop of freshly whipped cream is always a welcome addition. Its lightness and subtle sweetness provide a delightful contrast to the denser French toast. If you’ve made homemade whipped cream, even better – the fresh flavor is unparalleled.
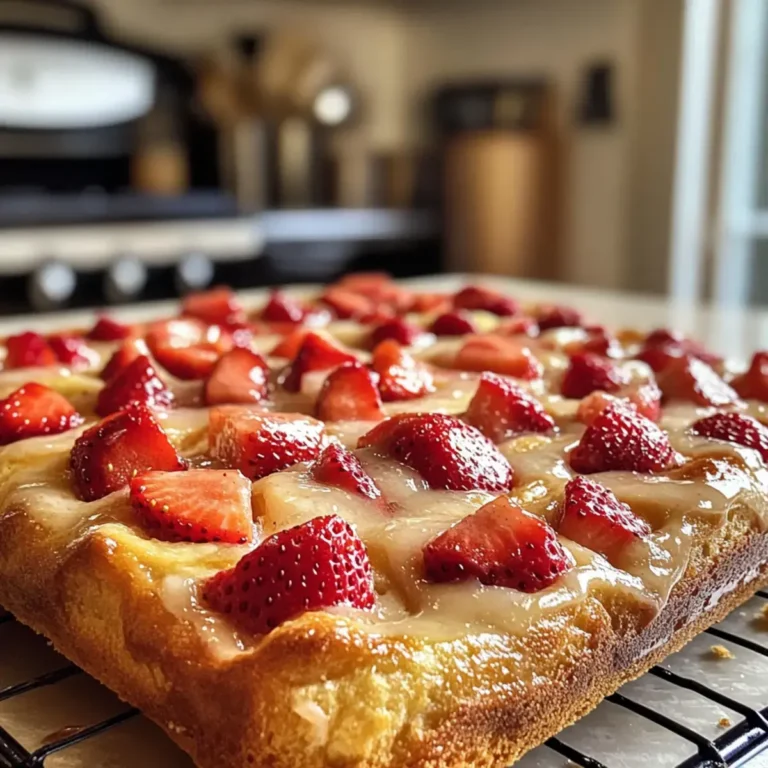
Don’t shy away from incorporating fresh fruit. Berries such as raspberries, blueberries, and strawberries add a burst of freshness, vibrant color, and a touch of tartness that cuts through the sweetness. Sliced bananas are another popular choice, offering a creamy texture and natural sweetness. For a more decadent experience, consider adding a spoonful of your favorite fruit preserves, like strawberry jam or a spiced plum compote. Nuts, such as chopped pecans or walnuts, can provide a pleasant crunch and nutty flavor. Finally, a drizzle of caramel sauce or a smear of peanut butter can transform this breakfast into an outright dessert-like experience.
Pro Tips for challah french toast recipe
Day-Old is Best: Always use challah bread that is at least one day old. Fresh bread will absorb too much custard and become soggy. If your challah is fresh, slicing and leaving it out on a cooling rack overnight is the ideal method for drying it out.
Don’t Over-Soak: While you want the bread to absorb the custard, prolonged soaking will lead to mushiness. A few minutes per side is generally sufficient. You want the bread to be moistened, not saturated through and through.
Medium Heat is Key: Cooking French toast over medium heat is crucial. If the pan is too hot, the outside will burn before the inside is cooked. If it’s too low, you’ll end up with pale, greasy toast. Patience ensures a perfect golden-brown crust and a cooked-through center.
Butter Between Batches: Don’t be stingy with the butter for cooking, and remember to add a little more between batches. This ensures each piece gets a beautifully crisp, golden-brown exterior and prevents sticking. The butter adds essential flavor and that irresistible finish.
A Drain Rack is Your Friend: Placing the soaked bread on a wire rack before cooking allows excess custard to drip away. This simple step significantly contributes to achieving a wonderfully crisp texture, preventing any sogginess from excess liquid.
Serving Suggestions for challah french toast recipe
Decoration
A light dusting of powdered sugar provides an elegant and classic finish, creating a snowy appearance that is visually appealing. Fresh berries, such as vibrant red raspberries or deep blue blueberries, add a pop of color and freshness, arranged artfully on top of the French toast. A delicate swirl of whipped cream, piped or dolloped generously, adds a cloud-like texture and visual softness.
Side Dishes
Complementing the sweetness of the French toast with savory elements creates a balanced meal. Crispy bacon or perfectly cooked breakfast sausages offer a salty counterpoint. A light and fluffy egg white frittata or a rich spinach quiche provides protein and further depth. Breakfast potatoes, whether home fries or roasted wedges, add a satisfying starch component.
Creative Serving Ideas
Consider serving a “French Toast Bar” where guests can customize their own creations with an array of toppings, from assorted jams and fruit compotes to nuts and various syrups. A stack of challah French toast can be transformed into a dessert by drizzling with chocolate sauce and adding a scoop of vanilla ice cream. For a brunch affair, individual servings can be artfully arranged with fruit and a sprig of mint for a more polished presentation. You might also enjoy pairing this with a refreshing glass of mimosas, perhaps a pomegranate variation for a festive touch.
Preparation & Storage
Storing Leftovers
Leftover challah French toast can be stored in an airtight container in the refrigerator for up to 3 to 4 days. Ensure the French toast has cooled completely before sealing the container to prevent condensation, which can make the toast soggy. It’s best to layer slices with parchment paper in between if you are stacking them to prevent them from sticking together too much.
Freezing
To freeze your delicious challah French toast, allow the slices to cool completely. Then, arrange them in a single layer on a baking sheet and freeze until solid, which usually takes about 1 to 2 hours. Once frozen, transfer the individual slices to a freezer-safe bag or container, separating them with parchment paper to prevent sticking. Properly stored, they can last in the freezer for up to 2 months.
Reheating
Reheating can be done in several ways to recapture that perfect texture. For the best results, reheat the French toast in a single layer on a baking sheet in a preheated oven at 350°F (175°C) for about 5-10 minutes, or until heated through and slightly crisped. You can also use a toaster oven for individual portions. For a quicker option, a microwave can be used, though the texture may be slightly softer. Be sure to reheat until warm throughout.
Frequently Asked Questions
-
What is the primary difference between challah bread and other enriched breads like brioche?
The key distinction lies in the fat content and preparation methods. While both are enriched breads made with eggs, challah bread traditionally uses oil instead of butter as its primary fat source. This means it is pareve, meaning it contains neither dairy nor meat, making it suitable for observant Jewish dietary laws. Brioche, on the other hand, is characteristically rich with a high proportion of butter, which contributes to its distinct flavor and tender crumb. This difference in fat influences the texture and subtle flavor nuances of the final French toast.
-
Can I use fresh challah bread for French toast, and if so, how can I adapt it?
While day-old or slightly stale challah bread is ideal for French toast because its drier texture allows it to absorb the custard without becoming overly saturated, you can adapt fresh challah. If you only have fresh bread, the best approach is to slice it and leave the slices out on a wire rack for several hours, or ideally overnight, to allow them to air dry. Alternatively, as mentioned in the preparation steps, you can place the fresh slices in a low oven (around 300°F or 150°C) for about 10-15 minutes, flipping halfway through, until they are dry to the touch but not toasted. This will mimic the texture of day-old bread and prevent the French toast from becoming mushy.
-
What are the best ways to prevent challah French toast from becoming soggy during the soaking or cooking process?
Preventing sogginess involves a multi-step approach focused on controlling moisture. Firstly, using day-old, dried-out challah is paramount. Secondly, do not over-soak the bread; a few minutes per side is usually sufficient for it to absorb the custard. Thirdly, allowing the soaked bread to drain on a wire rack before cooking is crucial to remove excess liquid. During cooking, use medium heat to ensure a proper crust forms without burning, and avoid overcrowding the pan, which can lead to steaming instead of frying. Finally, if keeping cooked French toast warm, use a low oven with a wire rack to allow for air circulation rather than stacking them in a sealed container.