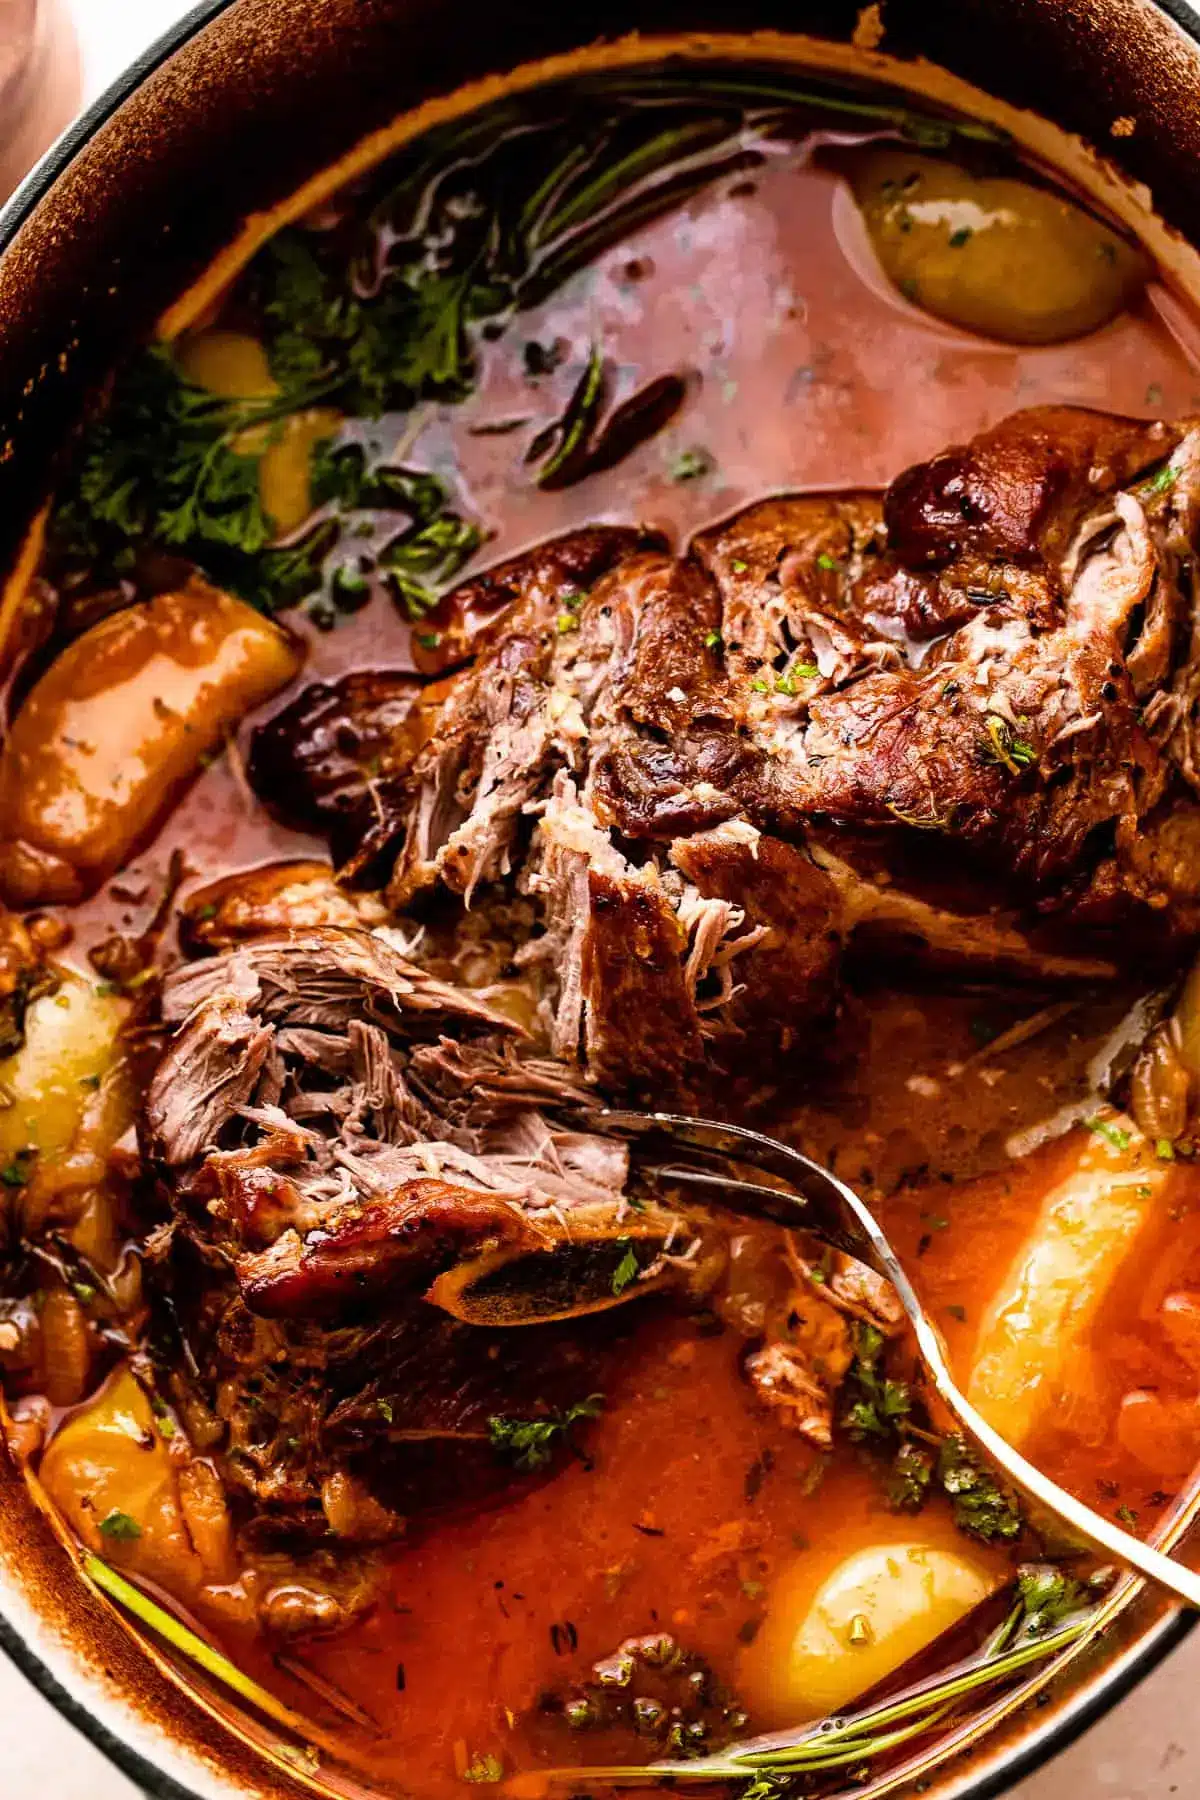
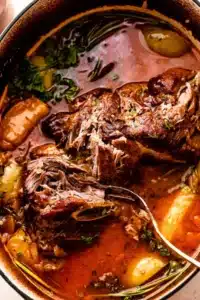
Apple Cider Braised Pork Shoulder – A Beautiful Fall Dinner!
Embarking on a culinary journey often leads to discovering dishes that are both comforting and incredibly satisfying. Braised pork shoulder stands as a testament to this, a dish that transforms a humble cut of meat into a tender, flavorful masterpiece. Its rich aroma fills the kitchen as it slowly cooks, promising a meal that’s perfect for a cozy evening or a celebratory gathering.
This particular braised pork shoulder recipe, infused with the seasonal essence of apple cider and tart Granny Smith apples, offers a unique twist on a classic. It’s a symphony of sweet, savory, and herbaceous notes that dance on the palate. The magic lies in the braising technique, which gently breaks down the connective tissues, rendering the pork incredibly succulent and easy to shred.
Why You Will Love This Recipe
- Exceptional Tenderness: Through the slow and steady braising process, the pork shoulder becomes incredibly tender, practically melting in your mouth and requiring minimal effort to pull apart.
- Deep, Layered Flavors: The combination of apple cider, white wine, aromatic vegetables, and herbs creates a complex and utterly delicious flavor profile that is both comforting and sophisticated.
- Low Hands-On Effort: While the cooking time is significant, the actual preparation and active cooking steps are minimal, allowing you to set it and forget it while the oven works its magic.
- Impressive Presentation: This dish not only delights the taste buds but also presents beautifully, making it a wonderful centerpiece for family dinners or special occasions.
- Versatile Serving Options: The rich sauce and tender pork lend themselves to a wide array of side dishes and accompaniments, making it adaptable to any preference or meal setting.
Ingredients You Need
The success of this braised pork shoulder recipe hinges on the quality of your ingredients. Opting for fresh, vibrant components will elevate the final dish significantly. From the robust pork shoulder itself to the crisp apples and aromatic herbs, each element plays a crucial role in building the layered flavors that make this dish so special. Remember that the foundation of any great meal starts with thoughtful ingredient selection.
Braised Pork Shoulder
This braised pork shoulder recipe is a rich and flavorful dish slow-cooked to tender perfection with apple cider, tart Granny Smith apples, sweet onions, garlic, and a splash of white wine.
- 3 pounds pork shoulder roast
- Kosher salt and fresh ground black pepper, to taste
- 2 tablespoons olive oil
- 4 yellow onions, thinly sliced
- 6 cloves garlic, minced
- ¼ cup dry white wine
- 1 tablespoon fresh thyme, or use 1 teaspoon dried thyme
- 1 tablespoon fresh chopped rosemary leaves, or use 1 teaspoon crushed dried rosemary
- 1 teaspoon smoked paprika
- 1½ cups Apple Cider, NOT Apple Cider Vinegar
- 1½ cups low sodium chicken broth
- 2 bay leaves
- 2 granny smith apples, cored and quartered
- 1Preheat the oven to 400°F.
- 2Pat dry the pork with paper towels and season all over with kosher salt and black pepper.
- 3Heat the oil in a large oven-safe Dutch oven set over medium-high heat. To the heated oil, add the pork and brown it on all sides; about 5 minutes per side.
- 4Remove the pork from the pot and set it aside.
- 5Add onions to the pot and cook over medium heat for about 4 to 5 minutes, stirring often, until softened. Stir in the garlic and cook for 20 seconds.
- 6Deglaze the pot with the wine, scraping up all the browned bits from the bottom of the pot. Then, stir in the thyme, rosemary, and paprika.
- 7Add the pork back to the pot. Add in the apple cider, chicken broth, and bay leaves; bring the mixture to a boil.
- 8Cover the pot with a tight-fitting lid and transfer the pork to the oven.
- 9Reduce the oven temperature to 350°F and cook for 2 hours.
- 10Remove the lid from the pot and drop in the apples. Cover and continue to cook in the oven for 30 minutes or until the internal temperature of the pork registers at least 145°F and up to 200°F.
- 11Remove from the oven and return the pot to the stovetop. Remove the pork from the pot and transfer it to a cutting board; let it rest for 10 minutes.
- 12In the meantime, set the pot over high heat and bring it to a boil; cook for a couple minutes or until sauce is slightly reduced and thickened.
- 13Cut the pork and serve it with the sauce, onions, and apples.
Keywords: braised pork shoulder, apple cider pork, fall recipe, autumn, German, comfort food
The precise quantities for each ingredient, along with any specific preparation notes, can be found within the detailed recipe card provided above.
Variations
For those seeking a plant-based alternative, this recipe can be beautifully adapted. Instead of pork shoulder, consider using large portobello mushrooms, thick slices of celeriac, or even a firm, pressed tofu. Sear these ingredients similarly to develop a rich base, and then braise them in a hearty vegetable broth enhanced with apple cider, a splash of balsamic vinegar for depth, and plenty of aromatic herbs and spices. The resulting dish will offer a wonderfully savory and satisfying experience, capturing the comforting essence of the original.
A low-carb version of this braised pork shoulder recipe can be achieved by omitting the apples and significantly reducing the amount of apple cider, or by substituting it with a sugar-free apple cider or a dry hard cider. Focus on enhancing the savory notes with extra garlic, onions, and perhaps a touch of smoked paprika or a pinch of cayenne pepper for warmth. Serve the tender pork with a medley of roasted low-carb vegetables like Brussels sprouts, broccoli, or cauliflower florets to maintain the spirit of a hearty meal without the carbohydrate load.
To infuse an international flair, consider a fusion approach. Imagine braising the pork shoulder with elements inspired by Asian cuisine. Use soy sauce, ginger, garlic, star anise, and a touch of hoisin sauce in your braising liquid, perhaps along with Shaoxing wine instead of white wine. This would create a wonderfully sticky and deeply savory pork shoulder that can be served over steamed rice or with a side of stir-fried bok choy, offering a delightful departure from the traditional apple cider profile.
How to Prepare braised pork shoulder
Step 1: Preparing the Pork Shoulder for the Braise
The journey to a perfectly braised pork shoulder begins with meticulous preparation of the star ingredient. Select a pork shoulder roast that boasts good marbling; this intramuscular fat is the key to achieving that melt-in-your-mouth tenderness and rich flavor during the long cooking process. Patting the roast thoroughly dry with paper towels is a critical step, as moisture is the enemy of a good sear.
Once dry, season the pork shoulder generously on all sides with kosher salt and freshly ground black pepper. Don’t be shy with the seasoning; a well-seasoned roast forms the foundation of a flavorful dish. This initial seasoning not only enhances the meat’s inherent taste but also helps to form that beautiful, caramelized crust during the searing stage.
The goal here is to create a dry surface for optimal browning. Any excess moisture will steam the meat rather than sear it, preventing the development of those delicious Maillard reaction compounds that contribute so much to the final flavor profile. A good sear means a more delicious braise, plain and simple.
Step 2: Achieving a Perfect Sear on the Pork
Now, it’s time to ignite the flavor development by searing the pork shoulder. Heat a tablespoon or two of olive oil in a large, heavy-bottomed Dutch oven or a sturdy oven-safe pot over medium-high heat until it shimmers. Carefully place the seasoned pork shoulder into the hot oil, ensuring not to overcrowd the pot, as this can lower the oil temperature and lead to steaming instead of searing.
Sear the pork shoulder for approximately five minutes on each side, using tongs to turn it and ensure all surfaces are deeply browned and caramelized. This step is crucial for locking in juices and developing a rich, complex flavor base that will permeate the entire dish during the braising process. The goal is to achieve a beautiful, dark crust that hints at the deliciousness to come.
Once all sides of the pork shoulder have been beautifully seared to a deep golden-brown hue, remove the roast from the pot and set it aside on a plate or cutting board. The rendered fat left in the pot is precious; it will be used to sauté the aromatics and add even more depth to the braising liquid.
Step 3: Building the Flavorful Braising Liquid
With the pork shoulder seared and temporarily set aside, it’s time to build the aromatic foundation of your braising liquid. Reduce the heat under the Dutch oven to medium and add the thinly sliced yellow onions. Sauté these onions, stirring frequently, for about four to five minutes, or until they become softened and begin to turn translucent, releasing their natural sweetness.
Next, add the minced garlic to the pot and cook for another 20-30 seconds until fragrant, being careful not to let it burn. Then, it’s time to deglaze the pot: pour in the dry white wine and use a wooden spoon or spatula to vigorously scrape up any browned bits that have adhered to the bottom of the pot. This process, known as deglazing, incorporates all those flavorful fond particles into the liquid, significantly enriching the overall taste of the braise.
Stir in the fresh thyme, chopped rosemary leaves, and smoked paprika. Allow these aromatics to toast for about 30 seconds, releasing their fragrant oils. Finally, pour in the unfiltered apple cider and the low-sodium chicken broth. Add the bay leaves, ensuring they are submerged in the liquid. Bring this entire mixture to a gentle boil, creating a robust and fragrant base for the pork.
Step 4: The Long Braise in the Oven
Carefully return the seared pork shoulder to the Dutch oven, nestling it down into the fragrant braising liquid. The liquid should come about halfway up the sides of the roast; if it seems a bit low, you can add a touch more chicken broth or water to achieve this level. Once the pork is back in the pot and the liquid is simmering, cover the Dutch oven tightly with its lid.
Transfer the covered pot to a preheated oven set at 350°F (175°C). Allow the pork to braise undisturbed for two hours. During this time, the low, slow heat will work its magic, breaking down the tough connective tissues in the pork shoulder, rendering it incredibly tender and succulent. The lid ensures that the moisture stays trapped within the pot, creating the perfect steamy environment for braising.
After the initial two hours of braising, it’s time to introduce the apples. Carefully remove the lid from the Dutch oven. Add the cored and quartered Granny Smith apples to the pot, nestling them around the pork shoulder. Replace the lid securely and continue to cook in the oven for an additional 30 minutes, or until the pork reaches an internal temperature of at least 190-200°F (88-93°C) for maximum tenderness, or 145°F (63°C) as a minimum for safety if you prefer it less shreddable.
Step 5: Resting and Reducing the Sauce
Once the pork shoulder has reached its optimal tenderness and the apples are soft, carefully remove the Dutch oven from the oven. Using tongs or a sturdy spatula, transfer the braised pork shoulder from the pot to a clean cutting board. Tent it loosely with aluminum foil and let it rest for at least 10 minutes. This resting period is vital, as it allows the juices within the meat to redistribute, ensuring that every slice or shred of pork remains wonderfully moist and flavorful.
While the pork is resting, place the Dutch oven containing the braising liquid, onions, and apples back on the stovetop over high heat. Bring the liquid to a vigorous boil. Allow it to bubble and reduce for several minutes, stirring occasionally, until the sauce has thickened to your desired consistency. This reduction concentrates the flavors, transforming the braising liquid into a rich, luscious sauce that perfectly complements the tender pork.
As the sauce reduces, you can, if desired, remove the bay leaves to prevent them from imparting too much bitterness. Taste the sauce and adjust seasoning with salt and pepper if necessary. The goal is a deeply flavored, slightly thickened sauce that coats the back of a spoon.
Step 6: Serving the Masterpiece
With the pork shoulder rested and the sauce beautifully reduced, it’s time to bring this culinary creation to the table. You can either slice the pork shoulder or, more commonly for braised pork, shred it using two forks. The meat should be so tender that it pulls apart with minimal effort, a testament to the successful braising process.
Arrange the sliced or shredded pork shoulder on a serving platter. Spoon the caramelized onions, softened apples, and the rich, thickened sauce generously over the top. The visual appeal of the dish, with its deep colors and glistening sauce, is as enticing as its aroma.
Garnish with freshly chopped parsley for a pop of color and a hint of freshness. This braised pork shoulder is a showstopper on its own, but it truly shines when paired with complementary side dishes that allow its rich flavors to be the star. Serve it piping hot and enjoy the fruits of your labor.
Pro Tips for braised pork shoulder
Choose the Right Cut: Always opt for a bone-in pork shoulder roast, often labeled as Boston butt or picnic shoulder. The bone adds extra flavor to the braising liquid, and the marbling throughout the meat is essential for tenderness. A well-marbled cut ensures that the pork will remain moist and succulent throughout the long cooking process.
Don’t Skip the Sear: The browning of the pork shoulder is not merely for aesthetics; it’s a fundamental step in flavor development. The Maillard reaction that occurs during searing creates hundreds of new flavor compounds that will deepen the richness of your final dish. Ensure your pot is hot and don’t overcrowd it to achieve a deep, even crust.
Low and Slow is Key: Braising is a low-and-slow cooking method for a reason. Maintaining a consistent, gentle heat in the oven allows the tough connective tissues in the pork shoulder to break down gradually, transforming them into gelatin. This gelatin not only tenderizes the meat but also enriches the braising liquid, creating a luscious sauce.
Deglaze Thoroughly: After searing the pork, the browned bits stuck to the bottom of the pot (fond) are pure flavor gold. Make sure to scrape up all of these bits when you deglaze with wine or broth. This step infuses your braising liquid with an incredible depth of flavor that would otherwise be lost.
Resting is Crucial: Just like with any roasted or braised meat, allowing the pork shoulder to rest after cooking is non-negotiable. This resting period allows the muscle fibers to relax and the juices to redistribute throughout the meat. Skipping this step will result in a drier, less flavorful pork shoulder, no matter how perfectly it was cooked.
Serving Suggestions for braised pork shoulder
Decoration
A sprinkle of freshly chopped parsley or chives over the finished braised pork shoulder adds a vibrant touch of green and a subtle fresh aroma that beautifully contrasts the richness of the meat. Consider also garnishing with a few fresh sprigs of rosemary or thyme that were used in the braise, creating a visually appealing link to the ingredients. For a touch of elegance, a few thin slices of crisp Granny Smith apple, perhaps lightly sautéed, can be artfully arranged on top.
Side Dishes
This succulent braised pork shoulder pairs exceptionally well with a variety of comforting side dishes that can soak up its delicious sauce. Creamy mashed potatoes are a classic choice, providing a smooth, velvety base for the rich pork and gravy. Alternatively, buttery egg noodles or a fluffy bed of polenta offer a wonderful texture and absorb the flavorful braising liquid beautifully. Roasted root vegetables, such as carrots, parsnips, and sweet potatoes, complement the autumnal flavors of the pork, offering a delightful sweetness and earthy notes.
For a lighter option, a vibrant green salad with a sharp vinaigrette can cut through the richness of the pork, providing a refreshing contrast. Consider a simple spring vegetable salad or a classic Caesar salad to balance the meal. Steamed or roasted green beans, asparagus, or broccoli also serve as excellent accompaniments, adding a healthy and colorful dimension to the plate. A side of crusty bread is essential for mopping up every last drop of the delectable braising sauce.
Creative Serving Ideas
Transform leftover braised pork shoulder into delightful sliders by shredding the meat and tossing it with a touch of the reduced braising sauce, then piling it onto soft slider buns with a crisp apple slaw for added texture and acidity. Another creative idea is to use the shredded pork as a filling for savory quesadillas or tacos, layered with melted cheese and your favorite toppings like pico de gallo or sour cream. This versatile meat also makes an incredible addition to a hearty stew or chili, infusing it with deep, slow-cooked flavor.
For a truly unique presentation, consider serving the braised pork shoulder over a savory bread pudding, allowing the rich sauce to soak into the bread and create a deeply flavorful and satisfying dish. You could also repurpose the shredded pork as a topping for loaded baked potatoes or sweet potatoes, creating a substantial and comforting meal. Experiment with incorporating the pork into a rich, creamy risotto for an elevated pasta-like experience, where the pork’s succulence melds beautifully with the Arborio rice.
Preparation & Storage
Storing Leftovers
Once the braised pork shoulder has cooled slightly, transfer any leftovers to airtight containers. It’s best to store the pork along with its accompanying sauce and any vegetables like onions and apples. This helps to keep the meat moist and flavorful during storage. Refrigerate promptly and consume within three to four days for optimal quality and safety. Ensure the containers are sealed tightly to prevent the absorption of odors from other foods in the refrigerator.
Freezing
Braised pork shoulder freezes remarkably well, making it an excellent candidate for meal prepping or enjoying at a later date. Allow the cooked pork and sauce to cool completely before portioning them into freezer-safe bags or airtight containers. For best results, remove as much air as possible from the packaging to prevent freezer burn. Frozen braised pork shoulder can be stored for up to two to three months. When ready to use, thaw overnight in the refrigerator.
Reheating
To reheat refrigerated leftovers, the best method is to gently warm the pork and sauce in a covered skillet or saucepan over low heat on the stovetop. This method helps to maintain the moisture of the meat and prevent it from drying out. Add a splash of extra broth or water if the sauce seems too thick. Alternatively, you can reheat smaller portions in the microwave, covering the dish and stirring halfway through to ensure even heating. Avoid high heat or prolonged cooking, as this can toughen the meat.
Frequently Asked Questions
-
What is the best way to ensure the pork shoulder becomes fall-apart tender?
Achieving fall-apart tenderness in pork shoulder relies on a combination of factors: choosing a well-marbled cut, searing it properly to develop flavor, and, most crucially, braising it at a low temperature for an extended period. The target internal temperature for truly tender, shreddable pork shoulder is generally between 195-205°F (90-96°C). This long cooking time allows the collagen in the connective tissues to break down into gelatin, which lubricates the meat and results in that signature melt-in-your-mouth texture. Don’t rush the process; patience is key to unlocking the full potential of this cut.
-
Can I use a different cut of pork for this braised recipe?
While pork shoulder is the ideal cut for braising due to its high fat and collagen content, which break down beautifully over long cooking times, other cuts can be used with some adjustments. A pork butt (which is actually part of the shoulder) will yield similar results. However, leaner cuts like pork loin or tenderloin are not suitable for braising as they lack the necessary fat and connective tissue, and would likely become dry and tough. If you must use a leaner cut, a much shorter braising time and careful monitoring would be required, but the texture and flavor profile would differ significantly from traditional braised pork shoulder.
-
What can I do if my braising liquid isn’t thick enough after reducing?
If, after reducing the braising liquid on high heat, it remains too thin for your liking, there are a few effective methods to thicken it further. The most common technique involves creating a slurry: whisk together one to two tablespoons of cornstarch with an equal amount of cold water until smooth, then gradually whisk this slurry into the boiling braising liquid. Continue to boil for a minute or two until the sauce thickens. Alternatively, you can mash some of the cooked onions or apples against the side of the pot and stir them into the sauce to add body, or even incorporate a small amount of roux (equal parts butter and flour cooked together) for a richer, more traditional gravy texture.