How to Make Banana Chips
Craving a sweet and satisfying snack that won’t derail your healthy eating goals? Look no further than these incredibly easy baked banana chips. They offer a delightful crunch and natural sweetness that’s simply irresistible, making them the perfect guilt-free treat for any time of day.
Forget complicated recipes or expensive store-bought alternatives. This method leverages the power of your oven to transform simple bananas into crispy, golden delights with minimal effort. It’s a fantastic way to use up ripe bananas and create a snack that everyone in the family will adore.
Why You Will Love This Recipe
- Healthy & Guilt-Free: Enjoy a crunchy snack without added sugars or unhealthy fats, making it a perfect choice for conscious eaters.
- Incredibly Easy Preparation: With just a few simple steps and common kitchen tools, you can create these delicious chips with minimal fuss.
- Customizable Flavor: While naturally sweet, you can easily elevate the flavor profile with a sprinkle of cinnamon or a pinch of sea salt for a delightful twist.
- Perfect for On-the-Go: These chips are incredibly portable, making them an ideal snack for lunchboxes, road trips, or a quick energy boost during busy days.
- Minimal Ingredients: You’ll only need a couple of pantry staples to whip up a batch, making it an accessible recipe for everyone.
Ingredients You Need
The beauty of homemade banana chips lies in their simplicity, requiring just a few high-quality ingredients to achieve that perfect crunch and natural sweetness. Opting for ripe yet firm bananas is key, as they provide the best balance of texture and flavor for baking. Freshly squeezed lemon juice not only prevents browning but also adds a subtle tang that complements the banana’s sweetness beautifully. Ensuring your ingredients are fresh will make a noticeable difference in the final outcome.
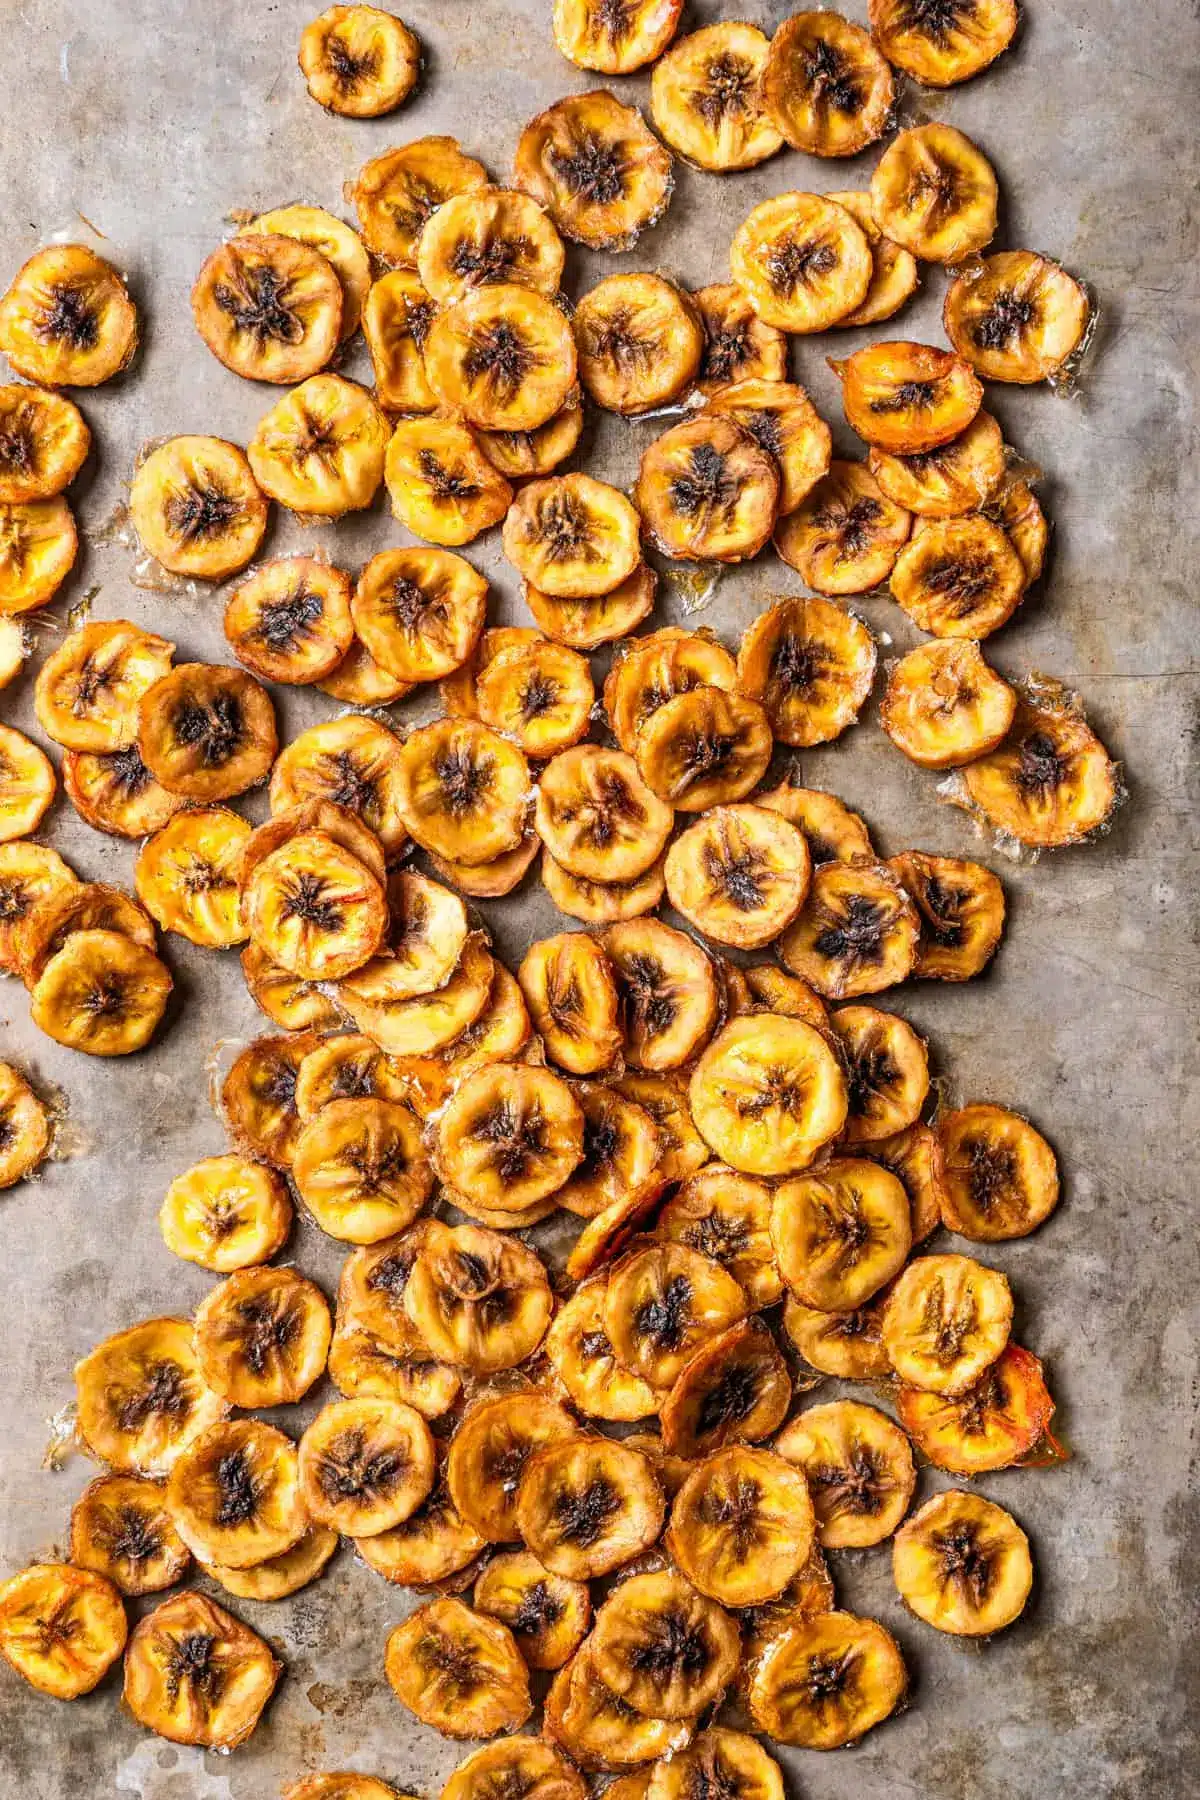
Baked Banana Chips
Deliciously sweet, guilt-free baked banana chips make a perfectly portable, light, and tasty snack to have on hand in case a craving strikes! These are easy to make with just two ingredients and your oven.
- 10 ripe but firm bananas, thinly sliced
- Freshly squeezed lemon juice (1 lemon is plenty)
- 1Preheat oven to 200ºF. Cover a baking sheet with foil and lightly grease it with cooking spray.
- 2Toss the banana slices in lemon juice.
- 3Arrange the bananas in a single layer on the prepared baking sheet.
- 4Bake for 1 hour. Check to see if the tops are firm and starting to turn color. If so, flip the slices with a metal spatula and continue to bake for 1 hour longer or until desired crispness.
- 5Remove from the oven and transfer the banana chips to a wire rack to cool completely. The longer they cool, the crunchier they will get. Store in an airtight container.
Keywords: banana chips, baked, snack, fruit, healthy, easy, homemade
The precise quantities for each ingredient can be found within the detailed recipe card provided below. This ensures you have all the necessary information for perfect results every time.
Variations
For those seeking a plant-based delight, simply ensure your ingredient sourcing aligns with vegan principles, and these banana chips become a wonderfully satisfying vegan treat. The natural sweetness of the banana is amplified by the baking process, making it an excellent dessert alternative.
Individuals following a low-carbohydrate lifestyle might find these chips less suitable due to the natural sugars present in bananas. However, one could explore baking unripe plantains, which have a starchier profile, or focus on portion control for a modest indulgence.
Spice enthusiasts can embark on a flavor adventure by introducing a variety of seasonings. A dusting of cinnamon transforms them into a warm, comforting snack, while a pinch of chili powder and cumin creates a surprisingly delightful sweet and spicy fusion. Experimenting with different spice blends allows for endless creative possibilities.
How to Prepare baked banana chips
Step 1: Preheating and Pan Preparation
The journey to perfectly baked banana chips begins with preparing your oven and baking sheet. Preheat your oven to a gentle 200°F (95°C). This low and slow temperature is crucial for drying out the banana slices without burning them, allowing them to develop that sought-after crispness.
Next, ready your baking sheet by lining it with either parchment paper or aluminum foil. This step is highly recommended as it greatly simplifies the cleanup process later on. A light spritz of cooking spray over the lining adds an extra layer of protection, ensuring the banana slices won’t stick during the baking process.
This meticulous preparation at the outset sets the stage for a smooth and successful baking experience, minimizing any potential frustrations and maximizing the chances of achieving perfectly golden, crispy banana chips.
Step 2: Slicing the Bananas
Selecting the right bananas is paramount for achieving the best texture and flavor in your baked chips. Aim for bananas that are ripe but still firm to the touch, avoiding any that are overly soft, bruised, or have significant brown spots. These characteristics indicate a banana that is too mushy and will not hold its shape well during baking.
The key to even crisping lies in the uniformity of your slices. Use a sharp knife or a mandoline slicer to cut the bananas into consistent, thin rounds, approximately ¼-inch thick. If using a mandoline, exercise caution to prevent injuries. If slicing by hand, try to maintain as much uniformity as possible; this ensures that all slices cook at the same rate.
Unevenly sliced bananas will result in some chips being perfectly crisp while others remain chewy or, worse, become burnt. Therefore, taking a moment to ensure consistency in slicing is a critical step that significantly impacts the final outcome of your homemade banana chips.
Step 3: The Lemon Juice Bath
Once your bananas are perfectly sliced, it’s time to prepare them for their transformation. Place the uniform banana slices into a medium-sized bowl. Ensure the bowl is large enough to comfortably hold all the slices without overcrowding, allowing for easy tossing.
Gently pour freshly squeezed lemon juice over the banana slices. You’ll need enough to lightly coat all the pieces, but avoid drowning them. A good starting point is the juice of one lemon, but adjust as needed based on the quantity of banana slices you have. This lemon juice bath serves a dual purpose: it helps prevent the bananas from browning prematurely due to oxidation and adds a subtle, refreshing tang that enhances the overall flavor profile of the chips.
Toss the banana slices very gently in the lemon juice, ensuring each slice is lightly coated. Allow them to sit in the juice for no more than 10 minutes; any longer can start to affect the texture and make them too soft for optimal crisping. This brief immersion is crucial for maintaining their appealing color and adding a layer of nuanced flavor before they hit the oven.
Step 4: Arranging on the Baking Sheet
After their brief citrus soak, it’s time to carefully arrange the banana slices on the prepared baking sheet. Working methodically, place each lemon-juice-coated banana slice onto the lined and lightly greased baking sheet. It is absolutely essential that the slices are arranged in a single layer, with no overlapping.
Overlapping the banana slices will cause them to steam rather than bake, resulting in chewy, unappealing chips instead of crisp ones. Ensure there is a small amount of space between each slice to allow for proper air circulation around them. Good air flow is vital for achieving even drying and crisping throughout the entire batch.
If you find that your baking sheet is too crowded, it is far better to use a second baking sheet than to compromise the single-layer arrangement. Patience and careful placement at this stage are key to achieving the perfect crispy texture you desire in your homemade baked banana chips, setting you up for success.
Step 5: The Baking Process
Now comes the patient part: the baking. Place the prepared baking sheet into the preheated oven at 200°F (95°C). The initial baking time will be approximately 1 hour. After this first hour, it’s crucial to check on the banana slices.
The goal is to see if the tops of the slices are firm and have started to show a slight color change, indicating they are beginning to dry out. If they appear to be on track, carefully flip each slice using a thin metal spatula. This flipping ensures that both sides of the banana chips achieve an even crispness and color. After flipping, continue to bake for another 1 to 2 hours, or until the chips reach your desired level of crispness.
It’s important to note that oven temperatures can vary significantly, and the thickness of your banana slices will also impact baking time. Therefore, it is imperative to check on the chips periodically throughout the baking process. You may find that some chips crisp up faster than others; in such cases, you can carefully remove the done chips from the baking sheet while allowing the remaining ones to continue baking. This vigilance prevents burning and ensures a consistently delicious batch.
Step 6: Cooling for Ultimate Crispness
Once your banana chips have achieved that perfect golden-brown hue and satisfying crispness, it’s time to remove them from the oven. Immediately transfer the hot banana chips from the baking sheet onto a wire cooling rack. This step is critical for achieving maximum crispiness.
Allow the chips to cool completely on the wire rack. As they sit and cool, they will continue to dry out and become even crispier. The longer they are left to cool, the more pronounced their crunchy texture will become. Resist the temptation to taste them too early; the true crunch develops as they reach room temperature.
Ensure the chips are in a single layer on the rack to facilitate even cooling and prevent any trapped moisture from making them soggy. Once fully cooled, they are ready to be stored and enjoyed. This final cooling stage is as important as the baking itself for achieving that signature brittle crunch.
Pro Tips for baked banana chips
Even Slicing is Non-Negotiable: For uniformly crisp chips, invest time in slicing your bananas to precisely the same thickness. A mandoline slicer can be a game-changer here, but even careful knife work makes a difference. This ensures every chip bakes and dries at the same rate, preventing burnt edges or chewy centers. Achieving this consistency is perhaps the most vital step for success.
Patience is a Virtue: The low oven temperature is intentional. Don’t be tempted to crank up the heat to speed things up; this will likely lead to burnt, bitter chips. The extended, gentle baking time is what allows the moisture to evaporate slowly, resulting in that delightful crunch. Trust the process, and allow ample time for the drying to complete.
Monitor Closely: Ovens are notoriously inconsistent, and banana thickness varies. Keep a close eye on your chips, especially during the latter stages of baking. Remove any chips that are perfectly crisp before others start to overcook. This vigilance ensures you get the best possible texture from your entire batch, preventing any disappointment.
The Cooling Factor: Don’t underestimate the power of cooling. Chips continue to crisp up as they cool on the wire rack. If they seem a little softer than you’d like right out of the oven, give them more time. They will firm up considerably as they reach ambient temperature.
Embrace the Spice: While delicious plain, these chips are a fantastic canvas for flavor. Experiment with cinnamon, nutmeg, a hint of cardamom, or even a dash of cayenne for a sweet and spicy kick. A sprinkle of sea salt before baking can also create a delightful sweet-salty contrast that is incredibly addictive.
Serving Suggestions for baked banana chips
Decoration
These delicate, golden banana chips can be artfully arranged as a charming garnish for desserts. They add a beautiful textural contrast and an elegant visual appeal to cakes, tarts, and even ice cream sundaes. Imagine them standing tall like little edible fans, or crumbled artfully over a chocolate ganache.
For a more rustic presentation, they can be artfully scattered around the plate, providing a delightful visual element that hints at the delightful crunch to come. Their natural golden hue complements a wide range of dessert colors, making them a versatile decorative element that enhances any sweet creation.
Consider using them to adorn a fruit platter, adding an unexpected textural dimension to the soft, juicy fruits. Their simple elegance makes them a sophisticated yet easy way to elevate the presentation of any dish.
Side Dishes
Baked banana chips are a fantastic accompaniment to breakfast and brunch fare. Sprinkle them generously over yogurt parfaits or overnight oats for an added layer of satisfying crunch. They also pair wonderfully with a bowl of cottage cheese or a creamy smoothie, transforming a simple meal into something more dynamic and exciting.
For a more substantial meal, consider serving them alongside lighter dishes like a fresh salad or a savory breakfast scramble. The sweetness of the chips provides a pleasing contrast to the more savory or tangy elements of these dishes. Their portability also makes them an excellent addition to packed lunches, offering a healthy and delicious alternative to typical snack items.
They can even be crushed and used as a unique, gluten-free coating for chicken tenders or fish fillets, adding an unexpected sweet note and delightful crispiness to your main course. This innovative use transforms a simple snack into a culinary ingredient.
Creative Serving Ideas
Create a vibrant trail mix by combining these banana chips with nuts, seeds, and a touch of dried fruit. This homemade blend is a far healthier and more customizable option than many store-bought varieties. It’s perfect for hiking, long workdays, or simply satisfying a mid-afternoon snack attack.
For a sophisticated appetizer, layer them with a dollop of cream cheese or goat cheese and a drizzle of honey on small crackers or cucumber slices. This simple yet elegant combination offers a delightful interplay of sweet, creamy, and crunchy textures. It’s a crowd-pleaser that’s remarkably easy to assemble.
Consider incorporating them into a homemade granola recipe for an added dimension of sweetness and crunch. They also make a wonderful topping for pancakes, waffles, or crepes, offering a delightful textural surprise with every bite. The possibilities are truly endless for these versatile chips.
Preparation & Storage
Storing Leftovers
Once your delightful baked banana chips have cooled completely, proper storage is key to maintaining their crisp texture. Transfer the cooled chips into an airtight container. This is the most crucial step to prevent them from absorbing moisture from the surrounding air, which would render them soggy.
A glass jar with a tight-fitting lid, a resealable plastic container, or even a quality zip-top bag will work effectively. Ensure there is no excess air trapped inside the container before sealing it tightly. Properly stored, these homemade banana chips can retain their delicious crispness at room temperature for up to three weeks.
It’s important to make sure they are entirely cool before sealing them away, as any residual warmth can create condensation within the container, leading to sogginess. Store the container in a cool, dry place away from direct sunlight for optimal longevity.
Freezing
While these baked banana chips are designed to last for a considerable time at room temperature, freezing is an option if you’ve made an exceptionally large batch or wish to preserve them for an even longer duration. However, it’s important to manage expectations regarding texture post-freezing.
To freeze, ensure the chips are completely cool and have retained their crispness. Arrange them in a single layer on a baking sheet and freeze until solid, which typically takes about 1-2 hours. This pre-freezing step, known as flash freezing, prevents the chips from clumping together in the freezer.
Once solid, transfer the frozen banana chips into freezer-safe bags or airtight containers. They can typically be stored in the freezer for up to 2-3 months. While they may lose a slight degree of their crispness upon thawing, they can still be enjoyed, perhaps best used in baked goods or smoothies where texture is less critical.
Reheating
If your banana chips have become slightly soft due to humidity or prolonged storage, a brief reheating session can often restore their delightful crispness. This is a simple process that requires minimal effort and time.
Preheat your oven to a very low temperature, around 200-250°F (95-120°C). Spread the slightly softened banana chips in a single layer on a baking sheet lined with parchment paper. Place the baking sheet in the preheated oven for about 5-10 minutes.
Keep a very close eye on them during this process, as they can go from perfectly crisp to burnt very quickly due to their thinness and natural sugars. The goal is simply to gently warm them and allow any absorbed moisture to evaporate. Once they feel crisp to the touch, remove them from the oven and let them cool completely on a wire rack before enjoying or storing them again.
Frequently Asked Questions
- Can I use green bananas for baked banana chips?
Using green bananas for baked banana chips is generally not recommended if you’re aiming for the sweet, crispy result this recipe provides. Green bananas are much starchier and less sweet, and they tend to remain tough and somewhat bland when baked. They are better suited for savory dishes or recipes where their firm texture is desired, like certain fried or boiled preparations. For sweet, snackable chips, ripe but still firm bananas are the ideal choice, offering the perfect balance of natural sweetness and texture that bakes up beautifully.
- Why are my baked banana chips still chewy and not crispy?
Several factors can contribute to chewy, rather than crispy, banana chips. Firstly, the thickness of your slices is crucial; if they are too thick, the moisture won’t evaporate efficiently. Secondly, the baking temperature might have been too high, causing the outside to brown before the inside could dry out, or too low and without enough time for proper dehydration. Insufficient baking time is a common culprit. Also, ensure the chips are completely cooled on a wire rack; they continue to crisp up as they cool. Finally, storing them in a non-airtight container will allow them to absorb ambient moisture, leading to sogginess.
- Can I add sugar or other sweeteners to my baked banana chips?
While this recipe focuses on the natural sweetness of ripe bananas, you can certainly add sweeteners if you prefer a more pronounced sweet flavor or are using slightly less ripe bananas. A light dusting of granulated sugar, brown sugar, or even a sprinkle of a sugar substitute like erythritol can be added before baking. For a different flavor profile, cinnamon and a touch of sugar mixed together is a classic choice. If using liquid sweeteners like honey or maple syrup, a very light brushing might be necessary, but be mindful that these can increase the risk of burning due to their sugar content and may require a slightly lower baking temperature or shorter time.