Arancini Recipe – Crispy & Cheesy Italian Rice Balls!

Get ready to embark on a culinary adventure that will transport your taste buds straight to the heart of Italy with these incredible homemade arancini. These golden, crispy spheres of joy are more than just a dish; they’re a celebration of texture and flavor, perfect for any occasion.
Imagine biting into a perfectly fried arancini, the satisfying crunch of the exterior giving way to a warm, creamy risotto interior, punctuated by pockets of delightful, melty cheese. This recipe is designed to bring that authentic Italian experience right into your kitchen, proving that gourmet delights are well within reach for the home cook.
Why You Will Love This Recipe
- Crispy Perfection: Experience an irresistible crunch with every bite, thanks to the expert breading and frying technique. The golden-brown exterior is the hallmark of a truly exceptional arancini.
- Creamy & Cheesy Interior: Inside the crispy shell lies a treasure trove of creamy Arborio rice, perfectly seasoned and studded with delightful pockets of melted goat cheese. This contrast in textures is what makes arancini so addictive.
- Beginner-Friendly: This recipe breaks down the process into simple, manageable steps, making it accessible even for those new to making fried appetizers. We guide you through each stage to ensure success.
- Versatile Delight: Arancini are incredibly adaptable, serving brilliantly as a sophisticated appetizer, a satisfying light lunch, or even a flavorful snack. They pair wonderfully with a variety of dips and sauces.
- Make-Ahead Magic: Prepare the risotto base a day in advance and chill it, allowing for quicker assembly and frying when you’re ready to serve. This makes entertaining significantly easier.
Ingredients You Need
The secret to truly outstanding arancini lies in the quality and freshness of your ingredients. Using good Arborio rice is paramount for achieving that signature creamy risotto texture that holds its shape beautifully. Fresh herbs, quality cheeses, and good quality oil for frying will elevate these Italian rice balls from good to absolutely spectacular. Remember, the subtle nuances of flavor from high-quality components will shine through in the final dish, making them a true culinary triumph.
Arancini Recipe

This easy arancini recipe makes crispy, cheesy, golden-fried Italian rice balls filled with melty pockets of tangy goat cheese. Customize the filling any way you'd like!
- To Make the Risotto
- 1 tablespoon olive oil
- 2 shallots, finely diced
- 2 cloves garlic, minced
- 1 tablespoon unsalted butter
- 2 medium zucchini, finely diced
- 1 teaspoon fresh thyme leaves
- 1 cup Arborio rice
- 2¾ cups vegetable broth
- To Make the Arancini
- 1 large egg
- 1 cup all purpose flour
- 1 cup breadcrumbs
- vegetable oil, for frying
- 1To Make the Risotto
- 2Sauté the veggies. In a large, heavy-bottomed skillet, heat the olive oil over medium-high heat. Add the shallots, season with salt, and sauté until translucent. Add the garlic and sauté for 15 seconds or until fragrant. Add the butter. Once the butter has melted, add the zucchini. Sauté until tender and nicely browned, about 2 to 3 minutes.
- 3Toast the rice. Add the rice to the pan and cook for 1 minute, stirring constantly to toast.
- 4Cook the rice. Add the white wine. Cook until mostly evaporated. Turn the heat to medium-low. Add ½ cup of the broth. Cook until the vegetable broth absorbs into the rice, stirring occasionally. Repeat until you are out of broth, and don't forget to stir. If the rice is not fully cooked by the time you run out of vegetable broth, add a bit more broth or water, ½ cup at a time, until the rice is cooked through.
- 5Finish the rice. Remove the pan from the heat and stir in the grated Parmesan and goat cheese.
- 6Cool. Allow the rice to cool to room temperature before continuing. If you are not ready to make the arancini right away, store the cooled rice in an airtight container in the refrigerator for up to 2 days.
- 7To Make the Arancini
- 8Form the arancini. Divide the rice mixture into 12 portions and form the remaining goat cheese into 12 balls. Use your hands to form a portion of the rice mixture into a flat circle in your palm. Add a goat cheese ball to the center of the circle. Close the rice mixture around the goat cheese and form it into a ball. Repeat with the remaining portions of the rice mixture and goat cheese.
- 9Bread the arancini. Add the egg to a small bowl and the flour to another. In a large, shallow bowl, whisk together the breadcrumbs, Parmigiano, salt, and pepper. Dip a goat cheese-stuffed rice ball into the flour bowl, coating it thoroughly. Dip the ball into the egg, coating it thoroughly. Allow any excess egg to drip off the ball into the bowl. Dip the ball into the breadcrumb mixture, coating thoroughly.
- 10Heat the oil. Pour 4 inches of vegetable oil into a large, heavy-bottomed saucepan and heat over medium heat until a piece of bread added to the oil turns golden brown within 45 seconds. You could also use a thermometer and start frying the rice balls when the oil has reached a temperature of about 350°F to 375°F.
- 11Fry the arancini. Gently lower the rice balls into the oil and fry for 8-10 minutes. Turn the fried arancini out onto a plate lined with a paper towel.
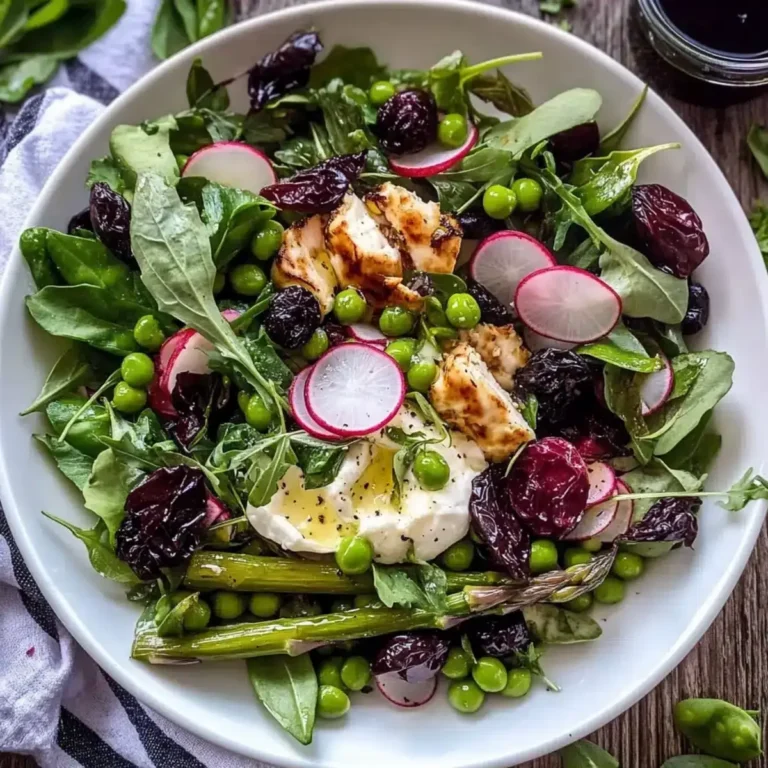
- 12Serve. Serve the arancini warm with a fresh green salad.
Keywords: arancini, italian, rice balls, fried, appetizer, cheese, goat cheese, risotto, breaded
The precise quantities for each ingredient, along with detailed measurements, are readily available within the recipe card provided for your convenience.
Variations
While the classic goat cheese filling is undeniably delicious, the world of arancini variations is vast and exciting. Consider a classic Ragu-filled arancini, where a slow-cooked, rich meat sauce is nestled within the creamy rice for a deeply savory experience. This is a truly traditional approach that many find irresistible.
For those seeking a vegetarian option, finely chopped and roasted Italian mushrooms, like porcini or cremini, can be incorporated into the risotto or used as a filling. This offers a wonderful earthy depth that complements the cheesy rice perfectly. Alternatively, you could experiment with a medley of finely diced roasted vegetables such as bell peppers, zucchini, and onions, creating a vibrant and flavorful bite.
A low-carb variation could involve using cauliflower rice as a base, although this requires careful binding techniques to ensure the arancini hold their shape. For a more decadent twist, swap the goat cheese for cubes of creamy mozzarella or Fontina cheese, which will melt into gooey perfection when fried. Each variation offers a unique opportunity to explore different flavor profiles and make these beloved Italian snacks your own.
How to Prepare arancini recipe
Step 1: Prepare the Risotto Base
Begin by finely dicing your shallots and zucchini, and mincing the garlic. In a large, heavy-bottomed skillet, heat the olive oil over medium-high heat until shimmering. Add the diced shallots and a pinch of kosher salt, sautéing them until they become translucent and fragrant. This initial sautéing process lays the foundation for the deep flavors to come.
Once the shallots are softened, add the minced garlic to the skillet and cook for another 15 seconds, just until its aroma is released, being careful not to burn it. Now, add the tablespoon of unsalted butter to the pan; once it has melted, introduce the finely diced zucchini. Sauté the zucchini until it is tender and begins to brown nicely, which typically takes about 2 to 3 minutes, adding a lovely sweetness and texture.
Introduce the Arborio rice to the pan, stirring it constantly for approximately 1 minute. This toasting step is crucial as it coats each grain of rice in oil and helps it absorb flavors more effectively, preventing it from becoming mushy. The rice will become slightly opaque around the edges during this process, signaling it’s ready for the next stage of cooking. This meticulous preparation ensures a superior risotto texture for your arancini.
Step 2: Cook the Risotto to Creamy Perfection
Pour in the white wine and let it bubble and cook until it has mostly evaporated, stirring gently. This deglazing action incorporates a layer of acidity and complex flavor into the rice. Once the wine is nearly absorbed, reduce the heat to medium-low. Begin adding the vegetable broth, about half a cup at a time, stirring occasionally.
Continue this process, allowing each addition of broth to be mostly absorbed by the rice before adding the next ladleful. It’s essential to stir the risotto regularly to release its starches, which creates the characteristic creamy texture. This gradual addition of liquid and consistent stirring is the hallmark of authentic risotto preparation.
If you find that you’ve used all the vegetable broth and the rice is still not fully cooked, you can add a little more broth or even hot water, a quarter cup at a time, until the rice is tender but still has a slight bite to it, known as al dente. The final risotto should be creamy and flowing, not stiff or dry, a perfect base for shaping.
Step 3: Finish and Cool the Risotto
Once the Arborio rice has reached the desired cooked consistency, remove the skillet from the heat. Stir in the freshly grated Parmesan cheese and the fresh goat cheese until they are fully incorporated and the risotto is wonderfully creamy and rich. The residual heat will melt the cheeses beautifully, binding the grains together.
It is absolutely critical to allow the risotto to cool completely to room temperature before attempting to shape it into arancini. If the risotto is too warm, it will be sticky and difficult to handle, and the arancini will be less likely to hold their shape. You can speed up this cooling process by spreading the risotto onto a large baking sheet or shallow dish.
If you are not making the arancini immediately after cooking the risotto, cover the cooled risotto tightly with plastic wrap (pressing it directly onto the surface to prevent a skin from forming) and refrigerate it for up to 2 days. Chilled risotto is firmer and much easier to work with when forming the rice balls. This make-ahead step is a game-changer for entertaining.
Step 4: Shape and Fill the Arancini
Once the risotto has cooled sufficiently, it’s time to form the arancini. Divide the cooled risotto mixture into approximately 12 equal portions. It’s helpful to use a kitchen scale for consistency, but eyeballing them into roughly tablespoon-sized balls works well too. Prepare your filling by dividing the additional fresh goat cheese into 12 small balls, about the size of a small marble.
Take one portion of the risotto mixture and flatten it into a disc in the palm of your hand. Place one of the small goat cheese balls in the center of the risotto disc. Carefully bring the edges of the risotto up and around the cheese, gently enclosing it completely. Roll the entire mixture between your palms to form a compact, smooth ball. Ensure there are no cracks or openings where the cheese might escape during frying.
Repeat this process with the remaining risotto and goat cheese portions, creating 12 perfectly formed arancini. If the mixture feels a bit sticky, you can lightly dampen your hands with water or olive oil. The goal is to create a firm, tightly packed ball that will maintain its shape throughout the cooking process. These uniformly shaped balls will ensure even cooking later on.
Step 5: Bread the Arancini
Set up your breading station. You will need three shallow dishes. In the first dish, place the all-purpose flour and season it lightly with a bit more salt and pepper if desired. In the second dish, whisk the large egg until it is well beaten and slightly frothy. In the third dish, combine the breadcrumbs, the ⅓ cup of grated Parmesan cheese, the ½ teaspoon of kosher salt, and the ¼ teaspoon of freshly ground black pepper, mixing them thoroughly.
Take one formed risotto ball and first roll it in the seasoned flour, ensuring it is completely coated. Gently shake off any excess flour. Next, dip the floured ball into the beaten egg, allowing any excess egg to drip back into the bowl. The egg wash acts as the adhesive for the breadcrumbs.
Finally, place the egg-coated ball into the breadcrumb mixture. Roll it around until it is thoroughly and evenly coated with the breadcrumbs and Parmesan. Press gently to help the breadcrumbs adhere. Repeat this three-step breading process for all 12 arancini. This triple coating ensures a wonderfully crisp exterior that will protect the creamy interior during frying. For an extra crispier crust, you can double-bread them by repeating the egg and breadcrumb steps.
Step 6: Fry to Golden Perfection
Pour approximately 4 inches of vegetable oil into a large, heavy-bottomed saucepan or Dutch oven. Heat the oil over medium heat until it reaches the optimal frying temperature, around 350°F to 375°F (175°C to 190°C). An easy way to test if the oil is hot enough without a thermometer is to drop a small piece of bread into the oil; if it turns golden brown within 45 seconds, the oil is ready. Proper oil temperature is crucial for achieving crispy arancini without them becoming greasy.
Carefully lower 3-4 arancini at a time into the hot oil using a slotted spoon or spider strainer. Avoid overcrowding the pan, as this will lower the oil temperature and result in soggy arancini. Fry them for about 8 to 10 minutes, turning them occasionally with the slotted spoon to ensure they cook evenly and develop a beautiful, uniform golden-brown crust on all sides. The goal is a deep, satisfying crunch.
Once they are perfectly golden and crispy, carefully remove the arancini from the oil using the slotted spoon and place them on a plate lined with paper towels. This step allows excess oil to drain off, ensuring they remain deliciously crisp. Allow them to cool slightly before serving, as the interior and cheese will be extremely hot. Serve these crispy delights warm for the best texture and flavor experience.
Pro Tips for arancini recipe
Cool Completely: Always ensure your risotto is completely cooled to room temperature before attempting to shape the arancini. This is the most critical step to prevent them from falling apart during the frying process, as warm risotto is too soft to hold its form reliably.
Chill Before Frying: For an extra layer of security against your arancini disintegrating in the hot oil, consider placing the breaded rice balls on a parchment-lined baking sheet and chilling them in the freezer for 10-15 minutes just before frying. This firms them up significantly.
Don’t Overfill: While tempting, resist the urge to pack too much cheese into the center of each arancini. Overfilling can cause the rice ball to burst open during frying, leading to a messy and disappointing result. A moderate amount of cheese is perfect for a delightful gooey center.
Maintain Oil Temperature: Use a kitchen thermometer to monitor your frying oil temperature, aiming for that sweet spot between 350-375°F. If the oil is too cool, the arancini will absorb excess grease; if it’s too hot, the outside will burn before the inside is heated through. Adjust the heat as needed between batches.
Drain Properly: Always drain your fried arancini on a wire rack set over a baking sheet or on a generous layer of paper towels. This allows air to circulate and ensures the bottoms don’t become soggy from trapped oil, preserving that desirable crispiness.
Serving Suggestions for arancini recipe
Decoration
Elevate the presentation of your homemade arancini with a few simple garnishes. A light dusting of fresh parsley, finely chopped, adds a touch of vibrant green and a hint of freshness. You could also offer a sprinkle of extra grated Parmesan cheese over the top just before serving for an added savory note. A small dollop of aioli or a drizzle of balsamic glaze can also add a sophisticated visual and flavor element.
Side Dishes
Arancini are wonderfully versatile and pair beautifully with a variety of accompaniments. A fresh, crisp green salad dressed with a light vinaigrette provides a refreshing contrast to the richness of the fried rice balls. Consider a simple Caprese salad with ripe tomatoes, fresh mozzarella, and basil, or a Mediterranean salad featuring cucumbers, olives, and feta cheese. For a more substantial meal, serve them alongside a hearty pasta dish or a grilled protein.
Creative Serving Ideas
Serve your arancini as an elegant appetizer at your next dinner party, arranged artfully on a platter with a selection of dipping sauces like marinara, spicy arrabiata, or a creamy garlic aioli. For a more casual gathering, offer them in small paper cones as a street-food-inspired treat. They also make a fantastic addition to a buffet or a tasting menu, allowing guests to sample multiple flavors if you offer different fillings.
Preparation & Storage
Storing Leftovers
To store any leftover arancini, allow them to cool completely before placing them in an airtight container. They can be kept in the refrigerator for 2 to 3 days. While they won’t be as crispy as when freshly fried, proper storage will help maintain their texture and flavor for later enjoyment. Ensure the container is well-sealed to prevent them from drying out or absorbing odors from other foods.
Freezing
You have the option to freeze your arancini either before frying or after they have been cooked and cooled. To freeze uncooked arancini, arrange them in a single layer on a baking sheet lined with parchment paper and freeze until solid, then transfer them to a freezer-safe bag or container for up to 2 months. For cooked arancini, cool them completely, then freeze on a parchment-lined tray until firm before transferring to a freezer bag. This pre-freezing step prevents them from clumping together.
Reheating
The best method for reheating arancini to restore their crispiness is to use your oven. Preheat your oven to 350°F (175°C). Place the cold arancini in a single layer on a baking sheet. Reheat for approximately 15-20 minutes, or until they are heated through and the exterior is crisp again. Avoid reheating them in the microwave, as this will result in a soft, undesirable texture.
Frequently Asked Questions
-
Can I bake arancini instead of frying them?
While deep-frying is the traditional method that yields the ultimate crispy texture, baking is a viable alternative for those seeking a lighter option. To bake your arancini, preheat your oven to 375°F (190°C) and place the breaded rice balls on a wire rack set over a baking sheet (lining the pan makes cleanup easier). Bake for approximately 20-25 minutes, flipping them halfway through, until they are golden brown and heated through. Keep a close eye on them, as baking times can vary depending on your oven and the size of the arancini. They won’t achieve the same level of crispiness as fried versions, but they will still be delicious.
-
How do you keep arancini from falling apart during frying?
The most crucial factor in preventing arancini from falling apart is ensuring the risotto is thoroughly cooled and firm before shaping. Cold risotto is much easier to handle and holds its shape better. Additionally, a double breading process (flour, egg, breadcrumbs, then egg again, and breadcrumbs again) can create a more robust coating that helps keep everything together. Chilling the shaped and breaded arancini in the freezer for at least 15-20 minutes before frying also significantly helps to firm them up and prevent breakage.
-
What kind of risotto is best for making arancini?
Arborio rice is the gold standard for making risotto, and consequently, for arancini. Its high starch content releases during cooking, creating the creamy, cohesive texture necessary for the rice balls to bind together. Carnaroli rice is another excellent option, often referred to as the “king of rice,” which can also produce a wonderfully creamy risotto. While other short-grain rice varieties might be used, they may not yield the same ideal texture and binding properties that are so vital for successful arancini.