Air Fryer Garlic Bread
This air fryer garlic bread is an absolute game-changer for any meal. It delivers an incredibly crispy exterior that gives way to a soft, buttery interior, all infused with a robust garlic flavor that’s simply irresistible. Prepare to elevate your side dish game with this quick and simple recipe.
In my kitchen, garlic bread is a beloved staple, almost a mandatory addition to any dinner spread. My husband has a particular fondness for adding garlic to nearly every dish, while my younger daughter’s culinary preferences often lean towards bread as her primary choice. Given this household dynamic, creating air fryer garlic bread was an inevitability, a delicious solution to satisfy everyone’s cravings. The result is a perfectly balanced bite, crisp on the outside and tender within, ready in mere minutes, leaving just enough time to whip up a complementary dish like garlic butter noodles or a comforting chicken and white bean soup.
Why You Will Love This Recipe
- Perfect Texture: Enjoy garlic bread in the air fryer that achieves a delightful crispness on the outside while the inside remains wonderfully warm, soft, and buttery.
- Quick and Easy: The preparation is incredibly straightforward; simply spread the butter, add the minced garlic, and let your air fryer work its magic, delivering ready-to-eat bread in just about 5 minutes.
- No Oven Needed: This recipe is ideal for those evenings when you prefer not to heat up the kitchen or deal with the hassle of using baking sheets, offering a convenient alternative.
- Pairs with Everything: This versatile garlic toast complements a wide array of dishes, from pasta and soups to salads, and it’s also fantastic sliced for appetizers with your favorite dipping sauces.
Ingredients You Need
Crafting this exceptional air fryer garlic bread relies on just a few fundamental ingredients, many of which you likely already have stocked in your pantry. The quality of these simple components is paramount to achieving the most delightful flavor and texture. Using fresh ingredients, particularly the garlic, will significantly amplify the aromatic qualities of this beloved side dish.
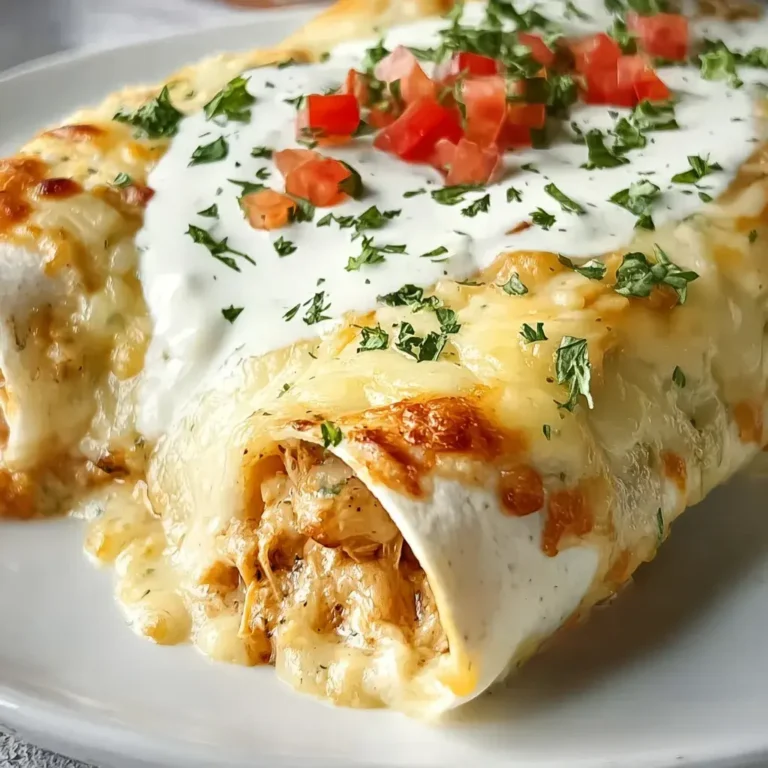
Air Fryer Garlic Bread

This air fryer garlic bread is extra crispy on the outside, soft and buttery in the center, and packed with garlic flavor. It comes together in minutes with simple ingredients and is perfect for pasta nights, soups, or dunking in marinara.
- 1 loaf (14-ounces) French bread
- ½ cup butter, divided, softened enough to spread easily
- 6 garlic cloves, minced
- 2 teaspoons dried parsley, or use your favorite dried herbs
- 1Set the air fryer to preheat at 370°F.
- 2Cut the bread in half, then slice each half longwise to get two top halves and two bottom halves.
- 3Spread 2 tablespoons of softened butter onto the cut sides of each quarter of bread. Mince the garlic and spread it over the butter on the bread slices. Then sprinkle on the parsley.
- 4Transfer two bread pieces at a time to the air fryer basket and cook for about 5 minutes, or until the bread is golden and crisp on the edges.
- 5Once done, let the garlic bread cool slightly, then cut each quarter into five slices and enjoy.
Keywords: garlic bread, air fryer, side dish, appetizer, bread, vegetarian
- loaf of french bread: a 14-ounce loaf provides the ideal structure for this recipe, offering a good balance of crust and soft interior.
- butter: half a cup, divided, softened to perfection for easy spreading without tearing the bread.
- garlic cloves: six cloves, freshly minced, to infuse every bite with pungent, delicious flavor.
- dried parsley: two teaspoons, or your preferred dried herbs, to add a touch of color and subtle herbaceous notes.
The specific quantities for each ingredient are conveniently detailed within the recipe card for your ease.
Variations
One of the most delightful aspects of this air fryer garlic bread is its inherent versatility, allowing for numerous creative adaptations to suit different tastes and dietary needs. Imagine transforming this simple side into a more substantial or decadent treat with just a few thoughtful additions.
Cheesy Garlic Bread: For those who believe everything is better with cheese, a generous sprinkle of shredded mozzarella, mild cheddar, or finely grated Parmesan cheese over the buttered bread during the final 1 to 2 minutes of air frying will create a wonderfully gooey and flavorful topping. This elevates the classic garlic bread into a truly indulgent experience, perfect for satisfying even the most discerning cheese lovers. It’s a quick way to add a gourmet touch to a simple dish.
Extra Herbs and Spices: To expand beyond the basic parsley, consider incorporating other dried herbs or even fresh ones for an intensified herbaceous profile. A blend of Italian seasoning, a pinch of dried oregano and basil, or even a touch of red pepper flakes for a subtle kick can dramatically alter the flavor dimensions. If you have fresh herbs like rosemary or thyme, a light chiffonade can be added just before serving for a burst of fresh, aromatic flavor.
Spicy Kick: For those who enjoy a little heat, a pinch of cayenne pepper or a dash of your favorite hot sauce mixed into the butter mixture before spreading can introduce a delightful warmth. This subtle spiciness can beautifully complement the richness of the butter and the pungency of the garlic, offering a more complex flavor profile that will intrigue your palate. It’s a simple adjustment that yields a significantly different and exciting taste experience.
How to Prepare air fryer garlic bread
The beauty of this air fryer garlic bread lies in its astonishing speed and simplicity. From gathering your ingredients to having perfectly golden bread on your plate, the entire process is remarkably efficient, making it an ideal choice for quick weeknight dinners or impromptu appetizer needs.
Step 1: Preheat Your Air Fryer and Prepare the Bread
Begin by preheating your air fryer to 370°F (188°C). This crucial step ensures that the bread cooks evenly and achieves that desirable crispy exterior right from the moment it enters the basket. A properly preheated air fryer is key to avoiding soggy or unevenly cooked results.
While the air fryer is warming up, turn your attention to the loaf of French bread. You’ll want to slice this loaf in half lengthwise, creating two distinct halves. Following this, slice each of those halves again, lengthwise, to yield four long quarters. This method ensures that each piece has ample surface area to receive the buttery garlic mixture and cook to perfection.
The Best Part: This initial preparation is straightforward and sets the stage for the flavor infusion to come. The consistent slicing ensures that each portion will cook uniformly, leading to a delightful and satisfying eating experience for everyone.
Step 2: Generously Butter the Bread
Now it’s time to imbue the bread with its signature richness. Take about two tablespoons of softened butter for each of the four bread quarters. Spread this softened butter evenly across the cut sides of each bread piece. Ensure the butter reaches all the way to the edges to guarantee a beautifully toasted and flavorful crust.
Important Tip: Using softened butter is essential here; it should be pliable enough to spread smoothly without tearing the delicate crumb of the bread. If your butter is too cold, it will be difficult to distribute evenly, leading to patchy coverage and a less cohesive flavor profile.
The goal is a consistent, inviting layer of butter that will melt and crisp up wonderfully in the air fryer, creating a delectable base for the garlic and herbs. This step is where the magic truly begins, transforming plain bread into a mouthwatering delight.
Step 3: Add the Garlic and Parsley
With the butter layer in place, it’s time to introduce the aromatic star of the show: garlic. Finely mince your six fresh garlic cloves. The finer the mince, the more evenly the garlic flavor will distribute throughout the butter. Carefully spread this minced garlic over the buttered surface of each bread quarter. Don’t be shy; this is where the robust garlic essence comes from.
Once the garlic is distributed, sprinkle two teaspoons of dried parsley evenly over the garlic and butter. The parsley not only adds a lovely visual appeal with its flecks of green but also contributes a subtle, fresh herby note that balances the richness of the garlic and butter. If you prefer a more pronounced herb flavor, feel free to use slightly more parsley or incorporate other dried herbs as suggested in the variations.
Flavor Fusion: This combination of butter, garlic, and parsley is a classic for a reason. As it heats in the air fryer, the aromas will fill your kitchen, promising a truly delicious outcome. The garlic will soften and become fragrant, melding beautifully with the melted butter to create a truly irresistible spread.
Step 4: Cook the Garlic Bread in the Air Fryer
Carefully transfer two of the prepared bread quarters into your preheated air fryer basket. It’s crucial not to overcrowd the basket; cooking in batches ensures that the hot air can circulate effectively around each piece, leading to optimal crisping and even cooking. Overcrowding can result in steaming rather than toasting, diminishing the desired crispy texture.
Air fry the bread at 370°F (188°C) for approximately 5 minutes. The exact timing can vary slightly depending on your specific air fryer model and the thickness of your bread. Keep a close eye on it, especially during the first few minutes, to achieve the perfect level of golden-brown crispiness on the edges without burning.
Hands-Off Perfection: Resist the urge to flip the bread during cooking. Leaving it undisturbed helps maintain the integrity of the buttery, garlicky topping and allows the bottom of the bread to toast beautifully against the air fryer basket, creating a delightful textural contrast. The internal soft center will remain perfectly moist.
Step 5: Repeat for Remaining Bread
Once the first batch of garlic bread is golden and ready, carefully remove it from the air fryer basket. Set it aside to cool slightly. Then, place the remaining two bread quarters into the air fryer basket, ensuring not to overcrowd it. Air fry these for another approximately 5 minutes at 370°F (188°C), or until they achieve the same perfect golden-brown color and crisp edges as the first batch.
This systematic approach ensures that all your garlic bread is cooked to perfection. By working in batches, you guarantee that each piece receives adequate exposure to the circulating hot air, resulting in consistently delicious results. The aroma filling your kitchen at this stage is simply divine, a testament to the simple yet powerful combination of ingredients.
The Reward: The effort involved is minimal, but the payoff is immense. You’ll have a batch of wonderfully aromatic and perfectly cooked garlic bread, ready to be sliced and devoured. This methodical repetition guarantees that everyone gets a share of the deliciousness.
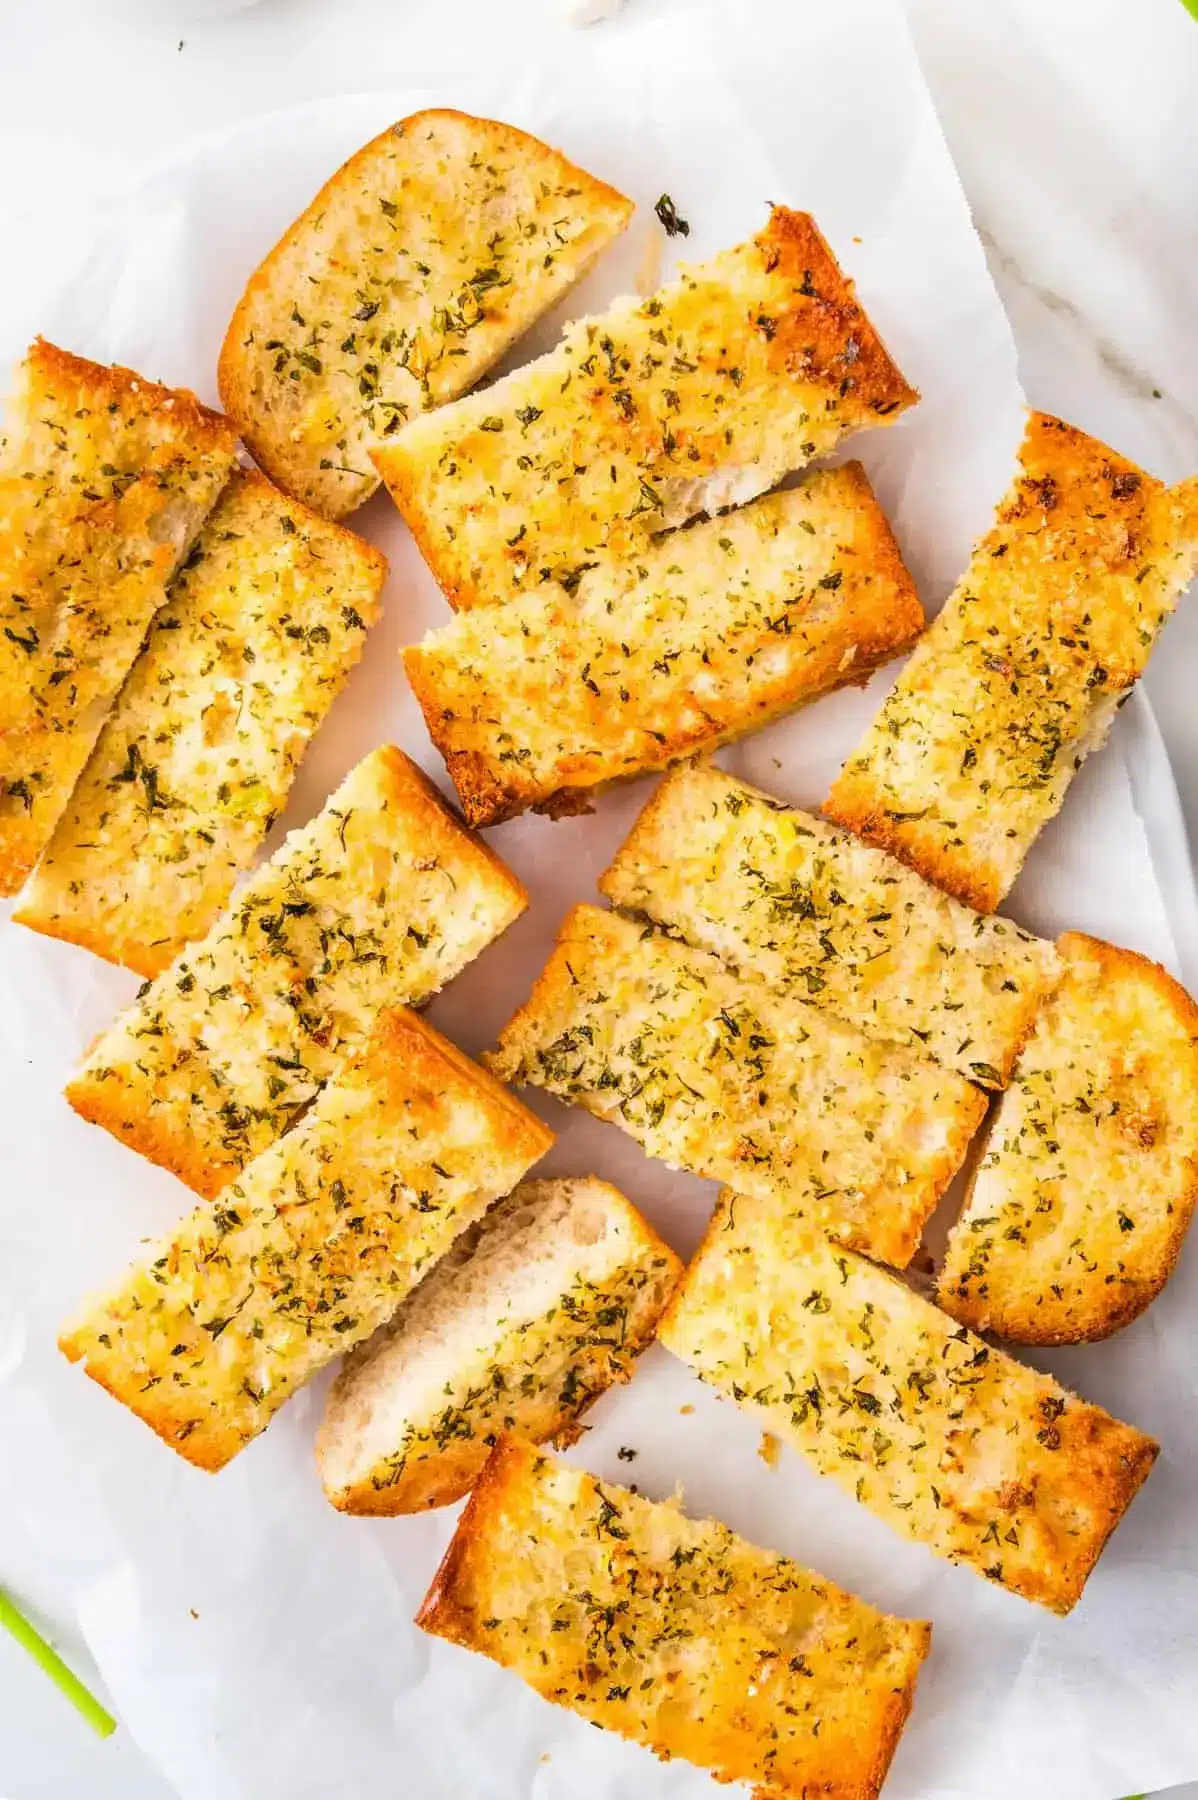
Step 6: Slice and Serve
After the garlic bread has finished its air frying journey and has cooled for just a moment to make handling easier, it’s time to slice. Using a sharp serrated knife, carefully cut each quarter of the bread into five individual slices. This slicing method results in nicely sized portions that are perfect for dipping, accompanying meals, or enjoying on their own. Slicing after cooking also helps to preserve the soft, buttery interior of the bread.
Serve the garlic bread immediately while it’s still warm and fragrant. The heat will enhance the aroma and ensure the butter is perfectly melted, creating an irresistible experience. This fresh-from-the-air fryer goodness is truly at its peak flavor and texture right after cooking.
Enjoy Immediately: This air fryer garlic bread is best enjoyed fresh, allowing you to fully appreciate its crispy crust and tender, buttery center. The combination of textures and the intense garlic flavor make it an instant crowd-pleaser. Pair it with your favorite dinner dishes for a complete and satisfying meal.
Pro Tips for air fryer garlic bread
Achieving garlic bread perfection in the air fryer is wonderfully straightforward, but a few expert tips can elevate your results from good to truly exceptional. These small adjustments and considerations can make a noticeable difference in the final texture and flavor profile, ensuring you get the most out of this simple yet satisfying recipe.
Soft Butter is Key: Always ensure your butter is truly softened, not melted. It should be pliable enough to spread easily without tearing the bread. This creates an even coating that melts beautifully and toasts to perfection. If your butter is too firm, it can create an uneven layer, leading to some parts being under-toasted and others potentially burning.
Watch Your Air Fryer Closely: Air fryers can vary significantly in their heating elements and calibration. The first time you make this recipe, keep a very close eye on the bread, especially during the last couple of minutes of cooking. This will help you determine the perfect timing for your specific appliance to achieve that ideal golden-brown crispness without burning.
Don’t Overcrowd the Basket: This is a fundamental rule for successful air frying. Overcrowding prevents the hot air from circulating properly, which is essential for achieving crispiness. Air-fry the bread in batches if necessary to ensure each piece has enough space for optimal results. Proper airflow is your best friend for achieving that coveted crunch.
Slice After Cooking for Softness: While you can slice the bread before air frying, slicing it afterward often results in a softer, more buttery interior. This is because the butter has more time to permeate the bread during cooking. It also makes the slicing process much easier and cleaner, preventing the butter and garlic from smearing excessively.
Experiment with Garlic Intensity: The recipe calls for six minced garlic cloves, but this is a guideline. If you are a true garlic aficionado, don’t hesitate to add an extra clove or two. Conversely, if you prefer a milder garlic flavor, start with fewer cloves and adjust to your taste. The beauty of homemade recipes is personalization.
Serving Suggestions for air fryer garlic bread
Air fryer garlic bread is an incredibly versatile accompaniment, capable of elevating a wide range of meals from ordinary to extraordinary. Its comforting aroma and irresistible texture make it a welcome addition to almost any table, but its presentation and pairing can be thoughtfully considered for maximum impact.
Decoration
While the dried parsley already adds a touch of visual appeal, a few fresh herbs can significantly enhance its presentation. A light sprinkle of freshly chopped chives or flat-leaf parsley just before serving adds a vibrant burst of color and a fresher aroma. For a more sophisticated touch, a few delicate sprigs of fresh rosemary or thyme can be artfully placed on the serving platter, infusing the air with their delightful fragrance and promising an enhanced sensory experience.
Side Dishes
This garlic bread is a perfect partner for hearty dinner dishes. It’s excellent alongside a rich bowl of cajun chicken pasta, where its crisp texture can contrast beautifully with the creamy sauce. It also pairs wonderfully with robust soups, such as a classic tomato bisque or a hearty lentil soup, providing a satisfying crunch with every spoonful. For a more substantial meal, consider serving it with grilled or roasted meats like steak or chicken, where it can soak up any delicious pan juices.
Creative Serving Ideas
Beyond being a simple side, consider using your air fryer garlic bread as a base for creative appetizers. Slice it into smaller, bite-sized pieces and serve them with a selection of dips, such as a creamy ranch, a zesty marinara sauce, or even a spicy avocado crema. You could also layer melted cheese and a sprinkle of Italian herbs onto the bread before its final minutes in the air fryer, transforming it into mini garlic bread pizzas. This adaptability makes it a fantastic option for game days or casual gatherings, offering something delightful for everyone.
Preparation & Storage
The convenience of air fryer garlic bread extends to its storage and reheating capabilities, ensuring you can enjoy its deliciousness even if you have leftovers. Proper handling will maintain its delightful texture and flavor for days to come.
Storing Leftovers
Once the garlic bread has cooled completely, store any leftovers in an airtight container at room temperature for immediate consumption within a day or two. For longer storage, transfer the container to the refrigerator. Ensure the container is well-sealed to prevent the bread from drying out and to maintain its moisture. Refrigerated, it can typically last for 2 to 3 days, though the crispness may diminish over time.
Freezing
To freeze garlic bread for longer-term storage, allow it to cool completely. Wrap individual slices or portions tightly in plastic wrap, followed by a layer of aluminum foil or place them in a freezer-safe bag or airtight container. Properly frozen garlic bread can maintain its quality for up to 2 months. This makes it an excellent option for having a quick and delicious side dish on hand whenever the craving strikes.
Reheating
Reheating garlic bread in the air fryer is the most effective way to restore its crispy texture. Place the cooled leftovers in the air fryer basket and heat at approximately 390°F (200°C) for 2-4 minutes, or until warmed through and crisped to your liking. You can also reheat it in a conventional oven at a similar temperature, though the air fryer generally yields a superior crispness. Avoid reheating in a microwave, as this will likely result in a soft, chewy texture.
Frequently Asked Questions
-
Should I slice the bread before or after air frying it?
You have the flexibility to slice the bread either before or after air frying, and each method offers distinct advantages. Slicing the bread *before* air frying provides crispier edges on every individual piece, as the heat can directly access all sides of the cut surface. However, this method requires a bit more preparation time upfront. On the other hand, slicing the bread *after* air frying is a faster process and is often preferred because it helps to keep the inside edges of the bread softer and more buttery. The residual heat from air frying also makes the bread easier to slice cleanly when it’s still warm.
-
Can I make frozen garlic bread in the air fryer?
Absolutely! Making frozen garlic bread in the air fryer is a fantastic and quick alternative. Simply place the frozen garlic bread directly into the air fryer basket. Set your air fryer to approximately 370°F (188°C) and cook until the bread is heated through and has achieved a desirable crispness. The exact cooking time will vary based on the thickness and type of frozen garlic bread you are using, so it’s advisable to start checking after about 5-7 minutes and continue cooking as needed, usually for a total of 8-12 minutes.
-
What is the best way to mince garlic for this recipe?
For the best flavor and even distribution, using a garlic press is generally the quickest and easiest method to mince fresh garlic for this recipe. A garlic press will crush the cloves efficiently, releasing their potent oils and creating a fine paste that blends seamlessly with the butter. If you don’t have a garlic press, the next best option is to finely mince the garlic cloves with a sharp knife. Aim for a very fine chop to ensure the garlic is distributed evenly across the bread and doesn’t have large, overpowering chunks. You can also finely mince with a microplane for a paste-like consistency.