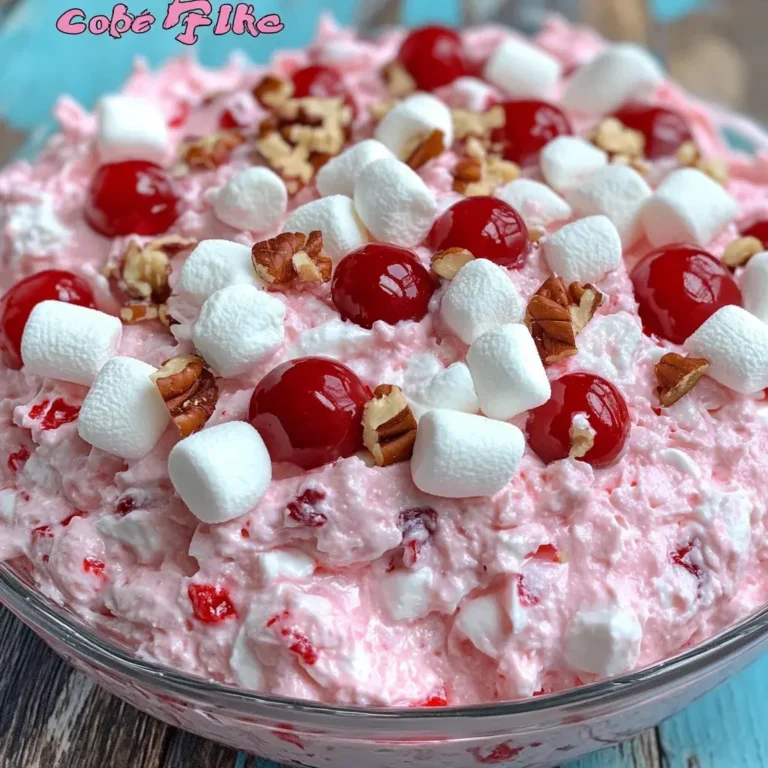
Irresistible 3 Ingredient Cool Whip Candy You Can Make Today

As I stood in my kitchen, the tempting aroma of melting chocolate wafted through the air, instantly transporting me back to my childhood. There’s something truly magical about creating a sophisticated dessert that requires just three simple ingredients, and that is exactly what you will find with this 3 Ingredient Cool Whip Candy.
These dreamy chocolate squares are incredibly easy to whip up, making them the perfect solution for unexpected guests or a last-minute sweet tooth craving after dinner. With zero baking involved, you can enjoy the ultimate satisfaction of a delicious homemade dessert without any kitchen fuss.
Why You Will Love This Recipe
- Quick Preparation: You can have this delightful treat ready for the freezer in less than ten minutes of active work.
- Rich, Creamy Texture: The unique blend of airy whipped topping and velvety chocolate creates a melt-in-your-mouth experience that feels indulgent yet light.
- Endless Customization: You are free to get creative by adding chopped nuts, crushed cookies, or flavor extracts to make this treat uniquely your own.
- No-Bake Convenience: With absolutely no oven time required, you can keep your kitchen cool while preparing a high-quality dessert that satisfies every craving.
- Crowd-Pleasing Delight: Whether you are hosting a casual family gathering or a fancy party, these elegant chocolate squares are guaranteed to impress your guests.
Ingredients You Need
To achieve the best results, always prioritize high-quality chocolate chips, as they form the foundation of the flavor profile. Ensuring your ingredients are at the right temperature is also crucial for a smooth and consistent emulsion. The specific measurements for each item can be found in the recipe information below.
3 Ingredient Cool Whip Candy
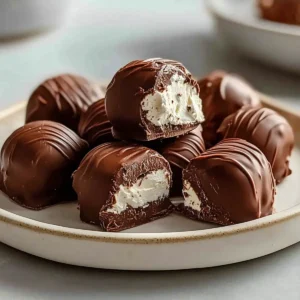
These dreamy chocolate squares are incredibly easy to whip up, requiring only three ingredients. With zero baking involved, you can enjoy the satisfaction of a delicious homemade dessert without any fuss.
- 8 oz Cool Whip (Fully thawed for smooth texture)
- 12 oz Semi-Sweet Chocolate Chips (Can substitute with milk or dark chocolate)
- 2 tbsp Coconut Oil (Adds glossiness)
- Optional: Chopped Nuts, Crushed Oreos, Mini M&Ms, Peanut Butter, or 1 tsp Peppermint Extract
- 1Prepare an 8x8-inch baking dish by lining it with parchment paper or foil and lightly greasing it.
- 2In a microwave-safe bowl, combine 12 oz of semi-sweet chocolate chips and 2 tablespoons of coconut oil, heating in 20-30 second intervals until melted.
- 3Allow the melted chocolate to cool slightly for about 5 minutes, then gently fold in 8 oz of thawed Cool Whip until the mixture is creamy and no white streaks remain.
- 4Spread the mixture evenly into the prepared baking dish and smooth the top.
- 5Chill in the freezer for 1-2 hours until firm enough to cut.
- 6Lift the candy out of the dish using the parchment paper edges and cut into bite-sized squares.
- 7Serve immediately or store in an airtight container in the freezer for up to 2 weeks.
Keywords: Cool Whip Candy, No-Bake Dessert, Easy Chocolate Treats, 3 Ingredient Recipe, Dessert Squares
- cool whip: must be fully thawed to ensure a smooth, cloud-like consistency in the final candy.
- semi-sweet chocolate chips: these provide the perfect balance of cocoa intensity and sweetness for the base.
- coconut oil: this essential ingredient adds a glossy finish and helps the candy maintain its structure when chilled.
- chopped nuts: optional add-ins like almonds or pecans provide a wonderful textural contrast.
- crushed oreos: use these for a cookies-and-cream variation that children and adults will absolutely love.
- peppermint extract: a small dash of this elevates the candy into a festive, holiday-ready treat.
Variations
The Vegan Twist: You can easily adapt this recipe for a plant-based lifestyle by using vegan-certified whipped topping and dairy-free chocolate morsels. Ensure your coconut oil is organic and unrefined if you prefer a subtle hint of tropical flavor in your finished dessert.
Low Carb Options: For those following a keto or low-sugar diet, simply swap the standard chocolate chips for high-quality sugar-free alternatives. Using a sugar-free whipped topping will keep the net carb count very low, allowing you to enjoy a decadent piece of candy without compromising your goals.
Flavor Infusions: Experiment with extracts like almond, vanilla, or even espresso powder to deepen the complexity of the chocolate. These small adjustments can transform a simple recipe into a gourmet snack that pairs perfectly with a glass of milk or a hot drink.
How to Prepare 3 Ingredient Cool Whip Candy
Step 1: Prepare Your Dish
The Foundation: Begin by selecting a sturdy 8×8-inch baking dish that fits easily into your freezer. Line the base and sides with parchment paper or high-quality aluminum foil to ensure a clean removal later.
Pro Prep: Lightly grease the lining with a tiny amount of coconut oil or non-stick spray to prevent any sticking. Having your station ready before you start melting the chocolate will make the entire process much smoother and more efficient.
Step 2: Melt the Chocolate and Oil
Gentle Heat: Place your semi-sweet chocolate chips into a microwave-safe glass bowl along with the measured coconut oil. The oil is the secret to a silky, professional-looking shine on your finished candy squares.
Microwave Technique: Heat the mixture in 20-30 second intervals, ensuring you stir thoroughly after each session to prevent burning. Stop heating as soon as the chips are 90% melted, as the residual heat will finish the job perfectly.
Step 3: Combine Cool Whip and Chocolate
Temperature Control: Allow the melted chocolate mixture to sit on your counter for about five minutes before proceeding. If the chocolate is too hot, it will cause the whipped topping to collapse rather than stay airy and light.
The Fold: Gently fold the thawed whipped topping into the chocolate using a silicone spatula. Use a circular motion, scraping the sides and bottom, until no white streaks remain and the mixture is uniform.
Step 4: Spread the Mixture
Even Distribution: Carefully transfer your chocolate mixture into the prepared baking dish. Use your spatula to spread it into the corners, ensuring the height of the candy is level across the entire square.
Smooth Surfaces: A flat, even layer ensures that every piece you cut later will look uniform and professional. Tap the dish gently against the counter a few times to release any trapped air bubbles.
Step 5: Chill to Set
The Freeze: Place the dish into the freezer for at least 1-2 hours to allow the fats in the coconut oil and chocolate to firm up. This patience is vital for achieving that classic fudge-like texture that makes this candy so special.
Testing Readiness: After one hour, gently touch the center of the candy to ensure it has reached a solid, firm consistency. If it still feels tacky or soft, return it to the freezer for an additional 30 minutes before attempting to cut.
Step 6: Cut Into Squares
Clean Cuts: Lift the entire block of candy out of the dish using the overhanging parchment paper. Place it on a clean cutting board and use a sharp, warm knife to slice through the candy.
Refined Presentation: To get the cleanest edges, wipe your knife with a warm, damp cloth between each slice. This simple action prevents the chocolate from dragging and leaves you with pristine, beautiful candy squares.
Pro Tips for 3 Ingredient Cool Whip Candy
Thawing is Key: Always make sure your whipped topping is completely thawed before you begin folding it into the chocolate. Frozen or icy clumps will ruin the texture and cause the mixture to separate, resulting in a grainy mouthfeel instead of a creamy one.
Gentle Heating: If you are nervous about burning the chocolate, you can use a double boiler method on the stovetop instead of a microwave. This offers more control and keeps the temperature consistent throughout the melting process, which is ideal for those who prefer to be careful.
Balance Your Mix-Ins: If you decide to add nuts, crushed cookies, or candy pieces, add them toward the end of the folding process. Over-mixing can deflate your light whipped base and make the final product dense, so stop as soon as everything is just barely combined.
Storage Matters: Since this candy relies on the stability of the whipped topping, it should ideally be stored in the freezer until you are ready to serve. If you have guests, take the tray out just five minutes before serving so the candy softens slightly without losing its structural integrity.
Serving Suggestions for 3 Ingredient Cool Whip Candy
Decoration
To take your presentation to the next level, sprinkle a pinch of sea salt over the top before freezing. This enhances the cocoa flavor and adds a professional aesthetic. You could also try a light dusting of powdered sugar or cocoa powder to make the squares look like gourmet truffles.
Side Dishes
When hosting a lunch or dinner party, serve these candies alongside a platter of fresh berries. Strawberries, raspberries, and blackberries provide a tart, refreshing contrast to the rich, heavy nature of the chocolate squares. They also help cleanse the palate between bites.
Creative Serving Ideas
Consider placing each square into a decorative paper cupcake liner for easy handling and a touch of elegance. If you want to get creative, you can serve these alongside a small bowl of warm raspberry coulis or salted caramel sauce for guests to dip their squares into. Pairing them with a classic German pancake recipe as an afternoon snack is another wonderful way to enjoy the versatility of this dish.
Preparation & Storage
Storing Leftovers
Because of the dairy content in the whipped topping, leftovers must be kept cold. Store them in an airtight container to keep out unwanted odors from your freezer or fridge. When kept in the freezer, they will stay fresh and delicious for up to two full weeks.
Freezing
This recipe is built for the freezer, so you do not need to worry about the cold temperature affecting the quality. If you want to keep them for a longer period, wrap each individual square in parchment paper before placing them in a freezer bag. This prevents the pieces from sticking together and makes grabbing a single treat effortless.
Reheating
There is no need to reheat this dish, as it is designed to be a frozen or chilled delight. If you prefer the texture to be softer, simply move a square from the freezer to the refrigerator about 20 minutes before you plan to enjoy it. Serving it too warm may cause it to melt, so be mindful of the ambient room temperature during the summer months.
Frequently Asked Questions
- What type of Cool Whip should I use?
For the best results, use standard or “Extra Creamy” whipped topping. Ensure it is fully thawed in the refrigerator for at least four hours before you begin, as the chemistry of the recipe relies on the stability of the emulsion created between the melted chocolate and the topping. Using a partially frozen product will lead to water separation and a gritty final texture.
- Can I use different types of chocolate for this recipe?
Yes, you can absolutely experiment with different varieties of chocolate chips! Milk chocolate creates a much sweeter, milder candy that kids typically prefer, while dark chocolate offers a more sophisticated, intense flavor profile. Just be aware that white chocolate behaves differently and might require a bit less oil due to its higher sugar and milk fat content compared to semi-sweet varieties.
- What happens if my chocolate seizes while I am melting it?
If your chocolate becomes clumpy or grainy, it is likely due to the introduction of moisture or excessive heat. You can often save the mixture by adding another teaspoon of coconut oil and stirring vigorously in a circular motion until the cocoa butter emulsifies again. If the mixture is completely scorched, however, it is best to start over with fresh ingredients to ensure the quality of your dessert.