Peach Crisp
There’s something undeniably comforting about a warm, bubbling fruit dessert, and this Peach Crisp recipe is an absolute triumph in that category. It strikes a perfect balance between sweet, tender fruit and a satisfyingly crunchy, buttery topping. This dessert is destined to become a cherished staple in your home, offering a delightful escape with every spoonful. Its universal appeal makes it suitable for everything from casual family dinners to more elaborate celebrations, ensuring smiles all around.
Imagine the aroma filling your kitchen as it bakes – a fragrant blend of cinnamon-spiced peaches and toasted oats. This crisp is more than just a dessert; it’s an experience, a warm embrace on a plate that evokes feelings of nostalgia and pure joy. It’s the kind of treat that brings people together, creating cherished memories around the table. Prepare to be amazed by its simplicity and the extraordinary flavor it delivers.
Why You Will Love This Recipe
- Irresistible Flavor Combination: The natural sweetness of ripe peaches mingles beautifully with warm cinnamon and a hint of brown sugar, creating a deeply satisfying flavor profile. This harmonious blend is a testament to the magic of simple, quality ingredients working together.
- Effortless Preparation: This recipe is designed for ease, minimizing the time spent in the kitchen so you can enjoy more moments with loved ones. Even novice bakers will find the steps straightforward and rewarding, leading to a delicious outcome with minimal fuss.
- Incredibly Versatile: Whether served warm as a stand-alone treat or accompanied by a scoop of creamy vanilla ice cream, this peach crisp adapts beautifully. It’s equally delightful with a dollop of whipped cream or even a side of Greek yogurt for a tangier counterpoint.
- Crowd-Pleasing Appeal: The classic pairing of fruit and a crunchy topping is universally loved, making this dessert a guaranteed hit with guests of all ages. It’s a reliable option for potlucks, holiday gatherings, or any occasion where you want to impress without the stress.
Ingredients You Need
The success of any great dessert hinges on the quality of its ingredients, and this peach crisp is no exception. Opting for fresh, ripe peaches will significantly enhance the final flavor and texture, ensuring a wonderfully gooey filling. Similarly, using good quality butter and freshly ground cinnamon will elevate the aromatic and taste dimensions of both the fruit and the topping.
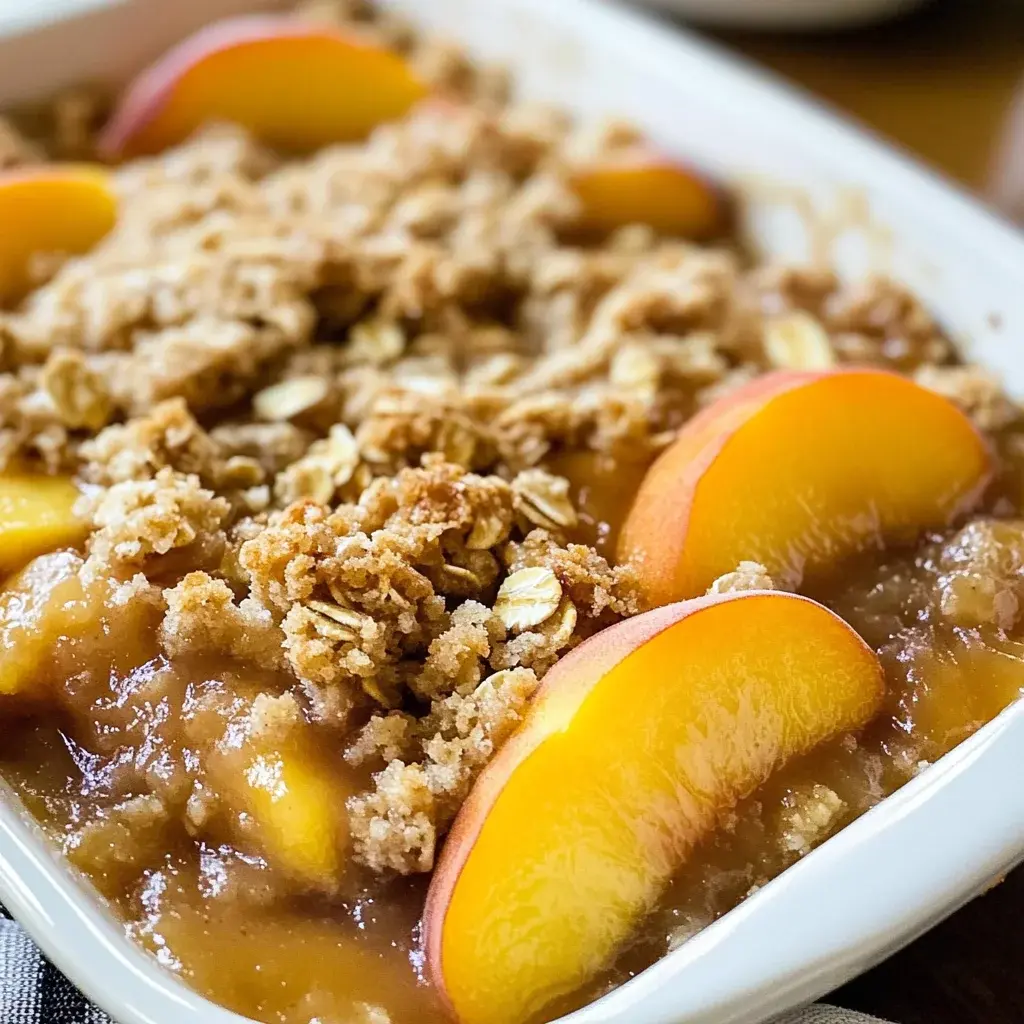
Classic Peach Crisp

Indulge in the delightful warmth of this Peach Crisp, a perfect dessert that combines gooey, sweet peaches with a crunchy oatmeal topping. Ideal for any occasion, this easy-to-make recipe features a comforting blend of flavors that makes it a standout choice for any season.
- 6-8 ripe peaches, peeled and sliced
- 2 tablespoons melted unsalted butter
- 1 teaspoon cinnamon
- 1/4 cup brown sugar
- 2 tablespoons cornstarch
- 1 cup old-fashioned oats
- 3/4 cup brown sugar (for topping)
- 1 cup all-purpose flour
- 1/2 teaspoon cinnamon (for topping)
- 1 pinch salt
- 3/4 cup cold butter
- 1Preheat your oven to 350°F.
- 2In a mixing bowl, combine sliced peaches, melted butter, 1 tsp cinnamon, 1/4 cup brown sugar, and cornstarch. Fold gently until combined.
- 3Pour the fruit mixture into a greased Dutch oven or 9x13-inch pan.
- 4In another bowl, mix oats, 3/4 cup brown sugar, flour, 1/2 tsp cinnamon, and salt. Cut in cold butter with a fork or pastry cutter until the mixture is crumbly.
- 5Spread the topping evenly over the peaches and bake for 30-40 minutes until the top is golden brown.
- 6Allow the crisp to cool for 10-15 minutes before serving warm.
Keywords: Peach Crisp, Dessert, Summer, Easy Baking, Fruit Dessert
- peaches, ripe: choose peaches that yield slightly to gentle pressure for optimal sweetness and juiciness.
- unsalted butter, melted: provides richness and helps bind the peach filling together.
- cinnamon: a warming spice that perfectly complements the peaches, enhancing their natural flavor.
- brown sugar: adds a molasses-rich sweetness to the peach filling, contributing to its gooey texture.
- cornstarch: acts as a thickener, ensuring the peach filling reaches a delightful, syrupy consistency.
- old-fashioned oats: form the base of the crunchy topping, providing texture and a wholesome flavor.
- brown sugar, for topping: contributes to the crisp’s signature sweet and caramelized flavor.
- all-purpose flour: a key component of the topping, creating a tender yet crisp texture when combined with butter and oats.
- cinnamon, for topping: adds another layer of warm spice to the crumbly topping, enhancing its aroma.
- salt: a small pinch of salt balances the sweetness and intensifies the other flavors in the topping.
- cold butter: essential for creating a crumbly, flaky topping when cut into the dry ingredients.
You’ll find the precise quantities for each ingredient conveniently listed within the recipe card above, ensuring you have everything you need for a perfect bake.
Variations
While this classic Peach Crisp recipe is undoubtedly superb, its versatility allows for delightful variations that can cater to different dietary needs and flavor preferences. Embracing these creative twists can introduce new dimensions to this beloved dessert, keeping it fresh and exciting for every occasion.
For those seeking a plant-based option, a vegan peach crisp is easily achievable. Substitute the butter in both the filling and the topping with a high-quality vegan butter alternative or a neutral-flavored oil like coconut oil. Ensure your brown sugar is also vegan-certified, as some sugar processing can involve bone char. The result will be a wonderfully rich and satisfying dessert that everyone can enjoy, maintaining that comforting texture and flavor profile.
A low-carb or keto-friendly version can also be crafted with a few smart substitutions. Replace the brown sugar with a keto-approved sweetener like erythritol or monk fruit blend. For the topping, consider using almond flour or coconut flour in place of all-purpose flour, and ensure your oats are either omitted or substituted with finely chopped nuts like almonds or pecans for added crunch and healthy fats. This adaptation allows for guilt-free indulgence, proving that delicious desserts can align with specific dietary goals.
Experimenting with added spices and fruits opens up another avenue for customization. Consider incorporating a pinch of nutmeg or a dash of cardamom into the peach filling for an exotic twist. Mixing in a handful of fresh berries, such as blueberries or raspberries, alongside the peaches adds a burst of vibrant color and a delightful tartness that perfectly complements the sweet fruit. These small additions can transform the familiar into something uniquely your own.
How to Prepare Peach Crisp recipe
Step 1: Preheat the Oven and Prepare Your Baking Vessel
Begin by setting your oven to the ideal baking temperature of 350 degrees Fahrenheit (175 degrees Celsius). This ensures that the oven is sufficiently preheated, allowing for even and consistent cooking of your peach crisp from the moment it enters the heat. A properly preheated oven is fundamental to achieving that perfectly golden-brown and bubbly dessert we all crave.
Simultaneously, select and prepare your baking dish. A 9×13-inch baking pan is a common and excellent choice, providing ample space for the fruit filling and the topping. Alternatively, individual ramekins or a cast-iron Dutch oven can also be used, each offering a slightly different presentation and cooking dynamic. Whichever vessel you choose, ensure it is lightly greased with butter or cooking spray to prevent the peach crisp from sticking, which guarantees easy serving and a clean release.
This initial preparation step is crucial for setting the stage for a successful bake. Having the oven hot and the dish ready allows you to transition smoothly into assembling the components of your delicious peach crisp without any delays. It’s a small detail that makes a significant difference in the final outcome, contributing to a beautifully baked dessert with minimized risk of undercooking or uneven browning.
Step 2: Crafting the Luscious Peach Filling
In a generously sized mixing bowl, combine all the prepared ingredients for the peach filling. This typically includes your perfectly sliced fresh peaches, a measure of melted unsalted butter, aromatic ground cinnamon, sweet brown sugar, and the thickening agent, cornstarch. The goal here is to gently coat each peach slice, ensuring that every element is evenly distributed throughout the mixture.
Using a spatula or a large spoon, carefully fold these ingredients together until the peaches are thoroughly coated and the mixture begins to look luscious and syrupy. It’s important not to overmix or mash the peaches at this stage; a gentle folding motion preserves their shape and texture, which will develop beautifully during the baking process. You should see a lovely, inviting sheen developing as the sugar and cornstarch begin to meld with the peach juices and butter.
This combination of ingredients is key to achieving that signature gooey, jammy peach layer that makes a peach crisp so irresistible. The melted butter adds a subtle richness, while the brown sugar caramelizes slightly, enhancing the natural sweetness of the fruit. The cornstarch, activated by the heat of the oven, transforms the accumulated juices into a delightful, thick sauce that hugs each tender peach slice.
Step 3: Assembling the Base Layer of Fruit
Once your peach filling has been expertly combined, it’s time to transfer it into its designated baking vessel. Carefully spoon the entire mixture into the bottom of your prepared greased Dutch oven or 9×13-inch baking pan. Ensure you get all the delicious syrupy juices along with the peaches, as these will form the wonderfully moist and flavorful base of your crisp.
Spread the peach mixture out evenly across the bottom of the pan. This even distribution is important for ensuring that the peaches cook uniformly and that the topping can be spread evenly over the entire surface. If you notice any particularly large peach slices, you can gently nudge them into place or even give them a slight press with your spatula to ensure they are nestled well within the filling.
The visual appeal at this stage is already promising – a vibrant layer of tender peach slices glistening with their sweet, spiced coating. This layer is the heart of the peach crisp, providing the soft, yielding contrast to the crunchy topping that follows. Taking a moment to ensure it’s laid out attractively will set the stage for the final presentation of your dessert.
Step 4: Creating the Irresistible Crumbly Topping
Now, turn your attention to crafting the crowning glory of your peach crisp: the delectable crumbly topping. In a separate, clean mixing bowl, combine the dry ingredients. This typically includes the old-fashioned oats, a generous portion of brown sugar for sweetness and caramelization, all-purpose flour for structure, fragrant cinnamon for warmth, and a crucial pinch of salt to balance the sweetness and enhance all the flavors.
Whisk these dry ingredients together thoroughly to ensure they are well combined and evenly distributed. This step is important because it prevents pockets of flour or sugar in the final topping, leading to a more consistent texture. Once blended, add the cold, cubed butter to this dry mixture. The butter should be chilled, as this is critical for achieving the signature crumbly texture.
Using a pastry blender, a fork, or even your fingertips, cut the cold butter into the dry ingredients. Continue this process until the mixture resembles coarse crumbs or small peas. Some larger butter pieces are acceptable, as they will melt and contribute to the crispiness during baking. The goal is to achieve a texture that will bake up into a wonderfully crunchy, slightly chewy layer.
Step 5: The Grand Finale: Topping and Baking
With your peach filling nestled snugly in the pan and your glorious crumbly topping ready, it’s time to bring them together. Evenly distribute the topping mixture over the entire surface of the peach layer. Ensure the topping covers the fruit completely, creating a protective and delicious barrier that will transform into a golden-brown crust during baking.
You can gently press down on the topping with your spatula or the back of a spoon, but avoid compacting it too much; a looser topping tends to be crispier. The goal is to create a beautiful, textured layer that promises delightful crunch in every bite. Some bakers like to leave a few small gaps to allow some of the bubbling peach filling to peek through, adding to the rustic charm.
Place the assembled peach crisp into your preheated 350°F oven. Bake for approximately 30 to 40 minutes, or until the topping is beautifully golden brown and the peach filling is bubbling around the edges. The aroma filling your kitchen during this time will be simply heavenly, a true testament to the deliciousness that awaits.
Step 6: The Patient Wait and The Glorious Serve
As the timer signals the end of the baking period, carefully remove the peach crisp from the oven. You’ll be greeted by a vision of bubbling, golden goodness, with the topping perfectly crisped and the fruit underneath likely peeking through in delightful pockets of warmth. The visual appeal alone is enough to make your mouth water in anticipation.
However, resisting the urge to dive in immediately is key to achieving the best texture. Allow the peach crisp to cool on a wire rack for at least 10 to 15 minutes before serving. This crucial resting period allows the molten fruit filling to set slightly, preventing it from being too runny when you serve. It also allows the flavors to meld further, deepening their delicious complexity.
Once it has rested, serve your warm peach crisp. It is absolutely divine on its own, showcasing the perfect harmony of tender fruit and crunchy topping. However, for an extra touch of indulgence, consider serving it with a scoop of premium vanilla ice cream, a dollop of freshly whipped cream, or a drizzle of crème anglaise. Each accompaniment enhances the experience in its own unique way, creating a truly memorable dessert moment.
Pro Tips for Peach Crisp recipe
Choose the Right Peaches: For the most flavorful and texturally pleasing peach crisp, select ripe, slightly soft peaches. Avoid overly hard or unripe fruit, as they may not break down sufficiently during baking, resulting in a less gooey filling. Varieties like Elberta, Freestone, or even Yukon peaches are excellent choices for their sweetness and texture when cooked.
Cold Butter is Key: When making the crumbly topping, ensure your butter is thoroughly chilled and cut into small cubes. This is essential for achieving a flaky, crisp texture. As the cold butter melts in the oven, it creates steam pockets, leading to a lighter, more tender topping that crumbles beautifully. Warm or melted butter will result in a denser, greasier topping.
Don’t Skimp on Spices: Cinnamon is a classic pairing with peaches, but don’t hesitate to experiment with other warm spices. A pinch of nutmeg, cardamom, or even a whisper of ginger can add intriguing depth and complexity to both the fruit filling and the topping. These spices enhance the natural sweetness of the peaches and create a more aromatic dessert.
The Importance of Resting: While it’s tempting to serve your peach crisp straight from the oven, allowing it to cool for at least 10-15 minutes is crucial. This resting period permits the fruit filling to thicken and set properly, preventing it from becoming too liquidy when served. It also allows the flavors to meld and deepen, resulting in a more cohesive and delicious final product.
Add Texture with Nuts: For an extra layer of crunch and flavor, consider incorporating chopped nuts into the topping mixture. Pecans, walnuts, or slivered almonds pair wonderfully with peaches. Add them along with the oats and flour for a delightful nutty element that complements the sweet fruit and buttery crumble.
Serving Suggestions for Peach Crisp recipe
Decoration
Elevate the visual appeal of your peach crisp with simple yet elegant decorative touches. A light dusting of powdered sugar over the cooled topping can create a whimsical, snowy effect, especially fitting for autumn or winter gatherings. Fresh mint sprigs, with their vibrant green color, provide a refreshing contrast and a hint of fresh aroma.
For a more decadent look, consider garnishing individual servings with a swirl of whipped cream and a single fresh peach slice or a few fresh berries. A delicate drizzle of caramel sauce can also add an appealing visual sheen and an extra layer of flavor. These small decorative flourishes transform a comforting dessert into a show-stopping finale.
Side Dishes
While peach crisp is a star on its own, it pairs beautifully with a variety of complementary side dishes that can complete a meal. For a light and refreshing contrast, a simple mixed greens salad with a tangy vinaigrette can balance the sweetness of the dessert. Consider adding some toasted nuts or dried cranberries to the salad for added texture and flavor.
A scoop of high-quality vanilla bean ice cream is the quintessential partner for warm peach crisp, its creamy coolness a perfect foil for the hot fruit and crunchy topping. Alternatively, a dollop of rich, homemade whipped cream offers a lighter, airier sweetness. For a more sophisticated pairing, a small wedge of aged cheddar cheese can provide a surprising yet delightful savory counterpoint.
Creative Serving Ideas
Move beyond the traditional bowl and explore creative ways to serve your peach crisp. Layer individual portions in clear glasses or ramekins, allowing guests to see the distinct layers of fruit and topping. This presentation is particularly appealing for buffet-style gatherings or when serving smaller, more elegant portions.
Consider turning your peach crisp into a spectacular sundae by serving it warm over a base of vanilla or cinnamon ice cream, then topping it with whipped cream, a cherry, and perhaps a sprinkle of toasted almonds. Another innovative idea is to incorporate it into other desserts; crumble a portion over a scoop of pound cake or use it as a filling for crepes. These creative approaches add an element of surprise and elevate the humble peach crisp to new culinary heights.
Preparation & Storage
Storing Leftovers
Proper storage is key to maintaining the deliciousness of your leftover peach crisp. Once the dessert has cooled completely, transfer any remaining portions into an airtight container. This will prevent the topping from becoming soggy and will keep the fruit filling from drying out. Ensure the container is well-sealed to lock in freshness.
Store the covered peach crisp in the refrigerator. When kept properly chilled, it can retain its quality and delicious flavor for up to 3 to 4 days. While the topping may lose some of its initial crispness over time, the overall flavor profile remains delightful. It’s a perfect treat for enjoying over the next few days.
Freezing
Peach crisp freezes exceptionally well, making it an excellent dessert to prepare ahead of time or to save for future cravings. For the best results, allow the crisp to cool completely before wrapping it tightly. First, wrap the entire dish or individual portions securely in plastic wrap, ensuring there are no air gaps.
Next, add a layer of aluminum foil or transfer the wrapped dessert into a freezer-safe container or a heavy-duty freezer bag. This double-layer protection is crucial for preventing freezer burn and preserving the quality of the crisp. Properly frozen peach crisp can be stored for up to 2 to 3 months. When you’re ready to enjoy it, thaw it overnight in the refrigerator before reheating.
Reheating
Reheating your peach crisp is straightforward and helps bring back that wonderful warm, comforting texture. The most effective method is to use your oven. Preheat your oven to 350°F (175°C). Place the leftover peach crisp in an oven-safe dish, and cover it loosely with aluminum foil.
Bake for about 15-20 minutes, or until the filling is heated through and bubbling, and the topping has regained some of its crispness. If the topping starts to brown too quickly, you can remove the foil for the last few minutes of baking. For quicker reheating of individual portions, the microwave can be used, heating for about 30-60 seconds intervals until warm, though this may result in a softer topping.
Frequently Asked Questions
-
What are the best types of peaches to use for peach crisp, and what if they aren’t in season?
For the most flavorful and texturally ideal peach crisp, it’s best to use ripe, freestone peaches. Varieties like Elberta, Cresthaven, or even Yellow Delicious are excellent choices as they tend to be sweet and break down beautifully when baked, creating a lovely gooey filling. If fresh peaches are out of season, frozen peaches are a perfectly viable alternative. Ensure you purchase “sliced” frozen peaches for convenience, and importantly, thaw them completely and drain off any excess liquid before incorporating them into the filling. This step is crucial to prevent your crisp from becoming too watery. While canned peaches can be used in a pinch, they often contain added sugar and may have a softer texture, so fresh or frozen are generally preferred for optimal flavor and texture.
-
How can I ensure my peach crisp topping is perfectly crispy and not soggy?
Achieving a perfectly crispy topping involves several key factors. Firstly, ensure your butter is very cold when you cut it into the dry ingredients for the topping; this is paramount for creating steam pockets that result in a flaky, crisp texture. Secondly, avoid overworking the dough; you want a crumbly mixture, not a cohesive dough. A pastry blender, a fork, or your fingertips work well to cut the butter in until the mixture resembles coarse crumbs with some pea-sized pieces of butter remaining. Thirdly, ensure the fruit filling isn’t excessively watery; drain any excess juice from very ripe or frozen peaches before mixing them with cornstarch and sugar. Finally, consider the baking process: ensure your oven is at the correct temperature and bake until the topping is visibly golden brown and the filling is bubbling vigorously around the edges. Allowing the crisp to cool for a short period after baking also helps the topping retain its crispness.
-
Can I add other fruits or nuts to my peach crisp, and how would that affect the recipe?
Absolutely! Peach crisp is wonderfully adaptable, and incorporating other fruits or nuts can add delightful new dimensions to the flavor and texture. Berries like blueberries, raspberries, or blackberries are fantastic additions; they introduce a lovely tartness that beautifully balances the sweetness of the peaches. You can add them directly to the peach filling, perhaps in a 1:1 ratio or to your preference. Apples, particularly tart varieties like Granny Smith, also pair exceptionally well with peaches, offering a firmer texture and a pleasant tang. When adding other fruits, be mindful of their moisture content; you may need to slightly adjust the cornstarch if you’re using very juicy fruits. For added crunch and nutty flavor, chopped pecans, walnuts, or slivered almonds can be mixed into the topping along with the oats and flour. Nuts toast beautifully during baking, adding a wonderful aroma and satisfying texture to the crisp, complementing the fruit perfectly.