Irresistible Apple Upside-Down Cake Recipe to Delight Your Tastebuds
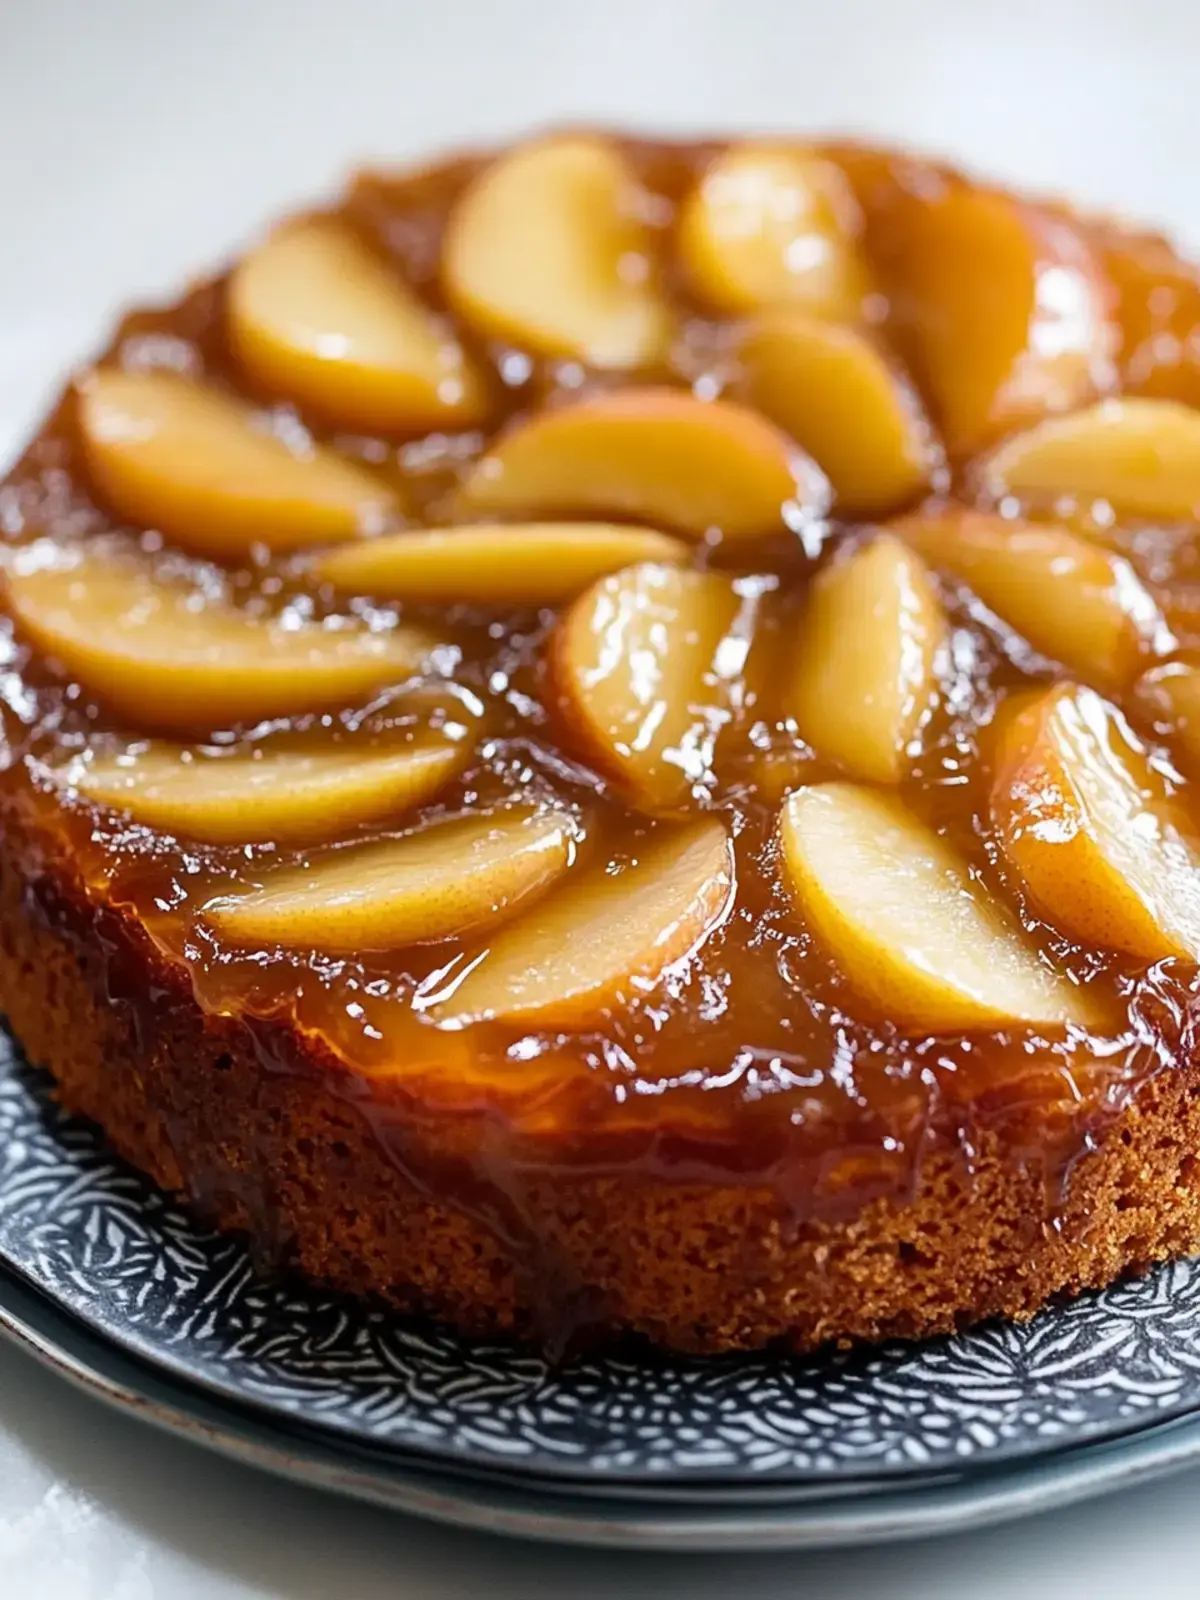
There’s something undeniably magical about the first bite of a warm Apple Upside-Down Cake. It’s a harmonious blend of buttery, caramelized apples meeting a tender, moist cake that evokes feelings of comfort and cherished memories. This dessert effortlessly transports me back to cozy family gatherings and the simple joy of lazy Sunday afternoons, filling the air with the comforting aromas of cinnamon and nutmeg.
In our fast-paced lives, where quick meals often take precedence, a slice of homemade goodness that doesn’t demand hours of preparation is a true treasure. This Apple Upside-Down Cake recipe is precisely that—an uncomplicated yet beautifully impressive dessert that brings warmth and delight to any occasion. It’s a wonderful way to celebrate the seasonal bounty of apples while filling your home with an inviting fragrance, promising a treat that will leave your taste buds singing.
Why You Will Love This Recipe
- Effortless Elegance: This recipe strikes a perfect balance between simplicity and visual appeal, creating a dessert that looks as stunning as it tastes.
- Decadent Topping: The rich, buttery caramel-topped apples create a luscious layer that caramelizes beautifully in the oven, offering a delightful contrast to the tender cake.
- Warm, Inviting Spices: A fragrant blend of cinnamon and nutmeg infuses both the topping and the cake, providing that quintessential cozy, comforting flavor profile.
- Versatile Delight: While apple is the star, this cake is a canvas for creativity, allowing for variations with other fruits or additions for a personalized touch.
- Comfort in Every Bite: It’s the kind of dessert that feels like a warm hug, perfect for sharing with loved ones or enjoying as a sweet moment of self-care.
Ingredients You Need
The success of any great dessert lies in the quality of its ingredients, and this Apple Upside-Down Cake is no exception. Opting for fresh, ripe apples and good-quality butter will truly elevate the final outcome, ensuring a rich flavor and perfect texture. Every component plays a crucial role in creating that irresistible balance of sweet, tart, and spiced notes that make this cake so beloved.
Irresistible Apple Upside-Down Cake Recipe
This Apple Upside-Down Cake Recipe is a delightful dessert featuring caramelized apples atop a moist cake, perfect for any occasion. It's simple to make and always impressive.
- For the Topping:
- 1/4 cup Unsalted butter
- 1/2 cup Brown sugar
- 1 teaspoon Ground cinnamon
- 1/4 teaspoon Ground nutmeg
- 3 medium Apples, peeled, cored, and thinly sliced
- For the Cake Batter:
- 1 cup All-purpose flour
- 1 teaspoon Baking powder
- 1 teaspoon Ground cinnamon
- 1/4 teaspoon Salt
- 1/4 teaspoon Ground nutmeg
- 1/2 cup Unsalted butter, softened
- 1 cup Granulated sugar
- 1/2 cup Brown sugar
- 2 large Eggs
- 1 teaspoon Vanilla extract
- 1 cup Whole milk
- 1 medium Apple, peeled and diced
- 1Preheat the oven to 350°F. Grease a 9-inch round cake pan with butter.
- 2In a small saucepan, warm 1/4 cup butter and 1/2 cup brown sugar over medium heat until dissolved. Whisk in 1 teaspoon cinnamon and 1/4 teaspoon nutmeg.
- 3Pour the caramel mixture into the prepared baking dish. Arrange the thinly sliced apples on top in a design. Refrigerate the pan until ready to add the batter.
- 4In a medium bowl, whisk together 1 cup flour, 1 teaspoon baking powder, 1 teaspoon cinnamon, 1/4 teaspoon salt, and 1/4 teaspoon nutmeg until well combined.
- 5In a large bowl, use an electric mixer to beat 1/2 cup softened butter with 1 cup granulated sugar and 1/2 cup brown sugar on medium speed until light and fluffy, about 2-3 minutes.
- 6Reduce speed to low and add the eggs, vanilla extract, and milk one at a time, mixing well after each addition.
- 7Gently fold the dry ingredients into the wet mixture until just combined. If desired, fold in the diced medium apple.
- 8Carefully pour the batter over the arranged apples in the pan, smoothing it into an even layer.
- 9Bake in the oven for 40-45 minutes, or until the top is golden brown and a toothpick inserted into the center comes out mostly clean.
- 10Allow the cake to cool in the pan for 10-15 minutes. Run a knife around the edge to loosen it, then invert it onto a wire rack or serving plate.
- 11Serve warm or at room temperature.
Keywords: Apple, Cake, Upside-Down Cake, Dessert, Baking, German, Vegetarian
- unsalted butter: essential for the rich caramel topping and a tender cake crumb.
- brown sugar: packed to provide a deep, molasses-infused sweetness that complements the apples perfectly.
- ground cinnamon: a warming spice that adds aromatic depth to the caramelized apples.
- ground nutmeg: offers a subtle, sweet warmth that pairs beautifully with cinnamon and apples.
- medium apples: peeled, cored, and thinly sliced for even caramelization and to create a beautiful mosaic on top.
- all-purpose flour: the structural foundation of the cake, ensuring a moist and tender crumb.
- baking powder: a leavening agent that helps the cake rise to a light and fluffy texture.
- ground cinnamon: a second addition to the cake batter to enhance its spiced flavor.
- salt: balances the sweetness of the sugar and butter, enhancing all the other flavors.
- ground nutmeg: complements the cinnamon and adds another layer of comforting spice to the cake.
- unsalted butter: softened, this contributes significantly to the cake’s buttery flavor and delicate texture.
- granulated sugar: provides sweetness and moisture, contributing to a tender cake.
- brown sugar: packed, it adds an extra layer of rich flavor and helps keep the cake moist.
- large eggs: bind the ingredients together and add richness and structure to the cake batter.
- vanilla extract: a classic flavor enhancer that rounds out the sweetness and spice notes.
- whole milk: contributes moisture and a creamy richness to the cake batter.
- medium apple: peeled and diced, this adds an extra burst of apple flavor and texture within the cake itself.
For the precise measurements of each ingredient, please refer to the detailed recipe card provided below.
Variations
Elevating this classic Apple Upside-Down Cake is incredibly easy with a few creative twists. Consider infusing it with different spices for a more complex flavor profile. A pinch of ground ginger or allspice can add an intriguing warmth that complements the apples beautifully.
For those seeking a textural contrast, folding in chopped walnuts or pecans directly into the batter before baking adds a delightful crunch. These nuts not only enhance the texture but also bring out the nutty undertones of the brown sugar, creating a more robust flavor experience.
A simple yet impactful variation involves a sprinkle of cinnamon sugar over the top before baking. This creates a wonderfully sweet, caramelized crust that is both visually appealing and incredibly delicious, adding an extra layer of indulgence to every slice.
How to Prepare Apple Upside Down Cake Recipe
Step 1: Prepare the Pan and Caramel Topping
Begin by preheating your oven to a moderate 350°F (175°C). This ensures the oven is at the perfect temperature for baking the cake evenly. Carefully grease a 9-inch round cake pan with softened butter, paying close attention to the sides to prevent any sticking issues later on. A well-greased pan is your first line of defense against a cake that’s difficult to release.
In a small saucepan, gently melt 1/4 cup of unsalted butter over medium heat. Once melted, whisk in 1/2 cup of packed brown sugar until it’s completely dissolved and the mixture is smooth and luscious. This forms the luscious caramel base for your upside-down cake, infusing the apples with incredible sweetness and a beautiful depth of flavor.
Remove the saucepan from the heat and stir in 1 teaspoon of ground cinnamon and 1/4 teaspoon of ground nutmeg. Whisk until these spices are fully incorporated, releasing their warm, aromatic essence into the caramel. The fragrance at this stage is simply divine, hinting at the deliciousness to come.
Step 2: Arrange the Apples
Carefully pour the warm caramel mixture into the bottom of your prepared cake pan. Tilt the pan gently to ensure the caramel evenly coats the entire base. This forms the foundation of your beautiful upside-down design, promising a glossy, caramelized surface once inverted.
Now comes the artistic part: arrange your thinly sliced apples over the caramel layer. You can create a classic concentric circle pattern, overlap them slightly, or get creative with your arrangement. Aim for an even layer that covers the caramel completely, as these apples will soften and deepen in flavor as they bake.
Once the apples are beautifully arranged, place the entire pan into the refrigerator. This chilling step allows the caramel to set slightly, preventing the apples from shifting too much when you add the cake batter. It’s a small step that makes a big difference in the final presentation and structure of your cake.
Step 3: Mix the Dry Ingredients
While the caramel and apples are chilling, turn your attention to the cake batter. In a medium-sized bowl, combine 1 cup of all-purpose flour, 1 teaspoon of baking powder, 1 teaspoon of ground cinnamon, 1/4 teaspoon of salt, and 1/4 teaspoon of ground nutmeg. Whisk these dry ingredients together thoroughly until they are well incorporated.
The purpose of whisking the dry ingredients is to ensure that the leavening agent (baking powder) and spices are evenly distributed throughout the flour. This prevents pockets of salt or baking powder in the finished cake and guarantees a consistent rise and flavor in every bite. A uniform blend of dry ingredients is key to a well-balanced cake.
Having these dry ingredients pre-mixed and ready allows for a smoother transition when you combine them with the wet ingredients later. It’s a small but significant step that contributes to the overall ease of the baking process and the quality of the final cake texture.
Step 4: Cream Butter and Sugars, Add Wet Ingredients
In a large bowl, begin by creaming together 1/2 cup of softened unsalted butter with 1 cup of granulated sugar and 1/2 cup of packed brown sugar. Use an electric mixer on medium speed to beat these ingredients together for about 2-3 minutes. You’re looking for a light, fluffy, and pale mixture, which indicates that air has been incorporated, contributing to the cake’s tender crumb.
Once the butter and sugars are beautifully creamed, reduce the mixer speed to low. Gradually add the 2 large eggs, one at a time, beating well after each addition until fully incorporated. This ensures the eggs are properly emulsified into the batter, contributing to its richness and structure.
Next, pour in 1 teaspoon of vanilla extract and 1 cup of whole milk. Continue mixing on low speed until these liquid ingredients are just combined with the butter and sugar mixture. Avoid overmixing at this stage; you want a smooth, emulsified base for your cake batter.
Step 5: Combine Wet and Dry Ingredients, Fold in Apple
Now, it’s time to bring the dry and wet ingredients together. Gradually add the whisked dry ingredients from Step 3 to the wet ingredients in the large bowl. Mix on low speed or gently fold with a spatula until the ingredients are just combined and no streaks of flour remain visible.
It is crucial not to overmix the batter at this point. Overmixing can develop the gluten in the flour, leading to a tough or dense cake instead of the light, tender crumb we desire. Stop mixing as soon as the last traces of flour disappear into the batter.
If you wish to add an extra layer of apple goodness within the cake itself, gently fold in 1 medium peeled and diced apple into the batter now. This will provide delightful pockets of soft apple throughout your cake, enhancing the overall apple flavor and texture. Ensure the diced apple is evenly distributed throughout the batter.
Step 6: Bake and Cool the Cake
Retrieve the chilled cake pan from the refrigerator. Carefully and evenly pour the prepared cake batter over the arranged apples and caramel topping. Use a spatula to gently smooth the top of the batter, ensuring it creates a uniform layer across the pan. This will help the cake bake evenly and result in a beautiful presentation.
Place the cake pan into the preheated oven at 350°F (175°C). Bake for approximately 40-45 minutes. The cake is ready when the top is golden brown and a toothpick inserted into the center comes out mostly clean, with perhaps a few moist crumbs attached. Avoid opening the oven door too early in the baking process, as this can cause the cake to fall.
Once baked, remove the cake from the oven and let it cool in the pan on a wire rack for about 10-15 minutes. This resting period is essential; it allows the cake to set slightly, making it easier to invert without breaking. Trying to invert it too soon can lead to a messy disaster, while waiting too long might cause it to stick.
Step 7: Invert and Serve
After the initial cooling period, carefully run a thin knife or offset spatula around the edge of the cake pan. This helps to loosen any parts of the cake that might be sticking to the sides, ensuring a clean release. Take a serving plate or wire rack that is larger than the cake pan and place it on top of the cake pan.
With steady hands, quickly and confidently invert the pan and the plate together. Lift the pan straight up to reveal the beautifully caramelized apples atop your now right-side-up cake. If any apples or caramel stick to the pan, gently scrape them off and arrange them back onto the cake.
This cake is absolutely delightful served warm, allowing the caramel to be wonderfully gooey and the cake to be incredibly moist and fragrant. However, it is also delicious at room temperature. For an extra special touch, consider serving it with a dollop of fresh whipped cream, a scoop of vanilla ice cream, or an extra drizzle of warm caramel sauce.
Pro Tips for Apple Upside Down Cake Recipe
Choose the Right Apples: The type of apple you use significantly impacts the texture and flavor of your upside-down cake. Opt for firm, slightly tart apples like Granny Smith, Honeycrisp, or Fuji. These varieties hold their shape well during baking and offer a pleasant balance to the sweetness of the caramel topping, avoiding a mushy result.
Achieve Perfect Caramel: Ensure your butter and brown sugar mixture is heated until the sugar is fully dissolved and smooth before adding the apples. If the sugar remains grainy, it can lead to uneven caramelization, and the apples might not adhere as beautifully. A well-combined caramel is key to that signature glossy finish.
Gentle Mixing is Key: When combining the dry ingredients with the wet ingredients for the cake batter, mix only until just combined. Overmixing can overdevelop the gluten in the flour, resulting in a dense, tough cake. A light hand ensures a tender and moist crumb that is characteristic of a perfect Apple Upside-Down Cake.
Test for Doneness Accurately: Oven temperatures can vary, so don’t rely solely on the baking time. Insert a toothpick or a thin skewer into the center of the cake; it should come out mostly clean, with just a few moist crumbs attached. If it comes out with wet batter, it needs more time in the oven.
Serve it Warm for Peak Flavor: While delicious at room temperature, this cake truly shines when served warm. The caramel is at its most luscious, the apple flavors are more pronounced, and the cake itself is at its softest and most fragrant. A few seconds in the microwave or a brief warm-up in the oven can revive its delightful warmth.
Serving Suggestions for Apple Upside Down Cake Recipe
Decoration
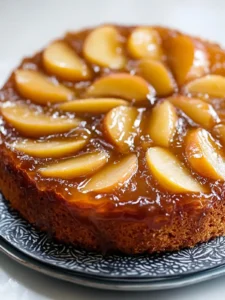
Once inverted, the caramelized apples themselves serve as a beautiful natural decoration, creating a stunning mosaic. For an extra touch of elegance, consider dusting the edges of the cake lightly with powdered sugar for a subtle snowy effect. A few fresh mint leaves can add a pop of vibrant green, contrasting beautifully with the warm hues of the apples and caramel.
Side Dishes
The classic pairing for this cake is, of course, a generous dollop of freshly whipped cream. Its light, airy texture and subtle sweetness perfectly complement the richness of the cake and the intensity of the caramel. Alternatively, a scoop of high-quality vanilla bean ice cream is unparalleled; the contrast between the warm cake and cold ice cream creates a delightful sensory experience as the ice cream melts into the warm apple layers.
For a more decadent experience, a drizzle of warm caramel sauce over the top of each slice amplifies the caramelized apple flavor. Another wonderful option is a warm, homemade vanilla custard sauce, which envelops each bite in a silky, creamy embrace. A sprinkle of toasted, chopped pecans or walnuts can add a lovely textural crunch and nutty depth.
Creative Serving Ideas
Transform individual slices into mini desserts by serving them in small ramekins. Add a small scoop of ice cream and a drizzle of caramel for an elegant presentation. For a brunch setting, consider serving smaller portions alongside a warm cup of spiced chai tea or coffee, making it a comforting start to the day.
You can also create a playful presentation by serving the cake with a small bowl of tart fresh berries, such as raspberries or cranberries. Their bright, acidic notes cut through the sweetness of the cake, offering a refreshing counterpoint. This dessert also pairs exceptionally well with a rich, dark coffee, its slight bitterness beautifully balancing the cake’s sweetness.
Preparation & Storage
Storing Leftovers
Leftover Apple Upside-Down Cake can be stored at room temperature for up to three days. It’s best to cover the cake loosely with plastic wrap or aluminum foil to help retain its moisture. Ensure the cake is completely cool before covering it to prevent condensation, which can make the cake soggy.
If your kitchen is particularly warm or humid, or if you plan to store it for longer than three days, refrigerating the cake is the better option. Wrap it tightly in plastic wrap or place it in an airtight container. This will help to preserve its freshness and prevent it from drying out in the refrigerator.
Freezing
For long-term storage, Apple Upside-Down Cake freezes exceptionally well. Once the cake has completely cooled, wrap individual slices or the entire cake tightly in a layer of plastic wrap, followed by a layer of aluminum foil. Alternatively, place the wrapped cake into a freezer-safe airtight container or bag.
Proper wrapping is crucial to prevent freezer burn, which can affect the cake’s texture and flavor. Frozen cake can be stored for up to three months. When you’re ready to enjoy it, allow it to thaw overnight in the refrigerator before reheating.
Reheating
To reheat individual slices, you can place them on a microwave-safe plate and heat them in the microwave for about 15-20 seconds, or until warmed through. Be careful not to overheat, as this can make the cake rubbery. For a slightly crisper topping, you can also gently reheat slices in a preheated oven at 350°F (175°C) for 10-15 minutes.
If you’ve frozen the entire cake, ensure it thaws completely in the refrigerator overnight before attempting to reheat it. Once thawed, you can reheat the whole cake or individual slices as described above. The goal is to warm it gently to restore its lovely texture and aroma without overcooking it.
Frequently Asked Questions
-
How do I choose the best apples for this recipe?
Choosing the right apples is absolutely crucial for a delicious Apple Upside-Down Cake, significantly impacting both texture and flavor. I highly recommend using firm, crisp varieties such as Granny Smith, Honeycrisp, or Fuji apples. These types maintain their structure beautifully during the baking process, preventing them from becoming overly mushy. Their inherent tartness also provides a wonderful contrast to the sweetness of the caramel and the cake itself, creating a more balanced and complex flavor profile. Avoid softer apple varieties like McIntosh or Red Delicious, as they tend to break down too much during baking and can result in a less appealing texture.
-
How should I store leftover Apple Upside-Down Cake?
Storing leftover Apple Upside-Down Cake properly will ensure it remains delicious for days to come. For short-term storage, up to three days, you can keep the cake at room temperature. It’s best to cover it loosely with plastic wrap or aluminum foil to help maintain its moisture without trapping too much condensation, which can make the cake soggy. If your environment is particularly warm or humid, or if you wish to store it for a longer period, refrigerating the cake is recommended. Wrap it tightly in plastic wrap or place it in an airtight container before refrigerating for up to a week.
-
Can I freeze Apple Upside-Down Cake?
Yes, you absolutely can freeze Apple Upside-Down Cake, making it an excellent candidate for make-ahead baking. To freeze it successfully, ensure the cake is completely cooled first. Then, wrap it very tightly in plastic wrap, followed by a layer of aluminum foil, or place it in a freezer-safe airtight container. This double-layer of protection is essential for preventing freezer burn, which can compromise the cake’s texture and flavor. Properly wrapped, the cake can be stored in the freezer for up to three months. When you are ready to enjoy it, the best method is to thaw it overnight in the refrigerator before reheating it gently.