Gluten Free Vegan Coconut Cake

Gluten Free Vegan Coconut Cake is a tender, celebration-ready dessert with rich coconut flavor, soft layers, and a creamy dairy-free frosting that feels elegant enough for special occasions but simple enough for weekend baking.
This is the kind of cake that works beautifully when you want something impressive without leaning on complicated techniques. The batter comes together in a familiar, straightforward way, and the toasted coconut finish gives it that bakery-style look with very little extra effort.
Why You Will Love This Recipe
- Rich Coconut Flavor: Experience the tropical essence of coconut in every single bite, from the moist cake layers to the creamy frosting and delightful topping.
- Tender & Moist Texture: Despite being gluten-free and vegan, this cake boasts an incredibly soft and moist crumb that is often difficult to achieve with alternative baking methods.
- Elegant Presentation: The layered design, smooth frosting, and generous coating of toasted coconut flakes make this cake a showstopper suitable for any celebration or special event.
- Dietary Friendly: Perfectly crafted for those avoiding gluten and dairy, this cake allows everyone to indulge in a delicious dessert without compromise.
- Straightforward Preparation: The recipe follows a classic cake-making process, making it accessible even for novice bakers looking to create something truly special.
Ingredients You Need
Crafting this exquisite Gluten Free Vegan Coconut Cake relies on selecting high-quality ingredients that work in harmony to create a tender crumb and rich flavor profile. The choice of full-fat coconut milk is paramount for both moisture and authentic coconut taste, while a good gluten-free 1-to-1 flour blend ensures structural integrity without grittiness. Don’t underestimate the power of softened vegan butter and a touch of dairy-free yogurt to add richness and a subtle tang that balances the sweetness.
Gluten Free Vegan Coconut Cake
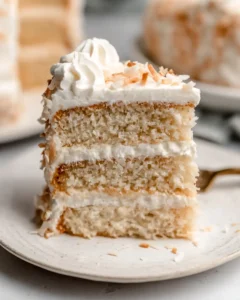
A tender, richly flavored coconut cake made without gluten or dairy, layered with a smooth coconut-vanilla frosting and finished with crisp toasted coconut flakes for texture and visual appeal.
- 1 1/2 cups full-fat canned coconut milk
- 1 tablespoon baking powder
- 2 teaspoons vanilla extract
- 3/4 cup dairy-free yogurt
- 1 cup unsweetened shredded coconut
- 1 3/4 cups granulated sugar
- 3 1/4 cups gluten-free 1-to-1 flour or cake flour
- 1/2 cup vegan butter, softened to about 70°F
- 1 teaspoon coconut extract
- 1/4 teaspoon sea salt
- 1 teaspoon arrowroot (when using all-purpose or gluten-free flour)
- 1/2 teaspoon baking soda
- 4 cups powdered sugar, sifted
- 1 cup vegan butter, at room temperature
- 1 teaspoon vanilla extract
- 1 cup vegan cream cheese, softened
- 2 tablespoons coconut cream
- 1 teaspoon coconut extract
- 3 cups toasted coconut flakes
- 1Preheat the oven to 350°F (175°C). Lightly grease three 6-inch or 8-inch cake pans with olive oil or coconut oil so the layers release easily after baking.
- 2In a large mixing bowl, beat the softened vegan butter with the granulated sugar until the mixture is well combined and the sugar has mostly dissolved. Add the dairy-free yogurt, vanilla extract, coconut extract, and sea salt. Mix on medium-low speed, then increase to medium speed until smooth, pausing to scrape down the bowl as needed.
- 3In a separate bowl, whisk together the gluten-free flour, arrowroot if using, baking soda, baking powder, and sea salt. Add half of the dry mixture to the wet ingredients, then pour in half of the coconut milk. Mix on low speed, then add the remaining dry ingredients and the rest of the coconut milk, blending only until combined. Fold in the shredded coconut evenly, taking care not to overmix the batter.
- 4Distribute the batter evenly among the prepared pans. Bake for 22 to 24 minutes if using 6-inch pans, or 27 to 30 minutes if using 8-inch pans. The cakes are ready when a toothpick inserted into the center comes out clean. Let the layers rest in the pans for 10 minutes, then transfer them to a wire rack and cool completely.
- 5For the frosting, place the vegan butter and softened vegan cream cheese in a large bowl or the bowl of a stand mixer. Beat for 2 to 3 minutes until creamy. Add the sifted powdered sugar gradually, about 1 cup at a time, mixing well after each addition until a thick buttercream forms.
- 6Blend in the vanilla extract, coconut extract, and coconut cream. Beat until the frosting reaches a smooth, spreadable consistency.
- 7Once the cake layers are fully cooled, spread frosting between each layer and over the outside of the cake. Press the toasted coconut flakes onto the sides and top for a golden, textured finish. Slice and serve.
Keywords: Gluten Free, Vegan, Coconut Cake, Dairy-Free, Dessert
The specific quantities for each ingredient are detailed within the accompanying recipe card, ensuring you have all the precise measurements needed for success.
Variations
For a delightful dessert experience that caters to specific dietary preferences, consider these creative twists on the classic Gluten Free Vegan Coconut Cake. Embracing the principles of plant-based eating, you can achieve a wonderfully moist cake by replacing the dairy-free yogurt with an equal amount of unsweetened applesauce or even a thick, unsweetened plant-based yogurt alternative like soy or almond. Ensure that any added flavors from these substitutes do not overpower the delicate coconut notes you’re aiming for.
If you’re looking for a lower-carbohydrate option, while a complete overhaul would be needed, you could experiment with alternative sweeteners and flours. Swapping granulated sugar for a blend of erythritol and stevia might work, and a mix of almond flour and coconut flour could offer a different texture, though this would significantly alter the cake’s structure and moisture retention and would require extensive recipe development.
For an extra burst of tropical flair, consider infusing the batter with a hint of lime zest or adding finely chopped candied ginger. These additions can provide a delightful contrast to the sweetness and creaminess of the coconut, offering a more complex and adventurous flavor profile that is both refreshing and comforting.
How to Prepare Gluten Free Vegan Coconut Cake
Step 1: Preparing the Baking Pans and Oven
The initial step in creating any exceptional cake, including this Gluten Free Vegan Coconut Cake, involves precisely preheating your oven and diligently preparing your baking pans. An oven temperature of 350°F (175°C) is crucial for ensuring the cake bakes evenly, allowing the gluten-free flour to hydrate properly and the leavening agents to work their magic effectively. A consistent temperature prevents the exterior from setting too quickly while the interior remains undercooked, which is a common pitfall with gluten-free baking.
To prepare the pans, a light yet thorough coating of oil is recommended, whether you choose olive oil or coconut oil. This creates a non-stick surface, which is particularly important for gluten-free cakes that can sometimes be more delicate and prone to sticking. Ensure every nook and cranny of the pan is covered, including the sides and the bottom. This attention to detail guarantees that your beautiful cake layers will slide out cleanly after baking, preserving their shape and integrity.
Consider lining the bottom of your cake pans with parchment paper circles as an extra precaution. This provides an additional barrier and makes the cake release even simpler, minimizing the risk of tearing or breaking. Once the pans are prepared and the oven is preheated, you can move on to mixing the cake batter, knowing that the foundation for a successful bake is already in place.
Step 2: Creating the Creamy Butter and Sugar Base
The heart of a tender cake often lies in the initial creaming of vegan butter and sugar. For this Gluten Free Vegan Coconut Cake, use softened vegan butter, ideally around 70°F (21°C), to achieve the perfect consistency for emulsification. When creamed with granulated sugar, this mixture creates tiny air pockets that contribute significantly to the cake’s light and airy texture, while also ensuring the sugar dissolves evenly. This process helps build a strong foundation for the cake’s structure and helps to achieve a delicate crumb.
Once the butter and sugar are beautifully blended into a creamy, pale yellow mixture, it’s time to introduce the wet flavor components. Gently incorporate the dairy-free yogurt, which adds essential moisture and a subtle tang, along with the pure vanilla extract and the distinct coconut extract. A pinch of sea salt is also added at this stage to enhance all the other flavors and balance the overall sweetness of the cake. Mixing these elements thoroughly ensures that their flavors are evenly distributed throughout the batter, leading to a more consistent and delightful taste in every slice.
Scraping down the sides of the bowl periodically during this mixing process is vital. This ensures that all ingredients are incorporated evenly, preventing any pockets of unmixed butter or sugar. An uniform mixture at this stage promotes consistent baking and a more cohesive cake texture, setting the stage for the dry ingredients to be added without overmixing.
Step 3: Whisking Together the Dry Ingredients
In a separate, medium-sized bowl, meticulously whisk together your gluten-free 1-to-1 flour blend, arrowroot powder (if you’re using it for an extra fine crumb), baking soda, and baking powder. The act of whisking is more than just combining; it aerates the dry ingredients, which helps to distribute the leavening agents evenly throughout the flour. This even distribution is paramount for ensuring that the cake rises uniformly and develops a consistent, tender crumb, a critical factor in gluten-free baking.
Arrowroot powder, while optional, can offer a subtle improvement in texture by contributing to a softer, finer grain. It helps to bind the gluten-free flour particles more effectively, preventing the cake from becoming too dense or crumbly. Baking soda and baking powder are the dynamic duo of leavening, working together to provide lift and lightness to the batter, countering the inherent density that gluten-free flours can sometimes impart.
Ensuring these dry ingredients are thoroughly combined before adding them to the wet ingredients is a small but significant step. It prevents pockets of baking soda or flour from creating an uneven rise or an unpleasant taste in the finished cake. This careful preparation of the dry components lays the groundwork for a perfectly textured gluten-free and vegan cake.
Step 4: Gently Combining Wet and Dry Ingredients
This is a critical juncture where a light hand is your best friend for achieving a tender crumb in your Gluten Free Vegan Coconut Cake. Begin by adding about half of the whisked dry ingredients to the wet mixture in the large bowl. Mix on a low speed, just until the flour is mostly incorporated. Then, pour in about half of the full-fat canned coconut milk, again mixing only until it’s just combined.
Continue this process by adding the remaining dry ingredients, followed by the rest of the coconut milk. It is absolutely imperative to mix only until the batter just comes together. Overmixing gluten-free batters, especially those containing coconut milk and vegan butter, can develop toughness and a less desirable texture, making the cake dense or gummy.
The goal here is to hydrate the gluten-free flours and activate the leavening agents without overworking the starches. A few streaks of flour remaining are perfectly fine at this stage, as they will be incorporated in the next step. This gentle approach is key to unlocking the cake’s potential for a soft, moist, and melt-in-your-mouth experience, truly embodying the essence of a celebration cake.
Step 5: Folding in Coconut and Filling Pans
With the batter almost fully combined, it’s time to introduce the star texture element: the unsweetened shredded coconut. Gently fold this into the batter using a spatula, ensuring it is evenly dispersed throughout the mixture. Avoid vigorous stirring; the aim is to distribute the coconut without disturbing the delicate structure of the batter you’ve carefully built. This inclusion adds delightful pockets of chewiness and a more pronounced coconut flavor throughout the cake’s interior.
Once the shredded coconut is evenly incorporated, carefully divide the batter equally between your prepared cake pans. To ensure even baking, gently smooth the tops of the batter in each pan with your spatula. This creates a level surface, allowing the heat to distribute uniformly during baking, which results in cake layers that are consistent in height and bake through evenly. An even surface prevents some parts of the cake from becoming overdone while others remain underbaked, a crucial aspect for visually appealing and texturally perfect layers.
Place the filled pans into the preheated oven and bake until a toothpick inserted into the center of each cake comes out clean. For 6-inch pans, this typically takes around 22-24 minutes, while 8-inch pans might require 27-30 minutes. The toothpick test is the most reliable indicator that the cake’s internal structure has set and is no longer liquid, signifying that it’s ready to be cooled and frosted.
Step 6: Cooling the Cake Layers
Once the cake layers have reached that perfect stage of doneness, signaled by a clean toothpick, it’s essential to allow them a brief resting period within their pans. Let them sit undisturbed for about 10 minutes on a wire rack. This short resting time is crucial because it allows the gluten-free cake structure to firm up slightly, making it more robust and less prone to breaking when you attempt to remove it from the pan.
After this initial rest, carefully invert the cake pans onto the wire rack to release the layers. If you’ve properly greased and lined your pans, they should slide out smoothly. Once out of the pans, allow the cake layers to cool completely on the wire rack. This is a non-negotiable step; attempting to frost a warm cake is a recipe for disaster, as the heat will melt the frosting, causing it to slide off and create a messy, unstable dessert.
Ensuring the layers are entirely cool to the touch means that the internal structure has stabilized and moisture has dissipated sufficiently for the frosting to adhere properly. Patience during this cooling phase guarantees a beautifully finished cake that is easy to handle and decorate, making the assembly process a joy rather than a challenge. This meticulous cooling process is a cornerstone of successful cake baking, especially for delicate gluten-free recipes.
Step 7: Crafting the Luscious Vegan Frosting
While the cake layers are diligently cooling, the stage is set to prepare the delectable dairy-free frosting that will crown your Gluten Free Vegan Coconut Cake. In a large mixing bowl, or the bowl of a stand mixer fitted with the paddle attachment, combine softened vegan butter and softened vegan cream cheese. Beat these together for approximately 2 to 3 minutes on medium speed until they achieve a smooth, creamy, and well-emulsified consistency, ensuring no lumps of cream cheese remain.
Gradually introduce the sifted powdered sugar, adding it about one cup at a time. It is important to mix thoroughly after each addition, allowing the sugar to fully incorporate before adding the next batch. This gradual addition helps create a thick, sturdy buttercream that holds its shape without being grainy. Once all the powdered sugar is incorporated and the frosting is thick, blend in the pure vanilla extract, coconut extract, and the crucial coconut cream. The coconut cream is key to achieving a luscious, spreadable consistency that is still firm enough to hold its structure.
Beat the frosting until it is perfectly smooth, light, and airy, reaching a consistency that is easily spreadable yet robust enough to create beautiful swirls and edges. This frosting provides a delightful tangy counterpoint to the sweet cake and a creamy mouthfeel that complements the coconut flavors beautifully, transforming the simple cake layers into an elegant dessert.
Step 8: Assembling and Decorating the Cake
With your cake layers completely cooled and your luscious vegan frosting prepared, the moment of truth has arrived: assembling the Gluten Free Vegan Coconut Cake. Place one of the cooled cake layers onto your serving plate or cake stand. Spread an even, generous layer of the prepared frosting over the top of this first layer, ensuring it reaches close to the edges. This creates a stable and delicious foundation for the next layer and adds height and richness.
Carefully place the second cake layer on top of the frosted first layer, aligning the edges as best as possible. Repeat the frosting process, spreading another generous layer over the second cake layer. Finally, place the top cake layer onto the stack. Once all layers are stacked, apply a thin “crumb coat” of frosting over the entire cake – the top and sides. This thin layer traps any loose crumbs and provides a smooth base for your final frosting application.
Chill the cake for about 15-20 minutes to set this crumb coat before applying the final, thicker layer of frosting. Once chilled, frost the entire cake smoothly and evenly. For the grand finale, press the toasted coconut flakes generously onto the sides and top of the frosted cake. This not only adds a delightful crunch and beautiful texture but also enhances the visual appeal, giving your Gluten Free Vegan Coconut Cake a polished, professional, and irresistibly inviting finish.
Pro Tips for Gluten Free Vegan Coconut Cake
Use Full-Fat Coconut Milk: For the most authentic and rich coconut flavor, along with optimal moisture in your cake layers, always opt for full-fat canned coconut milk. Avoid the thinner, refrigerated coconut beverages, as they do not contain the necessary fat content to achieve the desired cake texture and richness. This single ingredient makes a significant difference in the overall outcome of your dessert, elevating it from good to truly exceptional.
Ensure Complete Cooling: Patience is a virtue, especially when it comes to cake. Allow your cake layers to cool completely on a wire rack before attempting to frost them. Frosting a warm cake will inevitably lead to a melted mess, causing the frosting to slide off and compromising the cake’s structural integrity. This step is non-negotiable for a neat and professional finish.
Toast Coconut Ahead: To achieve perfectly crisp and flavorful toasted coconut flakes for your garnish, toast them in a dry skillet over medium-low heat until golden brown, or bake them in a low oven. Let them cool completely on a plate before pressing them onto the cake. This ensures they retain their delightful crunch and don’t melt into the frosting, providing a wonderful textural contrast.
Gentle Mixing is Key: When combining the wet and dry ingredients, mix just until they are incorporated. Overmixing gluten-free batters can lead to a tough or gummy texture, defeating the purpose of a tender cake. A light hand during this stage is crucial for achieving the delicate crumb that makes this cake so beloved, particularly when working with gluten-free flours.
Measure Flour Accurately: Gluten-free flours can vary in density. It’s best to spoon the flour into your measuring cup and level it off with a straight edge rather than scooping directly from the bag. This prevents you from packing too much flour, which can result in a dry or dense cake. Accurate measurement is a foundational principle for consistent baking results.
Serving Suggestions for Gluten Free Vegan Coconut Cake
Decoration
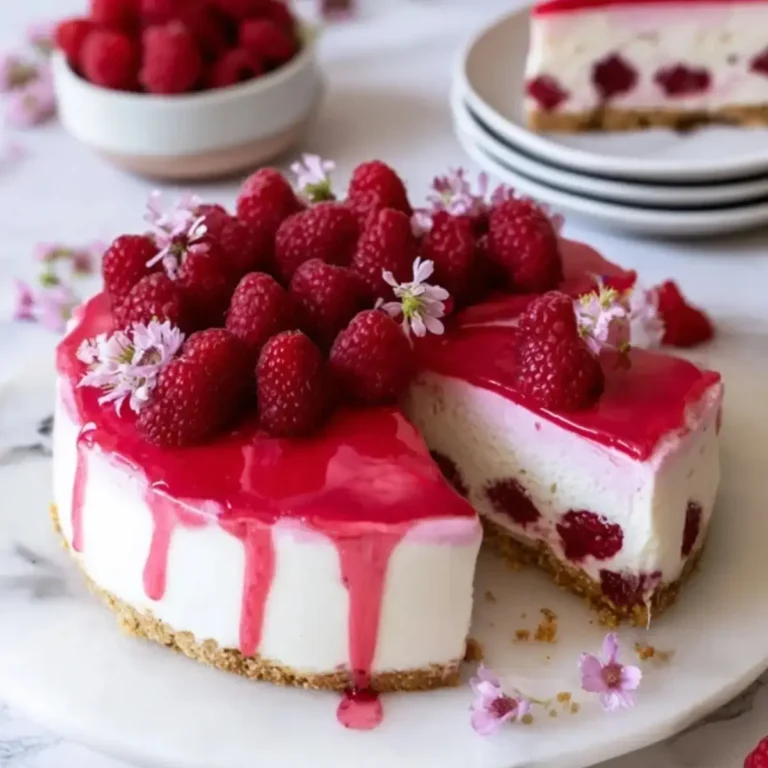
The visual appeal of this Gluten Free Vegan Coconut Cake is amplified by its thoughtful decoration. A generous coating of toasted coconut flakes provides a beautiful golden hue and an appealing texture that hints at the tropical flavors within. For an added touch of elegance, consider scattering fresh edible flowers, like violas or pansies, across the top of the cake. A light dusting of powdered sugar can mimic a gentle snowfall, especially fitting for a winter gathering, while a few perfectly placed fresh berries, such as raspberries or blueberries, can add a vibrant splash of color and a hint of tartness.
Side Dishes
To complement the rich, sweet, and coconut-forward flavors of the cake, consider serving it with a selection of light and refreshing accompaniments. A simple bowl of fresh berries, like strawberries, raspberries, and blueberries, offers a bright, natural sweetness and a slight tartness that cuts through the cake’s richness beautifully. A dollop of dairy-free whipped cream or a small scoop of vanilla bean vegan ice cream can enhance the dessert experience, adding an extra layer of creamy indulgence without overpowering the cake’s primary flavors. A light, fruity compote, perhaps made with mango or passionfruit, can also provide a delightful tropical contrast.
Creative Serving Ideas
Elevate your presentation by serving individual slices of the Gluten Free Vegan Coconut Cake on elegant dessert plates. A delicate drizzle of mango or passionfruit coulis around the plate can add a touch of sophistication and a burst of exotic flavor. For a more informal yet charming presentation, consider serving miniature versions of the cake as part of a dessert buffet, perhaps alongside other gluten-free and vegan treats. Alternatively, transform a slice into a decadent parfait by layering crumbled cake with dairy-free yogurt and fresh fruit in a tall glass, creating a visually stunning and equally delicious dessert experience.
Preparation & Storage
Storing Leftovers
Leftover Gluten Free Vegan Coconut Cake is best stored in an airtight container in the refrigerator for up to 4 days. The presence of vegan cream cheese in the frosting makes refrigeration essential to maintain its texture and prevent spoilage. Keeping the cake well-covered will prevent it from drying out and absorbing any unwanted odors from other foods in your refrigerator. Ensure the container seals tightly to lock in freshness and moisture, preserving the cake’s delightful crumb and creamy frosting for as long as possible.
Freezing
For longer-term storage, unfrosted cake layers can be individually wrapped tightly in plastic wrap and then placed in a freezer-safe bag or container for up to 2 months. If you wish to freeze frosted cake, it’s best to do so in individual slices, again wrapping them tightly in plastic wrap, followed by a layer of foil or a freezer bag. Freezing portions ensures that you can enjoy a slice of this delicious cake whenever the craving strikes without having to thaw the entire cake.
Reheating
When you are ready to enjoy your stored or frozen Gluten Free Vegan Coconut Cake, it’s important to thaw it properly to ensure the best texture. For refrigerated cake, allow the slices to sit at room temperature for about 15 to 20 minutes before serving. This brief resting period allows the frosting to soften slightly and the cake’s flavors to bloom. If thawing frozen cake, it is best to transfer it from the freezer to the refrigerator overnight. This slow thawing process helps to maintain the cake’s moisture and prevent it from becoming soggy. Avoid microwaving the cake, as this can lead to an uneven texture and potentially dry out the cake layers.
Frequently Asked Questions
-
Can I make this cake ahead of time for a party?
Absolutely! Preparing this Gluten Free Vegan Coconut Cake ahead of time is not only possible but can actually make your party preparations smoother. You can bake the cake layers a day or even two in advance. Once they have cooled completely, wrap them tightly in plastic wrap and store them at room temperature if frosting the next day, or refrigerate them for longer storage. The frosting can also be made a day in advance and stored in an airtight container in the refrigerator; just ensure it softens slightly at room temperature before frosting.
-
What are the best substitutes for dairy-free yogurt in this recipe?
If you find yourself without dairy-free yogurt, unsweetened applesauce is an excellent substitute and will provide similar moisture and help maintain a tender crumb. You can use an equal amount of applesauce in place of the yogurt. Another viable option is a thick, unsweetened plant-based yogurt, such as soy, almond, or cashew yogurt, ensuring it has a similar consistency to dairy-free yogurt. Always aim for an unsweetened variety to avoid altering the cake’s overall sweetness level, and be mindful that some substitutes might impart a subtle flavor of their own, though the coconut should remain the dominant note.
-
How do I ensure my gluten-free cake layers don’t crumble when I slice them?
Preventing a gluten-free cake from crumbling starts with proper preparation and handling. Ensure your cake layers are completely cooled before attempting to frost or slice them; warm cakes are inherently more fragile. Handle the cooled layers gently when stacking and frosting. Using a sharp, serrated knife and a gentle sawing motion, rather than pressing straight down, will also help create cleaner slices. Allowing the frosted cake to set in the refrigerator for at least 30 minutes before slicing can further firm up the frosting and cake structure, making it much easier to achieve neat, intact pieces. Sometimes, a slightly denser gluten-free flour blend can also contribute to a more robust crumb.