Old-Fashioned Sour Cream Donuts – Easy Cake Donut Recipe!

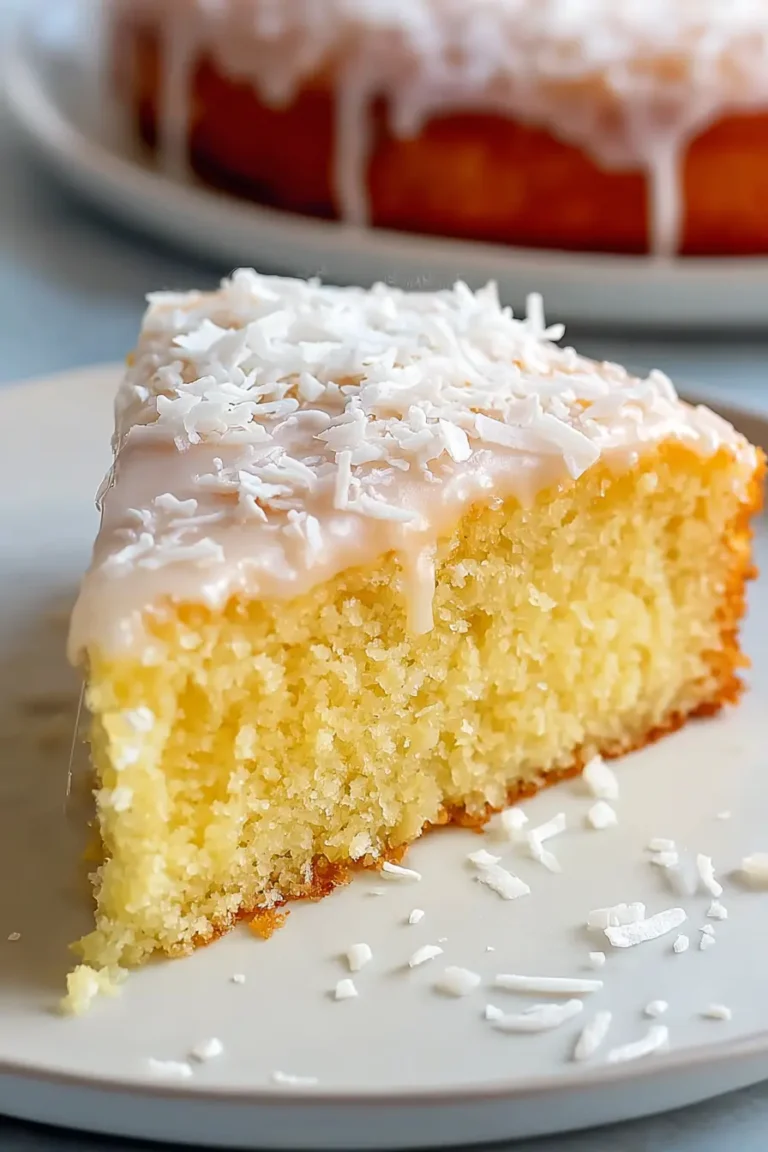
Embark on a delightful culinary journey with these old-fashioned sour cream donuts, a treat that evokes the simple joys of country fairs and homemade goodness. These aren’t just any donuts; they are a testament to classic baking, offering a tender, cake-like interior encased in a perfectly crisp, golden exterior.
Imagine biting into a soft, moist donut, generously coated in a sweet, creamy vanilla glaze that perfectly complements the rich, tangy flavor of sour cream. This recipe bypasses the often-tedious yeast-proofing process, making it an accessible and rewarding baking experience for home cooks of all levels, ensuring delicious results in under an hour.
Why You Will Love This Recipe
- Effortless Preparation: Forget long rising times; these cake donuts come together quickly with simple pantry ingredients, making them ideal for a spontaneous craving or a weekend treat.
- Irresistible Texture: Experience the perfect contrast between a delicate, cakey crumb inside and a beautifully fried, slightly crackly crust on the outside, creating a truly satisfying bite.
- Rich, Tangy Flavor: The star ingredient, sour cream, imbues these donuts with an unparalleled moistness and a subtle tang that elevates them beyond ordinary baked goods.
- Versatile Glazing: A simple yet decadent vanilla glaze provides the perfect finishing touch, creating a beautiful sheen and an extra layer of sweetness that pairs wonderfully with the donut’s flavor.
- Nostalgic Appeal: These donuts capture the essence of classic, homemade confections, bringing a touch of comforting nostalgia to your kitchen and your taste buds.
Ingredients You Need
Crafting these delightful sour cream donuts relies on readily available ingredients, many of which you likely already have in your pantry. The key to their exceptional texture and flavor lies in the quality and careful selection of each component, especially the sour cream, which contributes significant moisture and a subtle tang.
Sour Cream Donuts
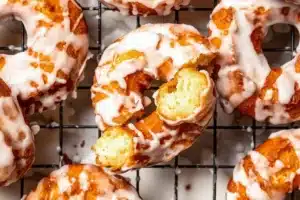
These old-fashioned sour cream donuts don't require any yeast or rising time, making them ready to eat in under an hour! Each one is soft and cakey beneath a golden, crackly crust that soaks up the creamy vanilla glaze.
- 2¼ cups cake flour
- 2½ teaspoons baking powder
- 1 good pinch of salt
- 2 tablespoons unsalted butter, melted and cooled
- 1 egg
- 1 egg yolk
- vegetable oil, for frying
- For the glaze:
- 2 cups powdered sugar
- 2-3 tablespoons of water
- 1Mix the dry ingredients: In a medium bowl, combine the flour, baking powder, and salt.
- 2Mix the wet ingredients: In a separate bowl, combine the granulated sugar with the (cooled) melted butter, egg, egg yolk, and sour cream.
- 3Combine: Add your dry ingredients to the liquid ones, then mix everything until you have a sticky dough. Do not overwork the dough, or the donuts will be tough.
- 4Roll out the donuts: Roll the dough on a lightly floured kitchen surface using a rolling pin to ¼-inch thick. Cut out the donuts using a 2 ½-3 inch donut cutter. Gather the dough and reshape it again. Continue until you have used all the dough.
- 5Get ready to fry them: Transfer the donuts to a sheet of parchment paper dusted with flour. If you did not make donuts with a donut cutter, make a hole in each donut with a chopstick and stretch it gently.
- 6Fry the donuts: Heat 2 inches of oil in a pot to 375°F. Carefully add the donuts to the hot oil. Do not overcrowd the pot. Fry the donuts for 1-2 minutes per side, then remove with a slotted spoon onto a plate lined with paper towels or a wire rack.
- 7Make the glaze: Whisk the powdered sugar with the water in a small bowl.
- 8Glaze the donuts: Drizzle the glaze over the donuts or dip the donuts into the glaze. Place the donuts on a wire rack until the glaze is set. Serve as desired.
Keywords: donuts, sour cream, fried, glaze, cake donuts, dessert
The exact quantities for all the ingredients, from the flour to the glaze components, are detailed within the recipe card for your convenience and precision.
Variations
While the classic glazed sour cream donut is undeniably delicious, there are numerous ways to adapt this recipe to suit different dietary preferences and flavor profiles. These variations ensure that everyone can enjoy a version of this comforting treat.
For a wonderfully vegan option, you can substitute the butter with vegan butter or coconut oil, and replace the egg and egg yolk with a flax egg (1 tablespoon flaxseed meal mixed with 3 tablespoons water, let sit for 5 minutes) or a commercial egg replacer. The sour cream can be swapped for a full-fat unsweetened vegan yogurt, such as coconut or soy-based yogurt, to maintain that crucial moisture and tang. Ensure your powdered sugar is also vegan-friendly, as some brands may contain bone char.
If you’re aiming for a lower-carbohydrate version, consider using a good quality almond flour or a coconut flour blend in place of cake flour, adjusting the liquid content as needed since these flours absorb moisture differently. You might also experiment with sugar substitutes like erythritol or xylitol for the dough and glaze, though this can affect texture and sweetness, so starting with small adjustments is recommended. Be aware that frying in oil might still be a higher-carb choice, so baking these low-carb donuts at a moderate temperature until golden brown could be an alternative preparation method.
Another exciting avenue is to infuse the dough or the glaze with additional flavors. Imagine adding a teaspoon of finely grated lemon or orange zest to the dough for a bright, citrusy note, or incorporating a dash of cinnamon or nutmeg for a warmer spice profile. You could also experiment with different glazes, perhaps a maple glaze, a chocolate glaze, or even a cream cheese glaze, to create entirely new flavor experiences from this foundational recipe.
How to Prepare sour cream donuts
Step 1: Mixing the Dry Ingredients
Begin by gathering all your dry components in a medium-sized mixing bowl. Carefully measure out the cake flour, ensuring you use the spoon-and-level method or a kitchen scale for accuracy, as too much flour can lead to dry donuts. Add the baking powder to the flour; this is your primary leavening agent, so freshness is key to achieving a good rise and tender texture.
Include a good pinch of salt in the mixture. Salt is often underestimated in baking, but it plays a crucial role in balancing sweetness and enhancing the overall flavor profile of your donuts, making them more complex and enjoyable. Whisk these dry ingredients together thoroughly to ensure an even distribution of the baking powder and salt throughout the flour.
This initial step is foundational, ensuring that when you introduce the wet ingredients, everything is perfectly primed for a uniform dough. An evenly mixed dry base is the first step towards achieving consistently textured and beautifully risen donuts.
Step 2: Combining the Wet Ingredients
In a separate, larger mixing bowl, you will combine the wet ingredients. Start by creaming together the granulated sugar and the unsalted butter. Ensure the butter has been melted and then allowed to cool slightly; hot butter can cook the egg prematurely. Creaming these together helps to incorporate air, which will contribute to the lightness of the donut.
Next, add the whole egg and the egg yolk to the sugar and butter mixture. The egg yolk, in particular, adds richness and helps bind the dough, contributing to a more tender and moist crumb. Follow this with the star ingredient: the sour cream. Make sure you are using full-fat sour cream for the best moisture and flavor; its tanginess is essential to the characteristic taste of these donuts.
Whisk these wet ingredients together until they are well combined and smooth. This mixture forms the rich, moist base of your donut dough. The combination of sugar, butter, egg, and sour cream creates a decadent foundation that promises a truly delightful donut.
Step 3: Forming the Dough
Now, it’s time to bring the dry and wet ingredients together. Gradually add the thoroughly whisked dry ingredients into the bowl containing the wet ingredients. Use a spatula or a wooden spoon to gently mix everything together.
The goal here is to create a sticky dough, but it is crucial not to overwork it. Overmixing develops the gluten in the flour too much, which will result in tough, dense donuts instead of the tender, cakey texture you desire. Mix just until no dry streaks of flour remain and the ingredients are incorporated into a cohesive, albeit sticky, mass.
Once the dough has just come together, stop mixing. The stickiness is expected and is a good indicator that the donuts will be moist. Resist the urge to add more flour, as this will counteract the desired texture and richness provided by the sour cream and egg yolk.
Step 4: Rolling and Cutting the Donuts
Lightly flour a clean work surface, such as your kitchen counter or a large cutting board. Carefully turn out the sticky donut dough onto the floured surface. You may want to dust your hands lightly with flour as well to help manage the dough.
Using a rolling pin, gently roll out the dough to a uniform thickness of about ¼-inch. It’s important to maintain this thickness consistently so that the donuts cook evenly. If the dough is too thick, the inside may remain raw while the outside burns; if too thin, they may become dry and brittle.
Once the dough is rolled to the desired thickness, use a 2½ to 3-inch donut cutter to cut out the rounds. If you don’t have a donut cutter, you can use a round cookie cutter or the rim of a glass for the outer circle and a smaller cutter or bottle cap for the center hole. Press firmly to ensure a clean cut. Re-gather the scraps of dough, gently knead them together, and roll them out again to cut more donuts, ensuring you use up all the dough.
Step 5: Preparing for Frying
Carefully transfer the cut-out donuts onto sheets of parchment paper that have been lightly dusted with flour. This prevents them from sticking and makes them easier to maneuver into the hot oil. If you created donut holes from the center, you can fry those as well for a little bonus treat.
If you made solid donut rounds without a center hole using a cookie cutter or glass rim, you will need to create a hole now. Use a chopstick, the end of a wooden spoon, or a similar utensil to gently poke a hole in the center of each donut. Gently stretch the hole outwards slightly to ensure it remains open during frying.
Prepare your frying station. Ensure you have a heavy-bottomed pot or deep-fryer ready with at least 2 inches of vegetable oil. Have a thermometer handy to monitor the oil temperature precisely, aiming for 375°F (190°C). Arrange a plate lined with paper towels or a wire cooling rack nearby to drain the fried donuts.
Step 6: Frying and Glazing
Heat the vegetable oil in your heavy-bottomed pot to precisely 375°F (190°C). It is crucial to maintain this temperature throughout the frying process; use a thermometer for accuracy, as oil that is too cool will result in greasy donuts, while oil that is too hot will cause them to burn on the outside before cooking through. Carefully lower 2-3 donuts at a time into the hot oil, being careful not to overcrowd the pot, as this can cause the oil temperature to drop significantly.
Fry the donuts for about 1-2 minutes per side, or until they puff up and turn a beautiful golden brown. They cook quite quickly, so keep a close eye on them. Use a slotted spoon or metal tongs to carefully remove the fried donuts from the oil, allowing any excess oil to drip back into the pot. Place the donuts on the prepared paper towel-lined plate or wire rack to cool slightly.
While the donuts are cooling, prepare the glaze. In a small bowl, whisk together the powdered sugar and 2-3 tablespoons of water until smooth and of drizzling consistency. Once the donuts have cooled enough to handle but are still slightly warm, you can either generously drizzle the glaze over them using a spoon or dip the tops of the donuts directly into the glaze. Place the glazed donuts back on the wire rack to allow the glaze to set completely before serving.
Pro Tips for sour cream donuts
Measure Flour Accurately: For the most consistent results, it is highly recommended to weigh your cake flour using a kitchen scale, aiming for approximately 270 grams. If you must use measuring cups, always spoon the flour into the cup and level it off with a straight edge, rather than scooping directly from the bag, which can lead to as much as 25% too much flour and dry donuts.
Don’t Overwork the Dough: The key to tender donuts is minimal gluten development. Mix the wet and dry ingredients only until they just come together to form a sticky dough. Overmixing will result in tough donuts, so stop as soon as you no longer see dry flour.
Maintain Oil Temperature: The ideal frying temperature for these donuts is 375°F (190°C). Using a deep-fry thermometer is the most reliable way to ensure this. If the oil is too cool, the donuts will absorb excess grease; if it’s too hot, they will burn before the inside is cooked through.
Fry in Batches: Avoid overcrowding the pot when frying. Frying only 2-3 donuts at a time allows the oil temperature to remain stable, ensuring even cooking and a beautiful golden crust without making the donuts greasy.
Use Full-Fat Sour Cream: The sour cream is integral to the moist and tender texture of these cake donuts. Opt for full-fat sour cream, as it provides the best richness and flavor without adding unnecessary liquid that could alter the dough consistency.
Serving Suggestions for sour cream donuts
Decoration
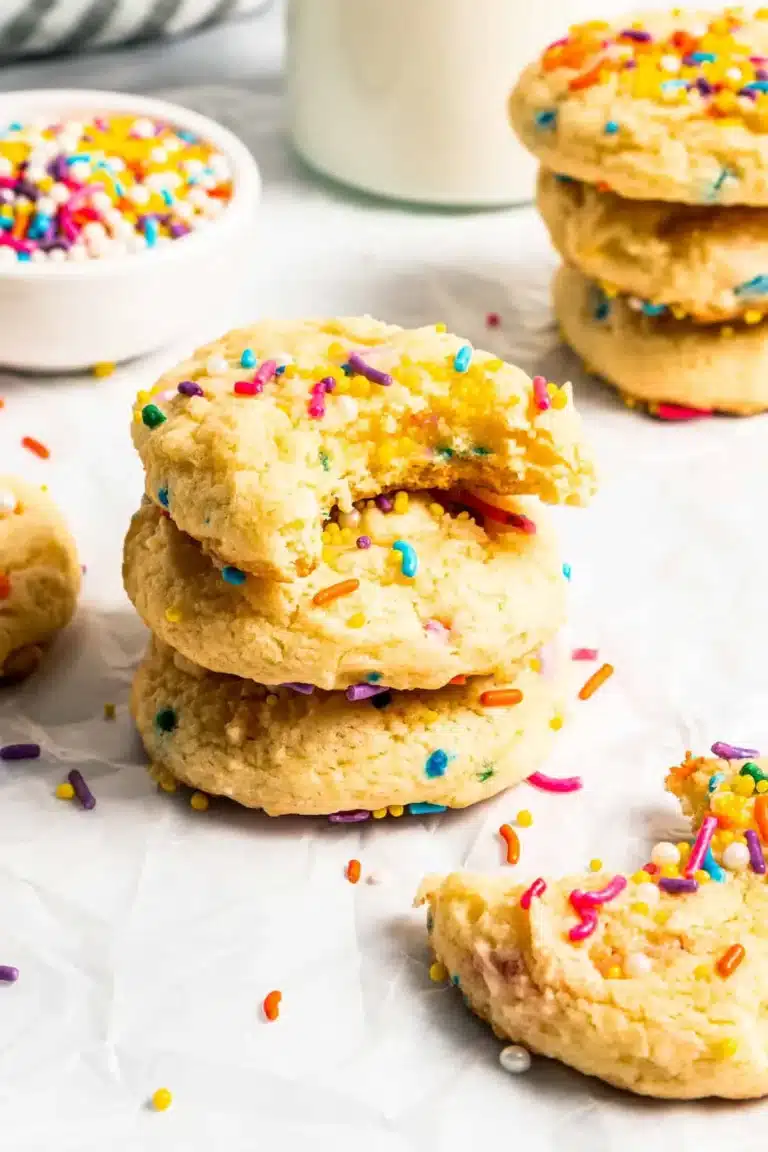
The classic vanilla glaze offers a beautiful sheen and a sweet counterpoint to the rich donut. For an extra touch, consider adding sprinkles immediately after glazing while the glaze is still wet, creating a festive and colorful presentation. You could also dust the tops with a light coating of cinnamon sugar for a warm, spiced finish, or opt for a simple dusting of powdered sugar over the top of cooled donuts for an elegant, understated look.
Side Dishes
These delightful donuts pair wonderfully with a hot cup of coffee, making them a perfect breakfast or brunch treat. A glass of cold milk is also a classic accompaniment, especially for younger fans of these sweet confections. For a more substantial brunch spread, consider serving them alongside fresh fruit salad, yogurt parfaits, or even a light quiche to balance the sweetness.
Creative Serving Ideas
Elevate your dessert table by arranging these glazed sour cream donuts on a tiered stand, making them a stunning centerpiece. You could also create a “donut bar” where guests can customize their donuts with various toppings like chocolate chips, chopped nuts, or fruit compotes. For a fun twist, serve them alongside a scoop of vanilla bean ice cream for a simple yet decadent dessert, or incorporate them into a larger dessert presentation, perhaps as a component in a deconstructed trifle.
Preparation & Storage
Storing Leftovers
Sour cream donuts are best enjoyed fresh, ideally within a few hours of being made. However, if you have leftovers, ensure they have cooled completely before storing them. Place the cooled donuts in an airtight container at room temperature. They will typically remain fresh and enjoyable for 1-2 days, though their texture may slightly soften over time.
Freezing
For longer storage, these sour cream donuts can be frozen, though it’s best to do so before glazing. Once the unglazed donuts have completely cooled after frying, wrap them individually in plastic wrap and then place them in a freezer-safe bag or container. They can be stored in the freezer for up to 2-3 months.
Reheating
If you’ve frozen your donuts, allow them to thaw completely at room temperature before glazing or reheating. To gently warm them up, you can place them in a single layer on a baking sheet and warm them in a preheated oven at a low temperature (around 250°F or 120°C) for about 5-10 minutes, or until they are slightly warmed through. Be cautious not to overheat, as this can dry them out.
Frequently Asked Questions
-
Can I bake these sour cream donuts instead of frying them?
While this recipe is specifically designed for frying to achieve the classic crispy exterior, you can adapt it for baking. If you choose to bake them, it is recommended to place the cut-out donuts on a parchment-lined baking sheet and bake them in a preheated oven at around 375°F (190°C) for 10-15 minutes, or until they are golden brown and cooked through. Keep in mind that the texture will be more cake-like and less crispy than fried donuts, and they may not rise as much without the direct heat of the oil.
-
Why are my donuts tough or dry?
Tough or dry donuts are often a result of overmixing the dough or adding too much flour. As mentioned in the pro tips, it’s crucial to mix the ingredients only until they just combine to form a sticky dough, and to measure your flour accurately by weight or using the spoon-and-level method. Overworking the dough develops too much gluten, leading to a tough texture, while too much flour absorbs the moisture provided by the sour cream and butter, resulting in dryness.
-
How can I ensure my donuts are perfectly round and have a nice hole?
Using a proper donut cutter is the most straightforward way to achieve perfectly shaped donuts with a consistent hole size. When rolling out the dough, ensure an even thickness of ¼-inch for uniform cooking. If you are not using a donut cutter, carefully use a round object for the outer edge and a smaller one for the center hole. After cutting, if the hole seems to close up, gently stretch it with a chopstick or your finger before placing the donuts on parchment paper. Properly handling the dough, avoiding excessive kneading, and frying them at the correct temperature will also help them maintain their shape and puff up nicely.