Classic Mimosa Recipe – Made In a Pitcher!
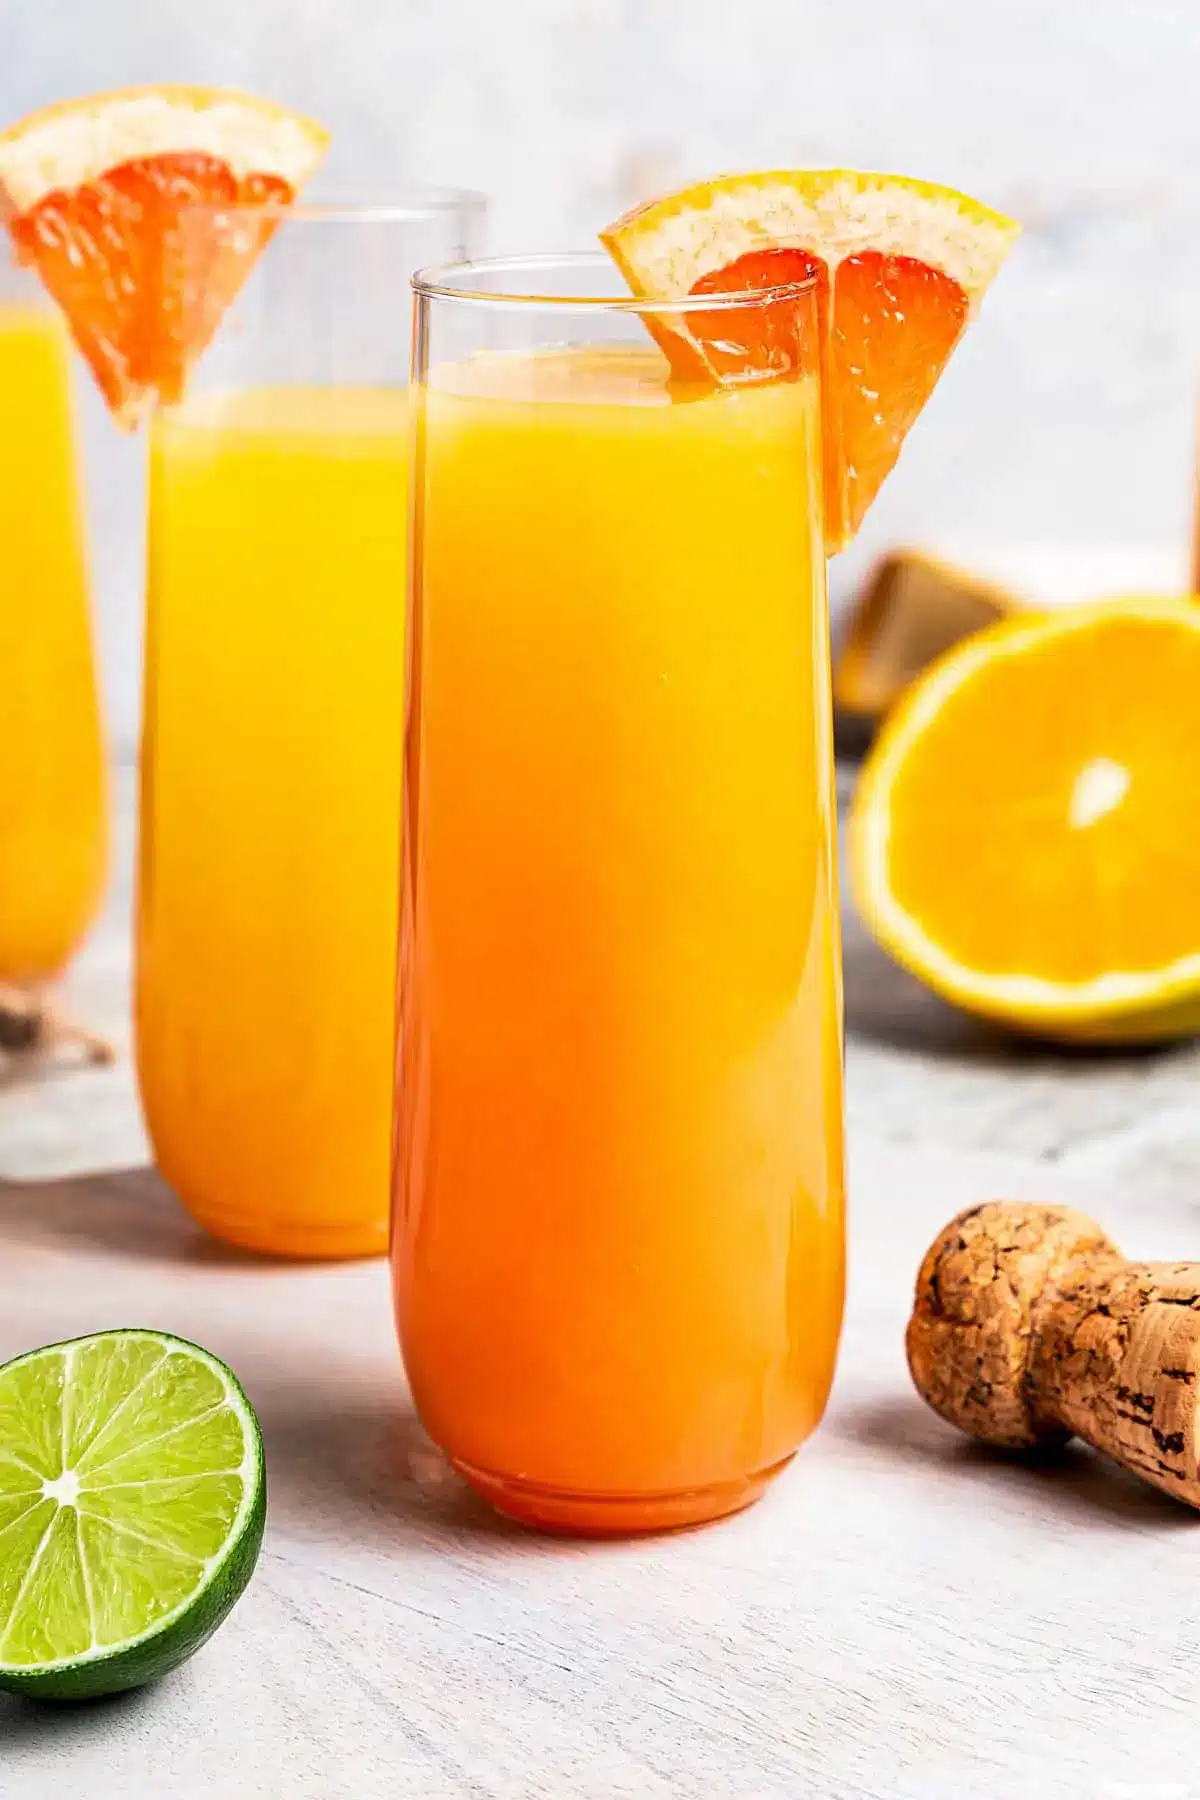
No Sunday brunch is truly complete without the effervescent joy of a classic mimosa. This beloved cocktail, a harmonious blend of bright orange juice and crisp sparkling wine, has become synonymous with leisurely mornings and festive gatherings. Its simple elegance makes it a perennial favorite, perfect for any occasion that calls for a touch of sparkle and cheer.
The magic of a mimosa lies in its understated sophistication and effortless preparation. Whether you’re hosting an Easter celebration, a Mother’s Day brunch, or simply enjoying a relaxed weekend morning, a pitcher of these delightful drinks is sure to be the centerpiece of your table. It’s the perfect companion to a spread of delicious breakfast fare, adding a celebratory touch to every sip.
Why You Will Love This Recipe
- Effortless Elegance: This recipe transforms simple ingredients into a sophisticated cocktail that impresses guests without requiring complex techniques.
- Crowd-Pleasing: Prepared in a pitcher, it’s designed to serve a group, making it ideal for parties and larger gatherings where quick assembly is key.
- Customizable Sparkle: While the classic is divine, this recipe encourages personalization with optional additions like cranberry juice or fresh citrus slices for a unique twist.
- Budget-Friendly Bliss: You don’t need the most expensive Champagne; quality Prosecco or other sparkling wines deliver fantastic flavor and fizz at a more accessible price point.
- Quick Preparation: With just a few minutes of assembly, you can have a refreshing pitcher ready to pour, leaving you more time to enjoy your guests and your meal.
Ingredients You Need
The beauty of a mimosa recipe lies in its minimalist ingredient list, allowing the quality of each component to shine through. For the perfect mimosa, we focus on two key elements: a high-quality sparkling wine and freshly squeezed or excellent quality orange juice. Ensuring both are well-chilled is paramount to achieving that delightful, refreshing effervescence.
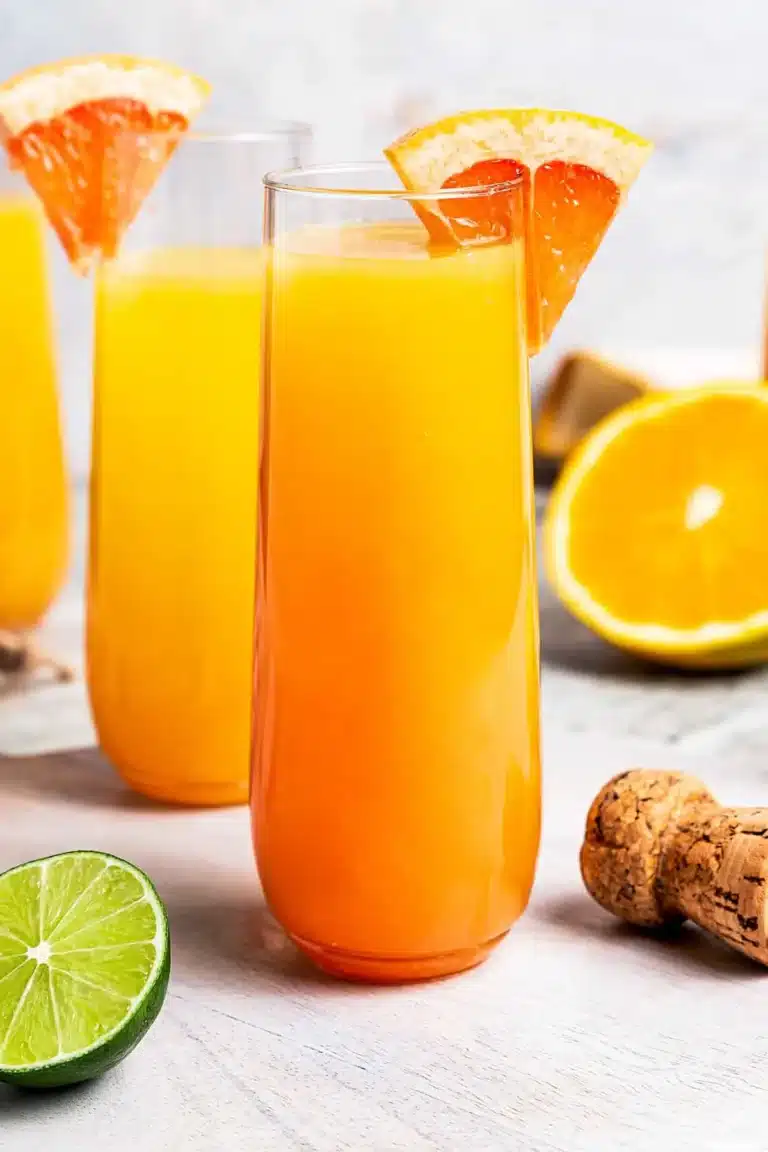
Classic Mimosa Recipe

This classic mimosa recipe is made for a brunch crowd! It's a simple cocktail made with orange juice and Prosecco. Mix it in a pitcher with fresh citrus for your next party!
- 1 bottle (750 mL) Prosecco
- 3-4 cups orange juice, I use 50% less sugar, or you can use freshly squeezed
- citrus slices, (grapefruits, oranges, lemons, limes)
- cranberry Juice, for serving
- 1Add citrus slices to a pitcher.
- 2Pour the bottle of Prosecco over the fruit.
- 3Slowly pour in the orange juice to combine with the Prosecco.
- 4Pour the mimosas into champagne flutes and add a splash of cranberry juice to each. Cheers!
Keywords: mimosa, brunch cocktail, sparkling wine, orange juice, pitcher drink, party drink, easy cocktail
- prosecco: a dry Italian sparkling wine that offers a budget-friendly yet delightful alternative to Champagne, ensuring your mimosas are bubbly and bright.
- orange juice: opt for freshly squeezed or a high-quality store-bought variety, preferably with little to no pulp for a smoother texture.
- citrus slices: a colorful and flavorful addition, featuring a mix of grapefruits, oranges, lemons, or limes to enhance the aroma and visual appeal.
- cranberry juice: a optional splash for serving, adding a beautiful crimson hue and a subtle tartness that complements the sweetness of the orange juice.
The exact quantities for these ingredients can be found in the convenient recipe card provided.
Variations
While the classic mimosa is undeniably perfect, the beauty of this cocktail lies in its adaptability. For those seeking a delightful drink that steers clear of alcohol, a non-alcoholic mimosa can be crafted with ease. Simply substitute the Prosecco with a crisp, clear soda water, a dealcoholized sparkling wine, or even a light and bubbly lemon-lime soda like Sprite. This allows everyone to partake in the celebratory toast, making it inclusive for all guests, regardless of their preference for alcohol.
For those following a lower-carbohydrate lifestyle, a few mindful adjustments can create a delicious mimosa variation. Opt for a dry sparkling wine, such as a Brut or Extra Brut Champagne or Prosecco, which contains less residual sugar. Pair this with a freshly squeezed orange juice, and perhaps a touch of lime or lemon juice to add tang without sweetness. You can also consider a splash of unsweetened cranberry juice or a few muddled berries for added flavor and visual appeal, ensuring a sophisticated, low-carb option.
The fall season brings forth a wonderful opportunity to infuse the mimosa with warm, comforting flavors. Imagine an apple cider mimosa, where the vibrant orange juice is partially replaced with cold, crisp apple cider. A dry sparkling wine will still provide the necessary effervescence, and a cinnamon stick or a thin slice of apple as a garnish can complete this autumnal twist. This variation is particularly delightful for holiday gatherings or cozy brunches during cooler months.
How to Prepare mimosa recipe
Step 1: Gather Your Citrus
The first crucial step in crafting the perfect pitcher of mimosas involves preparing your fresh citrus. Select a vibrant assortment of fruits, such as juicy oranges, tart grapefruits, zesty lemons, and refreshing limes. Wash them thoroughly under cool running water to remove any surface impurities. Next, using a sharp knife, carefully slice these fruits into thin, elegant rounds or wedges, ensuring they are manageable for both garnish and flavor infusion within the pitcher.
The variety of citrus you choose will significantly impact the final flavor profile of your mimosas. Oranges provide sweetness and a classic mimosa essence, while grapefruit can add a pleasing bitterness and complexity. Lemons and limes introduce a bright, zesty acidity that can cut through richness and awaken the palate. Aim for a visually appealing mix of colors as well; the red hues of some grapefruits or the vibrant yellow of lemons add an inviting touch to the pitcher, promising a delightful visual as well as gustatory experience.
Consider the ripeness of your fruit. Ripe citrus will yield more juice and a more pronounced flavor, so seek out fruits that feel heavy for their size and have smooth, unblemished skins. Gently pressing each slice before adding it to the pitcher can also release a bit more of its aromatic oils and juices, further enhancing the overall infusion. This initial preparation sets the stage for a truly elevated mimosa experience, moving beyond the basic and into the realm of thoughtful cocktail crafting.
Step 2: Add the Sparkle
Once your pitcher is artfully adorned with slices of fresh citrus, it’s time to introduce the effervescent heart of the mimosa: the sparkling wine. Carefully open a chilled bottle of your chosen bubbly – whether it’s a crisp Prosecco, an elegant Cava, or a classic Champagne. Slowly and steadily pour the entire contents of the bottle over the fruit resting in the pitcher. The goal here is to ensure the wine distributes evenly amongst the citrus slices, beginning the gentle infusion process.
It’s imperative that your sparkling wine is thoroughly chilled before this step. A warm bottle will result in a less satisfying fizz and a less refreshing final drink. The temperature also plays a role in how well the carbonation is retained. Pouring slowly helps to minimize the premature escape of precious bubbles, ensuring you retain that delightful fizziness throughout your pitcher. This step is where the cocktail truly begins to come alive, transforming simple ingredients into a festive beverage.
The gentle cascade of the sparkling wine over the fruit is not just for show; it begins to coax out the subtle aromas and flavors of the citrus. This initial pour sets the foundation for the harmonious blend that will define the finished mimosa. Take a moment to appreciate the subtle release of bubbles and the way the wine interacts with the vibrant colors of the fruit; it’s a preview of the delightful taste to come.
Step 3: Introduce the Orange Juice
With the sparkling wine now settled amongst the citrus, the next step is to gently incorporate the orange juice. Pour the cold orange juice slowly into the pitcher. The key here is to pour gradually rather than dumping it all in at once. This deliberate pouring technique helps to integrate the juice with the sparkling wine without excessively agitating the mixture, thereby preserving as much of the carbonation as possible.
The ratio of sparkling wine to orange juice is a matter of personal preference, but a classic 1:1 ratio is a fantastic starting point. Some prefer a slightly stronger orange flavor, while others lean towards a more wine-forward profile. Feel free to adjust the quantities slightly to suit your taste, but remember that too much juice can dilute the delightful fizz of your sparkling wine. Ensure your orange juice is also well-chilled, maintaining the optimal serving temperature for your mimosas.
As the orange juice mingles with the Prosecco and citrus, observe how the colors blend, creating that signature golden hue. This slow incorporation is essential for achieving a balanced taste and texture. The slight separation of the liquids initially is normal, and a gentle stir, if needed, should be performed with care to avoid further loss of carbonation. This is the stage where the foundational elements of the mimosa truly unite.
Step 4: Stir Gently to Combine
Once the orange juice has been added to the pitcher, a very gentle stir is recommended to ensure all the components are beautifully integrated. Use a long spoon or a cocktail stirrer to carefully swirl the mixture a few times. The aim is not to aggressively mix, but rather to create a uniform blend of the sparkling wine, orange juice, and the essence of the citrus slices. Over-stirring can lead to a significant loss of carbonation, diminishing the characteristic fizz that makes mimosas so appealing.
This gentle stirring also helps to distribute the flavors of the citrus throughout the entire pitcher. As the fruit steeps in the liquid, its subtle notes will infuse the mixture, adding layers of complexity and brightness. Take your time and be mindful of the bubbles; the softer the stir, the better the final effervescence will be. It’s a delicate balance between ensuring the ingredients are married and preserving the delightful sparkle.
Observe the texture and appearance after the brief stir. The liquid should have a consistent color and a pleasant aroma. This is the moment the pitcher is truly ready to be served. If you notice any stark layering of liquids, a few more very gentle turns of the spoon should suffice. Remember, the less you disturb the carbonation, the more delightful and festive your mimosas will be.
Step 5: Pour with Flair
Now comes the most exciting part: serving the mimosas. Select your preferred glassware, traditionally a champagne flute, which showcases the bubbles beautifully. Tilt the flute slightly as you pour the mimosa mixture from the pitcher. This technique helps to maintain the carbonation and prevent the glass from overflowing too quickly.
Fill each glass about two-thirds to three-quarters full with the mimosa mixture. This leaves ample space for any optional additions, such as a splash of cranberry juice or a garnish. The visual of the golden liquid cascading into the flute is always a pleasing sight, signaling the start of a delightful beverage experience. Pour at a steady, controlled pace to avoid excessive foaming.
For an extra touch of color and flavor, add a small splash of cranberry juice to the top of each mimosa just before serving. This not only enhances the visual appeal but also adds a subtle layer of tartness that complements the sweetness of the orange juice and the crispness of the sparkling wine. The addition of a fresh citrus slice on the rim of the glass or floating in the drink adds a final flourish of elegance.
Step 6: Garnish and Enjoy
The final step in presenting your perfect mimosa involves thoughtful garnishing, which elevates the drink from simply delicious to an artful creation. A thin slice of orange, grapefruit, or a delicate twist of lemon peel adds a wonderful aromatic element and a pop of visual appeal. Ensure your garnishes are fresh and visually appealing, complementing the vibrant color of the cocktail itself.
Consider the optional splash of cranberry juice for an added layer of color and a subtle hint of tartness. This small addition can transform a classic mimosa into something uniquely your own. For an extra touch of elegance, a fresh raspberry or a small sprig of mint can also be added, offering a delightful contrast in both color and flavor. The goal is to enhance the drinking experience without overpowering the delicate balance of the mimosa.
Serve your beautifully garnished mimosas immediately while they are perfectly chilled and effervescent. Encourage your guests to savor the delicate bubbles and the refreshing blend of flavors. This final touch of care in garnishing ensures that every sip is a delightful experience, making your brunch or celebration truly memorable. Cheers to a perfect pour!
Pro Tips for mimosa recipe
Chill Everything Thoroughly: The absolute key to a fantastic mimosa is ensuring every single component is ice-cold. This includes the sparkling wine, the orange juice, and even the glasses you plan to serve them in. A well-chilled drink maintains its fizz longer and offers a far more refreshing taste, especially on a warm brunch day or in a sunny setting.
The Right Ratio is Crucial: While personal preference dictates the exact proportion, a 1:1 ratio of sparkling wine to orange juice is a widely accepted standard for a balanced mimosa. Experiment slightly to find your perfect sweet spot, but avoid going too heavy on the juice, as it can mute the delightful effervescence of your bubbly.
Consider the Sparkler Quality: You don’t need to break the bank on the most expensive Champagne. A good quality Prosecco, Cava, or even an American sparkling wine will perform admirably. The “dryness” of the wine (Brut or Extra Brut) is generally preferred as it offers less sweetness, allowing the orange juice to be the primary sweet component.
Fresh Citrus Adds a “Wow” Factor: While not strictly necessary, adding slices of fresh orange, grapefruit, or lime to the pitcher infuses a subtle, brighter citrus aroma and flavor. It also adds a beautiful visual element, making the pitcher more inviting and festive for your guests.
Pour Slowly for Maximum Fizz: When combining the ingredients, pour the sparkling wine first, then slowly add the orange juice. This method helps to retain as much carbonation as possible. Similarly, when pouring into glasses, tilt them slightly and pour gently to minimize the loss of bubbles.
Serving Suggestions for mimosa recipe
Decoration
The visual appeal of a mimosa can be significantly enhanced with thoughtful decoration. A simple yet elegant garnish is often the most effective. Consider a thin, perfectly cut wheel of fresh orange or grapefruit placed on the rim of the glass. For an extra touch of sophistication, a delicate twist of lemon or lime peel, expressed over the drink to release its aromatic oils, adds a wonderful fragrance and visual flair. These small additions transform a basic cocktail into a visually stunning centerpiece for your table, inviting guests to indulge.
You can also elevate the presentation by incorporating a few fresh berries into the glass before pouring, such as raspberries or a single strawberry. These add a lovely pop of color and a hint of complementary flavor. Alternatively, for a more festive and playful touch, consider a sugar rim on the glass. A simple syrup wash followed by dipping the rim in granulated sugar or even a colored sugar can add sparkle and texture, making each mimosa a mini work of art.
If you’re serving a pitcher, consider floating a few extra citrus slices directly in the pitcher itself. This not only adds to the visual appeal from the moment it’s presented but also allows the fruit to subtly infuse the liquid further. The vibrant colors of the fruit against the golden hue of the mimosa create an inviting and festive atmosphere, perfectly setting the tone for a celebratory brunch or gathering.
Side Dishes
Mimosas are the quintessential brunch beverage, and their bright, refreshing taste pairs wonderfully with a wide array of classic brunch dishes. The citrusy notes and light effervescence cut through the richness of savory items, while complementing sweeter fare. Consider serving your mimosas alongside fluffy German pancakes, crispy bacon, or a hearty slice of quiche. The combination of a celebratory drink and satisfying food is a brunch classic for a reason.
For those who prefer lighter options, mimosas are an excellent accompaniment to fresh fruit salads, yogurt parfaits, or a delicate avocado toast. The bright citrus flavors enhance the freshness of the fruit and the creaminess of the avocado. If you’re aiming for a more indulgent spread, pairing them with savory delights such as smoked salmon and cream cheese or miniature crab cakes creates a sophisticated and satisfying brunch experience. The versatility of the mimosa makes it a perfect partner for almost any brunch menu.
Don’t overlook the power of baked goods in your side dish selection. A basket of warm, flaky croissants, buttery scones, or even a sweet and tangy cranberry orange loaf can be perfectly complemented by a glass of mimosa. The interplay between the sweetness of the baked goods and the crisp, slightly tart nature of the cocktail creates a delightful harmony on the palate. Ensure your side dishes offer a variety of textures and flavors to provide a well-rounded and enjoyable brunch experience for all your guests.
Creative Serving Ideas
Beyond the traditional champagne flute, think creatively about how to present your mimosas to add an extra layer of fun and sophistication. For a more casual gathering, consider serving mimosas in charming mason jars or even stemless wine glasses. This offers a more relaxed, yet still stylish, presentation that’s perfect for outdoor brunches or relaxed get-togethers. You can even pre-batch individual servings in small, sealable bottles or jars for a grab-and-go option for your guests.
Consider setting up a “Mimosa Bar” where guests can customize their own creations. Provide a selection of sparkling wines, various fruit juices like pineapple, mango, or pomegranate, and an assortment of fresh fruits for garnishes. Include small bowls of berries, mint sprigs, and even edible flowers for an extra touch of artistry. This interactive approach allows everyone to tailor their mimosa to their exact preferences, adding an element of personal expression and fun to your event.
For themed parties, get creative with the presentation. For a holiday brunch, perhaps use festive glassware or add a cinnamon stick garnish. For a summer soirée, consider serving mimosas with a tiny umbrella or a vibrant cocktail skewer. You could even freeze small fruits like raspberries or blueberries into ice cubes to add to the drinks, keeping them chilled without dilution while adding a beautiful visual element. These small, creative touches can make your mimosas unforgettable.
Preparation & Storage
Storing Leftovers
Storing leftover mimosas requires a bit of care to maintain their desirable qualities. While mimosas are best enjoyed immediately after preparation due to the effervescence of the sparkling wine, it is possible to store any remaining liquid for a short period. Transfer the leftover mimosa mixture into a clean, airtight bottle or container. Ensure the container is filled as much as possible to minimize air exposure, which can lead to oxidation and a loss of carbonation.
It’s crucial to understand that the vibrant fizz of the sparkling wine will diminish over time once it has been opened and mixed. Therefore, leftovers should be consumed within 24 to 48 hours for the best experience. While the flavor of the orange juice and citrus will remain, the delightful bubbly texture will be significantly reduced. For this reason, it’s often recommended to make mimosas in smaller batches if you anticipate having leftovers, or to plan on topping up individual glasses with a bit of fresh sparkling wine when reheating.
To mitigate the loss of sparkle, some people suggest leaving a small amount of headspace in the container and then topping it off with a small amount of fresh, chilled sparkling wine just before serving. This can help to reintroduce some of the lost carbonation. However, be realistic; the texture will never be quite the same as a freshly made batch. For optimal enjoyment, prioritize making only what you anticipate consuming to ensure that celebratory sparkle remains.
Freezing
Freezing mimosas, particularly in their liquid form, is generally not recommended if you wish to preserve their characteristic texture and effervescence. The carbonation in sparkling wine is delicate and does not hold up well to the freezing and thawing process. When frozen and then thawed, the sparkling wine will lose most, if not all, of its bubbles, resulting in a flat and unappealing drink. This would transform the vibrant mimosa into a simple, less exciting orange juice cocktail.
However, there are creative ways to incorporate mimosa flavors into frozen treats. You could freeze a portion of the mimosa mixture into ice cube trays. These “mimosa ice cubes” can then be used to chill future drinks, adding both flavor and a hint of fizz as they melt. Another idea is to create a mimosa sorbet or granita by freezing a sweetened mixture of orange juice and sparkling wine, perhaps with a touch of citrus zest. This allows you to enjoy mimosa flavors in a frozen format without compromising the carbonation of the original beverage.
For those who enjoy making beverages ahead of time, consider preparing a concentrated mimosa base that excludes the sparkling wine. This base, made from orange juice and perhaps some simple syrup and citrus zest, can be frozen in ice cube trays or small containers. When ready to serve, simply add a fresh pour of chilled sparkling wine to the thawed base in individual glasses. This method ensures you always have the core flavors ready, and the crucial sparkle is added just before consumption.
Reheating
The concept of “reheating” a mimosa doesn’t quite apply in the traditional sense, as mimosas are best served cold and are not meant to be warmed. Unlike hot beverages, their appeal lies in their refreshing coolness and effervescence. Therefore, if you have leftover mimosas, the primary concern is to maintain their chill and, if possible, revive some of their lost sparkle rather than heating them up.
If you find yourself with a pitcher of mimosas that has lost its initial fizz, but the flavor is still desirable, you can attempt to “refresh” it. The most effective way to do this is to add a fresh splash of chilled sparkling wine to individual servings just before drinking. This will reintroduce some carbonation and liven up the drink. Alternatively, you could add a small amount of chilled club soda or sparkling water to individual glasses to boost the bubbles, though this will slightly dilute the flavor profile.
Avoid any methods that involve heating, such as microwaving or stovetop warming, as this will destroy any remaining carbonation and fundamentally alter the character of the cocktail. The goal when dealing with leftovers is to bring them back to their optimal chilled state and, if possible, mimic the freshly prepared experience as closely as possible. Think of it as a revival rather than a reheat, focusing on temperature and carbonation rather than heat.
Frequently Asked Questions
-
Why is it called a mimosa, and what is the origin of this cocktail?
The name “mimosa” for this beloved cocktail is believed to have originated from the vibrant, golden-hued flowers of the mimosa plant (Acacia dealbata). The drink’s distinctive sunny color, a result of the orange juice and sparkling wine combination, bears a striking resemblance to these beautiful blossoms. The cocktail itself is thought to have been invented in London in 1925 at the Buck’s Club, though it gained significant popularity after being featured by Alfred Hitchcock in the 1950s.
While its exact genesis is debated, the mimosa quickly became a staple of brunches and celebrations worldwide due to its simple elegance and refreshing taste. Its association with leisurely weekend mornings and festive occasions solidified its place as a go-to celebratory drink. The mimosa’s appeal lies in its accessibility and its ability to add a touch of sparkle to any gathering without being overly complicated.
The core ingredients of sparkling wine and orange juice have remained constant, though variations have emerged over the years, including the addition of other juices or liqueurs. Nevertheless, the classic mimosa continues to be a beloved choice for its timeless simplicity and cheerful character, embodying the spirit of a relaxed and joyful occasion.
-
Can I make mimosas ahead of time, and how should I store them if I do?
While mimosas are best when freshly made to preserve their effervescence, you can prepare them partially in advance. The best method is to combine the orange juice and citrus slices in a pitcher and refrigerate them until you’re ready to serve. This allows the citrus to infuse its flavors into the juice without the risk of the sparkling wine going flat.
Right before you plan to serve, gently stir the chilled juice mixture and then slowly add the chilled sparkling wine. Pour immediately into glasses. If you must store a fully mixed mimosa, it should be done in an airtight container, filled as much as possible to minimize air exposure, and kept very cold. However, be aware that the carbonation will dissipate significantly over time, meaning the drink will become increasingly flat the longer it sits.
For best results and the most enjoyable experience, it’s highly recommended to make mimosas in smaller batches as needed rather than preparing a large pitcher far in advance. This ensures you get to enjoy the delightful sparkle and fresh taste that defines a perfect mimosa. Aim to consume any pre-mixed mimosas within 24 hours, topping them off with fresh bubbly if possible.
-
What are the best sparkling wine alternatives to Champagne for making mimosas, and what about non-alcoholic options?
For a delicious and more budget-friendly mimosa, there are several excellent sparkling wine alternatives to Champagne. Prosecco, an Italian sparkling wine, is a very popular choice due to its crispness and fruity notes, offering a fantastic balance of quality and value. Spanish Cava is another superb option, often crafted using traditional methods similar to Champagne, providing a complex flavor profile at a more accessible price point. Many American wineries also produce high-quality sparkling wines that work wonderfully in mimosas, so don’t hesitate to explore local options.
When choosing an alternative, look for “Brut” or “Extra Brut” designations, which indicate a drier style of sparkling wine with less residual sugar. This allows the sweetness of the orange juice to shine through without making the mimosa overly sweet. The key is to select a sparkling wine that is well-chilled and has a good level of carbonation to ensure a lively and refreshing drink.
For those seeking a completely non-alcoholic version, you have several delightful choices. Dealcoholized sparkling wine offers the taste and effervescence of traditional bubbly without the alcohol content, making it a sophisticated choice. Alternatively, high-quality sparkling grape juice or a crisp, clear soda water can serve as excellent bases. Even a light, bubbly lemon-lime soda like Sprite can be used in a pinch, though it will contribute additional sweetness, so adjust your orange juice accordingly.