Homemade Vanilla Bean Frappucino – Easy Starbucks Copycat Recipe!

Embarking on a culinary journey at home can be incredibly rewarding, especially when it leads to recreating beloved cafe beverages. This vanilla bean frappuccino recipe offers a delightful escape, bringing the essence of a premium coffee shop right into your own kitchen.
Imagine the rich aroma and creamy texture of your favorite blended drink, crafted with simple ingredients and a personal touch. This guide will walk you through creating a delicious, Starbucks-inspired vanilla bean frappuccino that will undoubtedly become a go-to treat for any time of day.
Why You Will Love This Recipe
- Effortless Preparation: This recipe comes together in a matter of minutes, making it perfect for a quick indulgence or a refreshing pick-me-up.
- Customizable Sweetness: You have complete control over the sweetness level, ensuring it perfectly matches your personal preference.
- Versatile Ingredients: Easily adapt the recipe using different types of milk or even non-dairy alternatives to suit your dietary needs or taste.
- Cafe Experience at Home: Enjoy the delightful taste and creamy texture of a premium frappuccino without the need to leave your house.
- Kid-Friendly Option: Made without caffeine, this vanilla bean frappuccino is a fantastic treat for all ages, offering a taste of luxury for everyone.
Ingredients You Need
The magic of this homemade vanilla bean frappuccino lies in its simplicity and the quality of its components. Opting for good-quality ingredients will elevate the final taste and texture, transforming a simple drink into a luxurious experience. You can find many of these at your local grocery store or specialty shops.
Vanilla Bean Frappuccino

An easy homemade copycat Starbucks-inspired vanilla bean frappuccino made with simple ingredients, including creamy vanilla bean ice cream. Enjoy this refreshing and caffeine-free treat!
- 1 cup whole milk, or 2% milk
- 2 tablespoons vanilla bean powder, or vanilla powder
- 1 scoop (about ⅓ cup) vanilla bean ice cream
- 1 cup ice
- whipped cream, for topping
- 1Add the milk, vanilla bean powder, ice cream, and ice to a blender.
- 2Blend until smooth and creamy.
- 3Pour into a glass and top with whipped cream. Serve immediately.
Keywords: frappuccino, vanilla, milkshake, coffeehouse, copycat, Starbucks, dessert, drink, beverage, homemade
- whole milk: This provides a rich and creamy base, but feel free to experiment with 2% milk or even non-dairy alternatives like almond or oat milk for a different flavor profile.
- vanilla bean powder: This is the star ingredient, offering an authentic and intense vanilla flavor. If you can’t find vanilla bean powder, regular vanilla powder or a good quality vanilla extract can be used as a substitute, though the depth of flavor may vary.
- vanilla bean ice cream: Using high-quality vanilla bean ice cream contributes to the luxuriously creamy texture and adds another layer of delicious vanilla essence. Classic vanilla ice cream will also work well if vanilla bean is unavailable.
- ice: This is crucial for achieving the signature frappuccino texture, ensuring it’s blended and frosty. Use standard ice cubes that are well-frozen.
- whipped cream: A generous swirl of whipped cream on top is essential for that authentic coffee shop finish. You can use store-bought or make your own for an extra special touch.
The specific quantities for these ingredients are detailed within the accompanying recipe card, ensuring you achieve the perfect balance for a single serving.
Variations
While the classic vanilla bean frappuccino is undeniably delicious, the beauty of homemade recipes lies in their adaptability. You can easily tweak this base recipe to suit different dietary needs and flavor preferences, opening up a world of delicious possibilities.
For those seeking a decadent dessert-like experience, consider a “Mocha Vanilla Bean Frappuccino.” Simply add a tablespoon or two of your favorite cocoa powder or a shot of chocolate syrup to the blender along with the other ingredients. This combination of rich chocolate and sweet vanilla creates a wonderfully indulgent flavor profile, perfect for satisfying a serious sweet craving. Top with chocolate shavings for an extra flair.
If you’re aiming for a low-carb or sugar-free option, adjustments can be made to maintain that delightful taste. Substitute the vanilla bean ice cream with a sugar-free vanilla ice cream or a few drops of high-quality sugar-free vanilla syrup. For the vanilla bean powder, ensure your chosen substitute aligns with your low-carb goals, and consider using a sugar-free sweetener like erythritol or stevia to adjust the sweetness to your liking. The milk choice also plays a role; unsweetened almond milk is an excellent low-carb choice.
Embracing a vegan lifestyle doesn’t mean missing out on this creamy delight. Simply swap the dairy milk for your favorite plant-based alternative such as almond, oat, soy, or coconut milk. For the vanilla bean ice cream, opt for a high-quality vegan vanilla ice cream. Many brands offer fantastic dairy-free options made from coconut cream, cashews, or oats, which will still provide that essential creaminess and vanilla flavor. Ensure your whipped topping is also dairy-free for a completely vegan treat.
How to Prepare vanilla bean frappuccino recipe
Step 1: Gather Your Ingredients and Equipment
Before you begin the blending process, ensure you have all your ingredients prepped and ready to go. This includes measuring out the milk, vanilla bean powder, and scooping the vanilla bean ice cream. Having your ice cubes within easy reach is also important for seamless blending. A high-powered blender is your most critical piece of equipment for this recipe; it needs to be robust enough to thoroughly crush the ice into a smooth, creamy consistency without leaving large chunks.
Having a dedicated workspace cleared and organized will make the process even smoother. Think about where you’ll place your blender, measuring cups, and the glass you’ll be serving the frappuccino in. This preliminary step ensures that once you start blending, there are no interruptions and you can focus on achieving the perfect texture.
Consider the type of milk you are using. If you’ve opted for a non-dairy milk, ensure it’s one that blends well and doesn’t have an overpowering flavor that might compete with the vanilla. Room temperature milk can sometimes blend more easily than very cold milk, though for a frappuccino, starting with chilled milk is perfectly fine and contributes to the frosty nature of the drink.
Step 2: Combine the Wet Ingredients and Vanilla Enhancers
Begin by pouring your chosen milk into the blender jug first. Adding liquids first helps the blender blades move more freely when you start, preventing them from getting stuck on solid ingredients. This initial step sets the foundation for a smooth blending process, ensuring all the components can be incorporated effectively.
Next, add the vanilla bean powder to the blender. This potent ingredient will infuse the entire drink with its characteristic sweet and slightly floral aroma and taste. If you are using vanilla extract or vanilla bean paste, add it at this stage as well, being mindful of the intensity and adjusting the quantity accordingly. The goal is to achieve a pronounced, authentic vanilla flavor.
Finally, add the scoop of vanilla bean ice cream. This is where the magic of creaminess truly begins. The ice cream not only contributes to the smooth texture but also adds its own delightful vanilla notes, creating a rich and layered flavor profile. Ensure the ice cream is slightly softened if it’s been frozen very hard, making it easier for the blender to incorporate.
Step 3: Add the Ice and Begin Blending
Now it’s time to add the ice cubes to the blender. The quantity of ice is crucial for achieving the desired thick, slushy texture characteristic of a frappuccino. Start with the recommended amount, and you can always add a few more if you prefer a thicker consistency. Make sure the ice cubes are not clumped together; breaking them apart if they are stuck will help with smoother blending.
Securely place the lid on your blender. Begin blending on a low speed, gradually increasing to a higher speed as the ingredients start to break down. The initial low speed helps to gently incorporate the ice without overwhelming the blender motor. Watch the mixture closely as it begins to swirl and transform.
Continue blending until the mixture is completely smooth and creamy, with no discernible chunks of ice. This may take anywhere from 30 seconds to a couple of minutes, depending on the power of your blender. You are looking for a thick, homogeneous consistency that resembles a milkshake or a very smooth sorbet. If the mixture seems too thick and the blender is struggling, you can add a tiny splash more milk to help it along, but be careful not to add too much, which would make the frappuccino too thin.
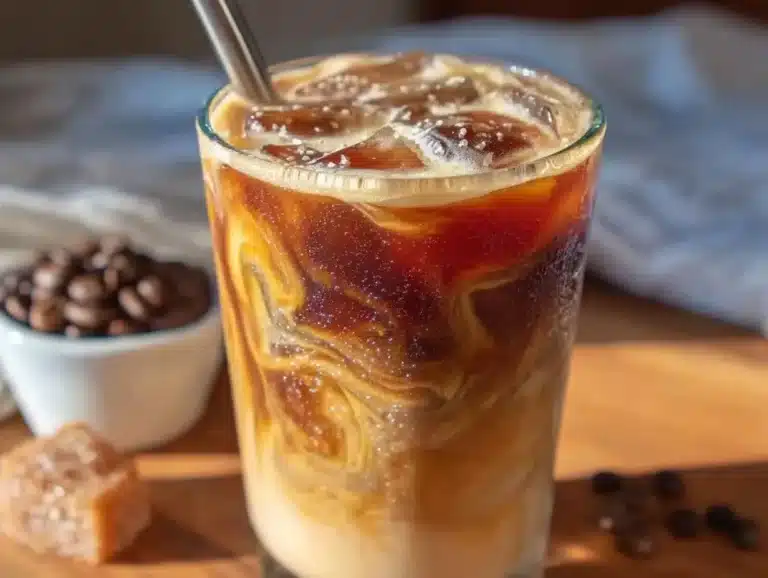
Step 4: Achieve the Perfect Frappuccino Texture
The texture of a perfect frappuccino is paramount. It should be thick enough to hold its shape and be sipped through a straw, yet smooth enough to blend seamlessly in your mouth. As you blend, keep an eye on the consistency. If it appears too thin, continue blending for another 30 seconds or so to allow more of the ice to break down and thicken the mixture. Sometimes, the friction from blending can slightly melt the ice cream, which also contributes to the final texture.
If, after initial blending, the mixture is still too thick and difficult for your blender to manage, carefully add a tablespoon or two of cold milk. Adding milk should be done sparingly, as too much liquid will result in a watery drink rather than a thick frappuccino. Blend again briefly after adding any extra liquid, just until incorporated.
Alternatively, if you prefer an even thicker consistency and your blender is struggling, you can pause blending, scrape down the sides of the blender jar with a spatula, and then resume blending. This ensures all parts of the mixture are being processed evenly and helps achieve that ultra-smooth, creamy finish that defines a premium frappuccino. The ideal texture is creamy and luxurious, not icy or watery.
Step 5: Serve and Garnish Your Creation
Once your vanilla bean frappuccino has reached the desired smooth and creamy consistency, it’s time to serve it. Pour the thick mixture immediately into a tall serving glass. Using a wide-mouthed glass will make pouring easier and allow for generous topping.
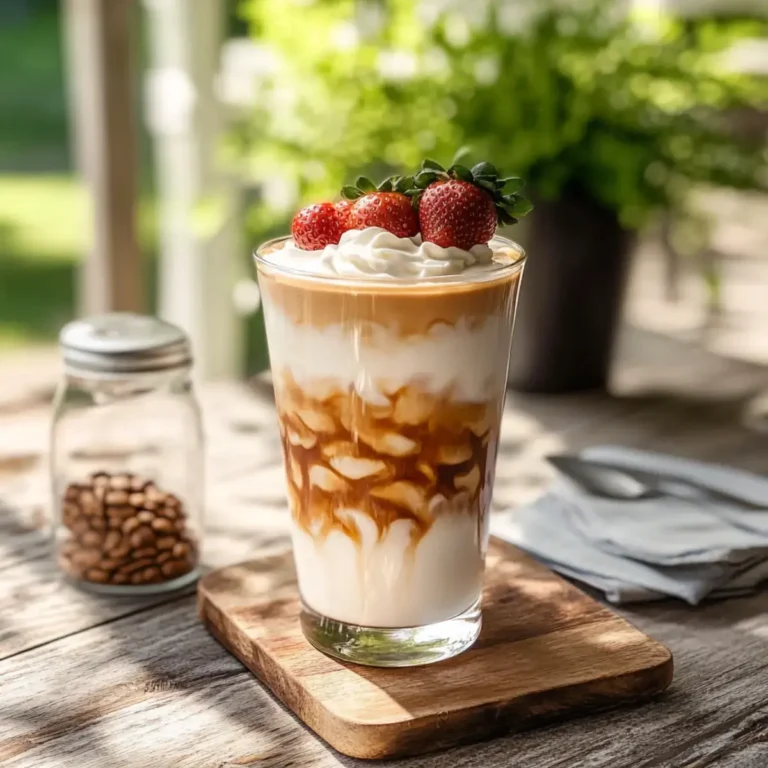
The final, quintessential step is to top your frappuccino with a generous swirl of whipped cream. This adds an extra layer of indulgence and visual appeal. For an even more decadent experience, you can dust the whipped cream with a pinch of vanilla bean powder, a sprinkle of cinnamon, or even some finely grated white chocolate.
Serve your homemade vanilla bean frappuccino immediately with a colorful straw. The best way to enjoy this delightful beverage is fresh, while it’s perfectly chilled and creamy. This is the moment to savor your creation, knowing you’ve expertly recreated a beloved cafe treat in your own home, perfectly tailored to your taste.
Step 6: Enhance with Optional Additions
For those who enjoy a bit of caffeine in their blended beverage, an espresso shot is a fantastic addition. You can either blend a shot of hot espresso directly into the frappuccino mixture during the blending process. This will infuse the drink with a coffee flavor and provide a delightful energy boost. Be sure to blend it thoroughly to integrate the coffee evenly throughout the drink.
Another popular method is to serve the frappuccino affogato-style. This involves pouring a shot of hot espresso directly over the top of the finished frappuccino after it’s been poured into the glass and topped with whipped cream. The hot espresso melts slightly into the cold, creamy drink, creating a wonderful contrast of temperatures and flavors as you sip. This method adds a sophisticated touch to your homemade treat.
Beyond coffee, consider other flavor enhancements. A few drops of almond extract can add a subtle nutty depth, complementing the vanilla beautifully. For a touch of zest, a tiny amount of lemon zest finely grated into the mix can provide a surprising and refreshing counterpoint. Experimenting with these small additions allows you to personalize your vanilla bean frappuccino to create a truly unique and signature drink that reflects your personal taste preferences.
Pro Tips for vanilla bean frappuccino recipe
Use High-Quality Vanilla: The flavor of your vanilla bean frappuccino hinges on the quality of your vanilla. If possible, use genuine vanilla bean powder for its rich, complex aroma and taste. If that’s unavailable, a good vanilla bean paste or a high-quality pure vanilla extract will work, but adjust quantities as extracts can be more potent.
Texture is Key: Achieve the perfect creamy, not icy, texture by using a powerful blender and ensuring your ice cubes are fully frozen. If your blender struggles, add a little more liquid sparingly. Avoid over-blending, which can melt the ice cream and make the drink too thin.
Adjust Sweetness: Taste your frappuccino before pouring it into the glass. You can easily add more sweetener or vanilla if needed. If it’s too sweet, a little extra milk or ice can help dilute it. Remember that the whipped cream topping also adds sweetness.
Pre-Chill Your Glass: For an extra touch of luxury and to keep your frappuccino colder for longer, chill your serving glass in the freezer for at least 15-20 minutes before pouring. This simple step enhances the overall drinking experience, especially on a warm day.
The Starbucks “Base” Secret: For a truly authentic Starbucks-style Frappuccino, they use a special “Frappuccino Base” syrup, not ice cream. You can recreate this at home by blending 1 cup water, 1 cup sugar, and 1 teaspoon xanthan gum until smooth, then using ¼ cup of this syrup instead of ice cream. This provides that signature thick, smooth texture without relying on dairy.
Serving Suggestions for vanilla bean frappuccino recipe
Decoration
Elevate your vanilla bean frappuccino with simple yet effective decorative touches. A generous swirl of whipped cream is the classic choice, providing a soft, pillowy topping. For an extra visual and flavor boost, dust the whipped cream with a pinch of finely ground vanilla bean powder or a sprinkle of confectioners’ sugar. Edible glitter or a few delicate chocolate shavings can also add a touch of whimsy and sophistication, transforming your drink into a special occasion treat.
Side Dishes
This creamy vanilla bean frappuccino pairs wonderfully with a variety of sweet and slightly savory treats, reminiscent of a delightful dessert spread. Consider serving it alongside freshly baked cookies, such as light and airy sugar cookies or rich chocolate chip cookies. A slice of moist lemon loaf or a fluffy baked good like a German pancake also complements the vanilla flavor beautifully. For a lighter option, fresh berries or a small fruit tart can provide a refreshing contrast to the rich sweetness of the drink.
Creative Serving Ideas
Presentation can turn a simple drink into an experience. Serve your vanilla bean frappuccino in tall, clear glasses to showcase its creamy texture. For a fun, casual gathering, consider a “build-your-own” frappuccino bar where guests can add their own toppings like sprinkles, cookie crumbles, or caramel drizzle. You could also serve individual portions in mason jars with reusable straws for an eco-friendly and rustic touch. For a special themed event, consider garnishes that match the theme, such as mini candy canes for a holiday party or edible flowers for a spring celebration.
Preparation & Storage
Storing Leftovers
Frappuccinos, by their nature, are best enjoyed immediately after preparation. Due to their blended, icy, and creamy composition, they do not store well for extended periods. If you find yourself with a small amount left over, it is not recommended to refrigerate or freeze it, as the texture will likely separate and become watery or icy. It’s best to plan your serving size accordingly or halve the recipe if you anticipate not finishing it.
Freezing
Freezing a prepared vanilla bean frappuccino is generally not advisable for maintaining its optimal texture. The ice crystals will become larger and more prominent upon thawing, leading to an unpleasant, watery consistency rather than the smooth, creamy blend you desire. If you wish to prepare something similar for later, consider freezing the unfrozen liquid base (milk, vanilla powder, sweetener if used) in ice cube trays. You can then blend these frozen cubes with fresh ice and a splash of milk when you’re ready to enjoy a fresh frappuccino.
Reheating
Reheating a frappuccino is not a feasible or recommended process. As a cold, blended beverage, it is not designed to be heated. Attempting to reheat it would likely result in a melted, separated liquid rather than a desirable drink. Frappuccinos are intended to be consumed cold and fresh, capturing their peak flavor and texture immediately after blending. Enjoying it promptly ensures you experience the intended delightful qualities of this special drink.
Frequently Asked Questions
-
Can I make a vanilla bean frappuccino without ice cream?
Yes, absolutely! To make a Starbucks-style vanilla bean frappuccino without ice cream, you will need to create a homemade Frappuccino base. This typically involves blending water, sugar, and xanthan gum until smooth to achieve that signature thick and creamy texture. Use about ¼ cup of this homemade base syrup in place of the ice cream in the recipe. This method mimics the texture found in commercial coffee shops and is a great option for those who prefer not to use ice cream or are looking for a dairy-free alternative if plant-based ingredients are used.
-
How can I make my vanilla bean frappuccino thicker or thinner?
To achieve a thicker frappuccino, start by using less milk or adding a bit more ice during the blending process. Ensure your ice cubes are solid and fully frozen; sometimes, slightly softened ice can lead to a thinner consistency. If the mixture seems too thin after blending, try adding a few more ice cubes and blending again briefly. For a thinner consistency, simply add a little more milk, a tablespoon at a time, until you reach your desired fluidity. It’s important to blend thoroughly after any adjustments to ensure all ingredients are well incorporated and the texture is smooth.
-
Is this vanilla bean frappuccino recipe caffeinated?
As written, this vanilla bean frappuccino recipe is caffeine-free, making it a delightful treat for any time of day or for those sensitive to caffeine. However, you can easily make it caffeinated by adding a shot of hot espresso. You can either blend the espresso shot directly into the frappuccino mixture along with the other ingredients for a coffee-infused flavor, or you can pour the hot espresso over the top of the finished frappuccino and whipped cream, serving it affogato-style. This offers a wonderful contrast of hot and cold, and coffee and vanilla flavors, making it a more traditional coffeehouse-style beverage.