Apple Cider Braised Pork Shoulder – A Beautiful Fall Dinner!
There’s a certain magic that happens when slow cooking transforms a humble cut of meat into something truly extraordinary. This braised pork shoulder recipe embodies that magic, infusing tender pork with the comforting flavors of autumn. Imagine the rich aroma filling your kitchen as the pork shoulder slowly simmers to perfection, promising a meal that’s both deeply satisfying and incredibly easy to prepare.
This dish is a testament to the beauty of simple ingredients coming together harmoniously. With the subtle sweetness of apple cider, the tang of Granny Smith apples, and the savory depth of onions and garlic, every bite is a delightful journey through autumnal tastes. It’s the kind of meal that evokes warmth and togetherness, perfect for a cozy evening or a festive family gathering.
Why You Will Love This Recipe
- Unbeatable Tenderness: The slow braising process breaks down the connective tissues in the pork shoulder, resulting in meat so tender it literally falls apart with the touch of a fork. This method ensures a melt-in-your-mouth experience every single time, making every mouthful a delight.
- Rich, Layered Flavors: A symphony of ingredients, including unfiltered apple cider, dry white wine, aromatic herbs like thyme and rosemary, and sweet onions, creates a complex and deeply satisfying flavor profile. The interplay of sweet, savory, and herbaceous notes makes this dish truly memorable and perfect for sophisticated palates.
- Effortless Elegance: Despite its gourmet appeal and incredible taste, this recipe requires surprisingly little hands-on time. Once the ingredients are assembled in the pot, the oven takes over, allowing you to relax while it works its magic, delivering a restaurant-quality meal with minimal fuss.
- Cozy Autumnal Charm: The combination of apple cider, apples, and warming spices evokes the essence of fall, making this dish a perfect centerpiece for seasonal celebrations. It’s comforting, inviting, and captures the spirit of the harvest season beautifully.
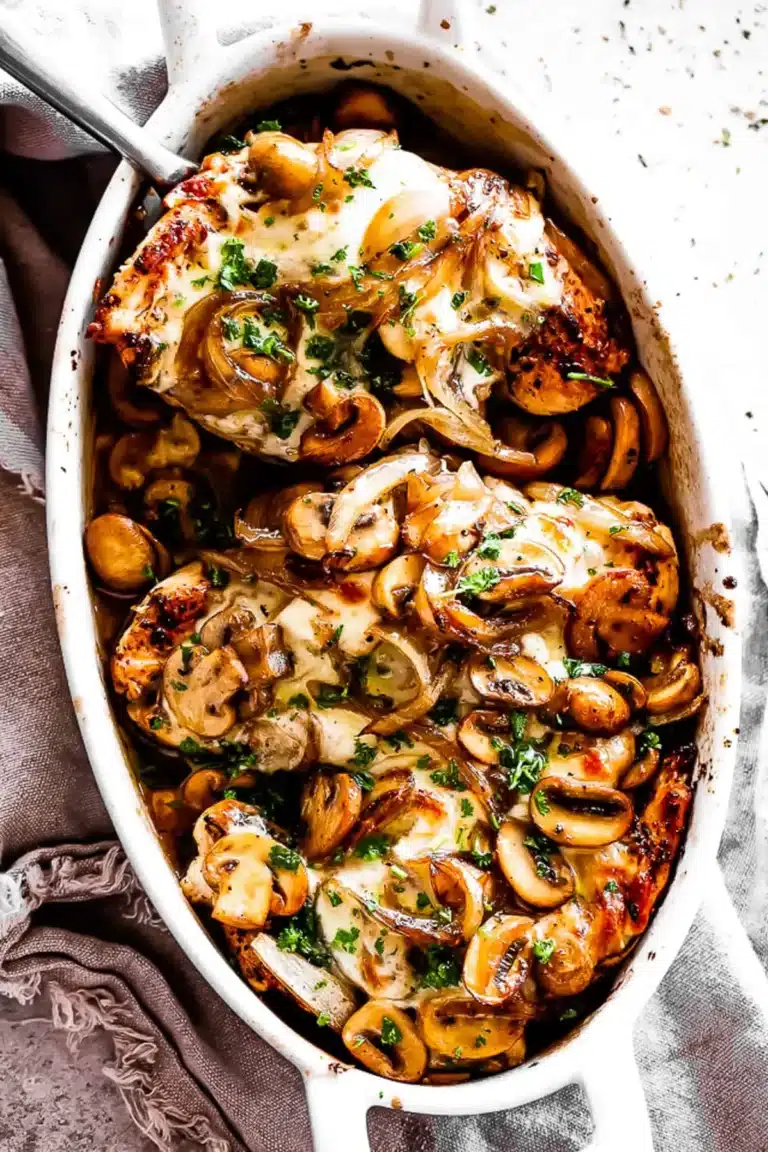
- Impressive Presentation: The glistening, tender pork shoulder served with the flavorful braising liquid and softened apples and onions makes for a visually stunning presentation. It’s a dish that will undoubtedly impress your guests and elevate any meal occasion.
Ingredients You Need
Crafting this delightful braised pork shoulder relies on a thoughtful selection of ingredients that come together to create its signature depth of flavor. Opting for high-quality components will significantly enhance the final dish, ensuring a rich and satisfying culinary experience for everyone at the table. These fresh, readily available items are the foundation for an unforgettable meal.
Braised Pork Shoulder
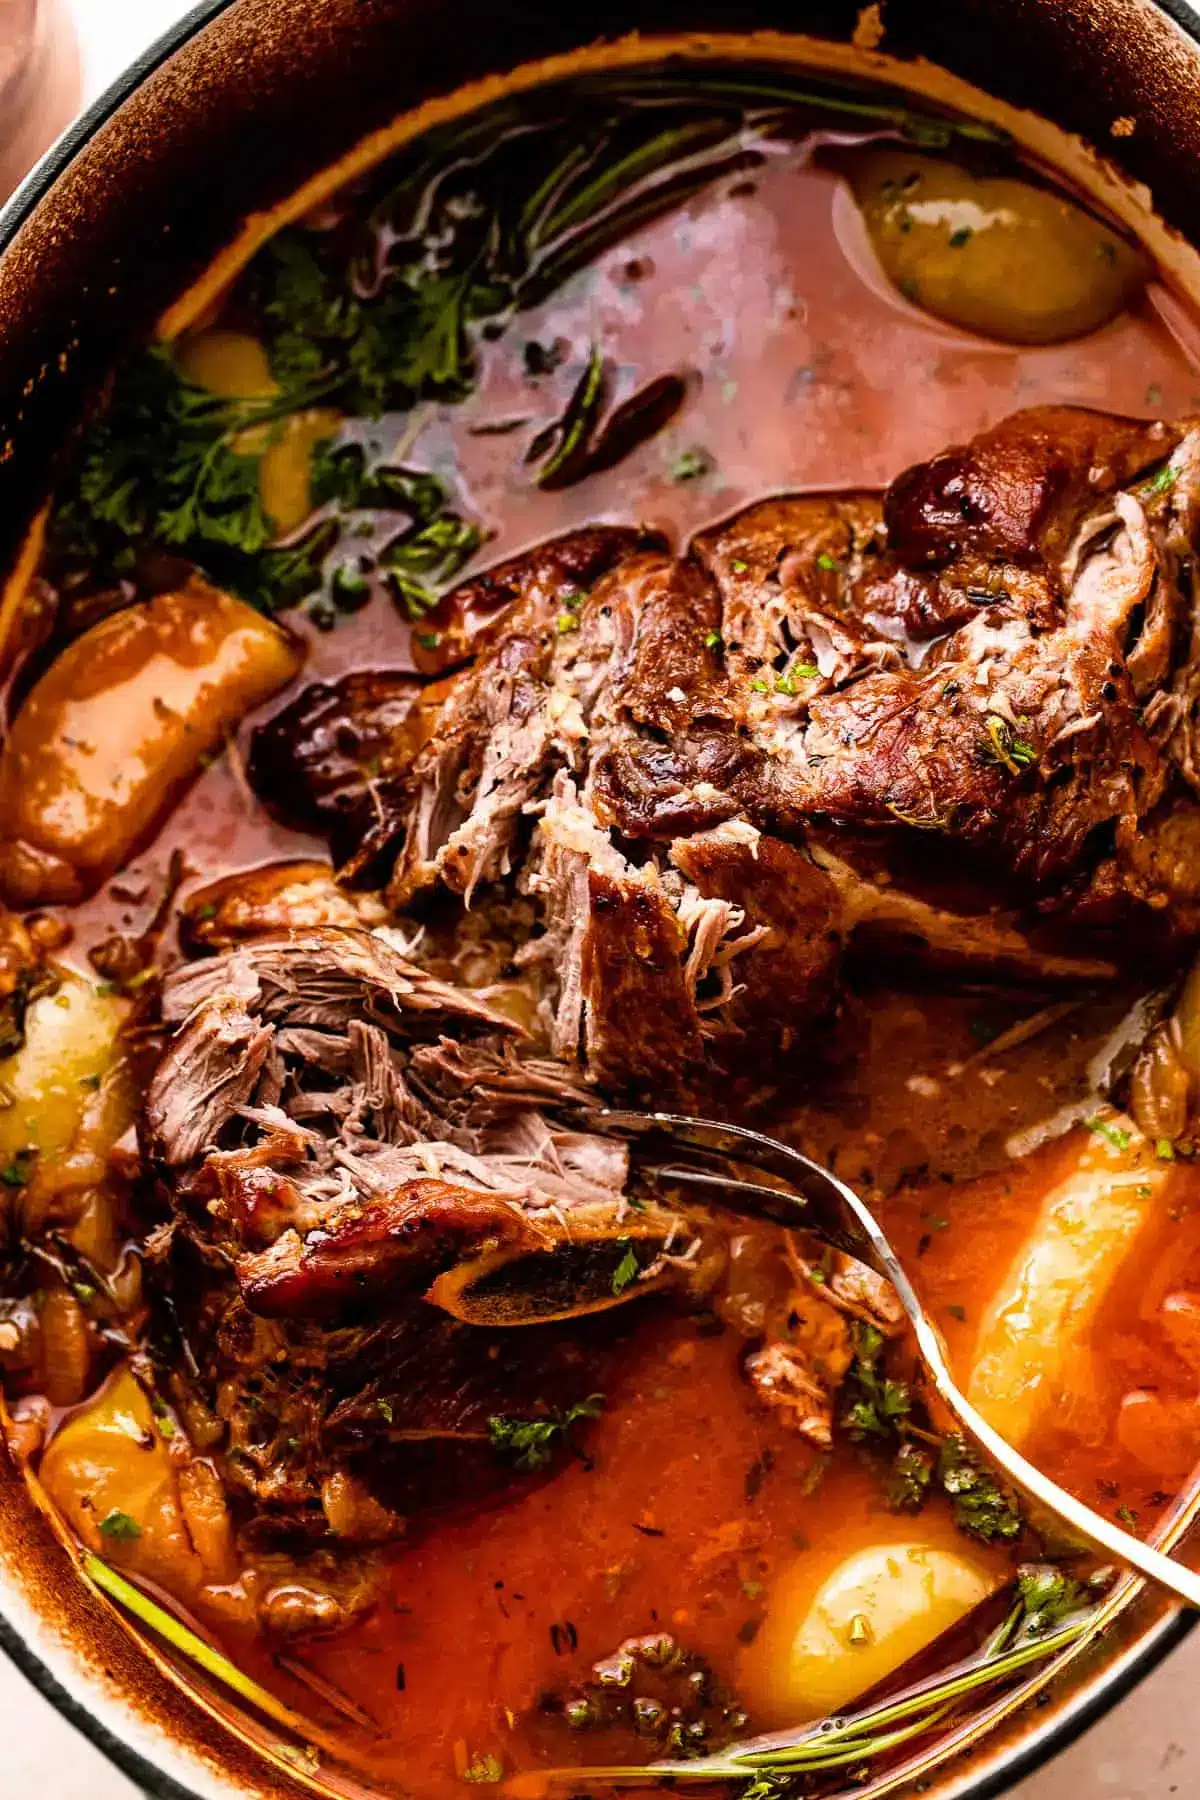
This braised pork shoulder recipe is a rich and flavorful dish slow-cooked to tender perfection with apple cider, tart Granny Smith apples, sweet onions, garlic, and a splash of white wine. It's an easy and beautiful autumn main course perfect for a special occasion or a cozy Sunday dinner.
- 3 pounds pork shoulder roast
- Kosher salt and fresh ground black pepper, to taste
- 2 tablespoons olive oil
- 4 yellow onions, thinly sliced
- 6 cloves garlic, minced
- ¼ cup dry white wine
- 1 tablespoon fresh thyme, or use 1 teaspoon dried thyme
- 1 tablespoon fresh chopped rosemary leaves, or use 1 teaspoon crushed dried rosemary
- 1 teaspoon smoked paprika
- 1½ cups Apple Cider (NOT Apple Cider Vinegar)
- 1½ cups low sodium chicken broth
- 2 bay leaves
- 2 granny smith apples, cored and quartered
- 1Preheat the oven to 400˚F. Pat dry the pork with paper towels and season all over with kosher salt and black pepper.
- 2Heat the oil in a large oven-safe Dutch oven set over medium-high heat. To the heated oil, add the pork and brown it on all sides; about 5 minutes per side.
- 3Remove the pork from the pot and set it aside.
- 4Add onions to the pot and cook over medium heat for about 4 to 5 minutes, stirring often, until softened. Stir in the garlic and cook for 20 seconds.
- 5Deglaze the pot with the wine, scraping up all the browned bits from the bottom of the pot. Then, stir in the thyme, rosemary, and paprika.
- 6Add the pork back to the pot. Add in the apple cider, chicken broth, and bay leaves; bring the mixture to a boil.
- 7Cover the pot with a tight-fitting lid and transfer the pork to the oven.
- 8Reduce the oven temperature to 350˚F and cook for 2 hours.
- 9Remove the lid from the pot and drop in the apples. Cover and continue to cook in the oven for 30 minutes or until the internal temperature of the pork registers at least 145˚F and up to 200˚F.
- 10Remove from the oven and return the pot to the stovetop. Remove the pork from the pot and transfer it to a cutting board; let it rest for 10 minutes.
- 11In the meantime, set the pot over high heat and bring it to a boil; cook for a couple minutes or until sauce is slightly reduced and thickened.
- 12Cut the pork and serve it with the sauce, onions, and apples.
Keywords: braised pork shoulder, pork roast, apple cider, fall recipe, comfort food, German
Detailed quantities for each ingredient can be found within the recipe card above, ensuring you have all the specifics for perfect execution.
Variations
To cater to different dietary preferences and culinary adventures, this braised pork shoulder recipe offers a world of exciting variations. Each modification allows you to tailor the dish to your specific needs while maintaining its core deliciousness and comforting appeal.
Vegan Adaptation: For a completely plant-based rendition, replace the pork shoulder with thick slices of king oyster mushrooms or substantial chunks of seitan. The braising liquid can be adapted using a rich vegetable broth, a splash of sherry vinegar for tang, and extra caramelized onions and apples to build depth. You might also incorporate smoked paprika and a touch of liquid smoke to mimic the savory notes of the original dish, ensuring a hearty and flavorful vegan main course.
Low-Carbohydrate Delight: To make this dish keto-friendly or low in carbs, omit the apples and white wine. Instead, increase the amount of chicken broth and consider adding a tablespoon of apple cider vinegar for a touch of tartness. For a richer sauce, a slurry made with a small amount of xanthan gum can be used to thicken the braising liquid. Serve this flavorful pork over a bed of cauliflower mash or with a side of sautéed greens like kale or spinach for a complete, low-carb meal.
Spicy Kick: If you enjoy a bit of heat, infuse your braising liquid with a pinch of red pepper flakes or a finely chopped jalapeño pepper during the initial simmering stage. You could also incorporate a tablespoon of chipotle in adobo sauce for a smoky and spicy dimension. This variation adds an exciting twist to the traditional flavors, making the dish more dynamic and stimulating for the palate.
How to Prepare Braised Pork Shoulder Recipe
Step 1: Preparing and Browning the Pork Shoulder
The journey to perfectly braised pork shoulder begins with meticulous preparation and achieving a beautiful sear. Start by preheating your oven to 400°F (200°C), setting the stage for the initial high-heat phase. Pat the pork shoulder thoroughly dry with paper towels; this crucial step ensures a superior crust forms when it hits the hot pan. A dry surface allows for better Maillard reaction, creating those desirable browned bits that add immense flavor to the final sauce.
Once dry, generously season the pork shoulder on all sides with kosher salt and freshly ground black pepper. Don’t be shy with the seasoning; the large cut of meat needs ample flavor to stand up to the long cooking process. Heat two tablespoons of olive oil in a large, oven-safe Dutch oven over medium-high heat until it shimmers. Carefully place the seasoned pork shoulder into the hot oil, and allow it to sear undisturbed for about five minutes per side. This browning process is critical for developing a rich, complex flavor base for the entire dish, so ensure each side gets a deep, golden-brown crust.
Step 2: Sautéing Aromatics and Building the Braising Liquid
After searing the pork shoulder to perfection, remove it from the Dutch oven and set it aside temporarily. The flavorful fond left in the pot is where the magic continues. Add four thinly sliced yellow onions to the same pot, reducing the heat slightly to medium. Sauté the onions, stirring occasionally, for about four to five minutes until they begin to soften and turn translucent, releasing their natural sweetness into the pot. This gentle cooking of the onions builds a foundational sweetness that will permeate the entire braise.
Next, stir in six minced cloves of garlic and cook for just about 20 seconds until fragrant. Be careful not to burn the garlic, as this can impart a bitter taste. Now, it’s time to deglaze the pot; pour in ¼ cup of dry white wine. Use a wooden spoon to vigorously scrape up all the delicious browned bits stuck to the bottom of the Dutch oven; these bits are packed with intense flavor. Once the wine has reduced slightly, stir in one tablespoon of fresh thyme, one tablespoon of fresh chopped rosemary leaves, and one teaspoon of smoked paprika, allowing their aromas to meld with the onions and garlic for a moment.
Step 3: Combining and Initial Braising
With the aromatics and deglazing liquid beautifully melded, it’s time to reintroduce the star of the show. Carefully place the browned pork shoulder back into the Dutch oven, nestling it amongst the softened onions and fragrant herbs. Now, pour in 1½ cups of unfiltered apple cider and 1½ cups of low-sodium chicken broth. Ensure the liquid comes about halfway up the sides of the pork roast; if not, you can add a little more broth or water to reach this level. Finally, tuck in two bay leaves amongst the liquid and the pork for an added layer of subtle aromatic complexity.
Bring the entire mixture to a boil over medium-high heat on the stovetop. Once it reaches a rolling boil, cover the Dutch oven tightly with its lid. This tight seal is essential for trapping the steam and moisture, allowing the pork to braise gently and evenly. Carefully transfer the covered Dutch oven into the preheated 400°F (200°C) oven. Once inside the oven, immediately reduce the temperature to 350°F (175°C). This lower, consistent temperature is key to tenderizing the tougher cut of pork shoulder without drying it out.
Step 4: The Long Braise and Apple Addition
Allow the pork shoulder to braise in the 350°F (175°C) oven, covered, for two full hours. During this time, the meat will slowly become incredibly tender as the connective tissues break down, and the flavors of the cider, broth, and aromatics will deeply penetrate the pork. Resist the urge to peek too often, as opening the oven door can cause temperature fluctuations, potentially affecting the braising process. The goal is a long, gentle cook that coaxes out the maximum tenderness and flavor from the pork shoulder.
After the initial two hours of braising, it’s time to introduce the apples. Carefully remove the Dutch oven from the oven. Remove the lid, and gently place two cored and quartered Granny Smith apples around the pork shoulder in the pot. These apples will soften and lend their tart sweetness to the braising liquid, creating a delightful counterpoint to the rich pork. Once the apples are added, replace the tight-fitting lid securely onto the Dutch oven.
Step 5: Finishing the Braise and Resting
Return the covered Dutch oven to the 350°F (175°C) oven for an additional 30 minutes. This final braising period allows the apples to become tender and their flavors to meld beautifully with the pork and the braising liquid. The pork shoulder is considered done when an instant-read meat thermometer inserted into the thickest part registers at least 145°F (63°C) and ideally up to 200°F (93°C) for maximum tenderness and shreddability. For pulled pork texture, aim for the higher end of this range.
Once the pork has reached the desired internal temperature, remove the Dutch oven from the oven. Carefully lift the pork shoulder out of the pot and transfer it to a clean cutting board. Tent it loosely with aluminum foil and let it rest for at least 10 minutes. This resting period is crucial for allowing the juices to redistribute throughout the meat, ensuring that the pork remains moist and succulent when sliced or shredded. While the pork rests, you’ll prepare the sauce.
Step 6: Reducing the Sauce and Serving
With the pork resting, turn your attention back to the braising liquid in the Dutch oven. Place the Dutch oven back on the stovetop over high heat. Bring the liquid to a rolling boil and let it bubble vigorously for several minutes. Stir occasionally as it reduces, thickening into a rich, glossy sauce that will beautifully complement the tender pork. The goal is to concentrate the flavors and achieve a consistency that coats the back of a spoon.
Once the sauce has thickened to your liking, discard the bay leaves. You can serve the pork shoulder in several ways: slice it against the grain for a more traditional presentation, or shred it using two forks for a pulled pork style that is perfect for sandwiches or bowls. Spoon the thickened sauce, along with the softened onions and apples from the pot, over the pork. Garnish with fresh chopped parsley for a touch of color and freshness. This final step brings all the elements together for a visually appealing and incredibly delicious meal.
Pro Tips for Braised Pork Shoulder Recipe
- Choose Wisely: When selecting your pork shoulder, look for a cut with good marbling. The intramuscular fat will render down during the long cooking process, contributing immense flavor and ensuring the final dish is exceptionally moist and tender. A well-marbled roast is key to achieving that melt-in-your-mouth texture.
- Don’t Skip the Sear: The browning step is non-negotiable. It develops a deep, complex flavor through the Maillard reaction and creates a visually appealing crust. A proper sear adds significant depth to the overall taste profile of the braised pork, so don’t rush this critical stage.
- Deglaze with Gusto: After searing, the browned bits left in the bottom of the pot are flavor gold. Deglazing with wine (or broth) and scraping them up effectively incorporates these intensely savory elements into your braising liquid, enriching the final sauce immeasurably. This step is vital for building layers of flavor.
- Patience with Temperature: While the recipe calls for specific temperatures, remember that ovens can vary. Pork shoulder benefits from long, slow cooking. If it’s not quite tender enough after the suggested time, don’t hesitate to continue braising at a lower temperature until it reaches that perfect, fall-apart consistency.
- Resting is Essential: Allowing the pork to rest after braising is as important as the cooking itself. This resting period allows the juices to redistribute throughout the meat, preventing it from becoming dry when sliced or shredded. Skipping this step will result in a less succulent final product, so be patient!
- Sauce Sorcery: For a smoother, more refined sauce, consider straining it after reducing. This will remove any solids like onions or herb fragments, leaving you with a silky, elegant sauce. Alternatively, if you desire a richer, creamier gravy, whisk in a splash of heavy cream during the final stages of sauce reduction.
Serving Suggestions for Braised Pork Shoulder Recipe
Decoration
The visual appeal of this braised pork shoulder can be significantly enhanced with thoughtful garnishes. A generous sprinkle of freshly chopped parsley adds a vibrant splash of green and a hint of fresh flavor that cuts through the richness of the pork. For an autumnal touch, consider adding a few fresh sprigsof rosemary or thyme around the serving platter, echoing the herbs used in the braise.
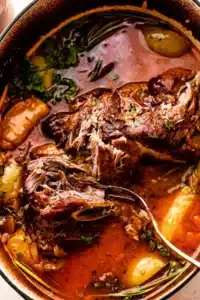
If you’ve served the pork shredded, a scattering of toasted sesame seeds or finely chopped chives can offer textural contrast and visual interest. For a more rustic presentation, consider serving the pork directly from the Dutch oven, garnished with the softened onions and apples, allowing the beautiful colors and textures to speak for themselves. The glistening sauce itself acts as a natural and appealing decoration.
Side Dishes
This rich and flavorful braised pork shoulder pairs exceptionally well with a variety of comforting and complementary side dishes. Creamy mashed potatoes are a classic choice, their fluffy texture and buttery flavor providing the perfect canvas for the rich braising sauce. For a lighter option, buttery mashed cauliflower offers a similar comforting feel with fewer carbohydrates.
Hearty grains like farro or barley pilaf can also be an excellent accompaniment, their chewy texture and nutty flavor standing up well to the robust pork. A side of roasted root vegetables, such as carrots, parsnips, and Brussels sprouts, seasoned with herbs and a touch of maple syrup, will enhance the autumnal theme. For a refreshing contrast, consider a bright, crisp green salad with a light vinaigrette to balance the richness of the pork.
Creative Serving Ideas
Beyond traditional plating, this braised pork shoulder offers numerous creative serving opportunities. Consider shredding the pork and using it as a filling for gourmet tacos or sliders, topped with a tangy coleslaw or a dollop of apple-fennel slaw. It also makes a fantastic topping for loaded baked potatoes or sweet potato fries, creating a decadent and satisfying meal.
Another innovative idea is to serve the pork shoulder over a bed of creamy polenta or grits, allowing the rich sauce to soak into the comforting grains. You could also incorporate the shredded pork into a hearty stew or chili, adding an extra layer of depth and flavor. For a unique appetizer, serve small portions of the shredded pork with crispy crostini, perhaps topped with a smear of apple butter or a dollop of crème fraîche.
Preparation & Storage
Storing Leftovers
To properly store leftover braised pork shoulder, allow the meat and any accompanying sauce and vegetables to cool to room temperature. Transfer the cooled leftovers into shallow, airtight containers. Ensure the pork is submerged in or covered by the braising liquid to help retain moisture. Storing it this way will keep the pork from drying out in the refrigerator, preserving its tender texture for longer.
These containers can then be refrigerated and should be consumed within three to four days for optimal freshness and food safety. Always ensure your refrigerator is set to a temperature of 40°F (4°C) or below to maintain the quality and safety of the stored food. Properly stored leftovers make for delicious and convenient future meals.
Freezing
Braising is a fantastic method for preparing meals that freeze exceptionally well. If you have more leftover braised pork shoulder than you can consume within a few days, freezing is an excellent option. Once the cooked pork and sauce have cooled completely, portion them into freezer-safe bags or airtight storage containers. It’s often beneficial to freeze the pork in serving-sized portions to make reheating easier and more efficient later on.
Remove as much air as possible from freezer bags before sealing them to prevent freezer burn. Label each container with the date of freezing and the contents. Properly frozen braised pork shoulder can maintain its quality for up to two to three months. When you’re ready to use it, transfer it to the refrigerator to thaw overnight for the best results.
Reheating
Reheating braised pork shoulder is straightforward and aims to restore its moist and tender texture. The best method for reheating is gently on the stovetop. Place the thawed leftovers in a saucepan or skillet, ensuring there is enough of the original braising liquid to cover the meat. Heat over low to medium-low heat, stirring occasionally, until the pork is heated through completely.
If the sauce seems a bit dry, you can add a splash of chicken broth or water to loosen it up. Alternatively, you can reheat smaller portions in the microwave, covered, on medium power, stirring halfway through to ensure even heating. Avoid high heat when reheating, as this can cause the pork to become tough and dry. The goal is a gentle warming process that preserves the succulence of the dish.
Frequently Asked Questions
-
What is the best cut of pork to use for braising?
The ideal cut for braising is pork shoulder, also known as pork butt or Boston butt. This cut comes from the upper part of the pig’s shoulder and is characterized by significant marbling and connective tissue. These qualities, while making it tougher in its raw state, are precisely what make it perfect for slow, moist cooking methods like braising. The long cooking time breaks down the collagen into gelatin, resulting in incredibly tender, succulent, and flavorful meat that practically melts in your mouth. Other cuts like pork belly can also be braised, but pork shoulder is generally preferred for its balanced fat content and exceptional tenderness when slow-cooked.
-
How can I tell when the pork shoulder is perfectly braised and tender?
The best indicator of perfectly braised pork shoulder is its tenderness. When done, the meat should be exceptionally tender, easily pierced with a fork, and should readily shred or fall apart with minimal effort. You can also check the internal temperature with a meat thermometer; for braised pork shoulder, the ideal temperature range is typically between 170°F and 195°F (77°C to 90°C). For a pulled pork texture, aim for the higher end of this range, around 200-205°F (93-96°C), as the connective tissues will have fully broken down by then. If the meat still feels firm or resists shredding, it simply needs more time in the braising liquid.
-
Can I make this braised pork shoulder recipe in a slow cooker or Instant Pot?
Yes, absolutely! Braised pork shoulder is very adaptable to different cooking methods. For a slow cooker, after browning the pork and sautéing the aromatics as described, transfer everything to the slow cooker. Add the braising liquid, cover, and cook on LOW for 8-10 hours, or on HIGH for 4-5 hours, until tender. Add the apples during the last 30-60 minutes of cooking. For an Instant Pot, you can follow a similar browning and sautéing process on the ‘Sauté’ function. Then add the braising liquid, secure the lid, and cook on high pressure for approximately 60-75 minutes, followed by a natural pressure release of at least 15-20 minutes. The exact timing may vary based on your appliance, so always check for tenderness.