Juicy Oven Roasted Chicken – No More Dry Chicken!

The aroma of perfectly roasted chicken can transform a simple weeknight meal into a culinary event. Achieving that coveted juicy, tender, and flavorful result with chicken breasts, however, can often feel like a culinary tightrope walk. Many home cooks have battled the disappointment of dry, rubbery chicken, questioning their methods and ingredients.
Fortunately, a few simple techniques can elevate your oven-roasted chicken breast game from disappointing to absolutely divine. This recipe focuses on a straightforward yet incredibly effective method: brining and a carefully crafted seasoning blend. Prepare to discover how a little bit of attention to detail can yield extraordinary results, making this your go-to method for the best roasted chicken breasts.
Why You Will Love This Recipe
- Unbelievable Tenderness: Brining ensures that the chicken breasts remain incredibly moist and tender, even after roasting.
- Effortless Preparation: This recipe is designed for simplicity, requiring minimal active time for maximum flavor impact.
- Customizable Flavors: The base seasoning blend is delicious on its own, but it also provides a fantastic canvas for your favorite herbs and spices.
- Versatile Serving Options: Whether served as a main course or incorporated into other dishes, these chicken breasts are a true crowd-pleaser.
- Consistent Perfection: Follow these steps, and you’re guaranteed juicy, flavorful chicken breasts every single time you make them.
Ingredients You Need
The foundation of any great dish lies in the quality of its ingredients. For this oven-roasted chicken breast recipe, we’re focusing on accessible yet impactful components. Using fresh chicken breasts is paramount; look for plump, firm pieces with no discoloration. The brining solution, composed of simple water and salt, works magic to infuse moisture deep within the meat, a crucial step often overlooked.
Oven Roasted Chicken Breast

This juicy and tender oven roasted chicken breast recipe turns out perfect every time! Say goodbye to dry chicken with this easy recipe featuring a quick saltwater soak and a delicious homemade spice mix.
- 1 to 1.5 pounds boneless, skinless chicken breasts
- 4 cups lukewarm water
- ¼ cup salt
- 1 tablespoon olive oil
- ¼ teaspoon salt (optional)
- ¼ teaspoon fresh ground black pepper
- ½ teaspoon smoked or sweet paprika
- ½ teaspoon garlic powder
- ½ teaspoon onion powder
- ½ teaspoon dried thyme
- ½ teaspoon dried basil
- ½ teaspoon dried rosemary
- ¼ teaspoon dried parsley
- ¹⁄‚ teaspoon cayenne pepper
- fresh chopped parsley, for garnish
- 1Preheat the oven to 425°F.
- 2Place the chicken breasts in a large bowl. In a large measuring cup or a mixing bowl, combine lukewarm water and salt; stir, then pour over chicken breasts. Let sit for 20 to 30 minutes. You can also cover the bowl and refrigerate for up to 2 hours.
- 3While the chicken is brining, prepare the chicken seasoning blend. Combine the salt, pepper, paprika, garlic powder, onion powder, dried thyme, dried basil, dried rosemary, dried parsley, and cayenne pepper in a small bowl; stir until thoroughly incorporated. Set aside.
- 4Pour out the salt water and rinse each chicken breast under cold water; pat them dry with paper towels. Place the chicken in a baking dish and rub the olive oil all over each chicken breast. Sprinkle the seasoning blend evenly over the chicken breasts on all sides.
- 5Transfer to the oven and bake for 22 to 25 minutes, or until internal temperature reaches 165°F. Use an instant-read meat thermometer to check for doneness.
- 6For a browned, crispy top, set your oven to broil on HIGH for the final 3 to 4 minutes, broiling until golden on top.
- 7Remove the chicken breasts from the oven and transfer them to a serving plate to rest for 10 minutes before cutting and serving.
- 8Garnish with fresh chopped parsley and serve.
Keywords: roasted chicken breast, baked chicken, juicy chicken, easy chicken recipe, chicken dinner
The spice blend is where the magic truly happens, combining pantry staples like paprika, garlic powder, onion powder, and a medley of dried herbs to create a robust and aromatic coating. Don’t forget a touch of olive oil to help the spices adhere and to encourage a beautiful, golden-brown crust during baking. Remember, specific quantities for these ingredients can be found in the accompanying recipe card, ensuring you have exactly what you need.
Variations
The beauty of this oven-roasted chicken breast recipe lies in its inherent versatility, allowing for endless creative twists. For a delightful vegan adaptation, consider using thick slices of firm tofu or portobello mushrooms as your base, marinating them in a similar spice blend with added soy sauce or tamari for depth, and roasting them until tender and slightly charred. This approach still captures the essence of a flavorful, roasted element without the meat.
If you’re embracing a low-carb lifestyle, this recipe adapts beautifully. While the chicken itself is naturally low in carbohydrates, you can amplify this by focusing on a vibrant array of low-carb vegetables as your roasting companions. Think broccoli florets, asparagus spears, or Brussels sprouts tossed with a little olive oil and the same spice blend, roasted alongside the chicken for a complete, keto-friendly meal. This ensures every component of your plate aligns with your dietary goals.
For those seeking an international flair, consider infusing the chicken with global flavors. A Japanese-inspired twist could involve marinating the chicken in a mixture of soy sauce, mirin, grated ginger, and garlic before roasting, perhaps with some thinly sliced shiitake mushrooms. Alternatively, a Mediterranean makeover might include a rub of olive oil, lemon zest, dried oregano, thyme, and a pinch of red pepper flakes, served with roasted cherry tomatoes and olives. These variations demonstrate how the simple act of roasting chicken can be a passport to culinary adventures.
How to Prepare oven roasted chicken breast
Step 1: The Crucial Brine
The journey to the most succulent oven-roasted chicken breast begins with a simple yet profound step: brining. This process is not merely about adding salt; it’s a scientific marvel that dramatically enhances moisture retention and tenderizes the meat. By immersing the chicken breasts in a saltwater solution, you allow the salt to penetrate the muscle fibers, altering their protein structure. This alteration enables the chicken to hold onto more moisture during the high heat of roasting, preventing the dreaded dryness.
To prepare your brine, you’ll need a large bowl or a resealable plastic bag. Combine four cups of lukewarm water with a quarter cup of salt. Stir this mixture until the salt is fully dissolved, creating a saline bath ready to work its magic. The lukewarm temperature of the water is beneficial as it begins to gently bring the chicken closer to room temperature, promoting more even cooking once it hits the oven. This initial step, though requiring a short waiting period, lays the groundwork for a truly exceptional outcome.
Carefully place your boneless, skinless chicken breasts into the brining solution, ensuring they are fully submerged. Cover the bowl or seal the bag to prevent any contamination. Allow the chicken to brine for a minimum of 20 minutes. For an even more profound impact on tenderness and flavor, you can extend this brining time up to two hours. However, avoid brining for excessively long periods, as this can sometimes lead to an overly salty final product or a mushy texture.
While the chicken is undergoing its transformative soak, take this opportunity to prepare your aromatic spice blend. In a small bowl, combine all the dried seasonings: salt (optional, as the brine imparts significant saltiness), fresh ground black pepper, smoked or sweet paprika, garlic powder, onion powder, dried thyme, dried basil, dried rosemary, dried parsley, and a pinch of cayenne pepper for a subtle kick. Whisk these ingredients together with a fork until they are thoroughly incorporated, creating a fragrant and colorful mixture that will soon adorn your chicken.
Once the brining time is complete, it’s time to prepare the chicken for its final transformation. Carefully remove the chicken breasts from the brine. It is essential to rinse them thoroughly under cold running water. This rinsing step is critical to remove any excess salt from the surface, ensuring that your chicken is perfectly seasoned and not overpoweringly salty. After rinsing, pat the chicken breasts completely dry with paper towels. This step is equally vital; a dry surface allows the olive oil and spices to adhere properly, promoting a better sear and a more appealing crust.
Step 2: Seasoning for Flavor
With the chicken properly brined and dried, the next pivotal step is to infuse it with an explosion of flavor through the carefully prepared spice blend. This seasoning mix is designed to complement the natural taste of the chicken without overpowering it, creating a symphony of savory and herbaceous notes that will tantalize your taste buds. The combination of paprika, garlic, onion, and various herbs creates a universally appealing flavor profile that is both comforting and exciting.
Begin by lightly coating each chicken breast with a tablespoon of olive oil. Use your hands or a pastry brush to ensure an even layer is applied all over the surface of the chicken. The olive oil acts as a binder for the spices, helping them to adhere beautifully to the meat and also contributing to a golden-brown finish during the roasting process. It’s important not to skip this oily embrace, as it significantly impacts the final texture and visual appeal of the roasted chicken.
Next, generously sprinkle the prepared spice blend over each olive oil-coated chicken breast. Ensure that both sides are thoroughly seasoned. You can use your fingertips to gently press the spices into the chicken, further encouraging adherence and ensuring every inch is coated in deliciousness. Don’t be shy with the seasoning; it’s this blend that will transform the humble chicken breast into a culinary masterpiece. You may not need to use the entire blend, depending on the size of your chicken breasts and your personal preference for seasoning intensity, but aim for a good, even coating.
Once seasoned, arrange the chicken breasts in a single layer within a baking dish. Avoid overcrowding the dish, as this can lead to steaming rather than roasting, hindering the development of a beautiful crust. If your chicken breasts are of varying thicknesses, it’s a good idea to place thicker ones towards the edges of the dish where the heat is slightly less intense, allowing them more time to cook through evenly with their thinner counterparts.
Step 3: The Roasting Process
Preheating your oven to 425°F (220°C) is a critical first step to ensure that the chicken roasts efficiently and develops a desirable crispy exterior. A hotter oven temperature is key to achieving that sought-after caramelization and golden-brown color on the chicken breasts. This high heat sears the outside of the meat quickly, locking in the juices that the brining process has already so effectively introduced.
Place the seasoned chicken breasts into the preheated oven. The initial roasting time will typically range from 20 to 25 minutes. However, this is a guideline, and the exact duration will depend on the thickness of your chicken breasts and the accuracy of your oven’s temperature. Thicker breasts will naturally require a longer cooking time than thinner ones, so it’s always best to rely on a more accurate method than just time alone.
The most reliable way to ensure your chicken is perfectly cooked is by using an instant-read meat thermometer. Insert the thermometer into the thickest part of a chicken breast, ensuring it does not touch any bone if you were using bone-in chicken (though this recipe calls for boneless). The chicken is considered fully cooked and safe to eat when the internal temperature reaches 165°F (74°C). Some chefs prefer to pull chicken slightly earlier, around 162°F (72°C), knowing that the carryover cooking during the resting period will bring it up to the safe temperature.
For an optional but highly recommended step to achieve an even more appealing appearance and texture, you can utilize your oven’s broiler. During the final 3 to 4 minutes of cooking, switch your oven to the broil setting on high. Keep a very close eye on the chicken during this phase, as broilers can brown food very quickly and can easily lead to burning if left unattended. The intense, direct heat from the broiler will quickly caramelize the spices and create a beautiful, slightly crispy top layer on the chicken.
As soon as the chicken reaches the desired internal temperature (or the broiling is complete), carefully remove the baking dish from the oven. It is imperative to let the chicken rest. Transfer the roasted chicken breasts from the hot baking dish to a clean cutting board or a warm plate. Tent them loosely with aluminum foil. This resting period is absolutely crucial; it allows the juices within the meat, which have been driven to the center by the heat, to redistribute throughout the entire chicken breast.
Resist the temptation to cut into the chicken immediately. Allow it to rest for a minimum of 5 to 10 minutes. This seemingly small step makes a monumental difference in the final succulence and moisture of your roasted chicken. If you were to cut it too soon, all those precious juices would escape onto the cutting board, leaving you with drier chicken. After the resting period, your oven-roasted chicken breasts are ready to be sliced and served, revealing a perfectly cooked, incredibly juicy interior.
Step 4: The Essential Rest
The final, yet perhaps most often overlooked, step in achieving perfectly roasted chicken breast is the essential resting period. After the chicken has been removed from the oven, and before it is sliced or served, allowing it to rest is paramount for optimal juiciness. During the high heat of cooking, the muscle fibers in the chicken contract, forcing the internal juices towards the center of the meat.
If you were to cut into the chicken immediately after removing it from the oven, these concentrated juices would simply spill out onto your cutting board, leaving the chicken dry and less flavorful. By allowing the chicken to rest, typically for 5 to 10 minutes, the muscle fibers have a chance to relax and expand again. This relaxation allows the juices to redistribute evenly throughout the entire piece of chicken, ensuring that every bite is moist and tender.
To facilitate this resting process, transfer the roasted chicken breasts to a clean cutting board or a warm serving plate. Tent them loosely with a piece of aluminum foil. This simple covering helps to retain some warmth without causing further cooking, ensuring that the chicken stays at an optimal temperature while its juices settle. The visual cue of a slightly glistening chicken breast after resting is a testament to this technique’s effectiveness.
The duration of the rest can vary slightly depending on the size of the chicken breasts, but a minimum of five minutes is always recommended. For larger cuts or thicker breasts, you might extend this to ten minutes. This period is not wasted time; it is an active part of the cooking process that significantly impacts the final quality of your dish. Patience during this stage will be rewarded with incredibly tender and flavorful chicken.
Step 5: Serving Your Masterpiece
Once the chicken has completed its crucial resting period, it is ready to be presented and enjoyed. The visual appeal of perfectly roasted chicken breast is undeniable – a golden-brown exterior hinting at the succulent tenderness within. You can serve the chicken breasts whole, or slice them into appealing portions. Slicing them against the grain will further enhance their tenderness and make them easier to eat.
If you’ve opted for a garnish, this is the perfect moment to add it. Fresh chopped parsley offers a bright, herbaceous counterpoint to the richness of the chicken and also adds a lovely splash of green color. Other fresh herbs like chives or cilantro could also be used, depending on the flavor profile you’ve aimed for with your seasoning blend. The visual appeal is an important part of the dining experience, and a simple garnish can elevate the presentation significantly.
These oven-roasted chicken breasts are incredibly versatile and can be the star of a simple meal or a component in more complex dishes. Their moist and flavorful nature makes them ideal for slicing and adding to salads, wraps, sandwiches, or even pasta dishes. The simplicity of the preparation means they pair beautifully with a wide range of side dishes, from light and fresh salads to hearty roasted vegetables or classic mashed potatoes. The choice is yours, and the possibilities are nearly endless.
Step 6: Enjoying the Fruits of Your Labor
The ultimate step in this culinary endeavor is, of course, to savor the delicious results of your effort. The aroma that fills your kitchen as these chicken breasts roast is merely a prelude to the delightful taste and texture that awaits. Each bite should be moist, tender, and packed with the savory notes of the herb and spice blend, a testament to the effectiveness of brining and careful roasting.
Observe how the chicken yields to your fork or knife, showcasing its perfectly cooked interior. The juices that might have been coaxed out during resting are now an integral part of the meat’s succulence, rather than escaping onto the plate. This satisfying experience is precisely what makes this recipe a keeper, promising consistent results that will impress family and friends alike.
Consider the synergy of flavors when paired with your chosen side dishes. The chicken acts as a perfect canvas, harmonizing with the accompaniments. Whether you’ve opted for a simple green salad, a creamy potato gratin, or a medley of roasted vegetables, the chicken breast will integrate seamlessly, creating a well-rounded and satisfying meal. This is the reward for meticulous preparation and adherence to the simple yet impactful techniques outlined.
Pro Tips for oven roasted chicken breast
Use an Instant-Read Thermometer: This is perhaps the single most important tip for ensuring perfectly cooked chicken breasts. Relying solely on time can lead to undercooked or overcooked poultry. An instant-read thermometer will give you an accurate reading in the thickest part of the meat, guaranteeing it reaches a safe internal temperature of 165°F (74°C) without overcooking and drying it out.
Don’t Skip the Rest: The resting period after cooking is non-negotiable for juicy chicken. Allowing the chicken to rest for at least 5-10 minutes, tented with foil, lets the juices redistribute throughout the meat. This crucial step prevents all the moisture from escaping when you cut into it, ensuring every bite is succulent.
Even Thickness is Key: If your chicken breasts are of significantly different thicknesses, they will cook at different rates. For more uniform cooking and to prevent smaller pieces from drying out while larger pieces finish, consider pounding the thicker parts of the chicken breasts to an even thickness before seasoning and roasting. A meat mallet or even the flat side of a heavy pan can be used for this purpose.
Experiment with Seasonings: While the provided spice blend is delicious, don’t be afraid to get creative and tailor it to your preferences. Consider adding smoked paprika for a deeper smoky flavor, a touch more cayenne for extra heat, or incorporating dried herbs like dill or oregano. You can also experiment with global flavor profiles by adding ingredients like cumin, coriander, or even a hint of curry powder for a unique twist.
Consider Brining Time Adjustments: While 20 minutes to 2 hours is a standard brining window, the exact time can be adjusted based on your preference and the thickness of the chicken. Shorter brines yield a noticeable improvement in moisture, while longer brines (up to 2 hours) can create an even more tender and flavorful result. Be mindful that excessively long brining periods can sometimes lead to a texture that is too soft or salty.
Serving Suggestions for oven roasted chicken breast
Decoration
Elevate the visual appeal of your oven-roasted chicken breast with simple yet effective garnishes. A sprinkle of fresh, finely chopped parsley adds a vibrant pop of green and a fresh, herbaceous aroma that complements the savory chicken beautifully. For a touch of elegance, consider a few sprigs of fresh rosemary or thyme artfully placed alongside the chicken. If you’ve added lemon to your seasoning or serve with lemon wedges, a thin slice of lemon perched on the side can also add a bright, citrusy visual cue.
Side Dishes
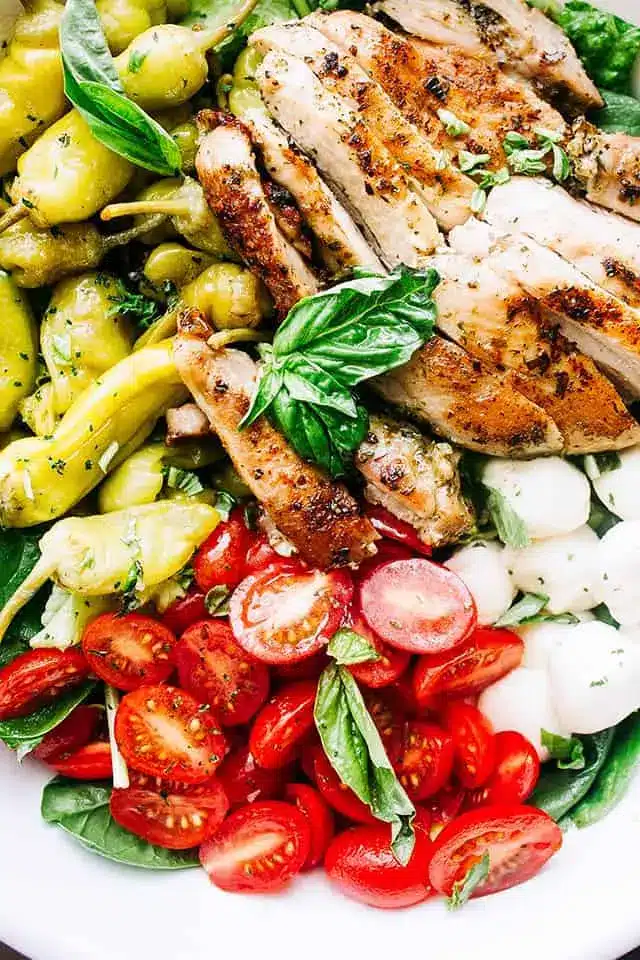
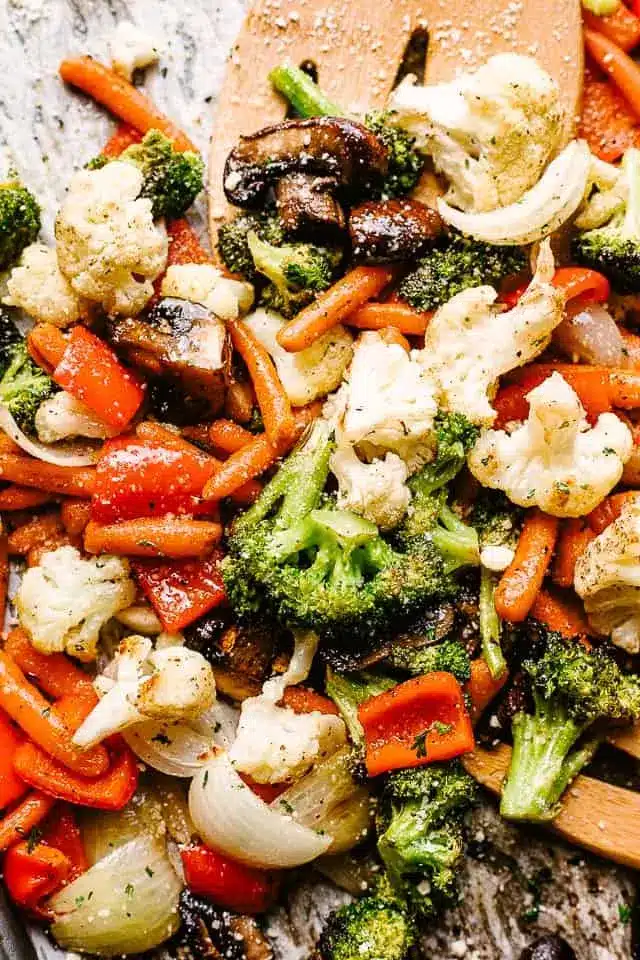
The versatility of oven-roasted chicken breast means it pairs wonderfully with a vast array of side dishes. For a classic comfort meal, creamy mashed potatoes or a fluffy rice pilaf are excellent choices that soak up any delicious juices. Roasted vegetables, such as asparagus, broccoli, or Brussels sprouts, tossed with olive oil and the same spice blend used on the chicken, offer a healthy and flavorful complement. A light and refreshing salad, like a mixed greens salad with a tangy vinaigrette or a vibrant tomato and cucumber salad, provides a refreshing contrast to the richness of the chicken.
Creative Serving Ideas
Beyond serving the chicken whole, consider slicing it thinly and incorporating it into other culinary creations. It’s perfect for creating gourmet sandwiches, adding to vibrant grain bowls, or shredding for flavorful tacos or enchiladas. Imagine the possibilities: a Mediterranean-inspired bowl with quinoa, roasted vegetables, and the sliced chicken, or a quick chicken salad sandwich elevated by the inherent juiciness of your expertly roasted breasts. The cooked chicken also makes for excellent leftovers, perfect for meal prepping lunches for the week.
Preparation & Storage
Storing Leftovers
Leftover oven-roasted chicken breast is a culinary goldmine, perfect for transforming into quick and delicious meals. To store your cooked chicken, allow it to cool completely at room temperature before transferring it to an airtight container. This prevents condensation from forming, which can lead to a soggy texture. Ensure the container is sealed tightly to maintain freshness and prevent the chicken from drying out in the refrigerator. Properly stored, cooked chicken breast can retain its quality in the refrigerator for up to 3 to 4 days.
Freezing
For longer storage, freezing is an excellent option to preserve the quality of your roasted chicken breasts. Once the chicken has cooled completely, wrap each breast individually and tightly in plastic wrap. This initial wrap helps to create a barrier against freezer burn. For an extra layer of protection, place the individually wrapped chicken breasts into a heavy-duty freezer bag or an airtight freezer-safe container. Removing as much air as possible from the bag before sealing is crucial to prevent ice crystal formation and maintain optimal texture and flavor. Frozen chicken breast can be stored for up to 3 to 4 months.
Reheating
Reheating your roasted chicken breast requires a gentle approach to preserve its moisture and tenderness. The key is to avoid overcooking, which can quickly lead to dryness. For best results, place the refrigerated or thawed chicken in a skillet over medium-low heat. Add a small amount of liquid, such as chicken broth, water, or even a touch of butter, to the pan. Cover the skillet tightly and allow the chicken to heat through slowly. This steaming effect will help to reintroduce moisture. Alternatively, you can reheat in a preheated oven at a low temperature (around 300-325°F or 150-160°C), covered, until warmed through.
Frequently Asked Questions
-
Can I brine the chicken breasts for longer than two hours, or even overnight?
While brining is highly effective, extending the brining time significantly beyond two hours, particularly for boneless, skinless chicken breasts, can be risky. Over-brining can lead to the chicken absorbing too much salt, resulting in an unpleasantly salty flavor profile. Additionally, prolonged exposure to the salt solution can begin to break down the muscle fibers too much, potentially leading to a mushy or overly soft texture rather than a firm, tender bite. For boneless breasts, sticking to the recommended 20 minutes to 2 hours is generally the safest bet for achieving optimal results without compromising texture or taste. If you wish to brine for longer, consider diluting the brine solution slightly or using a shorter time frame.
-
What is the best way to ensure the chicken is cooked through without drying out, especially if I have chicken breasts of different sizes?
The most foolproof method is to use an instant-read meat thermometer. Insert it into the thickest part of the breast, avoiding any bone or gristle. The chicken is safely cooked when it reaches an internal temperature of 165°F (74°C). To address the issue of different-sized breasts, it’s highly recommended to either pound the thicker parts to an even thickness before cooking or to group similar-sized breasts together when roasting. If you have a significant size disparity, consider removing smaller breasts from the oven earlier, while allowing larger ones more time. This targeted cooking ensures that all pieces reach their ideal doneness without overcooking any.
-
Can I substitute chicken thighs for chicken breasts in this recipe, and if so, how will it affect the cooking time?
Absolutely! Chicken thighs are often more forgiving than breasts and can yield incredibly moist results, even without brining, though brining will still enhance them. If you opt for boneless, skinless chicken thighs, they will generally require a slightly longer cooking time than boneless, skinless chicken breasts due to their higher fat content and denser muscle structure. Expect to add an additional 5-10 minutes to the roasting time. For bone-in chicken thighs, the cooking time will be even longer, potentially reaching 35-45 minutes. Always rely on your meat thermometer to confirm doneness, aiming for that 165°F (74°C) internal temperature in the thickest part of the thigh.