Garlic Butter Scallops – An Easy Seared Scallops Recipe!
Embark on a culinary adventure that promises elegance and simplicity with this exquisite garlic butter seared scallops recipe. Imagine tender, succulent scallops, kissed by the heat of a searing hot pan, bathed in a luscious, aromatic garlic butter sauce that sings with bright lemon and fresh parsley.
This dish is more than just a meal; it’s an experience designed to impress even the most discerning palates, all while being remarkably achievable for the home cook. Prepare to elevate your weeknight dinners or special occasion gatherings with a dish that truly shines.
Why You Will Love This Recipe
- Quick Preparation: This impressive dish comes together in a mere 10-15 minutes, making it perfect for busy evenings when you crave gourmet flavors without the fuss.
- Restaurant-Quality Taste: Experience the delightful crisp exterior and tender, melt-in-your-mouth interior of perfectly seared scallops, rivaling those found in fine dining establishments.
- Rich Garlic Butter Sauce: A simple yet decadent sauce made with butter, garlic, white wine, and lemon juice elevates the natural sweetness of the scallops, creating an unforgettable flavor profile.
- Minimal Ingredients: With a focus on fresh, high-quality components, this recipe highlights the natural beauty of scallops, proving that gourmet cooking doesn’t require an extensive pantry.
- Versatile Appeal: Whether served as an appetizer or a main course, these garlic butter seared scallops are a guaranteed crowd-pleaser, adaptable to various dining occasions.
Ingredients You Need
The success of this garlic butter seared scallops recipe hinges on the quality of its core ingredients. Opting for fresh, high-quality scallops, preferably dry-packed sea scallops, will ensure a superior sear and a more tender result. The richness of good unsalted butter, the pungency of freshly minced garlic, and the brightness of fresh lemon juice are essential for building the signature sauce.
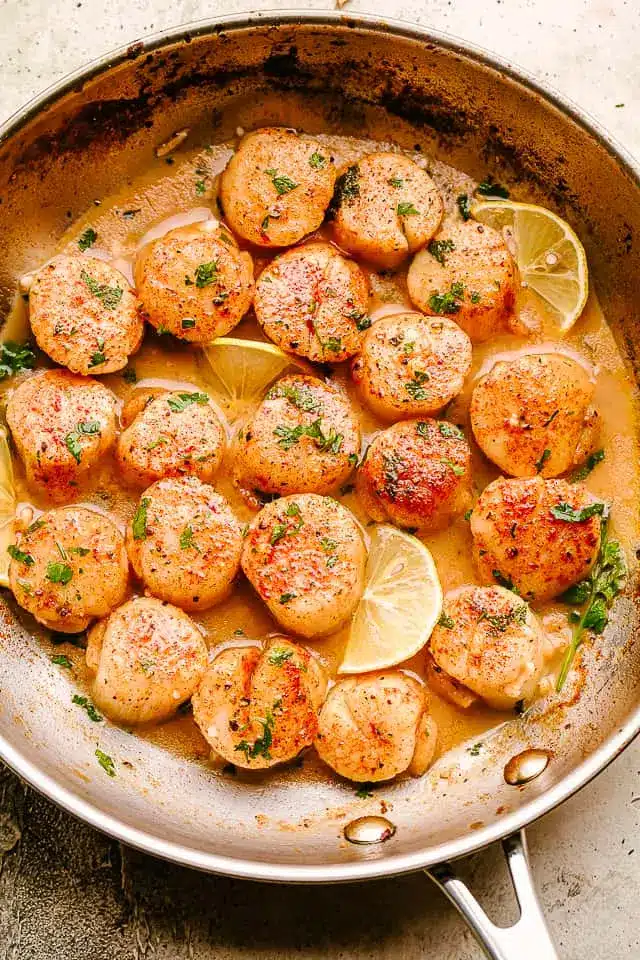
Garlic Butter Seared Scallops
These pan-seared scallops are cooked in the most delicious garlicky butter sauce. An easy and simple recipe you can make at home in under 10 minutes!
- 1 pound fresh bay or sea scallops, dry packed
- Salt and freshly ground black pepper, to taste
- ¼ teaspoon sweet paprika
- 4 tablespoons unsalted butter, divided
- 4 to
- 5 garlic cloves, minced
- 1 cup dry white wine, or use chicken or vegetable broth
- 1 tablespoon lemon juice
- 2 tablespoons chopped fresh parsley
- Lemon slices, for garnish
- 1Pat the scallops dry with paper towels. Remove any attached side-muscle by pinching and tearing it away.
- 2Heat 2 tablespoons of butter in a large skillet over high heat until sizzling.
- 3Season the scallops with salt, pepper, and paprika. Add them to the skillet in a single layer, leaving space between each one. Cook for 2 minutes without moving until browned.
- 4Flip the scallops, reduce heat to medium-high, and cook for another 1½ to 2 minutes until golden brown. Work in batches if needed. Remove scallops from pan and set aside.
- 5Add the remaining 2 tablespoons of butter to the pan. Stir in the minced garlic and cook for 1 minute, stirring constantly.
- 6Pour in the white wine and cook for 2 minutes to reduce slightly. Squeeze in the lemon juice and taste for seasoning, adjusting as needed.
- 7Return the scallops to the pan and spoon the sauce over them. Remove from heat, garnish with fresh parsley and lemon slices, and serve immediately.
Keywords: scallops, garlic butter, seafood, quick dinner, easy recipe, pan-seared, shellfish
Quantities for these essential components can be found within the detailed recipe card provided.
Variations
To infuse a touch of the exotic into your garlic butter seared scallops, consider a vibrant cilantro-lime twist. Instead of fresh parsley, finely chop fresh cilantro and add it along with the lemon juice at the end of the sauce-making process. A generous squeeze of fresh lime juice will then replace some or all of the lemon, offering a bright, zesty counterpoint that is both refreshing and invigorating.
For a touch of heat that complements the sweetness of the scallops, introduce a pinch of red pepper flakes to the garlic butter sauce as it simmers. This subtle warmth will awaken the palate and add another layer of complexity to the dish. You could even add a whisper of smoky paprika to the initial searing of the scallops for a deeper, more nuanced flavor that hints at barbecue without overpowering the seafood.
Elevate this dish into a sophisticated pasta course by tossing the seared scallops and their garlic butter sauce with perfectly cooked linguine or fettuccine. The starchy pasta water will help emulsify the sauce, creating a luxurious coating that clings beautifully to every strand. A sprinkle of toasted panko breadcrumbs for texture adds an extra delightful crunch.
How to Prepare garlic butter seared scallops
Step 1: Prepare the Scallops for Searing
The foundation of perfectly seared scallops lies in meticulous preparation, and the most critical step is ensuring they are exceptionally dry. Take your pound of fresh bay or sea scallops and place them on a clean kitchen towel or several layers of paper towels. Gently pat each scallop from all sides, ensuring no surface moisture remains; this is crucial for achieving that coveted golden-brown crust.
Once thoroughly dried, examine each scallop for a small, tough, rectangular muscle attached to its side. This is known as the side muscle or the foot, and it will not tenderize during cooking, resulting in an unpleasantly chewy texture. Gently pinch this muscle between your thumb and forefinger and peel it away from the scallop; it should detach easily. Discard the side muscle and set the prepared scallops aside, ensuring they remain dry until ready to cook.
Seasoning is the next vital element in this initial stage. Lightly season the dried and trimmed scallops on both sides with a generous pinch of salt and freshly ground black pepper. A delicate dusting of sweet paprika will not only add a subtle color but also a hint of sweetness that beautifully complements the seafood. For those who enjoy a little heat, a tiny pinch of cayenne pepper can be added at this point, though it’s entirely optional and can be adjusted to your personal preference.
Step 2: Achieve the Perfect Sear
To achieve that beautiful, caramelized crust on your scallops, the skillet must be screaming hot, and the fat must be shimmering. Place a large, heavy-bottomed skillet, preferably cast iron or stainless steel, over high heat. Allow it to preheat for a few minutes until it is thoroughly hot; you should feel the heat radiating from it intensely.
Add two tablespoons of unsalted butter to the hot skillet. Let the butter melt and begin to foam; watch it closely to prevent it from burning. Once the butter has melted and the foaming subsides, indicating it’s hot enough, it’s time to introduce the scallops. Be cautious, as the butter may sizzle vigorously.
Carefully place the seasoned scallops into the hot skillet in a single layer, ensuring they are not overcrowded. Overcrowding the pan will cause the scallops to steam rather than sear, defeating the purpose. Leave ample space between each scallop, allowing the heat to circulate freely and create that sought-after crust. Resist the urge to move or stir the scallops for the initial two minutes of cooking; this is essential for developing the golden-brown exterior.
Step 3: Flip and Finish the Searing Process
After approximately two minutes, peek at the bottom of a scallop. If it has developed a beautiful golden-brown sear, it’s time to flip them. Use a thin spatula or tongs to carefully turn each scallop over. At this stage, you can reduce the heat slightly to medium-high to prevent the scallops from cooking too quickly on the second side.
Continue to cook the scallops for another 1 ½ to 2 minutes on the second side. The exact time will depend on the size of your scallops and the intensity of your heat. You are looking for a similar golden-brown sear on this side, and the scallops should feel firm to the touch but still yield slightly, indicating they are cooked through but not overdone.
If you have a large batch of scallops and your pan isn’t large enough to accommodate them in a single layer, it’s crucial to work in batches. Remove the first batch of perfectly seared scallops from the pan and set them aside on a clean plate. Add the remaining scallops to the hot pan, searing them as you did the first batch, and then combine them with the first batch once they are all cooked. This ensures each scallop receives optimal heat for searing.
Step 4: Craft the Luscious Garlic Butter Sauce
Once the scallops have been seared to perfection and removed from the pan, it’s time to create the star of the show: the garlic butter sauce. Return the skillet to the stovetop, if you removed it. Add the remaining two tablespoons of unsalted butter to the same skillet, utilizing the fond (the browned bits) left from searing the scallops, which will add immense flavor.
Once the butter has melted, add your minced fresh garlic to the pan. Stir the garlic continuously for approximately one minute. It’s vital to cook the garlic gently and avoid burning it, as burnt garlic can impart a bitter flavor to the sauce. You are looking for the garlic to become fragrant and just slightly softened, releasing its aromatic oils into the butter.
Next, pour in the dry white wine (or your chosen substitute like chicken or vegetable broth). Increase the heat slightly and let the wine simmer and reduce for about two minutes. This process not only cooks off the alcohol but also concentrates the flavors of the wine and melds it with the garlic butter. The liquid should reduce by about half, thickening slightly to form a cohesive sauce.
Step 5: Unite Scallops and Sauce
Now for the moment of delicious harmony where the perfectly seared scallops meet their flavorful destiny. Return the seared scallops to the skillet with the simmering garlic butter wine sauce. Ensure you also add any accumulated juices from the plate where the scallops were resting; these juices are packed with flavor and will contribute to the sauce’s richness.
Gently spoon the luscious garlic butter sauce over the scallops, coating each one evenly. Allow the scallops to warm through in the sauce for about 30 seconds to a minute. This brief warming period allows the scallops to absorb some of the sauce’s incredible flavor without overcooking.
Just before removing the pan from the heat, stir in the fresh lemon juice. The bright acidity of the lemon juice cuts through the richness of the butter and garlic, adding a vibrant freshness that brightens the entire dish. Taste the sauce and adjust seasonings as needed; you might want a little more salt, pepper, or even a touch more lemon juice to achieve your desired balance of flavors.
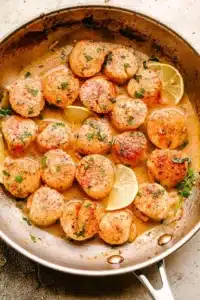
Step 6: Garnish and Serve Immediately
The final flourish that transforms these garlic butter seared scallops into a restaurant-worthy presentation is the addition of fresh herbs and a final touch of elegance. Remove the skillet from the burner. Sprinkle the chopped fresh parsley generously over the scallops and the sauce. The vibrant green of the parsley not only adds a pop of color but also provides a fresh, herbaceous aroma that enhances the overall sensory experience of the dish.
For an extra touch of visual appeal and a hint of citrus, arrange a few thin lemon slices around the scallops or place one delicately on top. The subtle aroma of the lemon will be released as the dish cools slightly, further enticing your guests. The key to enjoying scallops at their absolute best is to serve them immediately after they are finished cooking.
The delicate texture of perfectly seared scallops is fleeting, and they are most tender and flavorful right out of the pan. Presenting this dish promptly ensures that your diners experience the ideal contrast between the crisp exterior and the succulent, tender interior, bathed in the warm, aromatic garlic butter sauce. This is a dish meant to be savored in its prime, a testament to simple ingredients handled with care.
Pro Tips for garlic butter seared scallops
Dry is Key: Always pat your scallops completely dry with paper towels before seasoning and searing. Moisture is the enemy of a good sear, as it will cause the scallops to steam instead of brown, leading to a rubbery texture. This simple step is arguably the most important for achieving that beautiful golden crust.
Hot Pan, Don’t Crowd: Scallops require high heat to sear properly. Ensure your skillet is thoroughly preheated before adding the butter and scallops. Crucially, avoid overcrowding the pan; cook in batches if necessary. Overcrowding lowers the pan temperature, resulting in steaming and preventing that desired sear, so give each scallop ample space to breathe and brown.
Resist the Urge to Move: Once the scallops are in the hot pan, resist the temptation to move them around for at least two minutes per side. This stillness allows a crust to form. You’ll know it’s time to flip when the edges of the scallops start to turn opaque and the bottom releases easily from the pan. Patience here yields golden perfection.
Know When They’re Done: Scallops cook very quickly, typically only a few minutes per side. Overcooking will make them tough and rubbery. They are done when they are opaque throughout and slightly firm to the touch. They should still have a little give, rather than being completely hard. The internal temperature should reach around 120-125°F (49-52°C).
Embrace the Fond: Don’t clean the pan after searing the scallops! The browned bits stuck to the bottom, known as fond, are packed with flavor and are the perfect base for your garlic butter sauce. Deglazing the pan with wine or broth will lift these flavorful bits into the sauce, creating a richer, more complex flavor profile for your dish.
Serving Suggestions for garlic butter seared scallops
Decoration
Freshness and vibrancy are key to elevating the presentation of garlic butter seared scallops. A generous sprinkle of finely chopped fresh parsley provides a beautiful contrast of color against the golden scallops and the glossy sauce. Thinly sliced lemon wheels or wedges, artfully arranged around the plate, add a touch of sophistication and hint at the bright citrus notes within the dish. For an added herbaceous aroma and visual appeal, consider a few sprigs of fresh dill or chives, their delicate fronds offering a refined finish.
Side Dishes
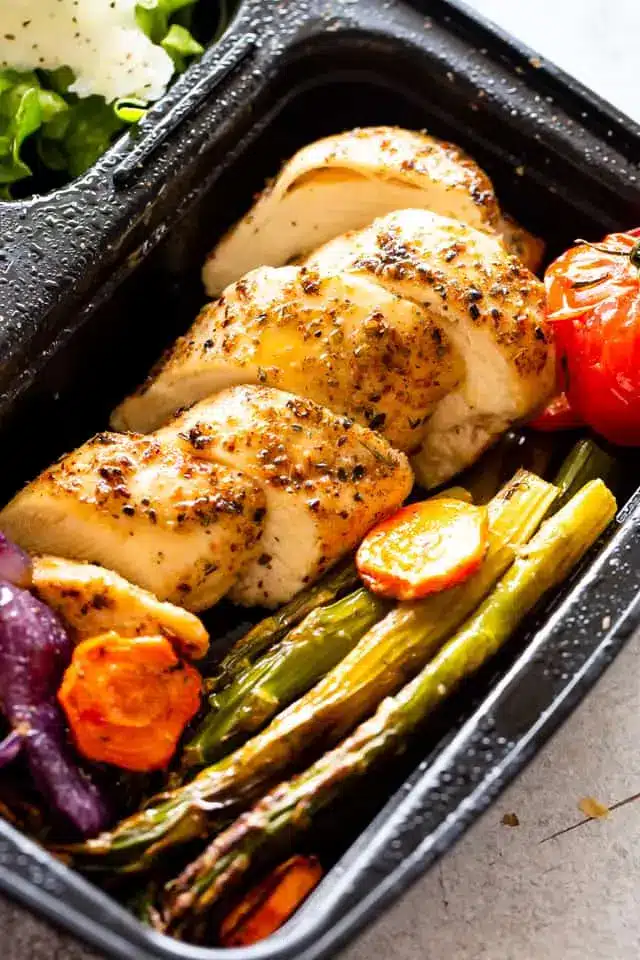
To create a truly balanced and satisfying meal, pair your garlic butter seared scallops with complementary sides that enhance rather than overpower their delicate flavor. Creamy, velvety mashed potatoes or a smooth cauliflower mash offer a comforting base that soaks up the delicious garlic butter sauce beautifully. A simple side of steamed asparagus, drizzled with a touch of olive oil and a squeeze of lemon, provides a fresh, crisp counterpoint. For a lighter option, consider a vibrant mixed green salad with a light vinaigrette, or some perfectly cooked, al dente pasta tossed with a hint of garlic and olive oil.
Creative Serving Ideas
Transform your garlic butter seared scallops into an elegant appetizer by serving them on individual spoons or small appetizer plates, perhaps garnished with a microgreen or a tiny dollop of chili oil for a kick. For a more substantial meal, nestle the scallops atop a bed of creamy risotto, allowing the saffron-infused rice to mingle with the garlic butter sauce. Another delightful idea is to serve them over toasted, crusty bread rubbed with garlic, creating a sophisticated bruschetta-style dish that is perfect for sharing. Consider a pairing with a bright lobster bisque for a decadent seafood feast that is truly unforgettable.
Preparation & Storage
Storing Leftovers
While garlic butter seared scallops are best enjoyed immediately, leftovers can be stored. Place any cooled scallops and sauce in an airtight container. Refrigerate them promptly, and aim to consume them within one to two days for optimal flavor and texture. It’s important to note that the texture of the scallops may change slightly upon refrigeration, becoming a bit firmer.
Freezing
Freezing garlic butter seared scallops is generally not recommended. The delicate texture of the scallops can become mushy and lose their appealing firmness after being frozen and thawed. The garlic butter sauce, however, might fare slightly better if frozen separately, but the overall quality of the dish is best preserved when enjoyed fresh.
Reheating
To reheat leftover scallops, do so gently to avoid further cooking and toughening them. The best method is to gently warm the scallops and sauce in a skillet over low heat, stirring occasionally, until just heated through. Alternatively, you can warm them in the microwave on a lower power setting, using short intervals and stirring in between, until they reach your desired temperature. Avoid high heat or prolonged cooking times during reheating.
Frequently Asked Questions
- What are the best types of scallops to use for searing, and why is “dry-packed” so important?
For the best searing results, it is highly recommended to use “dry-packed” sea scallops. Sea scallops are larger and meatier than bay scallops, making them ideal for achieving a substantial sear. The term “dry-packed” refers to scallops that have not been treated with a solution containing phosphates. This treatment, often used to extend shelf life in “wet-packed” scallops, causes them to absorb extra water. When you try to sear wet-packed scallops, this excess water steams them rather than allowing them to brown, resulting in a less desirable texture and appearance. Dry-packed scallops retain less moisture, enabling them to develop that beautiful, golden-brown crust that is characteristic of perfectly seared scallops.
- How can I tell if my scallops are fresh, and what should I do if I can only find frozen ones?
Fresh scallops should have a sweet, oceanic aroma, not a strong fishy or ammonia-like smell. Their flesh should be firm and moist, with a translucent to opaque appearance, and free from any discoloration. If you can only find frozen scallops, don’t worry; they can work beautifully in this recipe. Ensure they are of good quality, preferably sea scallops. Thaw them completely in the refrigerator overnight. Once thawed, it is absolutely critical to drain them thoroughly and then pat them extremely dry with paper towels before proceeding with seasoning and searing. This step is even more important for frozen scallops, as they tend to release more water during thawing.
- What can I serve with garlic butter seared scallops to make it a complete meal, and are there any wine pairings that would complement this dish?
Garlic butter seared scallops are incredibly versatile and pair well with a variety of dishes to create a complete meal. For a starchy side, consider serving them over creamy pasta, fluffy rice, or a smooth cauliflower mash. A side of steamed or roasted vegetables, such as asparagus, broccoli, or green beans, adds freshness and color. For a lighter meal, a simple side salad with a lemon vinaigrette is an excellent choice. In terms of wine pairings, crisp, dry white wines are ideal. A Sauvignon Blanc with its citrusy notes, a Pinot Grigio with its minerality, or a light-bodied Chardonnay without excessive oak will beautifully complement the richness of the butter and the brightness of the lemon in the scallops. A dry sparkling wine like Prosecco or Champagne also makes for a festive and fitting accompaniment.