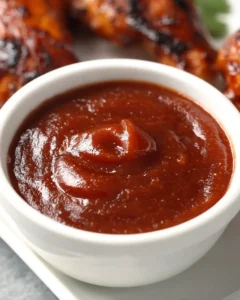
Smoky BBQ Sauce for Chicken

This homemade BBQ sauce for chicken is incredibly easy to whip up, making it a fantastic option for busy weeknights or spontaneous backyard grilling sessions. It delivers a perfect balance of sweet, tangy, smoky, and subtly spicy flavors that will elevate any chicken dish.
You’ll be amazed at how quickly this sauce comes together using common pantry staples, proving that delicious homemade condiments don’t require complex techniques or exotic ingredients. Its versatility means you can use it as a glaze, a dip, or a flavor enhancer for a variety of meals.
Why You Will Love This Recipe
- Quick Preparation: This BBQ sauce is ready in under 15 minutes, making it an ideal last-minute addition to your meal.
- Balanced Flavor Profile: It perfectly marries sweetness from sugar, tanginess from vinegar, smokiness from liquid smoke, and a gentle kick of heat.
- Pantry Staple Friendly: Most of the ingredients are likely already in your kitchen, meaning you can make it anytime the craving strikes.
- Versatile Application: Whether brushing on grilled chicken, dipping wings, or jazzing up pulled chicken sandwiches, this sauce is your go-to.
- Beginner-Friendly: The stovetop method is straightforward and foolproof, perfect for novice cooks and experienced chefs alike.
Ingredients You Need
Crafting this exceptional BBQ sauce relies on a thoughtful selection of ingredients, each contributing a crucial element to the final flavor profile. Using good quality ketchup as your base ensures a rich tomato foundation, while the type of sweetener can subtly influence the sauce’s depth and overall sweetness. The acidity from the vinegar is paramount for balancing the richness and ensuring the sauce isn’t cloying, and the judicious use of spices and flavorings builds complexity.
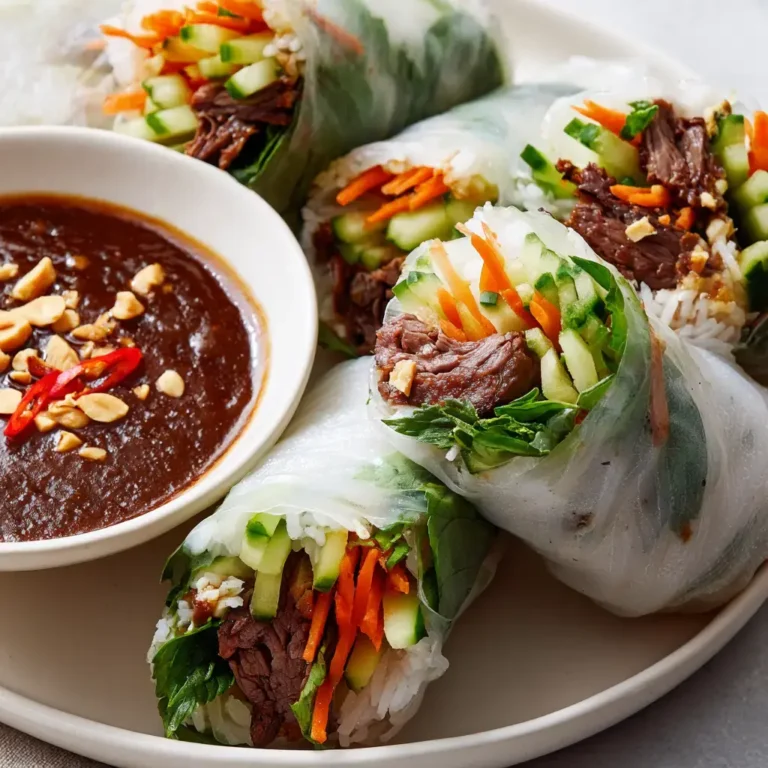
Easy BBQ Sauce for Chicken
A quick, smoky, beginner-friendly BBQ sauce with a sweet tang, gentle heat, and reliable stovetop results. Perfect for brushing onto grilled or baked chicken, using as a dipping sauce, or keeping in the fridge for simple weeknight meals.
- 1 cup ketchup
- 1/2 cup coconut sugar
- 1/2 cup apple cider vinegar
- 2 teaspoons Worcestershire sauce
- 2 teaspoons sriracha sauce (or adjust to taste for heat)
- 2 teaspoons Dijon mustard
- 1 teaspoon garlic powder
- 1 teaspoon onion powder
- 1 teaspoon chili powder
- 6 drops liquid smoke
- 1Add all ingredients to a small saucepan over medium-high heat.
- 2Whisk until smooth and glossy.
- 3Bring to a boil while watching closely.
- 4Reduce heat to medium-low and simmer for about 10 minutes, stirring occasionally.
- 5If splattering, rest the lid partway over the pot.
- 6Remove from heat and let cool before using or storing.
Keywords: BBQ Sauce, Chicken, Homemade, Easy, Smoky, Sweet, Tangy
- ketchup: the sweet and savory foundation of any classic barbecue sauce.
- coconut sugar: provides a mellow, caramel-like sweetness that complements the tomato base beautifully.
- apple cider vinegar: adds a bright, tangy note that cuts through the richness and balances the sweetness.
- sriracha sauce: introduces a gentle, creeping heat that can be adjusted to your preference for spice.
- Worcestershire sauce: lends a complex umami depth and a hint of savory savoriness.
- Dijon mustard: offers a subtle sharpness and helps to emulsify the sauce, adding another layer of flavor.
- garlic powder: brings an essential savory aroma and taste that is characteristic of barbecue.
- onion powder: contributes a mild, sweet onion flavor that rounds out the savory notes.
- chili powder: adds a warm, earthy depth and a very subtle underlying heat.
- liquid smoke: imparts that quintessential smoky barbecue flavor, essential for that authentic grill-kissed taste.
The exact quantities for these ingredients can be found within the recipe card for precise measurements.
Variations
For those seeking a vegan-friendly version of this delightful BBQ sauce, the substitution is remarkably simple. Replace the Worcestershire sauce with a vegan-friendly alternative, often found in specialty stores or online, which typically uses soy sauce or tamari as a base and includes similar umami-boosting ingredients without animal products. The rest of the ingredients are naturally vegan, making this a straightforward adaptation for anyone avoiding animal by-products. This allows everyone to enjoy the classic, comforting flavors of homemade BBQ.
If you are following a low-carb lifestyle, this recipe can be easily modified to suit your dietary needs. The primary adjustment involves swapping the coconut sugar for a low-carbohydrate sweetener that measures similarly in sweetness. Stevia, erythritol, or a monk fruit blend are excellent options, and you may need to experiment slightly with the amount to achieve your preferred sweetness level. Ensure your chosen ketchup is also low in added sugars; many brands offer sugar-free versions specifically for this purpose. This allows for that satisfying BBQ flavor without the carbohydrate load.
For an extra burst of flavor and a touch of gourmet flair, consider infusing the sauce with fresh herbs or a hint of fruit. You could simmer a sprig of fresh rosemary or thyme in the sauce during its brief cooking time, removing it before serving for a subtle aromatic enhancement. Alternatively, a tablespoon of finely minced chipotle peppers in adobo sauce can be added along with the sriracha for a deeper, smokier, and spicier profile. Another creative twist involves adding a small amount of fruit puree, such as apricot or peach, to the base for an added layer of fruity sweetness and complexity.
How to Prepare BBQ Sauce for Chicken
Step 1: Combining the Ingredients
The journey to your delicious homemade BBQ sauce begins with gathering all the necessary components in a small saucepan. This initial step is about bringing together the foundational elements that will transform into a rich, flavorful condiment. You’ll want to have your ketchup, coconut sugar, apple cider vinegar, sriracha, Worcestershire sauce, Dijon mustard, garlic powder, onion powder, chili powder, and liquid smoke ready to go.
Carefully measure each ingredient to ensure the balance of flavors is just right. The ketchup provides the essential tomato base, while the coconut sugar will add a pleasant, mellow sweetness. The apple cider vinegar is crucial for that signature tangy zest, and the sriracha offers a controllable kick of heat. Worcestershire sauce brings a depth of umami, and Dijon mustard adds a subtle sharp counterpoint.
Finally, the dry spices – garlic powder, onion powder, and chili powder – contribute the savory backbone and earthy warmth that defines classic barbecue. The liquid smoke is the secret weapon for that unmistakable smoky aroma and taste, even when you aren’t grilling. Having everything measured and ready before you turn on the heat will make the cooking process smooth and efficient.
Step 2: Initial Mixing and Dissolving
Once all the ingredients are in the saucepan, it’s time to start the mixing process. Use a whisk to thoroughly combine everything. This isn’t just about making the mixture look uniform; it’s about ensuring that the sugar dissolves completely and the spices are evenly distributed throughout the ketchup base. An even distribution is key to a consistent flavor in every bite.
As you whisk, you’ll notice the texture gradually changing from separate components into a more cohesive, glossy mixture. This initial whisking helps to break down any clumps of spices and ensures that the sugar begins to melt and incorporate. The goal here is a smooth, homogenous blend before applying heat. This thorough initial mix prevents pockets of undissolved sugar or concentrated spice.
Pay attention to the consistency as you stir. You want to achieve a glossy sheen, indicating that the sugar has started to dissolve and the ingredients are beginning to meld. This smooth, uniform consistency is the ideal starting point for the cooking process, setting the stage for a perfectly balanced and well-integrated BBQ sauce.
Step 3: Bringing the Sauce to a Boil
Now, place the saucepan over medium-high heat. As the mixture begins to warm up, continue to whisk it gently. You are aiming to bring the sauce just to a boil. This stage is important for activating certain flavors and helping the sauce to thicken slightly as it cooks. Keep a close eye on it, as sauces containing sugar and tomato products can escalate quickly once they reach a high temperature.
The moment the sauce starts to bubble, indicating it has reached a boil, is your cue to adjust the heat. It’s crucial to watch this process diligently because sugary mixtures can foam up and boil over very rapidly. A sudden, uncontrolled boil can lead to a messy stovetop and an unevenly cooked sauce. Therefore, standing by and observing is key.
Once you see those initial bubbles, you are almost ready for the next critical phase of simmering. This rapid heating phase helps to quickly integrate the ingredients and start the cooking process, preparing the sauce for its period of gentle reduction and flavor development. The visual cue of a rolling boil tells you the sauce is developing its characteristic texture and depth.
Step 4: The Simmering Phase
As soon as the sauce reaches a boil, immediately reduce the heat to medium-low. Allow the sauce to simmer gently for approximately 10 minutes. This simmering period is where the magic happens, allowing the flavors to meld and deepen, and the sauce to thicken slightly. A gentle simmer is much more effective than a hard boil for developing complex flavor profiles and achieving the desired consistency without scorching.
During these 10 minutes, the vinegar’s sharp edges will soften, the spices will become more fragrant and integrated, and the overall taste will become more rounded and harmonious. This controlled cooking process is essential for creating a sauce that tastes like it has been simmering for hours, even though it’s a quick preparation. It transforms the raw ingredients into a sophisticated condiment.
The reduction during this simmer is subtle but significant, concentrating the flavors and achieving a delightful thickness that clings perfectly to chicken. A 10-minute simmer is the sweet spot, providing enough time for flavor development without overcooking or allowing the sauce to become too thick or pasty. It’s a critical window for flavor infusion and textural refinement.
Step 5: Stirring for Consistency and Prevention
Throughout the 10-minute simmering process, remember to stir the sauce every so often. This is a vital step for several reasons. Firstly, stirring helps to prevent the sauce from sticking to the bottom of the saucepan and potentially scorching. Scorched sauce can impart an unpleasant bitter flavor to the entire batch, ruining the delicate balance you’ve worked to achieve.
Secondly, regular stirring ensures that the sauce reduces evenly. This promotes a consistent texture throughout the batch, avoiding areas that are thicker or thinner than others. It also helps to keep the ingredients well-emulsified, preventing any separation of components as the sauce cooks down. Your continuous attention is rewarded with a smooth, unblemished sauce.
The act of stirring also allows you to monitor the sauce’s consistency. As it thickens, you can gauge if it’s approaching your desired level of thickness. This hands-on approach to cooking ensures that the sauce develops perfectly, meeting your expectations for both flavor and texture without any unwanted surprises. It’s a simple action with significant impact on the final outcome.
Step 6: Managing Splatter
As the sauce simmers and begins to thicken, it can also start to splatter. This can create a messy stovetop and potentially cause burns if hot sauce splashes onto your skin. To manage this, you can partially cover the saucepan with its lid. Instead of placing the lid on tightly, rest it slightly ajar, creating a gap.
This partial covering allows steam to escape, preventing pressure from building up inside the pot, which is crucial for safety. Simultaneously, it acts as a barrier to catch most of the splattering sauce, keeping your stovetop much cleaner. It’s a simple but effective technique for a less chaotic cooking experience.
By allowing steam to escape, you ensure that the sauce continues to reduce properly, as a tightly sealed lid would trap moisture and slow down the thickening process. This method offers the best of both worlds: minimizing mess and allowing the sauce to cook as intended. It’s a practical solution for a common stovetop issue during sauce preparation.
Step 7: Cooling Down
Once the 10-minute simmering period is complete and you’ve achieved your desired consistency, it’s time to remove the saucepan from the heat. This step is crucial because the sauce will continue to cook slightly from residual heat, and it needs a chance to cool down before you can properly assess its final thickness and flavor. Rushing this step can lead to a sauce that is either too thin or too thick once it reaches room temperature.
As the BBQ sauce cools, it will naturally settle and thicken further. This is a normal part of the process, especially for sauces containing sugar and tomato paste. The cooling period allows all the flavors to meld together even more, creating a more harmonious and complex taste profile. Patience here is rewarded with a superior final product.
Allowing the sauce to cool slightly before using it also makes it safer to handle and easier to pour or brush. If you plan to store it, ensure it has cooled completely before transferring it to an airtight container. This cooling phase is not just about temperature; it’s an integral part of the sauce’s development, enhancing its texture and flavor balance.
Pro Tips for BBQ Sauce for Chicken
Taste and Adjust: Before the sauce cools completely, take a small spoonful to taste. This is your chance to fine-tune the flavors. Does it need more sweetness? A touch more vinegar for tang? A bit more sriracha for heat? Adjusting at this stage ensures your sauce is perfect before it sets.
Simmer Gently: Avoid letting the sauce come to a hard boil during the simmering phase. A gentle simmer is key to developing a smooth, rich texture and preventing the sugars from caramelizing too quickly or burning. This controlled heat ensures even flavor development.
Consider Smokiness: The liquid smoke is potent; a little goes a long way. Start with the recommended amount, and if you desire a more intense smoky flavor, add just a drop or two more at a time, tasting in between. You can also experiment with different types of liquid smoke for subtle variations.
Storage is Key: Once completely cooled, store your BBQ sauce in an airtight container in the refrigerator. This homemade sauce will typically last for about a week, retaining its vibrant flavor. Properly stored, it’s ready for your next chicken creation.
Experiment with Sweeteners: While coconut sugar is excellent, don’t hesitate to try other sweeteners like brown sugar for a deeper molasses note, or even a touch of maple syrup for a different kind of sweetness. Just be mindful of how different sugars affect the cooking time and final flavor profile.
Serving Suggestions for BBQ Sauce for Chicken
Decoration
A drizzle of this vibrant BBQ sauce can transform a simple plate into a visually appealing meal. For a professional touch, use a squeeze bottle with a fine tip to create decorative swirls or zigzags over the chicken. A light brushing can also create a beautiful glossy sheen, especially on grilled or baked chicken pieces, making them irresistible. Garnishing with a sprinkle of fresh chopped parsley or chives adds a pop of color and a hint of freshness.
Side Dishes
This BBQ sauce pairs exceptionally well with classic comfort food sides that complement its rich flavors. Creamy coleslaw provides a refreshing, crunchy contrast to the sticky sweetness of the sauce. Baked beans, whether simple or loaded with extra ingredients, offer a hearty, savory accompaniment that stands up well to the bold BBQ taste. Corn on the cob, grilled or boiled and slathered with butter, is another perfect partner, adding a touch of natural sweetness.
For a lighter option, a simple green salad with a vinaigrette dressing can offer a palate-cleansing counterpoint to the robust flavors of the BBQ chicken. Roasted vegetables, such as Brussels sprouts, sweet potatoes, or bell peppers, add earthy depth and appealing textures. And, of course, no BBQ meal is complete for many without a side of fluffy mashed potatoes or crispy French fries, perfect for soaking up any extra sauce.
Creative Serving Ideas
Beyond just brushing it on chicken, this sauce can be the star of many dishes. Consider using it as a base for a pulled chicken sandwich, tossing shredded chicken with a generous amount of sauce and piling it onto soft buns with your favorite toppings. It’s also fantastic as a dipping sauce for chicken tenders, nuggets, or even crispy fried chicken wings, offering a flavor explosion with every bite.
Elevate your appetizer game by using this BBQ sauce on mini chicken skewers or as a flavorful topping for loaded potato skins. It can also be incorporated into baked dishes, like a BBQ chicken casserole or topping for pizza. For a unique twist, mix a spoonful into your favorite chili recipe for an added layer of smoky sweetness and complexity, making your culinary creations truly stand out.
Preparation & Storage
Storing Leftovers
Once your delicious homemade BBQ sauce has completely cooled down, it’s essential to store it properly to maintain its freshness and flavor. Transfer the cooled sauce into a clean, airtight container. Glass jars with tight-fitting lids are ideal for this purpose, as they don’t absorb odors and are easy to clean. Ensure there’s minimal air inside the container, as this helps to prevent oxidation and prolong the sauce’s shelf life.
Refrigerated, this homemade BBQ sauce will typically stay delicious for about one week. During this time, you can use it to enhance a variety of meals, from simple chicken dishes to sandwiches and dips. Always use a clean spoon or utensil when taking sauce from the container to avoid introducing any bacteria that could shorten its lifespan. Checking the smell and appearance before use is always a good practice for any stored food item.
Freezing
For longer-term storage, this BBQ sauce freezes remarkably well, making it a convenient option to have on hand whenever you need it. Once cooled, portion the sauce into freezer-safe bags or containers. If using bags, remove as much air as possible before sealing to prevent freezer burn. Small, individual portions are often the most practical, allowing you to thaw only what you need for a single meal or recipe.
Frozen BBQ sauce can maintain its quality for up to three months. When you’re ready to use it, transfer the frozen portion from the freezer to the refrigerator the day before. This allows for a slow, even thaw, which helps to preserve the sauce’s texture and flavor. Freezing is an excellent strategy for batch cooking and ensuring you always have homemade goodness ready to go.
Reheating
When it’s time to use your refrigerated or thawed BBQ sauce, reheating it is a straightforward process. If the sauce has thickened more than you’d like after chilling, you can easily loosen it up. Place the desired amount in a small saucepan over low heat, stirring gently until it reaches your preferred consistency. Alternatively, you can microwave it in short bursts, stirring between each interval, until it’s warm and fluid.
If the sauce seems too thick even after warming, a small splash of water, apple cider vinegar, or even a little extra ketchup can be stirred in to adjust the consistency. The key is to heat it gently to avoid scorching or altering the flavor. Proper reheating ensures that the sauce is perfectly ready to be brushed, dipped, or drizzled onto your chicken, just like when it was freshly made.
Frequently Asked Questions
-
Can I make this BBQ sauce spicier?
Absolutely! To increase the heat level of this BBQ sauce, you can add more sriracha sauce. Start by adding an additional teaspoon, stir it in, and let it simmer for a minute or two before tasting. You can repeat this process, adding more in small increments, until you achieve your desired level of spiciness. For a different kind of heat and smoky depth, consider adding a pinch of cayenne pepper or a small amount of finely minced chipotle peppers in adobo sauce.
-
How long does homemade BBQ sauce typically last?
When stored correctly in an airtight container in the refrigerator, this homemade BBQ sauce should remain fresh and flavorful for approximately one week. The acidic components like vinegar and the natural preservatives in ketchup help to extend its shelf life. For longer storage, freezing is an excellent option, where it can last for up to three months while maintaining good quality. Always check for any signs of spoilage, such as off-odors or mold, before using, though proper refrigeration and airtight storage minimize these risks.
-
Can I use a different type of sugar or vinegar?
Yes, you can certainly experiment with different types of sugar and vinegar to alter the flavor profile of this BBQ sauce. For sugar, you could substitute brown sugar for a richer, molasses-like sweetness, or even honey for a slightly different flavor note (though this would make it non-vegan). When it comes to vinegar, while apple cider vinegar provides a classic tang, red wine vinegar or white distilled vinegar can also be used, each offering a slightly different intensity and flavor. Experimenting with these substitutions can lead to unique and personalized versions of your favorite BBQ sauce.