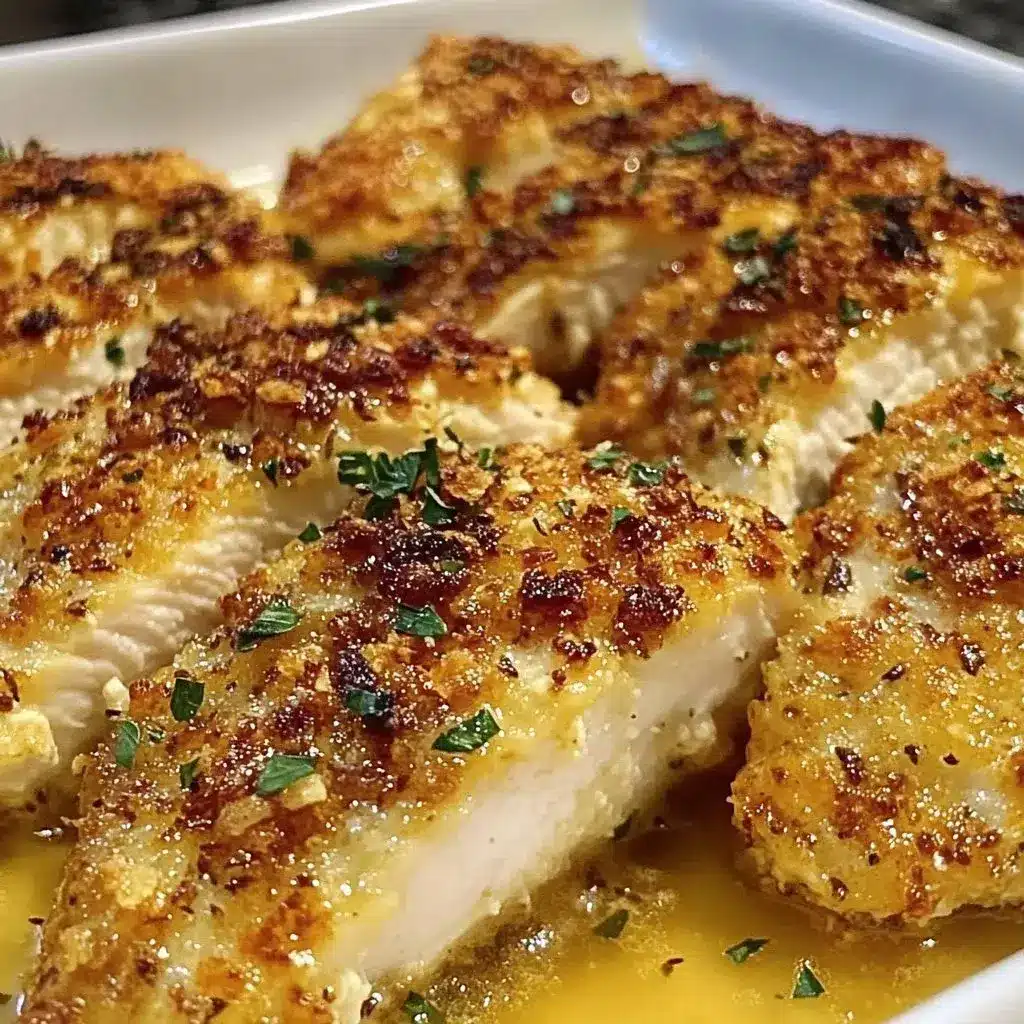
Irresistible Crispy Parmesan Crusted Chicken
Are you tired of the same old weeknight dinners that leave you feeling uninspired? If so, it’s time to transform your meals with Crispy Parmesan Crusted Chicken, a dish that promises to elevate your culinary game effortlessly.
This recipe is a symphony of textures and flavors, featuring succulent chicken breasts enveloped in a golden, crunchy crust of Parmesan cheese and savory breadcrumbs, baked to perfection without the need for frying. It’s the kind of meal that satisfies cravings while remaining surprisingly simple to prepare, making it an ideal candidate for your weekly rotation.
Why You Will Love This Recipe
- Effortless Elegance: Despite its gourmet appeal, this dish requires minimal effort, making it perfect for busy weeknights or impressing guests without spending hours in the kitchen.
- Irresistible Texture: The star of the show is the incredibly crispy Parmesan crust, which provides a satisfying crunch that perfectly complements the tender, juicy chicken within.
- Flavorful Fusion: A harmonious blend of savory Parmesan, aromatic garlic powder, and a hint of paprika creates a deeply satisfying taste profile that is both comforting and exciting.
- Healthier Alternative: This baked preparation offers a delightful alternative to traditional fried chicken, allowing you to enjoy that beloved crispiness with less added fat and a lighter feel.
- Highly Customizable: The basic recipe serves as a brilliant canvas for your creativity, inviting additions of herbs, spices, or different cheeses to tailor the flavor profile precisely to your liking.
Ingredients You Need
The beauty of Crispy Parmesan Crusted Chicken lies in its straightforward ingredient list, featuring pantry staples that likely already grace your kitchen. Using high-quality ingredients will always elevate the final dish, so opt for freshly grated Parmesan cheese if possible for the best flavor and texture in the crust. The chicken itself should be fresh and of good quality to ensure it remains moist and tender during the baking process. Even simple seasonings like garlic powder and paprika can make a significant difference in the overall taste experience, so ensure you have these on hand.
Crispy Parmesan Crusted Chicken

A delicious and easy-to-make chicken dish with a crispy, flavorful Parmesan and breadcrumb coating, perfect for any weeknight dinner or special occasion.
- 2 boneless, skinless chicken breasts (patted dry)
- 1 cup grated Parmesan cheese
- 1 cup breadcrumbs (gluten-free option available)
- 2 eggs, beaten
- 1 teaspoon garlic powder
- 1 teaspoon paprika
- Salt and pepper to taste
- Olive oil or cooking spray
- 1Preheat oven to 400°F (200°C).
- 2In a bowl, combine Parmesan cheese, breadcrumbs, garlic powder, paprika, salt, and pepper.
- 3In a separate bowl, beat the eggs.
- 4Dip each chicken breast in beaten eggs, then coat thoroughly with the breadcrumb mixture, pressing to adhere.
- 5Place coated chicken breasts on a parchment-lined baking sheet, ensuring they don't touch.
- 6Drizzle or spray chicken with olive oil.
- 7Bake for 25-30 minutes, or until chicken reaches an internal temperature of 165°F (75°C) and coating is golden brown.
- 8Let chicken rest for a few minutes before slicing and serving.
Keywords: Baked Chicken, Comfort Food, Crispy Chicken, easy dinner, Parmesan Chicken
- boneless, skinless chicken breasts: for a lean and tender protein base.
- grated Parmesan cheese: the key to a savory, golden crust.
- breadcrumbs: essential for achieving that signature crunch.
- eggs: used as a binder to help the coating adhere beautifully.
- garlic powder: adds a pungent, aromatic depth to the chicken.
- paprika: contributes a subtle sweetness and a lovely reddish hue to the crust.
- salt and pepper: to enhance all the flavors and season the chicken perfectly.
- olive oil or cooking spray: to promote crisping and add a touch of richness to the exterior.
Quantities for these ingredients are detailed within the recipe card provided.
Variations
For those seeking a completely plant-based option, transforming this dish into a vegan delight is remarkably straightforward. Simply replace the chicken with thick slices of firm tofu or portobello mushrooms, and swap out the eggs for a flax egg or a mixture of plant-based milk and a touch of apple cider vinegar. The Parmesan cheese can be substituted with a generous amount of nutritional yeast mixed with finely ground cashews or almonds, which will mimic the cheesy flavor and add a delightful texture to the coating.
If you’re embarking on a low-carb journey, omitting the breadcrumbs entirely is the simplest adjustment. Instead, rely heavily on finely grated Parmesan cheese, perhaps mixed with almond flour or crushed pork rinds for added crunch. A sprinkle of dried herbs like oregano and basil, along with a touch of garlic powder, will ensure the coating remains flavorful and satisfying, creating a delicious low-carb crust that pairs wonderfully with the tender chicken.
Introducing a touch of international flair can also revolutionize this dish. Consider a “Spicy Southwest” variation by incorporating chili powder, cumin, and a pinch of cayenne pepper into the breadcrumb mixture, then serving with a dollop of lime crema or salsa. Alternatively, an “Italian Herb” version could feature dried oregano, basil, thyme, and a sprinkle of finely chopped fresh parsley for a vibrant, classic taste that transports you straight to the Mediterranean.
How to Prepare Crispy Parmesan Crusted Chicken
Step 1: Preheating and Preparation of the Oven
The very first step in achieving perfectly cooked Crispy Parmesan Crusted Chicken involves preparing your oven and ensuring it reaches the optimal temperature. Preheat your oven to 400°F (200°C). This moderate-high heat is crucial because it allows the chicken to cook through evenly while simultaneously crisping up the Parmesan and breadcrumb coating to a beautiful golden-brown hue.
While the oven is working its magic, take this time to gather all your ingredients and prepare them for the coating process. This includes patting the chicken breasts thoroughly dry with paper towels; this step is surprisingly important as excess moisture can prevent the coating from adhering properly and hinder the crisping process. Ensure your workspace is clear and ready for the breading station you’re about to set up.
Step 2: Assembling the Flavorful Coating Mixture
In a medium-sized mixing bowl, combine the grated Parmesan cheese, breadcrumbs, garlic powder, and paprika. Add a generous pinch of salt and a good grind of black pepper to this dry mixture. Stir these ingredients together thoroughly until they are well incorporated. This dry blend forms the heart of the flavorful crust, infusing every bite with savory, aromatic notes that are both comforting and exciting.
The goal here is to create a homogenous mixture where the cheese and seasonings are evenly distributed amongst the breadcrumbs. Take a moment to smell the blend; the aroma of garlic and Parmesan is a promising sign of the deliciousness to come. This mixture will be used to coat the chicken, ensuring each piece is generously covered in this delightful flavor base.
Step 3: Preparing the Egg Wash Station
In a separate, shallow bowl or a pie dish, crack the two eggs. Whisk them vigorously with a fork or a small whisk until the yolks and whites are completely combined and a uniform yellow color. This egg mixture serves as the essential binder, creating a sticky surface that the breadcrumb and Parmesan mixture will adhere to.
Ensuring the eggs are thoroughly beaten is important, as unevenly mixed eggs can lead to an inconsistent coating. Some chefs prefer to add a splash of milk or water to the eggs, which can slightly thin the mixture and help it coat the chicken more evenly, though it’s not strictly necessary for this recipe. The consistency should be fluid enough to coat the chicken but thick enough to create a good base for the dry ingredients.
Step 4: The Art of Coating the Chicken
Now comes the most satisfying part: coating the chicken. Take one of the prepared, dry chicken breasts and place it into the beaten egg mixture. Turn it gently to ensure it is fully and evenly coated on all sides. Allow any excess egg to drip back into the bowl for a moment before proceeding.
Next, transfer the egg-coated chicken breast directly into the bowl containing the Parmesan and breadcrumb mixture. Using your hands or a spoon, press the mixture firmly onto the chicken, ensuring that every surface is well covered. You want a thick, even layer of the crust to adhere to the meat. Repeat this entire process for the second chicken breast, pressing gently but firmly to secure the coating.
Step 5: Arranging the Chicken for Optimal Baking
Prepare a baking sheet by lining it with parchment paper or aluminum foil. This not only prevents the chicken from sticking to the pan but also makes for much easier cleanup. Arrange the coated chicken breasts on the prepared baking sheet, ensuring that there is ample space between each piece.
Do not let the chicken breasts touch each other. This spacing is critical for allowing hot air to circulate evenly around each piece, promoting uniform cooking and ensuring that the crust becomes uniformly crisp. Overcrowding the pan can lead to steaming rather than baking, resulting in a soggy coating, which is precisely what we want to avoid.
Step 6: Enhancing Crispiness with a Touch of Fat
To achieve that coveted crispy, golden-brown exterior, a little fat goes a long way. Lightly drizzle the tops of the coated chicken breasts with olive oil or generously spray them with cooking spray. This step is key in helping the breadcrumbs toast and become wonderfully crisp in the oven.
The oil will help conduct heat, promoting browning and adding a subtle richness to the crust. Ensure you cover most of the surface of the coating with the oil or spray for the best results. Don’t be too shy with this step, as it directly contributes to the delicious texture of the final dish.
Step 7: Baking to Golden Perfection
Place the baking sheet with the prepared chicken into the preheated 400°F (200°C) oven. Bake for approximately 25-30 minutes. The exact baking time will depend on the thickness of your chicken breasts, so it’s important to monitor them closely during the last 10 minutes of cooking.
You’ll know the chicken is perfectly done when an instant-read thermometer inserted into the thickest part of the breast registers an internal temperature of 165°F (75°C). The crust should be a beautiful, deep golden brown and feel wonderfully crisp to the touch. The aroma emanating from your oven will be a delightful testament to the delicious meal you’re about to enjoy.
Step 8: The Crucial Resting Period
Once the chicken has reached the desired internal temperature and the crust is perfectly golden, carefully remove the baking sheet from the oven. Resist the urge to slice into it immediately! Allowing the chicken to rest for 5-10 minutes is a vital step that ensures the juices redistribute throughout the meat. This resting period is what keeps the chicken incredibly moist and tender on the inside, preventing it from drying out when you cut into it.
During this resting phase, the proteins in the chicken begin to relax, reabsorbing the moisture that would otherwise escape. This small but significant step guarantees that every bite of your Crispy Parmesan Crusted Chicken will be succulent and flavorful. Cover the chicken loosely with foil during this time to keep it warm.
Step 9: Slicing and Serving with Flair
After the resting period, the Crispy Parmesan Crusted Chicken is ready to be served. You can serve the chicken breasts whole, allowing everyone to cut into their own, or slice them into thick strips or bite-sized pieces for easier serving, especially for children or as part of a larger spread. Slicing them against the grain can also help ensure maximum tenderness.
Present your beautifully cooked chicken on a platter, perhaps garnished with a sprinkle of fresh parsley for a pop of color. This dish is incredibly versatile and pairs wonderfully with a multitude of sides, from vibrant green salads to creamy mashed potatoes or roasted vegetables, making it a complete and satisfying meal. Enjoy the fruits of your simple yet rewarding culinary labor!
Pro Tips for Crispy Parmesan Crusted Chicken
- Ensure Chicken is Dry: Always pat your chicken breasts thoroughly dry with paper towels before you begin the breading process. Moisture is the enemy of crispiness, and a dry surface ensures better adhesion of the egg and breadcrumb mixture, leading to a superior crust.
- Press the Coating Firmly: Don’t just lightly dredge the chicken; take the time to press the Parmesan and breadcrumb mixture onto the chicken breast. This firm adherence ensures the coating stays intact during baking and develops a truly robust, crispy texture.
- Don’t Overcrowd the Pan: Giving each chicken breast adequate space on the baking sheet allows for even heat circulation. This is essential for achieving uniformly golden and crispy results all around, preventing any part from becoming steamed or soggy.
- Use Freshly Grated Parmesan: While pre-grated Parmesan can work, using a block of good quality Parmesan and grating it yourself will result in a superior flavor and texture for the crust. Freshly grated cheese melts and crisps up beautifully.
- Monitor Baking Time: Chicken breast thickness can vary greatly. Keep an eye on the chicken during the last 10 minutes of baking and use an instant-read thermometer to ensure it reaches the safe internal temperature of 165°F (75°C) without overcooking, which can lead to dryness.
Serving Suggestions for Crispy Parmesan Crusted Chicken
Decoration
To elevate the visual appeal of your Crispy Parmesan Crusted Chicken, a simple garnish can make a world of difference. A sprinkle of freshly chopped parsley or chives over the top adds a vibrant splash of green and a hint of fresh flavor. For a more sophisticated touch, a drizzle of balsamic glaze or a few artfully placed sprigs of fresh rosemary can enhance the dish’s elegance. Consider serving with a wedge of lemon on the side, allowing diners to add a bright, zesty finish if they desire.
Side Dishes
This versatile chicken dish pairs beautifully with a wide array of side dishes, catering to various tastes and meal preferences. For a lighter, refreshing complement, a crisp green salad with a light vinaigrette or a colorful coleslaw works wonderfully. Creamy mashed potatoes or a fluffy rice pilaf are classic comforting choices that soak up any delicious chicken juices. Roasted vegetables, such as broccoli, asparagus, or Brussels sprouts, offer a healthy and flavorful accompaniment, their earthy notes balancing the richness of the chicken.
Creative Serving Ideas
Transform your Crispy Parmesan Crusted Chicken into a delightful sandwich by slicing the cooked chicken and serving it on toasted ciabatta rolls with marinara sauce and a slice of mozzarella cheese, then briefly broiling to melt. Another creative idea is to chop the chicken into bite-sized pieces and toss it with pasta and a light Alfredo sauce for a quick and satisfying pasta dish. You could also serve it over a bed of quinoa or farro for a hearty and nutritious grain bowl, topping it with your favorite roasted vegetables and a light drizzle of lemon-tahini dressing.
Preparation & Storage
Storing Leftovers
To ensure your leftover Crispy Parmesan Crusted Chicken remains as delicious as possible, proper storage is key. Allow the chicken to cool completely to room temperature before refrigerating. Once cooled, transfer the chicken to an airtight container, separating pieces with parchment paper if needed to prevent sticking. Properly stored, leftovers can be kept in the refrigerator for up to 3 to 4 days.
Avoid storing the chicken while it is still warm, as this can promote bacterial growth and compromise food safety. Ensure the container is well-sealed to prevent the chicken from drying out and to maintain its flavor and texture. If you plan to store it for longer than a few days, freezing is the recommended option.
Freezing
For extended storage, freezing Crispy Parmesan Crusted Chicken is an excellent strategy. Once the chicken has cooled completely, wrap individual portions tightly in plastic wrap, ensuring there are no air pockets. Then, place the wrapped portions into a heavy-duty freezer bag or an airtight freezer-safe container. This double-layer protection helps prevent freezer burn and preserves the quality of the chicken for up to 2-3 months.
When freezing, it’s advisable to freeze the chicken either whole or in larger slices, as smaller pieces may lose more moisture upon thawing. Label the bags or containers with the date of freezing to keep track of your frozen goods. Properly frozen chicken will retain its delicious flavor and texture for an extended period.
Reheating
Reheating Crispy Parmesan Crusted Chicken requires a method that helps restore its signature crispiness, rather than making it soggy. The best way to reheat is in the oven. Preheat your oven to 350°F (175°C) and place the leftover chicken on a baking sheet, ideally lined with parchment paper. Bake for approximately 10-15 minutes, or until the chicken is heated through and the crust has regained its crispiness. This method is far superior to microwaving for maintaining texture.
If reheating from frozen, allow the chicken to thaw completely in the refrigerator overnight before proceeding with the oven reheating method. Alternatively, if you’re in a pinch and need to reheat from frozen, you can increase the baking time slightly, perhaps by an additional 5-10 minutes, ensuring the internal temperature reaches 165°F (75°C). Avoid reheating multiple times, as this can degrade the quality of the chicken.
Frequently Asked Questions
-
Can I make Crispy Parmesan Crusted Chicken ahead of time, and if so, how should I store it?
Yes, you can absolutely prepare the chicken and coat it entirely ahead of time. After coating, place the chicken pieces on a parchment-lined baking sheet, cover them tightly with plastic wrap, and refrigerate for up to 24 hours. It is crucial to ensure the coating is firmly pressed onto the chicken to prevent it from falling off. When you’re ready to cook, bake it directly from the refrigerator, potentially adding a few extra minutes to the baking time to ensure it’s cooked through and the crust is perfectly crisp. This make-ahead option is a lifesaver for busy weeknights or when entertaining guests.
-
What are the best substitutes if I don’t have breadcrumbs on hand, and how might they affect the final texture?
If you find yourself without breadcrumbs, several excellent substitutes can achieve a similarly delicious crust. Panko breadcrumbs are a fantastic option, offering an extra-light and airy crispiness due to their larger flake size. Finely crushed cornflakes or crackers (like saltines or Ritz) can also work, providing a slightly different but equally satisfying crunch. For a gluten-free alternative, consider using almond flour or finely ground gluten-free oats, which will offer a lovely nutty flavor and a good texture. Each substitute will impart a subtle variation in flavor and crispness, but all can result in a delightful Parmesan-crusted chicken.
-
Is it possible to use frozen chicken breasts for this recipe, and what adjustments are needed for proper cooking?
While it is possible to use frozen chicken breasts, it is highly recommended to thaw them completely before proceeding with the recipe. Cooking chicken from frozen can lead to uneven cooking, where the outside becomes overcooked and dry while the inside remains undercooked. Thawing ensures that the chicken cooks through at the same rate as the crust browns, preventing temperature discrepancies. If you must cook from frozen, you will need to significantly increase the baking time, and the coating may not adhere as well or achieve the same level of crispiness, so thawing remains the preferred method for optimal results and safety.