How to Make Banana Chips
Craving a satisfyingly crunchy snack that’s both delicious and good for you? Look no further than these incredible baked banana chips. They offer a delightful sweetness and a perfect crisp that rivals any store-bought alternative, all without the guilt of added sugars or unhealthy oils.
Imagine a simple, two-ingredient snack that transforms humble bananas into golden, crispy perfection right in your own oven. This recipe is a testament to how easy healthy snacking can be, providing a fantastic option for busy weekdays or relaxed weekends. Let’s dive into how you can create this delightful treat.
Why You Will Love This Recipe
- Effortless Preparation: With just a few simple steps, you can transform ripe bananas into crispy, flavorful chips.
- Healthy Indulgence: Enjoy a satisfying crunch without the added oils or sugars typically found in store-bought snacks.
- Two-Ingredient Wonder: This recipe proves that deliciousness doesn’t require a long list of complex ingredients.
- Versatile Snacking: Perfect for lunchboxes, on-the-go snacks, or a healthy dessert alternative.
- Customizable Flavor: Easily adapt the recipe with your favorite spices for a personalized touch.
Ingredients You Need
The beauty of these baked banana chips lies in their simplicity. You only need two main ingredients to achieve that perfect crisp and natural sweetness. Opt for bananas that are ripe but still firm, avoiding any that are overly bruised or mushy, as this will affect their texture and how evenly they bake. Thinly sliced bananas are key to achieving that satisfying crunch.
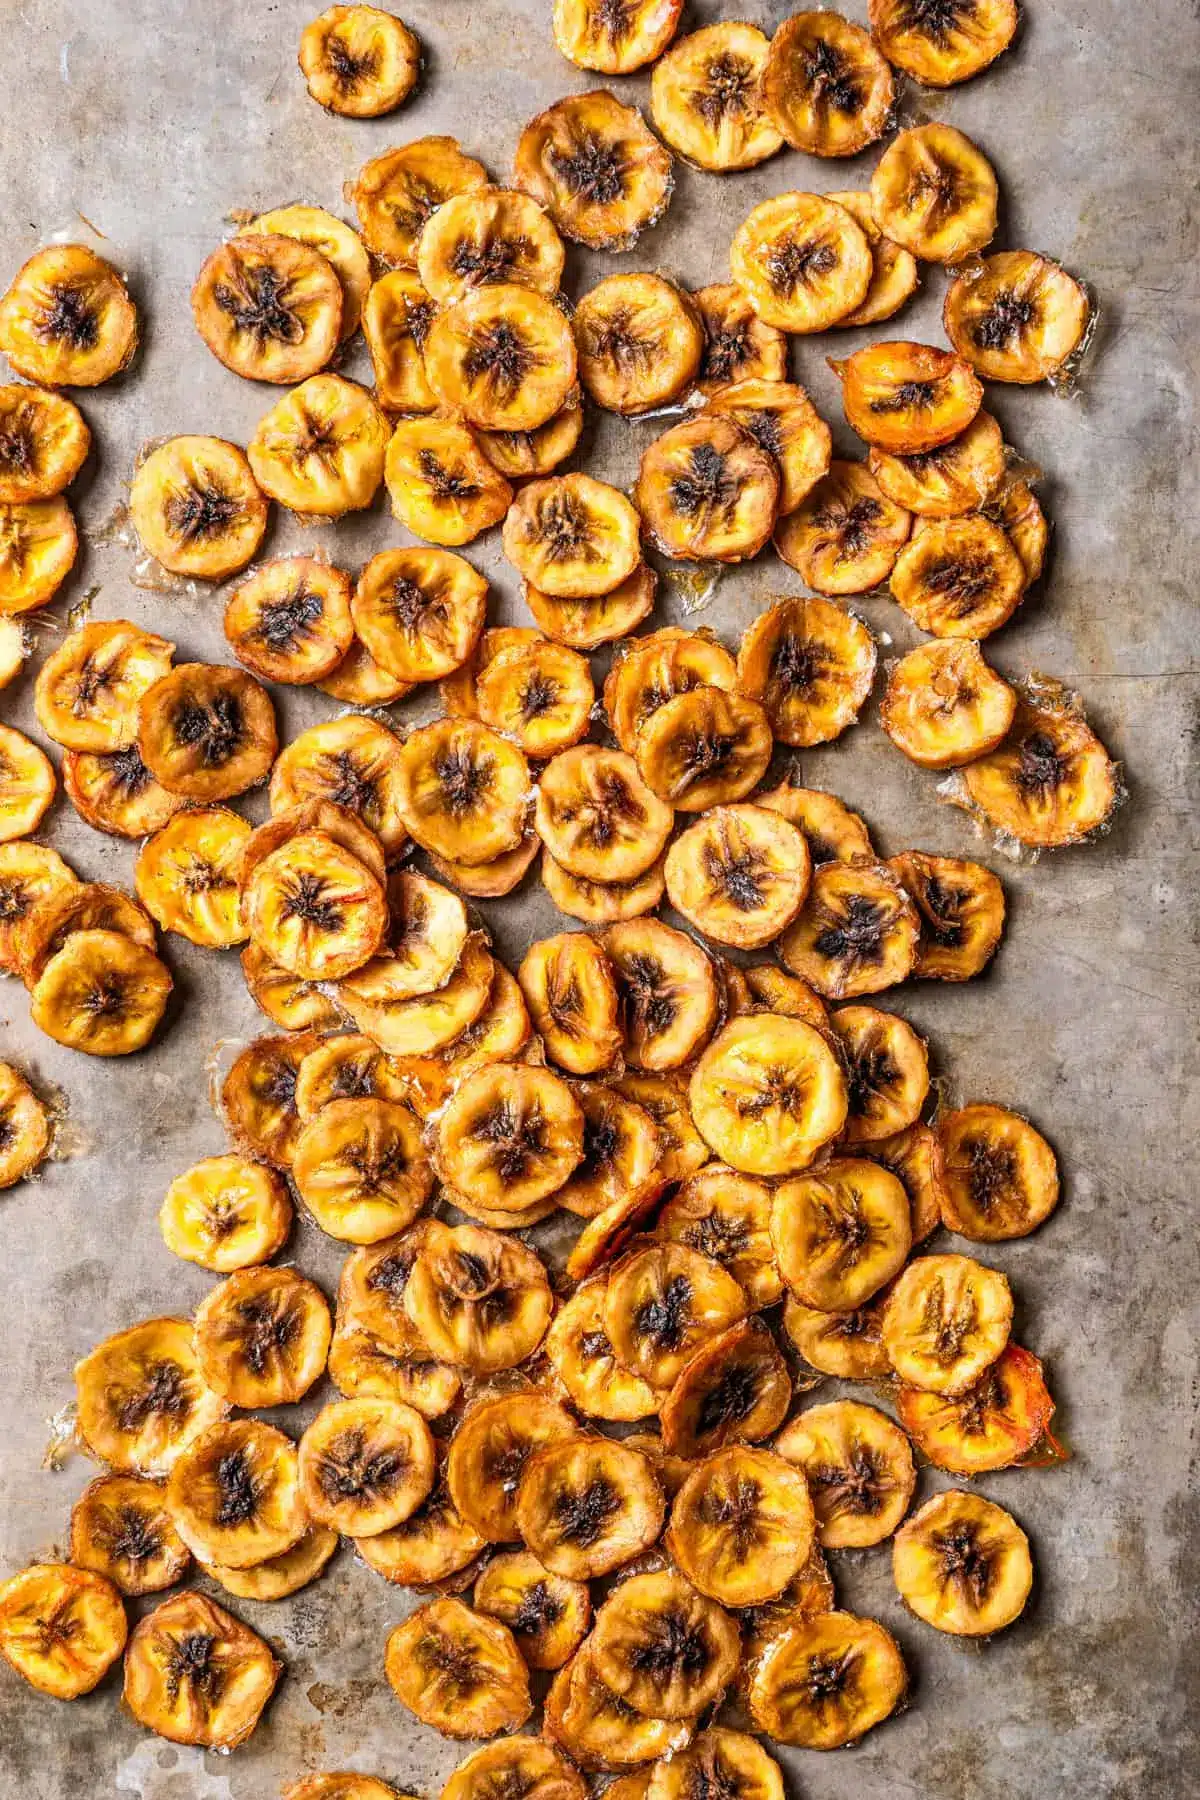
Baked Banana Chips
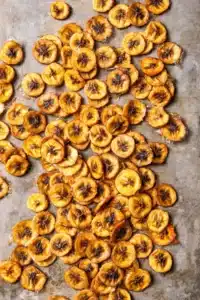
Deliciously sweet, guilt-free baked banana chips make a perfectly portable, light, and tasty snack to have on hand in case a craving strikes!
- 10 ripe but firm bananas, thinly sliced
- Freshly squeezed lemon juice (1 lemon is plenty)
- 1Preheat the oven to 200ºF. Cover a sheet pan with foil and lightly grease it with cooking spray.
- 2Toss the banana slices in lemon juice. Arrange the bananas in a single layer on the prepared baking sheet.
- 3Bake for 1 hour; check to see if the tops are firm and starting to turn color. If so, flip the slices with a metal spatula and continue to bake for 1 hour longer or until desired crispness.
- 4Remove from the oven and transfer the banana chips to a wire rack to cool completely. The longer they cool, the crunchier they will get. Store in an airtight container.
Keywords: banana chips, baked snacks, fruit chips, healthy snacks, guilt-free snacks, easy snacks
The full list of ingredients and precise quantities for this delightful snack can be found in the detailed recipe card located below this section, ensuring you have everything you need for success.
Variations
While these baked banana chips are wonderfully delicious on their own, they also offer a fantastic canvas for culinary creativity. You can easily adapt them to suit different dietary preferences or to add exciting new flavor profiles to your snacking experience.
Consider a vegan twist by ensuring your ingredients are all plant-based; this recipe inherently aligns perfectly with vegan diets, making it an effortless choice for those following a plant-powered lifestyle. The natural sweetness of the bananas shines through without any need for animal products.
For a low-carb option, while bananas are naturally higher in carbohydrates, you can still enjoy a portion control approach. Perhaps incorporate these chips as a textural element in a larger, more balanced low-carb meal or snack, such as sprinkled over a savory salad or alongside a protein-rich dish.
Don’t hesitate to experiment with sweet and savory spices. A sprinkle of cinnamon and a touch of nutmeg can transform your chips into a warm, comforting treat, perfect for a chilly afternoon. For those who enjoy a bit of heat, a dash of cayenne pepper or a blend of chili powder can create a surprisingly addictive sweet and spicy combination.
You could also explore a salt-kissed variation by adding a tiny pinch of sea salt before baking. This enhances the natural sweetness of the banana and adds a delightful sweet-salty contrast that many find irresistible. The possibilities are truly endless, allowing you to tailor these chips to your exact taste preferences.
How to Prepare baked banana chips
Step 1: Preparation of the Baking Sheet and Oven
Begin by preheating your oven to a low temperature, specifically 200°F (95°C). This gentle heat is crucial for dehydrating the bananas slowly, allowing them to become crisp rather than burnt. A low oven temperature ensures that the moisture evaporates gradually, leading to perfectly baked chips.
Next, prepare your baking sheet by lining it with aluminum foil or parchment paper. This simple step is a game-changer for easy cleanup, preventing any sticky residue from adhering to your baking pan. A light spritz of cooking spray over the foil or paper can further aid in preventing the banana slices from sticking, ensuring they release easily once baked.
Ensuring your baking sheet is well-prepared before you start slicing the bananas will make the entire process smoother. You want to be ready to transfer the prepared banana slices immediately once they are coated and arranged. This efficiency is key to maintaining the quality and texture of the chips.
Step 2: Slicing the Bananas
The key to achieving perfectly crisp banana chips lies in the thickness of your slices. Aim for uniform slices, ideally around ¼-inch (approximately 6 mm) thick. Consistency in thickness ensures that all the banana chips bake evenly, preventing some from becoming burnt while others remain too soft.
Using a sharp knife or a mandoline slicer will help you achieve these thin, even cuts. If using a mandoline, exercise caution to protect your fingers; they are incredibly efficient at creating uniform slices quickly. If slicing by hand, take your time to ensure each slice is as close in thickness as possible to the others.
Overripe or very soft bananas can be challenging to slice thinly and evenly. If your bananas are a little too soft, you might consider chilling them in the refrigerator for about 30 minutes before slicing. This firms them up slightly, making them easier to handle and slice precisely for optimal results.
Step 3: Coating the Bananas with Lemon Juice
Place your uniformly sliced banana rounds into a medium-sized bowl. It’s important to do this just before you plan to arrange them on the baking sheet to minimize oxidation. Bananas brown quickly once exposed to air, and the lemon juice acts as a natural barrier against this browning.
Pour freshly squeezed lemon juice over the banana slices. You don’t need to drown them; a couple of tablespoons are usually sufficient to coat all the slices. The acidity in the lemon juice not only prevents browning but also adds a subtle, bright flavor note that complements the natural sweetness of the banana.
Gently toss the banana slices with your hands or a rubber spatula to ensure each piece is lightly coated with the lemon juice. Avoid over-tossing, which could lead to mashed banana slices. The goal is a light, even coating on all surfaces of the banana rounds.
Step 4: Arranging the Banana Slices for Baking
Carefully transfer the lemon-coated banana slices from the bowl to the prepared baking sheet. It is absolutely crucial to arrange them in a single layer, ensuring that no slices are overlapping. Overlapping slices will steam rather than bake, resulting in chewier, less crispy chips.
Utilize the entire surface of the baking sheet, placing the slices edge-to-edge but without touching. If you find that your batch is too large to fit on a single sheet without overcrowding, it’s better to use two baking sheets than to compromise on the single-layer arrangement. This ensures optimal air circulation around each slice, which is essential for dehydration and crisping.
Take a moment to ensure all the slices are lying flat on the baking sheet. This even contact with the hot surface, combined with the gentle oven heat, will promote uniform dehydration and browning. A well-arranged baking sheet is a critical step towards achieving that perfect crunch you’re looking for.
Step 5: The Baking Process
Place the baking sheet into the preheated 200°F (95°C) oven. The initial baking time is approximately 1 hour. After this first hour, you will check on the banana chips; they should appear firm and may have started to show some slight color change on the tops.
Carefully remove the baking sheet from the oven. Using a thin metal spatula, gently flip each banana slice. Flipping them allows the moisture to escape from both sides and promotes even crisping. The ease with which they flip can also indicate their readiness to be flipped; if they are sticking significantly, they may need a bit more baking time before attempting to flip.
Return the baking sheet to the oven and continue baking for another 1 to 2 hours, or until the chips reach your desired level of crispness. This duration can vary depending on the thickness of your slices, the humidity in your kitchen, and the accuracy of your oven’s temperature. Keep a close eye on them, especially towards the end of the baking time, as they can go from perfectly crisp to burnt quite rapidly.
Some chips may be done before others. If you notice a few slices are perfectly crisp while others are still a bit pliable, you can carefully remove the done ones with a spatula and leave the rest to continue baking. This technique ensures you maximize the number of perfectly crispy chips from your batch. It’s a process that rewards vigilance.
Step 6: Cooling and Achieving Full Crispness
Once the banana chips have reached your desired crispness, carefully remove the baking sheet from the oven. Immediately transfer the hot banana chips from the baking sheet to a wire cooling rack. It is important to get them off the hot baking sheet as quickly as possible to stop the cooking process and allow for maximum air circulation.
Allow the banana chips to cool completely on the wire rack. This cooling phase is as critical as the baking itself for achieving peak crispness. As the chips cool, they will continue to dry out and become even more brittle and crunchy. Resist the urge to taste them too soon; patience here will be rewarded with a superior texture.
The longer they are left to cool, the crispier they will become. For the ultimate crunch, let them cool for at least an hour, or even longer if possible. Once fully cooled, they will have a delightful snap when broken. Store them in an airtight container immediately after they are completely cool to maintain their crispness.
Pro Tips for baked banana chips
Slice Uniformly: The most critical factor for even baking is slicing your bananas to a consistent thickness. Even ¼-inch slices ensure that every chip reaches optimal crispness simultaneously, preventing burnt edges and undercooked centers. A mandoline slicer is excellent for achieving this precision, but careful knife work can also be effective.
Don’t Rush the Bake: Patience is key. Baking at a low temperature for an extended period is essential for dehydrating the bananas properly. If you remove them too soon, they will remain chewy. It’s better to bake them slightly longer and check for crispness rather than risk them being underdone.
Monitor Closely: Oven temperatures can vary, and banana slices differ in moisture content. Keep a close eye on your chips, especially during the last hour of baking. Remove any that are perfectly crisp to prevent them from burning while others finish baking. This vigilance will yield the best results.
Cool Completely: The cooling process is where the magic happens for crispness. Transferring the chips to a wire rack allows air to circulate freely around them, drawing out residual moisture. Ensure they are entirely cool to the touch before storing to maintain their satisfying crunch.
Season Creatively: While delicious plain, consider adding a dash of cinnamon, a pinch of nutmeg, or even a touch of cayenne pepper before baking for added flavor complexity. A sprinkle of sea salt can also enhance the sweetness for a delightful sweet-and-salty profile. Explore these variations to find your personal favorite.
Serving Suggestions for baked banana chips
Decoration
These golden, crispy baked banana chips are not only a fantastic snack but also a visually appealing garnish. Sprinkle them over desserts like berry tarts or yogurt parfaits for an added textural element and a pop of natural color. They can add a unique charm to the presentation of your sweet creations.
Consider crushing some of the chips into smaller pieces to create a crunchy “dust” that can be artfully arranged on the rim of a glass or a dessert plate. This adds a sophisticated touch to any presentation. They can also be used to decorate the edges of cakes or cupcakes, providing an edible and flavorful trim.
For a more rustic presentation, simply arrange a few whole chips artistically around a serving bowl of ice cream or a fruit salad. Their slightly irregular shapes and golden hue bring an appealing, homemade aesthetic to your culinary endeavors.
Side Dishes
Baked banana chips make an excellent accompaniment to lighter meals, providing a satisfying crunch that balances softer textures. They can be a delightful addition to a breakfast spread, served alongside German pancakes or in a bowl of breakfast cereal or oatmeal for added texture and natural sweetness. This transforms a simple morning meal into a more engaging and flavorful experience.
For lunch, they can be served as a unique side to salads or sandwiches, offering a contrast to the typical potato chips or bread. Imagine a gourmet sandwich with a side of these crispy banana delights; it adds an unexpected yet pleasing dimension to the meal. They also pair well with lunch bowls featuring grains and protein.
They can even complement heartier dishes, offering a sweet counterpoint to savory flavors. Think of them as a palate cleanser or a textural interlude between bites of a savory main course. Their versatility makes them suitable for a wide range of meal occasions, from casual brunches to more formal settings.
Creative Serving Ideas
One exciting way to serve these chips is as part of a homemade trail mix. Combine them with nuts, seeds, and perhaps some dried fruit like cranberries or raisins for a perfectly portable and energizing snack. You can find inspiration for similar snack combinations on Pinterest, which is a treasure trove of creative ideas.
Another delightful idea is to incorporate them into smoothie bowls. Blend your favorite fruits and greens, then top generously with these crunchy banana chips for an irresistible textural contrast. They add a satisfying crunch that elevates the entire smoothie bowl experience, making it feel more like a complete meal or decadent dessert.
Consider creating a deconstructed dessert platter. Arrange the banana chips alongside dips like chocolate hummus, yogurt, or a fruit compote. This interactive approach allows guests to mix and match flavors and textures, creating their own personalized sweet creations. It’s a fun and engaging way to present these simple yet delightful chips.
Preparation & Storage
Storing Leftovers
Proper storage is crucial for maintaining the crispness of your baked banana chips. Once they have completely cooled, transfer them into an airtight container. This prevents moisture from the air from reaching the chips, which can cause them to lose their satisfying crunch and become soft or chewy.
Ensure the container is truly airtight. Glass jars with clamp lids, high-quality plastic containers with secure seals, or even resealable heavy-duty freezer bags can work well. If you’ve baked a large batch, consider dividing them into smaller containers to minimize the amount of air exposed each time you open one.
Stored correctly at room temperature, these homemade banana chips can remain deliciously crisp for up to three weeks. This long shelf life makes them an excellent pantry staple for instant snacking gratification. Always check for any signs of softening before enjoying; if they’ve lost their crispness, they can often be refreshed in a low oven, as mentioned in the pro tips.
Freezing
While freezing is an option for long-term storage, it’s generally not the preferred method for maintaining the crisp texture of baked banana chips. Freezing can introduce moisture when thawing, potentially leading to a softer, less crispy product.
If you absolutely must freeze them, ensure they are completely cooled and then pack them into freezer-safe airtight containers or heavy-duty freezer bags. Removing as much air as possible from the bags before sealing will help prevent freezer burn and maintain quality as much as possible.
It is advisable to consume frozen banana chips within a month or two for the best quality. Thawing them slowly in the refrigerator or at room temperature is recommended to minimize condensation. However, for optimal crispness, room temperature storage is highly encouraged.
Reheating
If your baked banana chips have lost some of their crispness due to humidity or improper storage, don’t despair! They can often be revived with a brief stint in a low oven. This process helps to drive out any absorbed moisture and restore their satisfying crunch.
Preheat your oven to a very low temperature, around 200-250°F (95-120°C). Spread the slightly softened chips in a single layer on a baking sheet lined with parchment paper. This low heat and air circulation will help them re-crisp without burning.
Bake for about 10-15 minutes, keeping a very close eye on them. They can go from re-crisped to burnt very quickly. Once they feel firm and crunchy again, remove them from the oven and let them cool completely on a wire rack before storing them in an airtight container. This simple reheating step can bring your chips back to their former glory.
Frequently Asked Questions
-
What is the best type of banana to use for baking chips?
For the best results, use bananas that are ripe but still firm. They should be yellow with perhaps a few brown spots, but not overly soft or mushy. Overripe bananas contain more sugar and moisture, which can cause them to burn more easily and result in a less desirable texture. Firm bananas hold their shape better during slicing and baking, leading to a more consistent and enjoyable chip. Using slightly underripe bananas is also an option, as they are firmer and easier to slice thinly, though they may yield a slightly less sweet chip.
-
Why are my banana chips not getting crispy?
There are several common reasons why banana chips might not achieve the desired crispness. Firstly, the slices may have been too thick; thicker slices take longer to dehydrate. Secondly, the oven temperature might have been too high, causing the outsides to brown before the insides could dry out. Ensure your oven is accurately calibrated and set to a low temperature (around 200°F or 95°C). Additionally, insufficient baking time is a frequent culprit; they need several hours at a low temperature to become fully crisp. Finally, not cooling them completely on a wire rack can prevent them from reaching peak crispness, as residual heat and trapped moisture can lead to softness.
-
Can I add other spices or sweeteners to my baked banana chips?
Absolutely! This recipe is a fantastic base for adding your favorite flavors. Before baking, you can toss the banana slices with spices like cinnamon, nutmeg, ginger, or even a pinch of cardamom for a warm, cozy flavor. For a bit of a kick, a very small amount of cayenne pepper or chili powder can create a delightful sweet-and-spicy contrast. If you prefer a sweeter chip without adding refined sugar, a light drizzle of maple syrup or honey over the slices before baking can also work, though be mindful that these sweeteners can caramelize and potentially burn, so monitor them closely. Even a sprinkle of sea salt can enhance the natural sweetness and add a pleasing complexity.